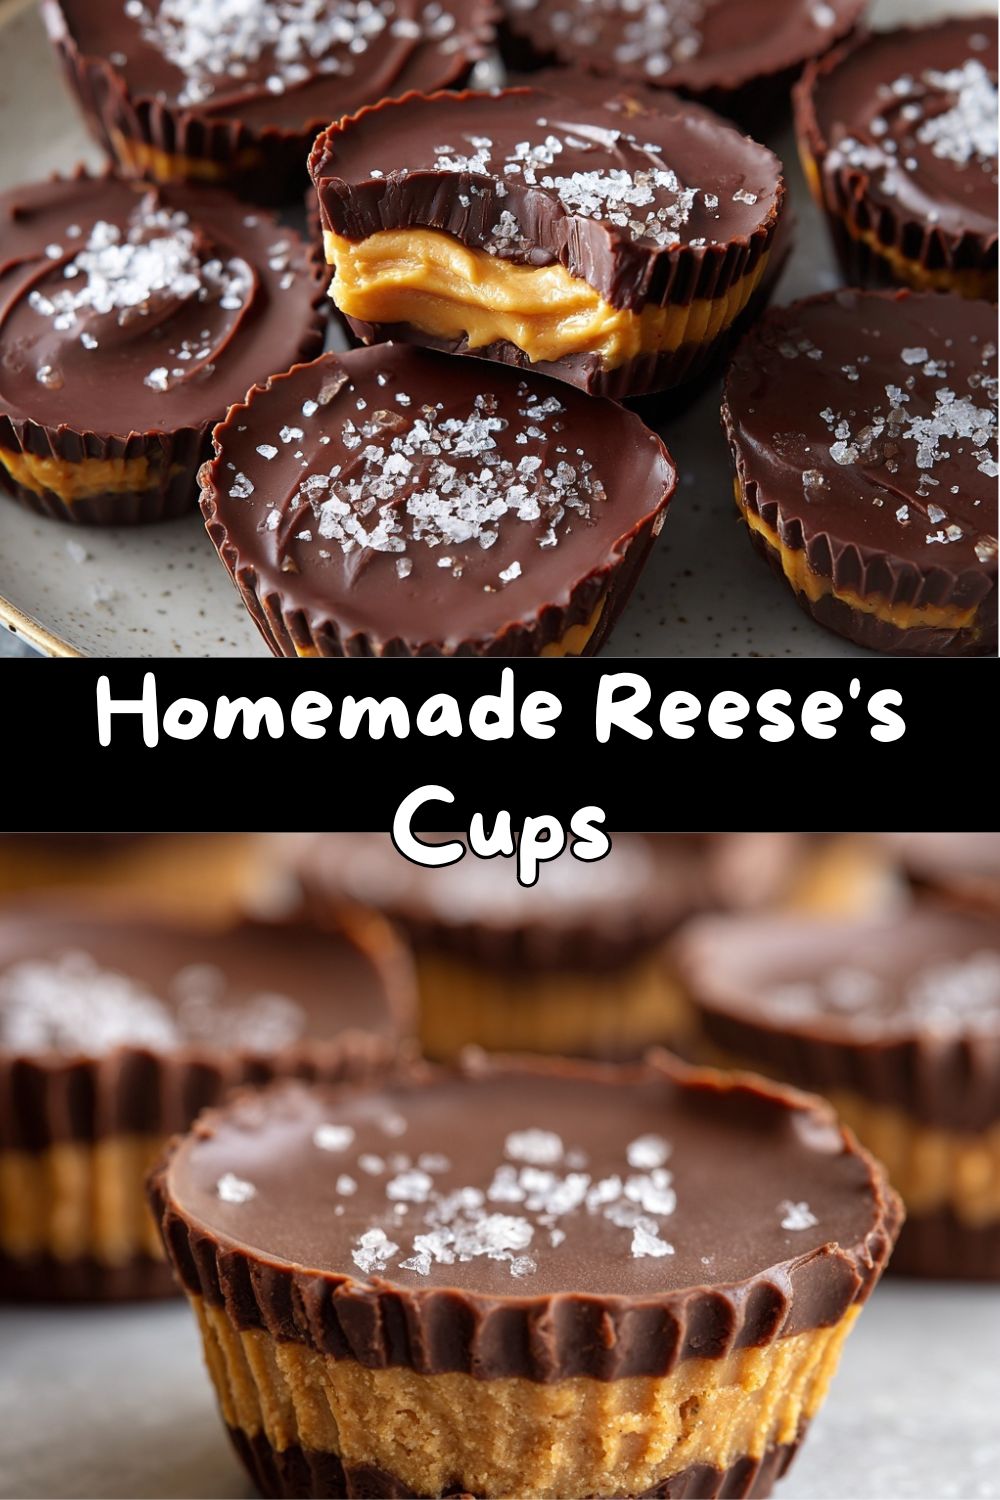
Homemade Reese’s Cups: Your New Favorite Chocolate Peanut Butter Ritual
Hey, you! Yes, you, the one whose heart does a little happy dance at the sight of that iconic orange wrapper. I get it. I’ve been there, standing in the checkout line, sneakily adding that twin-pack to my groceries because… well, because chocolate and peanut butter. It’s a love story for the ages. But what if I told you that you could craft that magic right on your own kitchen counter? That you could make homemade Reese’s Cups that are not only wildly delicious but also filled with ingredients you can actually pronounce?
Today, we’re ditching the mystery and embracing the messy, fun, and incredibly rewarding process of making our own chocolate peanut butter cups. This isn’t just a recipe; it’s a kitchen adventure. It’s about the satisfying *tap-tap-tap* of the bowl as you swirl melted chocolate, the glorious mess of peanut butter on your fingers, and the proud moment you pop one of these little beauties into your mouth, knowing you made that happen. So, tie on your favorite apron (the one with the stains that tell stories), and let’s make a treat that’s more than a snack—it’s a homemade hug.
The Sticky-Fingered Truth of My Peanut Butter Obsession
My love affair with this combo started young. My grandma, the wisest woman I knew, didn’t believe in withholding joy, especially the edible kind. Her “fancy” treat for us grandkids wasn’t from a boutique bakery; it was a humble plate of Ritz crackers, slathered with peanut butter and half-dipped in melted chocolate chips she’d warmed in a little saucepan. We’d sit at her Formica table, our legs swinging, meticulously licking every morsel of chocolate off our fingers before devouring the cracker.
It was messy, it was simple, and it was absolute perfection. That memory—the smell of melting chocolate mingling with coffee in her kitchen, the sound of her laugh—is baked into my soul. These homemade cups are the direct descendant of those sticky-fingered afternoons. They’re my grown-up, slightly more polished, but just as soul-satisfying tribute to that perfect pairing. Every time I make them, I’m right back at that table, and I hope making them brings you a little slice of your own joy, too.
Gathering Your Kitchen Crew: Simple Ingredients, Big Flavor
Here’s the beautiful part: you likely have most of this squad hanging out in your pantry already. Let’s meet the players!
- 1 cup chocolate chips (semi-sweet or dark): This is your shell. I prefer semi-sweet for that classic Reese’s balance, but dark chocolate (60-70%) makes it wonderfully sophisticated. Chef’s Insight: The quality of your chocolate matters here! A good chip melts smoother and tastes richer. Don’t have chips? A chopped chocolate bar works fantastically.
- 2 tsp coconut oil (optional but recommended): This is our secret weapon for a glossy, snappy shell that melts divinely. It thins the chocolate just enough for perfect dipping and prevents it from seizing. No coconut oil? A tiny bit of refined avocado oil or even shortening will work in a pinch.
- 1/2 cup creamy peanut butter: The star of the show! Use a standard, no-stir commercial brand like Jif or Skippy for the right thick, sweet consistency. Natural, drippy peanut butter can make the filling too soft. Substitution Tip: Sunflower seed butter is a fantastic nut-free alternative that creates a stunning “sunbutter cup.”
- 2 tbsp powdered sugar: This sweetens and, more importantly, thickens the peanut butter filling so it holds its shape. For a less sweet version, you can reduce this to 1 tbsp.
- 1/2 tsp vanilla extract: The flavor enhancer. It rounds out the peanut butter and adds a warm, bakery-like note. Try almond extract for a fun twist!
- A Generous Pinch of Salt: Do not skip this! Salt is what makes flavors pop. It cuts the sweetness and makes the chocolate and peanut butter sing in harmony. I use flaky sea salt for the filling and a tiny sprinkle on top for flair.
Let’s Build Some Magic: Step-by-Step
Ready? This is the fun part. We’re building layers of joy. Put on some tunes, and let’s get to it.
- Prep Your Stage: Line a mini muffin tin with paper liners. This recipe makes about 12 perfect, two-bite cups. Using a mini tin gives you that ideal candy-shop ratio. No mini tin? Regular cupcake liners on a plate or baking sheet work—you’ll just get fewer, larger, equally delicious cups!
- Melt the Chocolate: In a microwave-safe bowl, combine the chocolate chips and coconut oil. Microwave in 30-second bursts, stirring vigorously with a spatula between each burst. Stop when just a few small lumps remain—the residual heat will melt them as you stir. Chef’s Hack: Overheating is chocolate’s enemy! Short bursts and constant stirring prevent it from turning gritty or seizing. A double boiler works too if you’re feeling fancy.
- Craft the Filling: In another bowl, stir together the peanut butter, powdered sugar, vanilla, and that all-important pinch of salt. Mix until it’s completely smooth and slightly thickened. It should hold its shape if you spoon a little bit. Give it a taste—this is your reward for being chef.
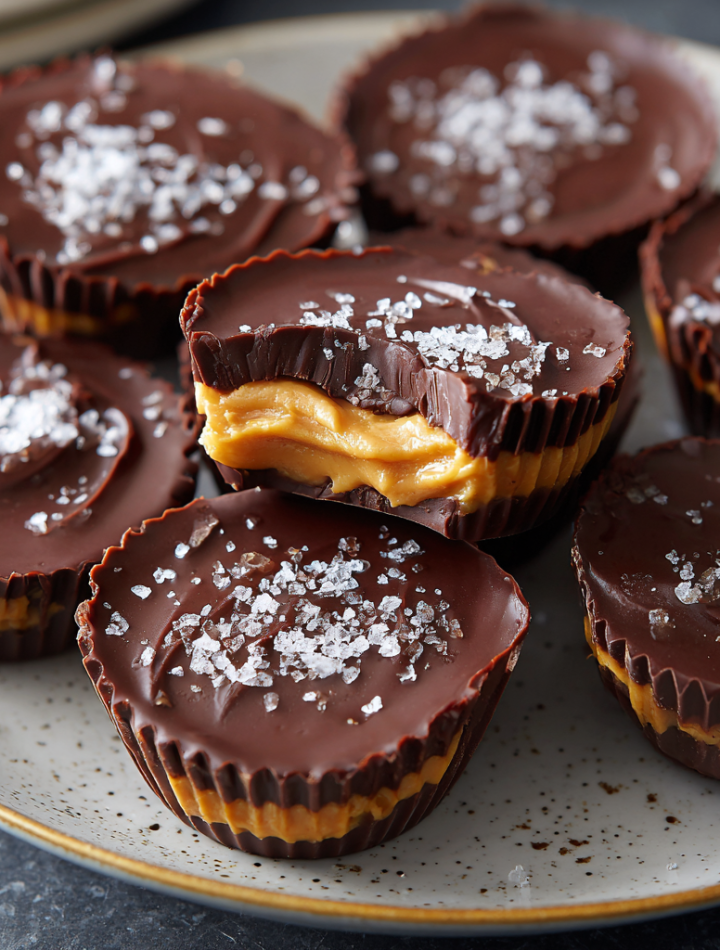
- Layer #1 – The Chocolate Foundation: Using a small spoon or a piping bag for neatness, add about 1 teaspoon of melted chocolate to the bottom of each liner. Now, pick up the tin and give it a few gentle tap-tap-taps on the counter. This settles the chocolate and creates a smooth, even base. Pop the whole tin into the freezer for 5 minutes to set. This chill prevents the layers from mixing.
- Layer #2 – The Peanut Butter Heart: Once the base is set, spoon or pipe about 1 teaspoon of the peanut butter mixture on top. Gently press it down slightly so it’s flat and leaves a tiny border for the final chocolate layer to seal it in. I use my finger (clean, of course!) or the back of a small spoon.
- Layer #3 – The Chocolate Seal: Now, cover that peanut butter heart completely with more melted chocolate. Spoon it over and use the back of the spoon to guide it to the edges, sealing the peanut butter inside. Another gentle tap-tap-tap ensures a smooth top. Feeling extra? A tiny sprinkle of flaky sea salt on top here is *chef’s kiss*.
- The Final Chill: Transfer the filled tin to the refrigerator for 20-30 minutes, or until completely firm. This is the hardest part—the waiting! But trust me, it’s worth it for that perfect snap when you bite in.
How to Serve Your Homemade Masterpieces
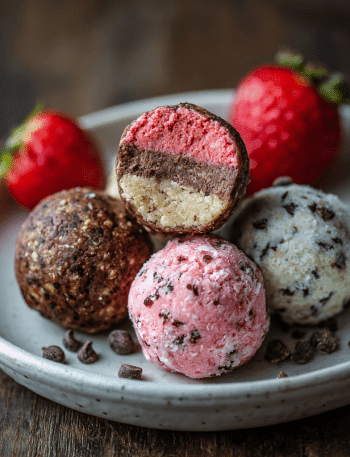
Once they’re set, gently peel off the liners. Behold your gorgeous creations! I love serving these on a little ceramic plate or in a vintage candy dish. They’re perfect for:
- After-Dinner Treats: Place one on each dessert plate with a cup of coffee for a perfect finish.
- The Ultimate Lunchbox Surprise: Tuck one into a lunchbox (they travel great in a container) for a midday joy boost.
- Party Platter Stars: Mix them with some fresh berries and nuts for an effortless yet impressive dessert spread.
- The Straight-Up Snack: My personal favorite. Eat one (okay, two) standing right at the kitchen counter, savoring every bite. You’ve earned it.
Mix It Up! 5 Fun Flavor Twists
Once you’ve mastered the classic, the playground is open! Here are some of my favorite riffs:
- Sea Salt & Dark Chocolate: Use 70% dark chocolate and top each cup with a flake of Maldon sea salt. Elegant and addictive.
- The “Inside-Out” Cup: Make the shell with melted peanut butter chips, and the filling with a mixture of chocolate hazelnut spread (like Nutella) and a little powdered sugar to thicken. Mind-blowing.
- Crunch Time: Add 2 tablespoons of crushed pretzels or rice cereal to the peanut butter filling for a fantastic salty crunch.
- Cookie Dough Delight: Add 2 tbsp of oat flour and a handful of mini chocolate chips to the peanut butter mixture for a safe-to-eat “cookie dough” center.
- SunButter Cups (Nut-Free): Swap the peanut butter for sunflower seed butter and use Enjoy Life chocolate chips. A perfect, inclusive treat for classrooms or parties.
Chef Emily’s Kitchen Confidential
This recipe has evolved from many happy (and a few hilariously messy) kitchen experiments. The first time I tried it, I didn’t chill the base layer, and my peanut butter swam into the chocolate, creating a delicious but homogenous blob—still tasty, but not a cup! Lesson learned. Now, that quick 5-minute freeze is my non-negotiable.
I’ve also learned that these are the ultimate “kitchen therapy” project. They don’t require precision, they come together fast, and the result is instant gratification. I’ve made them with my niece, on stressful days just to focus my hands, and as last-minute gifts tucked into a pretty box. They are, in every sense, made with love.
Your Questions, Answered!
Q: My chocolate got thick and clumpy when I melted it. What happened?
A: Ah, chocolate “seizing.” This usually means a tiny bit of water or steam got into it. Chocolate and water are frenemies. To fix it, try stirring in a tiny bit more coconut oil or even vegetable oil (½ tsp at a time) until it smoothes out. Prevention is key: make sure all bowls and utensils are completely dry!
Q: Can I use natural peanut butter?
A: You can, but the filling will be softer and oilier. If you do, try omitting the coconut oil from the chocolate and maybe adding an extra teaspoon of powdered sugar to the PB to help it firm up. For guaranteed results, standard peanut butter is best.
Q: How long do they keep, and do they need to be refrigerated?
A> Yes, store them in an airtight container in the fridge for up to 2 weeks (if they last that long!). The cold keeps the perfect texture. You can freeze them for up to 3 months—just thaw in the fridge for an hour before eating.
Q: My peanut butter layer is poking out the top! Help!
A> No worries! Just make sure you’re using a full, rounded teaspoon of melted chocolate for the final layer to fully encapsulate the filling. It’s okay if a little peeks through—they’re homemade, not machine-made, and that’s their charm!
A Note on Nourishment & Joy
While these are firmly in the “treat” category, making them at home means you control the ingredients. You’re using real peanut butter (a good source of protein and healthy fats), quality chocolate, and no preservatives. A homemade cup typically has around 130 calories, 3g of protein, 10g of carbs, 9g of fat (mostly from the good stuff in nuts and chocolate!), and 7g of sugar. Compared to the store-bought version, you’re often cutting back on sugar and skipping the PGPR and TBHQ. Food is about nourishment for the body and the soul, and these little cups deliver a hefty dose of the latter.
Go Forth and Create Candy Magic
And there you have it! You are now officially a homemade candy artisan. I hope you feel empowered, excited, and maybe a little bit proud. You took a few simple ingredients and created something truly special—something you can share, savor, or secretly stash in the back of the fridge (we’ve all been there).
Remember, cooking (and candy-making!) is about the journey. Embrace the drips, lick the spoon, and share the results with someone you love. Thanks for letting me be part of your kitchen adventure today. Now, go enjoy the fruits (or should I say, cups?) of your labor. You absolutely deserve it.
With a full heart and a chocolate-smeared apron,
Emily