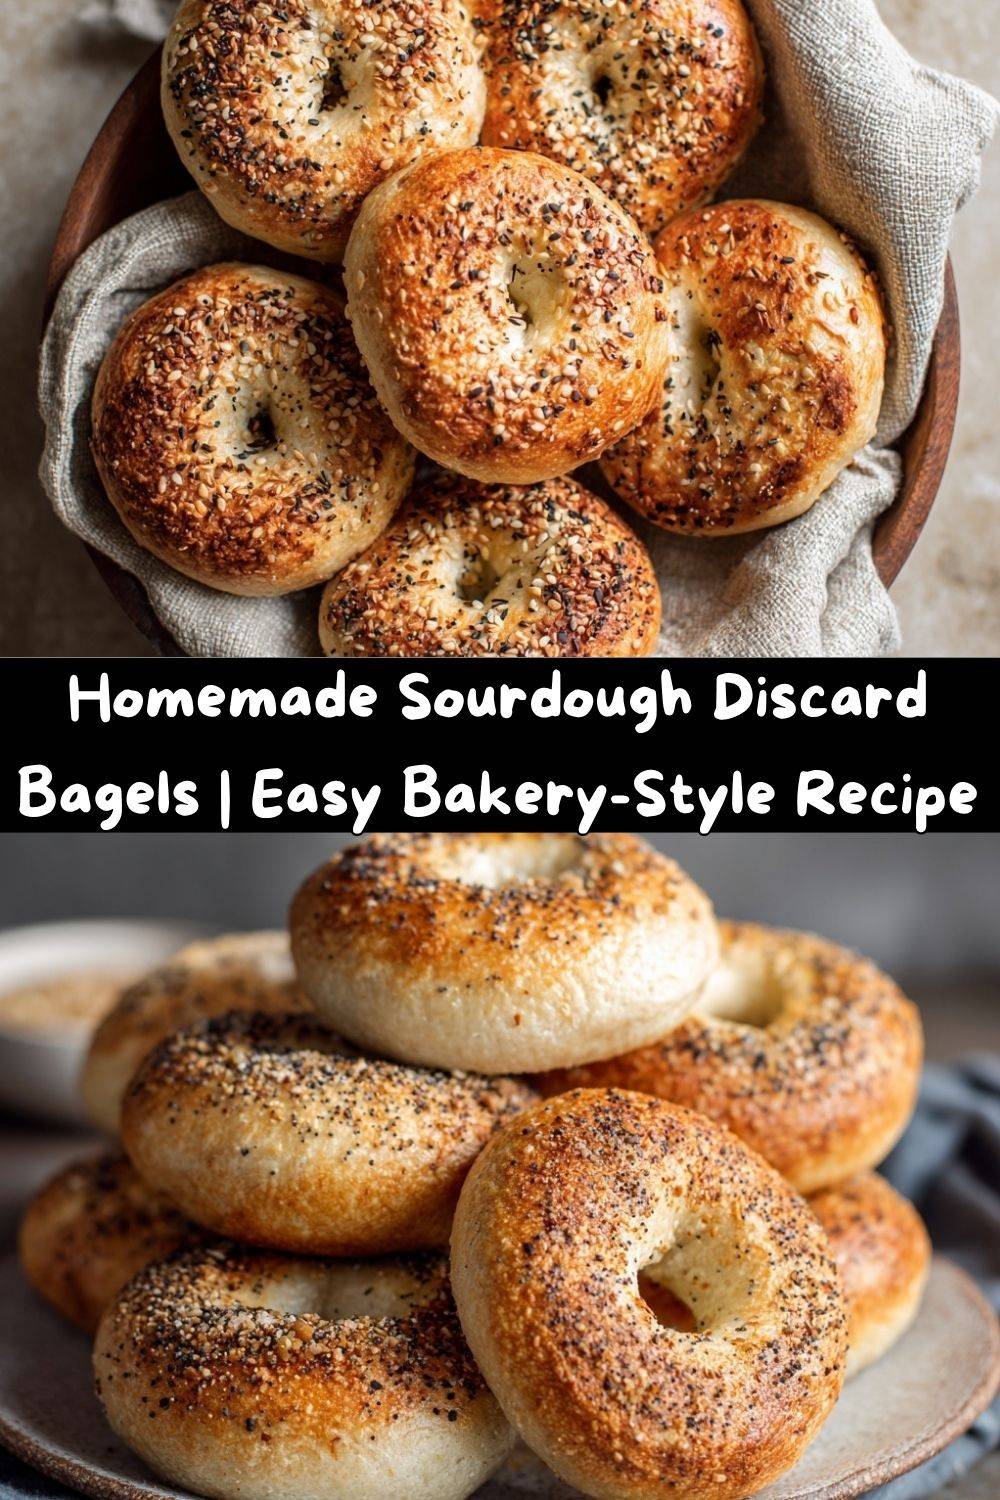
Forget the Bagel Shop: Your New Favorite Morning Ritual is Homemade
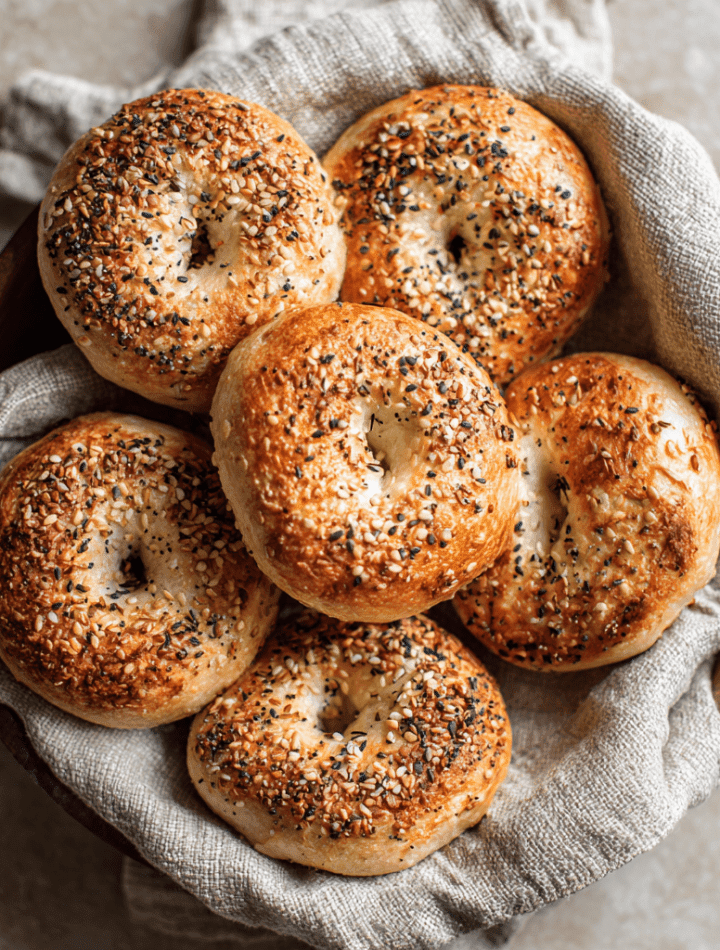
Hey there, my fellow food lover! Let me ask you a question. Is there anything better in this world than the perfect bagel? I’m talking about that magical combination of a crisp, shiny, crackly crust that gives way to a dense, chewy, and impossibly soft interior. The kind of bagel that can stand up to a thick schmear of cream cheese without getting soggy. The kind that turns a simple breakfast sandwich into a life-changing event.
For years, I thought you needed a time machine back to a 1980s New York deli or a culinary degree to achieve that at home. And if you’re like me, with a jar of sourdough starter bubbling away on your counter, you’ve probably also faced the weekly dilemma: what on earth do I do with all this discard?
Well, my friend, today is the day we solve both of those problems in one fell swoop. We are making Homemade Sourdough Discard Bagels, and I promise you, they are so much easier than you think. This recipe is my love letter to beginner bakers, busy home cooks, and anyone who has ever looked at a lump of dough and thought, “I could never.” You can. And I’m going to be right here with you, every step of the way. We’re going to transform that leftover sourdough discard into the most incredibly flavorful, bakery-style bagels you’ve ever sunk your teeth into. So, tie on your apron—the messy one, you know, the one with all the character—and let’s make your kitchen smell absolutely incredible.
The Bagel That Started It All: A Brooklyn Memory
My love affair with a truly great bagel didn’t start in a fancy bakery; it started on a bustling street corner in Brooklyn. I was visiting my cousin, a born-and-bred New Yorker who took her bagels as seriously as a presidential debate. She dragged me out of bed at what felt like the crack of dawn, promising it would be worth it. We joined a line that snaked out the door of a tiny, unassuming shop, the air thick with the scent of yeast and malt.
When we finally got to the front, she ordered two “everything” bagels, toasted, with a heavy layer of scallion cream cheese. We didn’t even make it to a bench. We stood right there on the sidewalk, and I took my first bite. CRUNCH. Then, CHEW. It was a textural symphony. The savory seeds, the cool, tangy cream cheese, the warm, slightly tangy bread… it was a revelation. I finally understood what all the fuss was about. That memory, of that simple, perfect food shared with someone I love, is what I try to capture every time I shape a bagel dough. It’s not just about baking; it’s about creating a little moment of joy.
Gathering Your Bagel-Making Squad: The Ingredients
Don’t let the short list fool you—each of these ingredients plays a starring role in creating that iconic bagel texture and flavor. Here’s the lowdown on our team players:
- 1 cup Sourdough Discard (unfed or active): This is our flavor superstar! Using discard adds a subtle, wonderful tang that makes these bagels uniquely delicious. It doesn’t matter if it’s fresh from the fridge or sitting on your counter—this recipe is forgiving. Chef’s Insight: The discard also adds a slight tenderness, balancing the chewiness perfectly.
- 1 ¼ cups Warm Water: The “warm” part is key here. You want it warm to the touch, not hot. Think baby-bottle temperature. Too hot, and it will kill the yeast; too cold, and it will take forever to rise.
- 1 tablespoon Honey or Sugar: A touch of sweetness to feed the yeast and give the bagels a beautiful golden color. I prefer honey for its floral notes, but plain granulated sugar works just as well.
- 1 packet (2 ¼ tsp) Active Dry Yeast: Our little engine of rise! This gives the bagels their lift and airy crumb, making the sourdough discard method extra reliable for beginners.
- 4 cups Bread Flour (or All-Purpose): Bread flour is my #1 choice here because of its higher protein content, which creates that classic, chewy bagel texture. If all you have is all-purpose, your bagels will still be delicious, just a tad softer and less dense.
- 1 ½ teaspoons Salt: The flavor enhancer! Don’t you dare forget the salt. It balances the tang from the sourdough and the slight sweetness from the honey.
- Boiling Water Bath: 8 cups water + 1 tablespoon honey or baking soda: This is the BAGEL SECRET WEAPON! Boiling the dough sets the crust, creates that iconic shiny, crackly exterior, and gives the bagels their distinctive chew. Honey will promote browning, while baking soda will make the crust darker and add a slight pretzel-like flavor. Your choice!
- Optional Toppings: This is where you get to shine! Sesame seeds, poppy seeds, everything bagel seasoning, coarse salt, minced garlic, or even dried onions. Go wild!
Let’s Get Our Hands Dirty: The Step-by-Step Magic
Ready? This is the fun part. We’re going to mix, knead, shape, boil, and bake our way to bagel bliss. Read through all the steps once before you start—it’s like reading the last page of a mystery novel, totally worth it.
- Wake Up the Yeast: In a large mixing bowl, whisk together the warm water, sourdough discard, and honey. Now, sprinkle the yeast over the top. Give it one gentle stir and then… walk away. Let it sit for 5-10 minutes. You’re looking for a foamy, bubbly, alive-looking surface. Chef’s Hack: If it doesn’t foam, your yeast might be old or your water was too hot/cold. Toss it and start this step over—it’ll save you heartache later!
- Make the Dough: Add the bread flour and salt to the yeasty mixture. If you’re using a stand mixer, fit it with the dough hook and mix on low speed until the flour is incorporated, then kick it up to medium for 8-9 minutes. If you’re kneading by hand (my preferred method for stress relief!), turn the shaggy dough out onto a lightly floured surface and knead for 8-10 minutes. You’re looking for a smooth, slightly firm, and elastic dough that springs back slowly when you poke it.
- The First Rise: Place your beautiful ball of dough into a lightly oiled bowl, turn it over to coat, and cover the bowl with a damp kitchen towel or plastic wrap. Find a warm, draft-free spot in your kitchen (like the inside of a turned-off oven with the light on). Let it rise for 60-90 minutes, or until about doubled in size. Don’t stress about the exact time—it’s ready when it looks ready!
- Shape Your Bagels: Punch the dough down (so satisfying!) and turn it out onto a clean surface. Divide it into 8 equal pieces. I use a kitchen scale for precision, but eyeballing it works just fine. To shape, roll each piece into a tight, smooth ball. Then, instead of rolling into a rope, simply poke your floured thumb straight through the center of each ball. Swirl your thumb around to widen the hole to about 1.5-2 inches—it will shrink a bit as it bakes. This method is foolproof and gives you that classic look.
- Brief Rest: Place your shaped bagels on a parchment-lined baking sheet, cover them with that damp towel again, and let them rest for 20-30 minutes. They’ll puff up just a little. This is a great time to preheat your oven to 425°F (220°C) and get your water bath ready.
- The Secret Step: The Boil! Bring the 8 cups of water and your choice of honey or baking soda to a rolling boil in a wide, large pot. Gently lower the bagels into the water, doing 1-2 at a time so you don’t crowd the pot. Boil for 45 seconds, flip them over, and boil for another 45 seconds. Use a slotted spoon or spider strainer to remove them, letting the excess water drip off, and place them back on the baking sheet. Chef’s Insight: The longer you boil, the chewier and denser the bagel. 45-60 seconds per side is the sweet spot!
- Top and Bake: While the bagels are still wet and sticky from their bath, sprinkle on your toppings. Now, bake for 20-25 minutes, or until they are deeply golden brown and gorgeous. Rotate the pan halfway through for even baking.
- The Hardest Part: Wait! Transfer the baked bagels to a wire rack and let them cool completely before slicing. I know, the temptation is real! But slicing into a hot bagel can make it gummy. Trust me, it’s worth the wait.
How to Serve Your Masterpiece
Okay, they’re cooled. NOW it’s time for the main event! A perfectly baked bagel deserves a proper stage.
For the Purist: A simple, generous layer of high-quality cream cheese is all you need. Let the tangy, chewy flavor of the bagel itself shine. My personal favorite is a good old-fashioned plain cream cheese on a sesame seed bagel.
For the Breakfast Champion: Slice that bagel in half, toast it until the edges are crisp, and build your ultimate breakfast sandwich. A fried egg, a slice of sharp cheddar, and a couple of slices of crispy bacon or avocado? Yes, please!
For the Lox & Loaded Fanatic (my weekend special): Schmear with a thick layer of scallion or plain cream cheese, top with silky slices of smoked salmon, a few rings of red onion, briny capers, and a sprig of fresh dill. It’s a restaurant-worthy brunch right at your kitchen table.
Make It Your Own: Delicious Recipe Variations
Once you’ve mastered the classic, the bagel world is your oyster! Here are a few of my favorite twists:
- Everything But The…: The classic for a reason! Brush the boiled bagels with a quick egg wash (a beaten egg with a splash of water) and generously sprinkle with everything bagel seasoning. The egg wash ensures the topping sticks like glue.
- Cinnamon Raisin Swirl: When dividing the dough, roll each piece out into a small rectangle. Brush with melted butter and sprinkle with a mix of cinnamon and sugar. Add a handful of raisins, roll it up like a tiny jelly roll, and then shape into a ball and poke the hole. You get a beautiful swirl in every slice!
- Jalapeño Cheddar: For a savory kick, knead ½ cup of shredded sharp cheddar and ¼ cup of finely diced pickled jalapeños into the dough during the last minute of mixing. The cheese gets all melty and the jalapeños give a little zing.
- Whole Wheat Honey: For a heartier bagel, substitute 1 ½ cups of the bread flour with whole wheat flour. The nutty flavor pairs beautifully with the honey in the dough.
- “Everything” Vegan Bagel: This recipe is easily vegan! Just ensure the sugar you use is vegan (or stick with maple syrup) and use aquafaba (the liquid from a can of chickpeas) brushed on top instead of an egg wash to hold the toppings.
From My Kitchen to Yours: Chef’s Notes
This recipe has been a living, evolving thing in my kitchen. The first time I made them, I was so nervous about the boil that I under-did it, and my bagels were a little too bread-like. The next time, I over-kneaded the dough and my arms were sore for a day! But that’s the beauty of baking—every “mistake” is a lesson. I’ve found that a slightly sticky dough is better than a dry one, and that a confident, quick hand is your best tool when shaping. These bagels have been on the table for sleepy Saturday mornings, packed into lunchboxes, and shared with neighbors. They’ve seen me through good days and bad, and every time, that process of creating something from scratch feels a little bit like magic.
Your Bagel Questions, Answered!
Let’s tackle some common questions before they even pop up.
Q: My bagels turned out really dense. What happened?
A: The most common culprits are over-proofing (letting them rise too long, which exhausts the yeast) or using a sourdough discard that is very, very old and acidic. Stick to the rise times in the recipe and try to use discard that’s no more than a week old for the best texture.
Q: Can I make these without a stand mixer?
A: Absolutely! I make them by hand 90% of the time. It’s a fantastic arm workout and there’s something deeply therapeutic about feeling the dough transform under your hands. Just be prepared to knead for a solid 8-10 minutes.
Q: How do I store these, and can I freeze them?
A> These bagels freeze like a dream! Once completely cooled, place them in a single layer on a baking sheet to “flash freeze” for an hour, then transfer to a freezer bag. They’ll keep for up to 3 months. To enjoy, just pop a frozen bagel straight into the toaster—no need to thaw.
Q: Why did my bagels deflate when I boiled them?
A: This usually means they over-proofed during their final 20-30 minute rest. They should look puffy, but not like fully inflated balloons. Keep that rest to 30 minutes max!
Breaking It Down: A Quick Nutritional Glance
Now, we’re all about joy and flavor first around here, but I know some of you like to keep track! Here’s a general breakdown per bagel (without toppings). Remember, this is homemade, so you control exactly what goes in. Compared to store-bought versions, you’re getting a product with no preservatives or unpronounceable ingredients. The sourdough discard can also help to slightly pre-digest the flour, making the nutrients more accessible and potentially easier on your tummy. It’s a win for flavor and a small win for wellness!
Nutrition Facts (Per Bagel):
Calories: 260 | Protein: 8g | Fat: 1g | Carbohydrates: 52g | Fiber: 2g | Sugar: 3g | Sodium: 400mg
You Did It! Welcome to the Bagel-Making Club
Look at you, you magnificent baker, you! You took a handful of simple ingredients and a bit of kitchen courage and created something truly special. There is a unique pride that comes from pulling a tray of golden, homemade bagels from your own oven. You’ve not only made a delicious breakfast; you’ve created a memory, saved your sourdough discard from the compost bin, and proven to yourself that you can do amazing things.
I hope this recipe becomes a staple in your home, a ritual that brings you as much happiness as it brings me. So, slice one open, listen to that crisp crust crackle, load it up with your favorite toppings
slice one open, listen to that crisp crust crackle, load it up with your favorite toppings, and take that first glorious bite.
That’s the moment it all becomes worth it—the mixing, the kneading, the boiling, the waiting. That’s the moment you realize: I made this. With your two hands, in your own kitchen, using ingredients you already had. It’s empowering. It’s comforting. It’s the kind of simple magic that makes home cooking feel like an act of love.
So welcome—officially—to the Bagel-Making Club. We have flour on our shirts, dough under our fingernails, and big smiles on our faces. And now? We have homemade sourdough bagels cooling on the counter like little golden rings of triumph.
When you make these (and you will!), I’d love to see your creations. Tag me @TastyChowEmily so I can cheer you on, drool over your toppings, and celebrate your bagel victory right along with you.
Until next time, keep feeding your starter, keep trusting your hands, and keep making magic in that kitchen of yours.
With love, carbs, and a whole lot of chewy goodness,
Emily 🧡