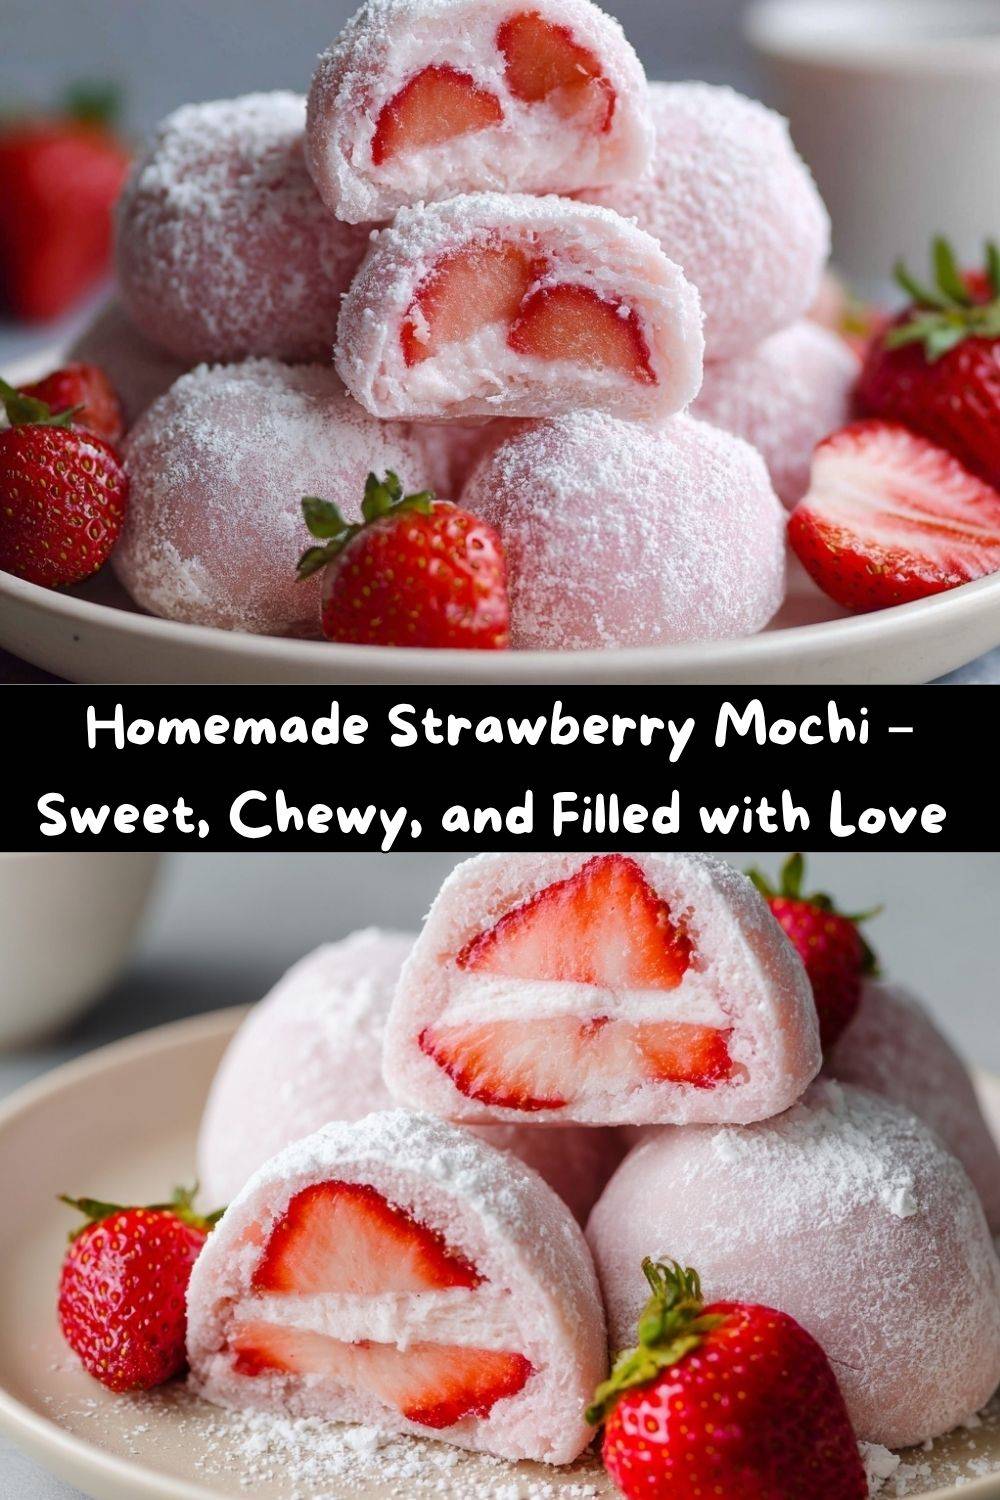
Homemade Strawberry Mochi: Your New Favorite Bite of Joy
Hey there, my fellow flavor-chaser! Let’s talk about a little magic, shall we? I’m not talking about pulling a rabbit out of a hat, but something even more delicious: transforming a handful of simple ingredients into a dessert that’s pure, edible happiness. I’m so excited to share this recipe for Homemade Strawberry Mochi with you today.
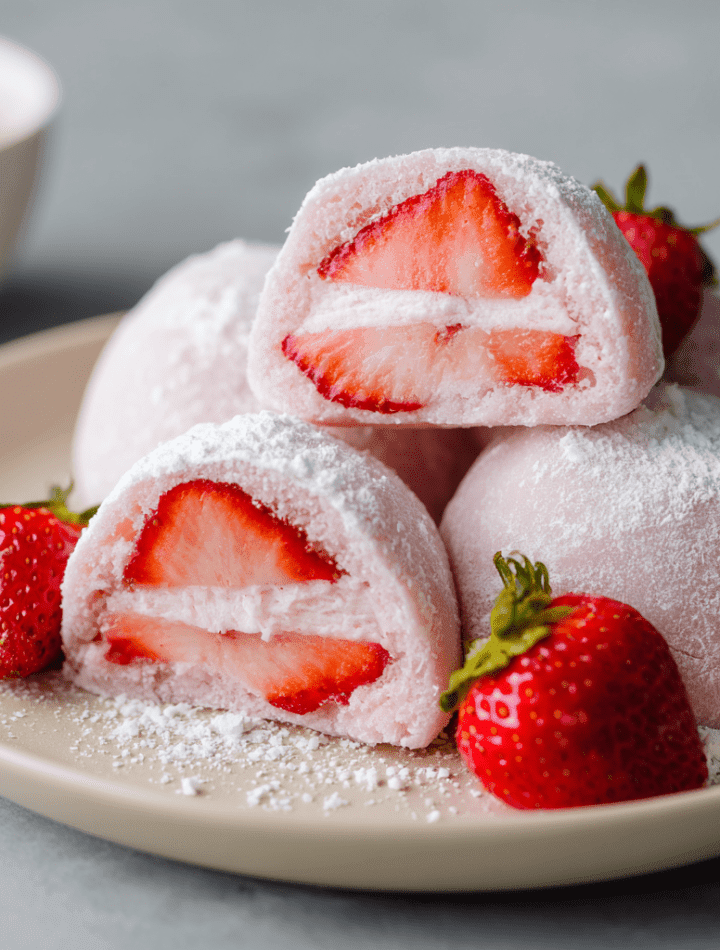
Imagine this: a soft, slightly sweet, and wonderfully chewy pink dough gives way to a cloud of freshly whipped cream and a burst of vibrant strawberry jam. It’s a textural dream and a flavor party, all wrapped up in one beautiful, bite-sized package. This is the kind of treat that makes you close your eyes and just savor the moment.
Now, I know the word “mochi” can sound a little intimidating, like it requires special equipment or years of practice. But I’m here to tell you, with my trusty microwave and a few chef hacks, we’re going to make the most incredible, soft, and chewy mochi right in your own kitchen. No steamer, no fancy tools—just you, your mixing bowl, and a whole lot of love. This recipe is my go-to when I want to impress guests (or just treat myself) with something that looks stunning but is secretly simple to make. So, tie on your apron, and let’s create some sweet magic together!
A Sweet Memory in a Tokyo Kitchen
My love affair with mochi started not in a fancy pastry shop, but in a tiny, steam-filled kitchen in Tokyo. I was visiting a friend’s family, and her grandmother, a tiny woman with the kindest eyes and surprisingly strong hands, was teaching me how to make traditional daifuku. The air was thick with the scent of sweet red bean paste, and I was utterly fascinated by the process. I remember fumbling with the sticky dough, my attempts looking more like abstract art than the perfect, round mochi she was effortlessly creating. She just laughed, patted my flour-dusted hand, and said, “It’s not about perfect. It’s about the love you put in.”
That moment has always stayed with me. While my version today is a fun, fruity twist on her classic, the spirit is the same. It’s about the joy of creating something with your hands, the shared laughter when a little filling peeks out, and the absolute bliss of that first bite. Every time I make these strawberry mochi, I’m transported back to that warm, welcoming kitchen, reminded that the best recipes are the ones made with heart.
Gathering Your Mochi-Making Magic
Here’s your grocery list for bliss! Don’t be scared by the grams; using a kitchen scale is the secret to perfect mochi, but I’ve included cup measurements to get you started. Let’s break it down.
For the Mochi Skin:
- 90g (about ½ cup diced) Fresh Strawberries: The star of the show! They give our mochi that beautiful natural pink hue and a lovely fruity flavor. Make sure they’re ripe and sweet for the best taste.
- 90g (about ⅓ cup + 2 tsp) Milk or Plant Milk: This is our liquid base. I use whole milk for richness, but oat or almond milk works beautifully for a dairy-free version.
- 40g (about 3 tbsp) Granulated Sugar: Just the right amount to sweeten the dough without overpowering the strawberry.
- 100g (about ¾ cup + 1 tbsp) Glutinous Rice Flour: This is the key to that iconic chewy texture! Don’t let the name scare you—it’s gluten-free. It’s also called mochiko or sweet rice flour.
- 30g (about 3 tbsp) Cornstarch: Our trusty sidekick! It helps tenderize the dough and prevents it from being too sticky.
- 20g (about 1½ tbsp) Unsalted Butter: A little bit of fat adds a lovely richness and a subtle sheen to the finished mochi. For a vegan swap, use a neutral-tasting oil or vegan butter.
For the Filling & Dusting:
- 150g (about ½ cup + 2 tbsp) Heavy Whipping Cream: We’re whipping this into a light, airy cloud. For a non-dairy version, use chilled coconut cream.
- 15g (about 1 tbsp) Granulated Sugar: For sweetening our whipped cream.
- 4 tbsp Strawberry Jam: I love the intense, concentrated flavor of a good-quality jam. You can also use finely diced fresh strawberries if you prefer a fresher, tarter burst.
- 50g (about ½ cup) Glutinous Rice Flour (for toasting): This is our “handling flour.” Toasting it first is a game-changer—it removes the raw flour taste and makes it perfect for dusting our work surface.
Let’s Make Some Mochi Magic: Step-by-Step
Ready to get your hands a little dusty and a lot happy? Follow these steps, and you’ll be a mochi master in no time.
- Prep Your “Handling” Flour: Grab a dry, non-stick skillet and add 50g of glutinous rice flour. Place it over medium heat and cook for about 5 minutes, stirring constantly. You’ll know it’s done when it smells warm and toasty, like popcorn! Pour it onto a plate and set it aside to cool. This is your best friend for preventing sticky situations later. Chef’s Hack: Toasting the flour is a non-negotiable step! It transforms the flavor from raw and chalky to nutty and delicious.
- Whip the Cream: In a chilled bowl, whip the heavy cream and 15g of sugar together until you have beautiful, stiff peaks. You should be able to turn the bowl upside down without anything falling out! Pop this bowl into the freezer while you work on the mochi. A super-cold filling is much easier to handle. Chef’s Hack: A cold bowl and beaters are the secret to quick, perfect whipped cream. I sometimes pop mine in the freezer for 10 minutes before I start.
- Create the Strawberry Liquid: In a blender or using an immersion blender, blitz your fresh strawberries, milk, and 40g of sugar until the mixture is completely smooth and lovely shade of pink. No chunks allowed!
- Combine the Dry and Wet: In a large, microwave-safe bowl, whisk together the 100g of glutinous rice flour and the cornstarch. Slowly pour in your vibrant pink strawberry milk, stirring as you go. Keep stirring until you have a thick, smooth, and lump-free batter.
- Microwave to Perfection: This is where the magic happens! Cover the bowl with a microwave-safe lid or plastic wrap. Important: Poke a few holes in the cover to let the steam escape. Microwave on high for 3 minutes. The dough should look set and slightly translucent. Grab a toothpick and poke the center—if it comes out clean, you’re good! If it’s still a bit wet, give it another 30 seconds. Chef’s Hack: All microwaves are different, so use the toothpick test as your guide. It’s better to undercook slightly and add time than to overcook and get a tough mochi.
- Knead in the Butter:Carefully remove the bowl (it will be hot!). Immediately add the butter right on top of the hot dough. Using a silicone spatula or a spoon, start to fold and stir the butter in. It will seem slippery at first, but it will gradually absorb into the dough.
- The (Slightly Messy) Fun Part: Once the dough is cool enough to handle, put on some food-safe gloves lightly coated with oil (this is the best way to prevent sticking!). Transfer the dough to a clean surface and knead it for a few minutes until it becomes smooth, elastic, and wonderfully stretchy. You’re building that perfect chewy texture right now!
- Divide and Conquer: Let the dough rest for about 5 minutes. Then, shape it into a log and use a bench scraper or a knife to divide it into 8 equal pieces. Cover them with a damp towel to prevent drying out.
- Assembly Time! Take one piece of dough and generously dust it with your toasted flour. Use your fingers to gently press and stretch it into a circle, about 4-5 inches across. The edges should be slightly thinner than the center. Place a dollop of your chilled whipped cream in the middle, then top with about ½ teaspoon of strawberry jam.
- The Art of the Seal: This is the trickiest part, but you’ve got this! Carefully gather the edges of the dough up and over the filling, like you’re making a little purse. Pinch the seams together firmly to seal. If there’s a little excess dough at the top, you can gently twist it and pinch it off. Roll the mochi ball in your hands to smooth it out, then place it seam-side down on a plate dusted with more toasted flour. Chef’s Hack: If a little filling peeks out, don’t panic! Just dust a little more toasted flour on the spot to “patch” it.
- The Final Rest: Repeat with the remaining pieces. Once they’re all assembled, let your beautiful mochi rest at room temperature for about 20 minutes. This allows the skin to set and develop its perfect soft-and-chewy texture.
How to Serve Your Strawberry Masterpieces
Presentation is part of the fun! These mochi are little works of art, so let’s show them off. I love serving them on a beautiful wooden board or a stark white plate to make that pink color really pop. For a touch of elegance, you can dust them with a little powdered sugar or even a tiny bit of freeze-dried strawberry powder.
These are best enjoyed the day they’re made, when the mochi skin is at its absolute peak of softness. Serve them slightly chilled for a refreshing treat, or at room temperature for the fullest, chewiest experience. They’re perfect with a cup of green tea, a glass of cold milk, or as the stunning finale to a dinner party. Trust me, your friends will be so impressed!
Get Creative! Fun Flavor Twists
Once you master the basic recipe, the flavor world is your oyster! Here are a few of my favorite ways to mix it up:
- Chocolate-Strawberry Dream: Add a teaspoon of cocoa powder to the dry mochi ingredients and fill with chocolate whipped cream and the strawberry jam. It’s like a chocolate-covered strawberry in mochi form!
- Tropical Mango Bliss: Swap the strawberries for mango puree and the jam for diced fresh mango. A little sprinkle of shredded coconut on top takes it to a tropical paradise.
- Matcha Green Tea Elegance: Replace the strawberries with more milk and add 1-2 teaspoons of high-quality matcha powder to the dry ingredients. Fill with sweet red bean paste (anko) or a simple vanilla cream. So sophisticated!
- Vegan & Dairy-Free: Use oat milk, vegan butter, and whip up a can of full-fat coconut cream that’s been chilled overnight. It works like a charm!
- Cookie & Cream: Fold crushed Oreo cookies into the whipped cream for a fun, crunchy filling that everyone will love.
Chef Emily’s Kitchen Notes
Oh, the stories this recipe could tell! I’ll never forget the first time I made it, I was so eager that I tried to knead the dough without any oil or gloves. Let’s just say I had pink, sticky dough webbed between my fingers for what felt like hours. It was a hilarious mess! That’s how I discovered the oiled gloves trick—a true kitchen lifesaver.
This recipe has evolved so much since then. I started by steaming the dough, but the microwave method is just so much faster and more reliable for a home cook. The addition of cornstarch was another happy accident that made the texture even more tender. Cooking is all about learning, adapting, and laughing along the way. Don’t be afraid to make it your own!
Your Mochi Questions, Answered!
Let’s tackle some common questions so you feel confident and prepared.
Q: My mochi skin turned out hard and not chewy. What happened?
A: This usually means the dough was overcooked. Microwaves vary in power, so start with less time and add in 15-30 second increments after the initial 3 minutes. The toothpick test is your best friend! Also, make sure you’re kneading the dough while it’s still warm—this develops the perfect texture.
Q: My mochi is too sticky to handle, even with the toasted flour!
A: Don’t worry, this is a common hurdle! First, ensure you’ve toasted your handling flour properly. Second, make sure your dough has cooled enough before you try to shape it. And third, don’t be shy with that toasted flour—dust your hands, the dough, and your work surface generously.
Q: Can I make these ahead of time?
A: You can assemble them a few hours ahead and keep them in the fridge. However, the mochi skin will start to harden and lose its soft, stretchy quality after about 24 hours due to the whipped cream. They are truly best enjoyed fresh!
Q: My whipped cream started to weep/melt while I was assembling. Help!
A: This is why we freeze the whipped cream! It needs to be ice-cold and firmly whipped. If your kitchen is very warm, you can even pop the assembled mochi into the fridge for 10 minutes after making a few to keep everything firm.
A Quick Nutritional Glance
I’m all about balance and enjoying treats mindfully! Here’s a general breakdown per mochi piece (assuming the recipe makes 8). Remember, these are estimates and can vary based on your specific ingredients.
- Calories: ~160
- Sugar: ~12g
- Fat: ~7g
- Gluten-Free: Yes! Just ensure your specific brands of glutinous rice flour and cornstarch are certified gluten-free if you have a severe allergy.
This treat is a wonderful way to enjoy a homemade dessert where you control the ingredients. Using fresh fruit and real whipped cream means you’re avoiding the preservatives and artificial flavors often found in store-bought versions.
You Did It! Now, Savor the Moment.
Look at you, you magnificent mochi-maker! You’ve just created something beautiful, delicious, and straight from the heart. I am so incredibly proud of you for diving in and giving this recipe a try. I hope these little pink parcels of joy bring a smile to your face and make your kitchen feel a little more magical.
This is what Tasty Chow is all about—sharing recipes that are fun, achievable, and packed with flavor. I’d love to see your creations! Tag me on social media @TastyChow so I can cheer you on. Now, go grab a fork (or just your hands!), get cozy, and chow down on your well-deserved treat. Until next time, happy cooking!
— With love and a flour-dusted apron,
Emily