How To Make An Epic Mini Cheesecake Board
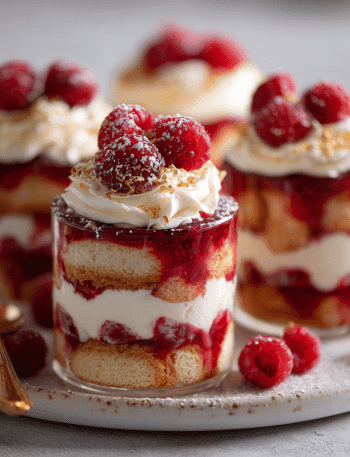
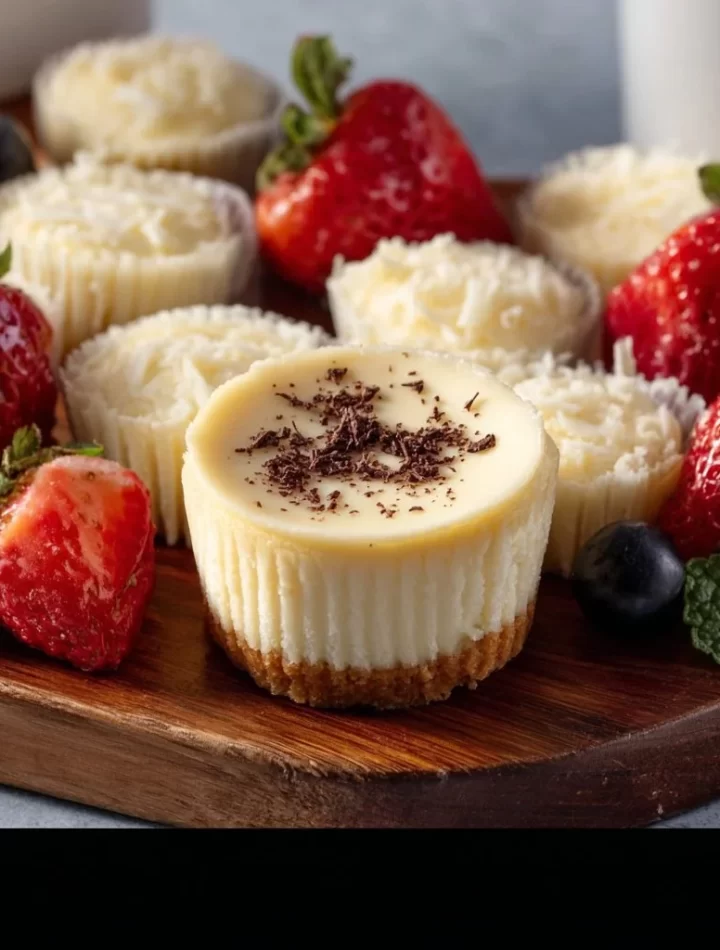
Hey there, fellow cheesecake enthusiasts! 🧀 If you’re as obsessed with creamy, dreamy cheesecakes as I am, then you’re definitely in for a treat today! Let’s talk about something a little different and absolutely fabulous: the mini cheesecake board. Imagine a vibrant display of bite-sized cheesecakes in all sorts of flavors, with fun toppings, fresh berries, and drizzles of chocolate or caramel. It’s like a dessert platter’s glamorous cousin who’s always the life of the party!
The beauty of a mini cheesecake board lies in its versatility. Whether you’re hosting a fabulous gathering, celebrating a birthday, or just wanting to liven up your Tuesday night, this delightful display is perfect for all occasions. You can mix and match flavors and toppings, allowing guests to indulge in a variety of tastes in one setting. Plus, these little treats are simply adorable and make any gathering feel special!
I remember the first time I hosted a get-together featuring a dessert board. I was nervous but excited, meticulously arranging each cheesecake on the platter while drizzling chocolate sauce like a true food artist. The moment my friends arrived and their eyes lit up with delight, I knew I was onto something magical. Not only did they devour just about every last crumb, but they also complimented me on my creativity. It was a proud chef moment!
As we dive deeper into the world of making the perfect mini cheesecake board, I will guide you through every luscious layer of this delicious venture. From selecting ingredients to plating, I’ll share my little tips and tricks along the way. So, grab your favorite apron, and let’s get ready to create something scrumptious together!
Personal Story
Growing up, my grandmother’s kitchen was a hub of joyful chaos. The sweet aroma of vanilla and baked goods filled the air, especially during family gatherings. Oh, those were the days of sneaking bites of fresh cheesecake batter! My grandma had this magical cheesecake recipe that was as creamy as it was simple. She taught me how to whip up the filling and perfectly bake the crust, and I still remember her laughter as she recounted the time she forgot to add the sugar—yikes!
One summer afternoon, we decided to experiment with mini cheesecakes for our family picnic. With small muffin tins in hand, we mixed flavors—classic vanilla, zesty lemon, and even a rich chocolate version. The look of wonder on my cousins’ faces when they took their first bites made it all worthwhile. It was a fun and creative kitchen adventure that sparked my love for mini desserts, paving the way for my upcoming cheesecake board idea.
Reflecting on those joyful moments and delicious creations, I believe food has an incredible power to create memories and connect us with those we love. So, let’s honor those delightful times while making our own mini cheesecakes and crafting a gorgeous board that’s sure to bring smiles and nostalgia to everyone who tries it!
Ingredients
Here’s what you’ll need to create your mini cheesecake board:
-
Cream Cheese: This is where the magic begins! Use block cream cheese for the best texture. If you’re short on time, consider using a whipped cream cheese for an easier blending process.
-
Granulated Sugar: The perfect sweetener to balance out the tangy cream cheese. No granulated sugar? You can substitute with powdered sugar for an even smoother filling!
-
Eggs: Essential for binding the ingredients together. Room temperature eggs mix better, but if you’re vegan or egg-free, substitute with mashed bananas or flax eggs (1 tablespoon of ground flaxseed mixed with 2.5 tablespoons of water per egg).
-
Vanilla Extract: Adds a delightful depth of flavor. For a twist, you can use almond extract or even citrus extracts like lemon or orange.
-
Graham Cracker Crumbs: The classic base layer for cheesecakes! If gluten-free, look for gluten-free graham crackers or crushed nuts mixed with a bit of coconut oil as a base.
-
Butter: Helps to bind graham cracker crumbs for the crust. For a plant-based option, use melted coconut oil or vegan butter!
-
Toppings: Fresh berries, chocolate sauce, caramel drizzle, whipped cream—these add a pop of color and flavor to your cheesecakes. Feel free to get creative with your favorite toppings!
With these ingredients on hand, you’re well on your way to cheesecakey perfection. Don’t worry if you need to improvise; cooking is all about having fun and making recipes your own!
Step-by-Step Instructions
Now that we’ve gathered the ingredients, let’s get down to the nitty-gritty of making those scrumptious mini cheesecakes!
Step 1: Preheat the Oven
Preheat your oven to 325°F (165°C). This ensures that your cheesecakes bake evenly, giving them a lovely creamy texture.
Step 2: Prepare the Muffin Tin
Line a muffin tin with cupcake liners or spray it with cooking spray for an easy release. I love using colorful liners—it adds a fun touch to the dessert display!
Step 3: Make the Graham Cracker Crust
In a mixing bowl, combine 1 cup of graham cracker crumbs, 1/4 cup of granulated sugar, and 1/2 cup of melted butter. Mix until well combined and crumbly.
- Chef Tip: Press the crumb mixture firmly into each muffin cup to create a solid base. A measuring cup or your fingers works great for this!
Step 4: Bake the Crust
Pop the muffin tin into the preheated oven and bake for about 5-7 minutes, until golden brown. This enhances the flavor and crunchiness of the crust. Let it cool for a bit before adding the filling—you don’t want to melt that luscious cream cheese!
Step 5: Prepare the Cream Cheese Filling
In a large mixing bowl, beat 16 ounces of softened cream cheese and 1 cup of granulated sugar using a mixer until smooth and creamy.
- Chef Insight: Scrape down the sides of the bowl every now and then to ensure no lumps remain!
Step 6: Add the Eggs and Vanilla
Add in 2 large eggs, one at a time, mixing well after each addition. Then, stir in 1 tablespoon of vanilla extract. Make sure you mix until just combined—overmixing can lead to cracks in your cheesecakes!
Step 7: Fill the Muffin Tin
Spoon the cream cheese filling into each muffin cup, filling them about 3/4 full to allow for slight puffing as they bake.
Step 8: Bake the Mini Cheesecakes
Bake the cheesecakes in the oven for 15-20 minutes or until the edges are set and the center is slightly jiggly. The residual heat will continue cooking the center, giving you that perfect creamy consistency.
Step 9: Cool and Chill
Once baked, let the cheesecakes cool on a wire rack. Then, refrigerate them for at least 2-3 hours (or overnight for the best flavor). They’ll firm up as they chill.
Step 10: Assemble Your Cheesecake Board
Once the cheesecakes are perfectly chilled, carefully remove them from the muffin tin. Arrange them on a large serving platter or cheeseboard.
- Serving Insight: Create visual interest by varying the layouts—mix flavors and colors, scatter fresh berries around, drizzle sauces, and add whipped cream dollops for that wow factor!
Serving Suggestions
When it comes to serving your epic mini cheesecake board, presentation is key! Here are a few tips to make your board as attractive as it is delicious:
-
Layering: Start by placing your mini cheesecakes in one area of the board. Surround them with colorful berries—think strawberries, blueberries, and raspberries—to create a vibrant burst of color and freshness.
-
Drizzles and Dips: Use small bowls or cute jars to hold your chocolate sauce, caramel, or fruit compote. Guests will love drizzling their favorite toppings right onto their cheesecakes!
-
Garnish: Consider garnishing with mint leaves or edible flowers for an elegant touch. It adds a bit of flair and makes your board feel like a work of art.
-
Themed Additions: If you’re hosting a special occasion, consider adding themed items like festive sprinkles, candy canes, or seasonal fruits to your board.
-
Personal Touch: Add little notes or signs to label different flavors—this will make it more interactive and fun for your friends!
Your cheesecakes will not only look delicious, but they’ll also be inviting, ensuring everyone can’t wait to dig in!
Recipe Variations
You’re in for a treat—here are some scrumptious and creative twists you can try with your mini cheesecakes:
-
Chocolate Lovers Delight: Add melted chocolate to the batter for a rich chocolate cheesecake. Top with chocolate ganache and chocolate shavings for a decadent bite!
-
Fruit Fusion: Swirl in fruit purees like raspberry or lemon curd to add fruitiness to the batter—don’t shy away from mixing flavors!
-
Nutty Goodness: Incorporate crushed pecans or walnuts into the crust instead of graham crackers for a delightful nutty flavor. Top with caramelized nuts and a drizzle of caramel sauce.
-
Fall Flavors: Blend in pumpkin puree and spices like cinnamon and nutmeg for a festive autumn treat. Serve with whipped cream and a sprinkle of cinnamon on top.
-
Vegan Version: Substitute cream cheese with cashew cream or coconut cream, and use flax eggs for a delightful vegan twist that everyone can enjoy!
Feel free to experiment and get creative. Each twist keeps it exciting, and you never know—you might just become the next cheesecake trendsetter!
Chef’s Notes
Creating mini cheesecake boards has truly become one of my favorite ways to showcase deliciousness. Over the years, I’ve learned a few things:
-
Don’t stress! Mistakes in the kitchen often lead to the best culinary adventures. One time, I threw in the wrong flavor while making the filling and ended up with an unexpected, delightful surprise—arugula cheesecake wasn’t a hit, but it gave everyone a good laugh!
-
Adaptability is key. Whether it’s a flavor that needs improvising or someone’s dietary restriction, don’t be afraid to vary your recipe to suit your needs. Cooking should be a joyful experience!
Remember, cooking is about joy and experimentation. So, grab your whisk and let your wonderful culinary creativity shine!
FAQs and Troubleshooting
1. Why are my cheesecakes cracking?
Cracks usually happen due to overmixing or too much heat. Ensure you mix until combined, and avoid opening the oven door while baking!
2. How do I know when my cheesecakes are done?
They should be set at the edges and slightly wobbly in the center. They will firm up as they cool.
3. Can I freeze these mini cheesecakes?
Absolutely! For 1-2 months, just make sure they’re well-wrapped or sealed in airtight containers.
4. What can I do if my cheesecakes are too runny?
This could happen from underbaking or not using enough eggs. Give the recipe another go, and remember to bake until set!
Nutritional Info (if applicable)
Each mini cheesecake is packed with delightful flavors but does come with some indulgence. Here’s a general breakdown of one mini cheesecake (without toppings):
- Calories: 150-200
- Total Fat: 10g
- Sodium: 150mg
- Carbohydrates: 14g
- Sugars: 8g
- Protein: 2g
Keep in mind that toppings and variations can add to these numbers, but hey, a treat now and then is all part of the culinary experience!
Final Thoughts
I hope this guide inspires you to create a stunning mini cheesecake board that’s as delicious as it is beautiful! Remember, the heart of cooking is about making wonderful memories with the people you love. So don’t hesitate to invite your closest friends or family over, roll up your sleeves, and dive into this delightful dessert venture.
Feel free to experiment with flavors, colors, and toppings—each cheesecake is a canvas waiting for your creative touch. Whether it’s a cozy night in or a festive gathering, I’m sure this epic mini cheesecake board will become a staple in your culinary repertoire!
Hop into the kitchen, channel your inner chef, and let’s make some sweetness together. Until next time—happy cooking, happy sharing, and cheers to living life one delicious bite at a time! 🍰💖
Print
Epic Mini Cheesecake Board
- Total Time: 45 minutes
- Yield: 12 mini cheesecakes 1x
- Diet: Vegetarian
Description
A vibrant display of bite-sized cheesecakes in various flavors, perfect for any gathering.
Ingredients
- 16 ounces block cream cheese (softened)
- 1 cup granulated sugar
- 2 large eggs
- 1 tablespoon vanilla extract
- 1 cup graham cracker crumbs
- 1/2 cup melted butter
- Toppings: fresh berries, chocolate sauce, caramel drizzle, whipped cream
Instructions
- Preheat oven to 325°F (165°C).
- Line a muffin tin with cupcake liners or spray with cooking spray.
- In a mixing bowl, combine graham cracker crumbs, sugar, and melted butter; mix until crumbly.
- Press the crumb mixture into each muffin cup and bake for 5-7 minutes.
- Beat cream cheese and sugar until smooth and creamy.
- Add eggs one at a time, mixing well, then stir in vanilla.
- Spoon filling into muffin cups, filling them 3/4 full.
- Bake for 15-20 minutes until edges are set and centers jiggle slightly.
- Cool on a wire rack and refrigerate for at least 2-3 hours.
- Remove from muffin tin and arrange on a serving platter with toppings.
Notes
Feel free to mix and match flavors and toppings. Cooking should be fun and creative!
- Prep Time: 15 minutes
- Cook Time: 30 minutes
- Category: Dessert
- Method: Baking
- Cuisine: American
Nutrition
- Serving Size: 1 mini cheesecake
- Calories: 175
- Sugar: 8g
- Sodium: 150mg
- Fat: 10g
- Saturated Fat: 6g
- Unsaturated Fat: 4g
- Trans Fat: 0g
- Carbohydrates: 14g
- Fiber: 0g
- Protein: 2g
- Cholesterol: 30mg
Keywords: mini cheesecakes, dessert board, cheesecake recipes