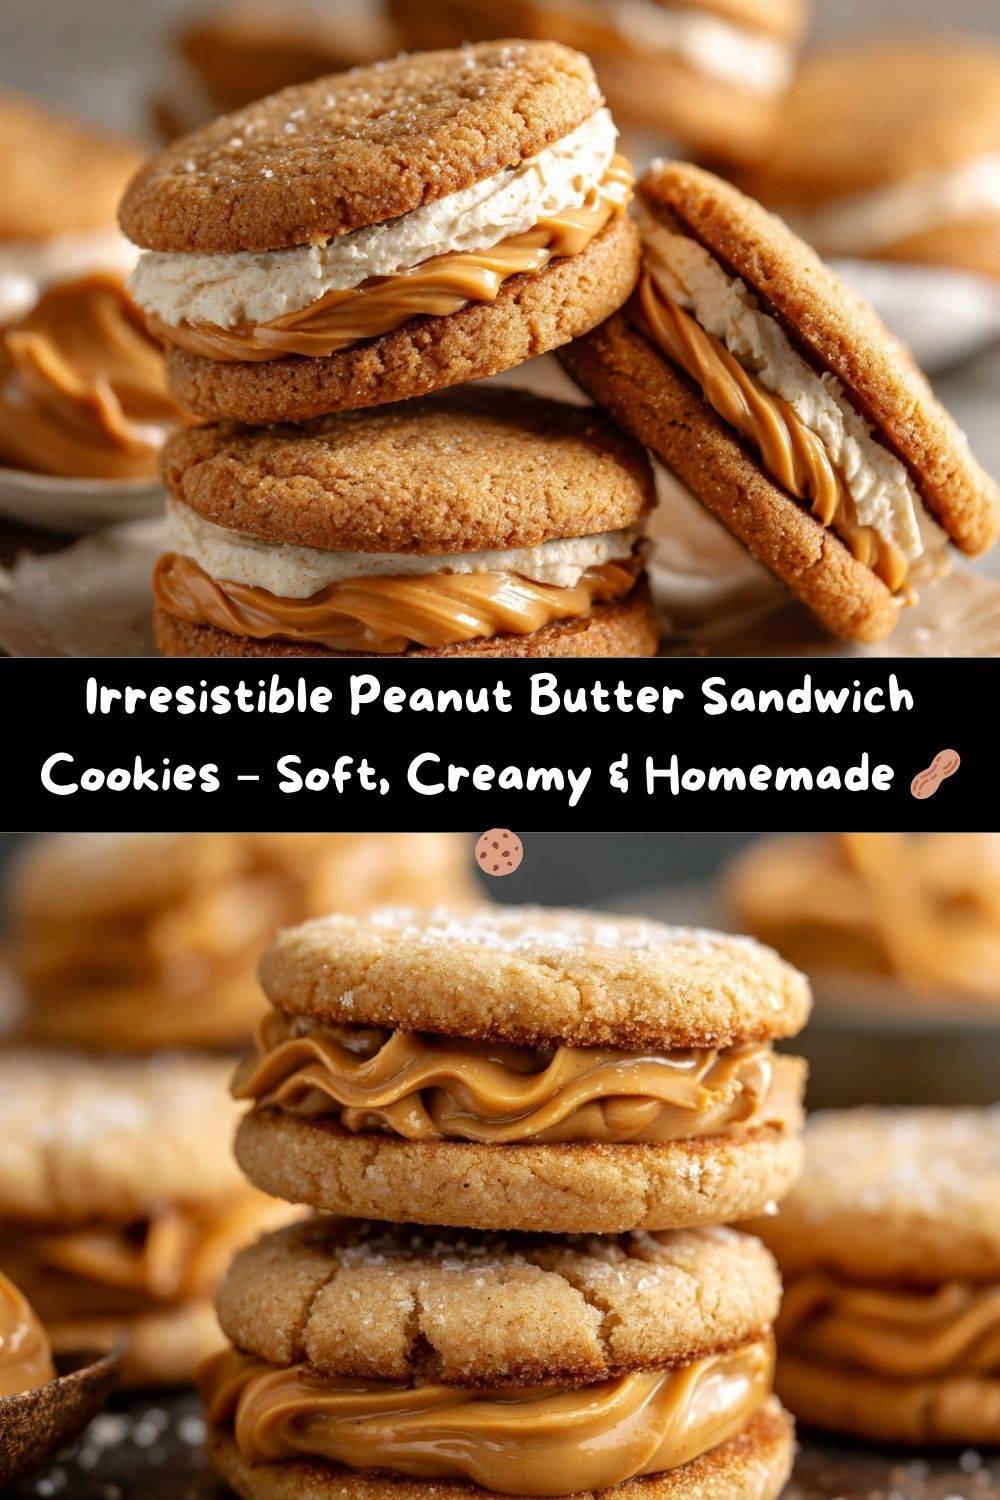
Irresistible Peanut Butter Sandwich Cookies – Soft, Creamy & Homemade
Hey there, my fellow flavor fanatic! Let’s be real for a second. Is there any scent in the world more comforting than peanut butter cookies baking in the oven? That warm, toasty, nutty aroma that wraps around your kitchen like a cozy blanket? It’s pure magic. And while a classic peanut butter cookie is a thing of beauty, we’re about to take it to a whole new level of amazing.
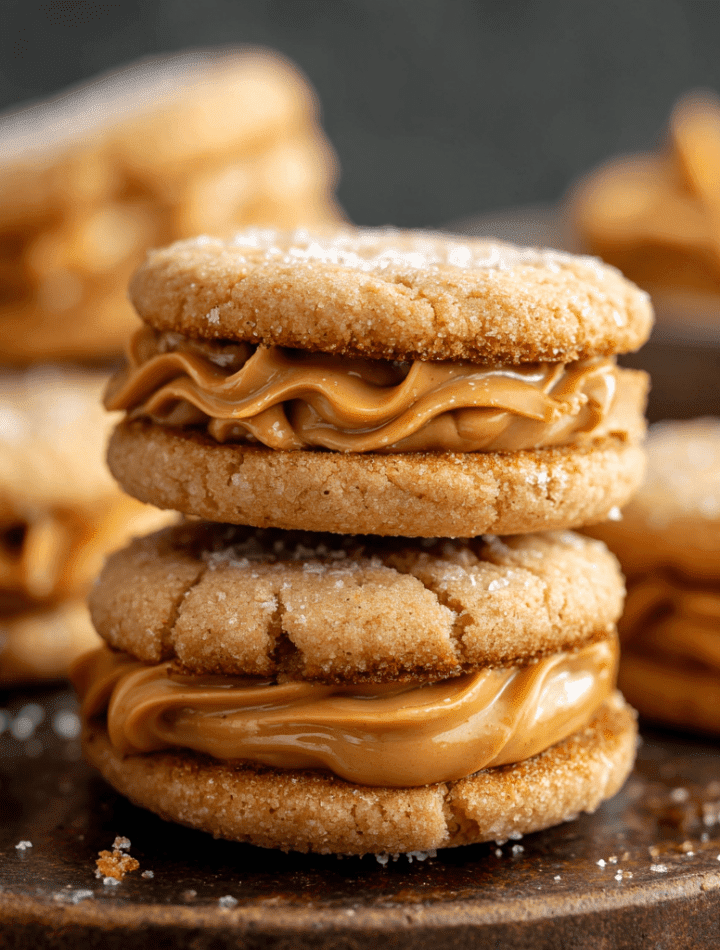
Imagine this: two incredibly soft, slightly chewy peanut butter cookies, still a little warm, hugging a cloud of creamy, fluffy peanut butter filling. It’s a double dose of peanut butter perfection, a salty-sweet symphony that will have you closing your eyes in bliss. This isn’t just a cookie; it’s an experience. It’s the cookie you pack in a loved one’s lunchbox to give them a midday boost of joy. It’s the treat you sneak with your 3 PM coffee, feeling like you’ve won the lottery. It’s the dessert platter superstar that disappears in minutes at any gathering.
And the best part? These irresistible peanut butter sandwich cookies are surprisingly simple to make. No fancy equipment or hard-to-find ingredients required. Just a bowl, a spoon (and maybe a mixer), and a whole lot of love. So, tie on your favorite apron—the one with the stains that tell a thousand kitchen stories—and let’s make something delicious together. Get ready to impress yourself, your family, and anyone lucky enough to get a taste.
The Cookie That Started It All: A Nod to Grandma Jean
This recipe takes me right back to my grandma’s linoleum-floored kitchen. My Grandma Jean was the queen of simple, soul-satisfying desserts. She didn’t need a fancy French patisserie book; she had a worn-out recipe box filled with index cards stained with chocolate and vanilla.
Her classic peanut butter cookies were my kryptonite. I’d sit at her formica table, swinging my legs, watching her strong hands effortlessly create that iconic crisscross pattern with the tines of a fork. To me, it was a secret code that meant something incredible was about to happen. She’d always let me have the first one straight off the baking sheet, warm and fragile, and it was like tasting happiness itself. This sandwich cookie recipe is my loving tribute to her. It’s her timeless cookie, but with a little extra “Emily” flair—because if one peanut butter cookie is good, two with a filling in the middle is a downright celebration.
Gathering Your Happy Ingredients
Let’s take a quick tour of the all-star lineup that’s going to make these cookies legendary. I’ve included some of my favorite chef insights and swaps so you can bake with confidence!
For the Soft & Chewy Cookies:
- 1 cup creamy peanut butter – This is the star of the show! I recommend using a standard, no-stir kind like Jif or Skippy for the best texture. The oils in natural peanut butter can separate and make the cookies greasy.
- 1/2 cup unsalted butter, softened – The “softened” part is key! Leave it out on the counter for about an hour. It should be cool to the touch but yield easily when you press it. This creates a wonderfully tender cookie crumb.
- 1 cup light brown sugar & 1/2 cup granulated sugar – The brown sugar brings molasses-y moisture and chew, while the white sugar helps them spread and crisp up just a tad. It’s the perfect balance.
- 1 large egg – Our binding agent! Make sure it’s at room temperature to blend seamlessly into the dough.
- 1 tsp vanilla extract – The supporting actor that makes all the other flavors pop. Don’t you dare skip it!
- 1 1/4 cups all-purpose flour – The structure-builder. For a gluten-free version, a 1:1 GF flour blend works beautifully here.
- 3/4 tsp baking soda & 1/2 tsp baking powder – Our leavening dream team! The baking soda encourages spread and browning, while the baking powder gives a little lift.
- 1/4 tsp salt – Crucial for balancing the sweetness and making the peanut butter flavor sing. If you only have salted butter, just reduce this to a tiny pinch.
For the Dreamy Peanut Butter Filling:
- 1/2 cup creamy peanut butter – Consistency is key here too. Using the same no-stir peanut butter ensures your filling is smooth and pipeable (or spreadable).
- 1/4 cup unsalted butter, softened – This whips up with the peanut butter to create a light, fluffy, and not-too-sweet filling.
- 1 cup powdered sugar – Sweetens and thickens the filling. Sift it if it’s lumpy for an ultra-smooth texture.
- 1–2 tbsp milk – Any kind you have! This is your control for consistency. Start with one tablespoon and add the second only if needed to make it spreadable.
- Pinch of salt – Trust me on this. A tiny pinch cuts the sweetness and makes the filling taste more complex and, well, more peanut buttery!
Let’s Bake! Your Step-by-Step Guide to Cookie Bliss
Okay, team! Here we go. Follow these steps, and you’ll be a peanut butter sandwich cookie pro in no time. I’ve sprinkled in my favorite kitchen hacks to make the process even smoother.
- Preheat and Prep. Fire up your oven to 350°F (175°C). This gives it plenty of time to get to the perfect temperature. Line your baking sheets with parchment paper. Chef’s Hack: Parchment paper is a non-negotiable for me. It prevents sticking AND makes cleanup a dream. No parchment? A silicone baking mat works great too!
- Cream the Good Stuff. In a large bowl, using a hand mixer or a stand mixer with the paddle attachment, beat together the 1 cup of peanut butter, 1/2 cup softened butter, brown sugar, and granulated sugar. Mix on medium speed for a good 2-3 minutes until it’s light, fluffy, and pale in color. Chef’s Insight: Don’t rush this step! Creaming the butter and sugar properly incorporates air, which is what gives your cookies that wonderful tender texture.
- Incorporate the Wet Ingredients. Beat in the egg and vanilla extract until the mixture is smooth and well-combined. It might look a little curdled at first, but just keep mixing—it will come together beautifully.
- Whisk the Dry Team. In a separate, medium bowl, whisk together the flour, baking soda, baking powder, and salt. Chef’s Hack: Whisking is like giving your dry ingredients a little aerobics class. It ensures the leaveners and salt are evenly distributed, so every cookie bakes up perfectly.
- Combine Wet and Dry. Gradually add the dry ingredients to the wet ingredients, mixing on low speed just until the flour disappears. Chef’s Warning: Stop mixing as soon as you no longer see streaks of flour. Overmixing at this stage can lead to tough cookies, and we want soft, tender ones!
- Scoop and Flatten. Roll the dough into 1-tablespoon-sized balls. I use a small cookie scoop for uniformity—it’s a game-changer! Place them about 2 inches apart on your prepared baking sheets. Now, grab a fork and gently press down on each ball in a crisscross pattern. Chef’s Insight: This isn’t just for looks! It helps the cookies bake evenly.
- Bake to Perfection. Bake for 8-10 minutes. They are done when the edges are just barely starting to turn golden brown. The centers will still look soft and slightly underdone. Chef’s Secret: This is the secret to a soft cookie! They will continue to cook on the hot baking sheet as they cool. Do not overbake!
- The All-Important Cool. Let the cookies cool on the baking sheet for 5 minutes before transferring them to a wire rack to cool completely. I know it’s hard, but you MUST let them cool all the way before filling. A warm cookie will melt your beautiful filling into a sad puddle.
- Whip Up the Filling. While the cookies are cooling, make the filling. In a clean bowl, beat the 1/2 cup peanut butter and 1/4 cup softened butter until smooth. Gradually beat in the powdered sugar and pinch of salt. It will be thick! Add milk, one tablespoon at a time, until it reaches a smooth, fluffy, and spreadable consistency.
- Assemble the Masterpiece! Once the cookies are completely cool, turn half of them upside down. Spread or pipe a generous tablespoon of filling onto the flat side of each upside-down cookie. Gently press a second cookie on top, flat side down, to create a sandwich. Give it a little gentle squeeze so the filling peeks out the edges. You’ve done it!
How to Serve These Peanut Butter Beauties
Now for the best part: eating them! While they are absolutely sublime all on their own, here are a few fun ways to serve them up:
The Classic: Pile them high on a rustic wooden board or a vintage cake stand. They look homey and irresistible.
The Milk Dip: This is non-negotiable in my house. A tall, ice-cold glass of milk is the perfect partner for these rich cookies. For the adults, a dark roast coffee or even a glass of cold brew is a fantastic contrast.
The “Fancy Affogato” Treatment: Place a cookie on a small plate and pour a shot of warm espresso over it. Let it soak in for a few seconds before diving in. It’s a next-level dessert experience.
The Lunchbox Surprise: Tuck one into a lunchbox for a surefire smile. They travel well and hold their shape.
Get Creative! Fun Flavor Twists & Swaps
Once you’ve mastered the classic, the playground is open! Here are a few of my favorite ways to mix things up:
- Chocolate Drizzle Dream: Melt 1/2 cup of chocolate chips with a teaspoon of coconut oil and drizzle it over the assembled cookies. Let it set for a gorgeous and delicious finish.
- Peanut Butter & Jelly: Add a tiny dollop (about 1/2 tsp) of your favorite jam or jelly in the center of the filling before sandwiching the cookies together. Strawberry or raspberry is a classic combo!
- Crunchy Peanut Lover’s: Use crunchy peanut butter in the filling for a delightful texture contrast. You could even roll the edges of the filled cookies in finely chopped salted peanuts.
- “Elvis” Special: Add 1/2 cup of mashed very ripe banana to the cookie dough and fold in 1/2 cup of cooked, crumbled bacon. It sounds wild, but the sweet-salty-smoky combo is incredible.
- Dairy-Free Delight: Use vegan butter sticks and a plant-based milk (like oat or almond) to make the entire recipe dairy-free. It works like a charm!
Chef Emily’s Kitchen Notes & Stories
This recipe has seen a few… *experiments* over the years. There was the infamous “double-batch” incident where I accidentally used baking powder instead of baking soda. Let’s just say we ended up with puffy, cakey, strangely tall cookies that my dog wouldn’t even eat. A valuable lesson in reading labels carefully!
I’ve also learned that the quality of your peanut butter truly matters here. This is its time to shine, so use a brand you genuinely love the taste of. The dough might seem a little softer than other cookie doughs—that’s normal! Chilling it for 20-30 minutes can help if you find it too sticky to handle, but I usually just dive right in. These cookies are meant to be forgiving and fun, just like my kitchen philosophy.
Your Questions, Answered!
Q: My cookies spread too much and got flat! What happened?
A: This is usually a butter issue. Was your butter too warm or melted? Or, your baking soda might be old. Test it by sprinkling a bit in vinegar—if it doesn’t bubble vigorously, it’s time for a new box. Also, make sure you’re using a no-stir peanut butter.
Q: Can I make the dough ahead of time?
A: Absolutely! You can scoop the dough balls, freeze them solid on a baking sheet, and then transfer them to a freezer bag. Bake straight from frozen, adding 1-2 minutes to the baking time. You can have fresh, warm cookies anytime the craving strikes!
Q: My filling is too runny/thick. How can I fix it?
A: Kitchen environments vary! If it’s too runny, beat in a little more powdered sugar. If it’s too thick to spread, add more milk, a teaspoon at a time, until it’s perfect. You’re in control!
Q: How should I store these sandwich cookies?
A: Keep them in an airtight container at room temperature for up to 3 days. For longer storage, I freeze them. They thaw perfectly at room temperature in about 20 minutes.
A Quick Nutritional Glance
I’m all about balance and enjoying the foods you love! Here’s a general breakdown per sandwich cookie (approximate, as ingredients can vary). This is for your information, so you can bake and eat mindfully.
Calories: ~280 | Fat: 17g | Saturated Fat: 6g | Carbohydrates: 28g | Sugar: 18g | Protein: 6g | Fiber: 1.5g | Sodium: 180mg
Final Thoughts from My Kitchen to Yours
Well, my friend, we’ve done it. We’ve created a batch of pure, unadulterated joy. I hope these cookies fill your kitchen with wonderful smells and your heart with the same warmth I feel every time I bake them.
Remember, baking is about the journey, not just the destination. So what if a cookie breaks or the crisscross isn’t perfect? It will still taste incredible. The real magic is in the act of creating something with your own two hands to share with people you love.
I’d love to see your creations! If you make these, tag me on social @TastyChow with #TastyChow so I can cheer you on. Now, go forth and chow down!
With a full heart and a flour-dusted apron,
— Emily