Juicy Oven-Baked Chicken Tenderloins: Your New Family Dinner Hero
Hey there, friend! Let’s talk about that magical, slightly frantic time we all know and love: the weekday dinner dash. You’re staring into the fridge, the clock is ticking, and the universal question echoes through the kitchen: “What’s for dinner?” You want something everyone will actually eat (yes, even the picky ones), something that doesn’t dirty every pan you own, and something that tastes like you fussed for hours. Sound familiar? Well, pull up a chair, because I’m about to introduce you to your new dinner MVP: my Juicy Oven-Baked Chicken Tenderloins.
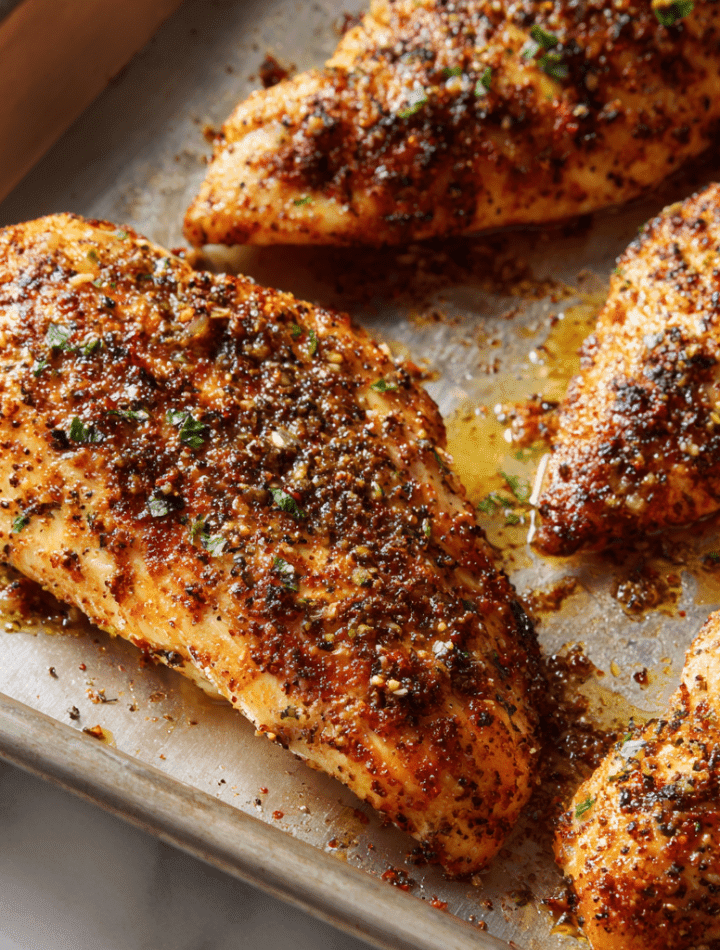
This isn’t just another baked chicken recipe. This is your ticket to tender, flavorful, foolproof perfection every single time. We’re talking golden-brown edges, a juicy, melt-in-your-mouth interior, and a seasoning blend that’s like a warm hug for your taste buds. It’s the kind of recipe you’ll scribble on a notecard and pass down because it just works. Whether you’re feeding a hungry family, meal-prepping for the week, or need a protein superstar for your salads and wraps, these tenderloins are about to become a staple in your kitchen. So, tie on your apron—the cute one or the messy one, no judgment here—and let’s make something delicious that will have everyone asking for seconds!

The Recipe That Started With a “Little Helper”
This recipe always takes me right back to my niece, Lily’s, fifth birthday party. I was on kid-food duty, tasked with feeding a squad of energetic, sauce-obsessed mini-critics. The pressure was on! I wanted to make something fun and dippable, but way better than the frozen stuff. I remembered the pure, simple joy of my grandma’s roasted chicken—how the smell alone could bring the whole family running. But I needed it in kid-friendly, quick-cooking form.
Enter the humble chicken tenderloin. I whisked together my favorite herbs and spices—the ones that smelled like my grandma’s kitchen—gave the tenders a good toss, and popped them in the oven. Twenty minutes later, the timer dinged, and I held my breath. The first kid took a tentative bite… then devoured three pieces. The ultimate review came from Lily, who declared, “Auntie Em, these are even better than dinosaur nuggets!” with ketchup smeared from ear to ear. That was the moment I knew this simple formula was something special. It bridged that gap between nostalgic flavor and easy, modern cooking. Every time I make them now, I think of that happy, messy table and remember that the best recipes are the ones that create those simple, joyful connections.
What You’ll Need: Simple Ingredients, Big Flavor
Gathering your ingredients is the first step to kitchen success! Here’s everything you need, plus my little chef insights to help you understand the “why” behind each item.
-
- 1.5 lbs chicken tenderloins (about 8–10 pieces): The star of the show! Tenderloins are naturally tender and cook quickly. Chef’s Tip: If you can only find chicken breasts, just slice them into 1-inch thick strips. Pat them very dry with paper towels first—this is the #1 secret for getting that perfect golden bake, not a steam!
- 2 tablespoons olive oil: Our flavor conductor and crisping agent. It helps the seasoning stick and creates a beautiful exterior. Substitution: Avocado oil or melted ghee work wonderfully here too.
- 1 teaspoon garlic powder: Provides a sweet, mellow garlic flavor that permeates every bite without the risk of burning. Chef’s Insight: I prefer powder over fresh here for even distribution, but a teaspoon of finely minced fresh garlic mixed into the oil is a fabulous twist!
- 1 teaspoon paprika: This is for color, sweetness, and a hint of earthy flavor. Fun Swap: Use smoked paprika for a subtle, campfire-kissed depth that’s absolutely incredible.
- 1/2 teaspoon onion powder: The unsung hero! It builds a savory-sweet base note that rounds out the flavor profile perfectly.
1/2 teaspoon dried oregano: A touch of herby, aromatic goodness. Fresh Sub: Use 1 ½ teaspoons of finely chopped fresh oregano if you have it!
- 1/2 teaspoon salt (I use kosher salt): Crucial for enhancing all the other flavors. Don’t skip it! Pro Tip: If using fine table salt, reduce to a scant 1/2 teaspoon.
- 1/4 teaspoon black pepper: For that essential gentle heat. Always use freshly ground if you can—the flavor difference is night and day.
- Optional garnish: squeeze of lemon juice or fresh parsley: The finishing touch! A bright squeeze of lemon right before serving or a sprinkle of fresh parsley makes the flavors pop and adds a gorgeous pop of color.
Let’s Get Cooking: Simple Steps to Juicy Perfection
Follow these steps, and you’re guaranteed success. I’ve packed each one with my favorite kitchen hacks to make you feel like a pro!
- Preheat & Prep Your Pan: Crank your oven to 400°F (200°C). This hot start is key for a nice sear and juicy interior. While it heats, line a large baking sheet with parchment paper or give it a light coating of oil or non-stick spray. Chef’s Hack: For even better browning, place a wire rack on the baking sheet and spray it. Lifting the chicken allows hot air to circulate all around it, giving you a gorgeous, even color on all sides!
- The Flavor Toss: In a large bowl, combine the olive oil and all your dried spices (garlic powder, paprika, onion powder, oregano, salt, and pepper). Give it a quick whisk to create a flavorful paste. Now, add your patted-dry chicken tenderloins. Using your hands or tongs, toss and massage until every piece is evenly and lovingly coated. Chef’s Commentary: Don’t be shy here! Get in there with your hands—it’s the best tool for ensuring every nook gets seasoned.
- Arrange for Success: Place your coated tenderloins on your prepared baking sheet. This is non-negotiable: give them space! Arrange them in a single layer with a little room between each piece. If they’re crowded, they’ll steam instead of roast, and we’re after golden-brown, not pale and soggy.
- Bake to Juicy Perfection: Slide the baking sheet into your preheated oven. Set your timer for 18 minutes. Ovens vary, so start checking at the 18-minute mark. The chicken is done when it’s firm to the touch, the juices run clear, and an instant-read thermometer inserted into the thickest part reads 165°F (75°C). My Biggest Tip: PLEASE use a meat thermometer! It takes the guesswork out and is the only surefire way to guarantee juicy, safe chicken every single time.
- The Golden Finish (Optional but Recommended): If you want that extra gorgeous, crispy-edged finish, turn your oven to BROIL for the last 1-2 minutes. Watch it like a hawk! This step works quickly and gives you that irresistible restaurant-quality look.
- The Crucial Rest: Once out of the oven, let the chicken rest on the pan for about 5 minutes. I know it’s tempting to dig right in, but this pause allows the juices to redistribute throughout the meat. If you cut immediately, all those delicious juices will run out onto the cutting board, leaving you with drier chicken. Trust me on this one—it’s a game-changer!
How to Serve Your Masterpiece
Now for the fun part—getting these golden beauties to the table! Their versatility is what makes them a true family favorite.
For a classic, comforting dinner, I love to plate them alongside some creamy mashed potatoes (extra gravy, please!) and a simple steamed veggie like broccoli or green beans. The tenderloins are perfect for dragging through that gravy or mashed potatoes. Want something lighter? They’re phenomenal atop a big, crispy salad with lots of veggies and a tangy vinaigrette. Slice them up and toss them right in!
And let’s not forget the dip situation. Serving these with a variety of dipping sauces turns dinner into a fun, interactive experience. Set out little bowls of honey mustard, barbecue sauce, ranch, or a zesty comeback sauce. For the adults, a quick herby yogurt sauce (Greek yogurt, lemon, dill, salt) is a refreshing and protein-packed option. Pile them high on a platter, garnish with that fresh parsley or lemon wedges, and watch them disappear!
Mix It Up! 5 Flavorful Twists
Once you’ve mastered the classic, the playground is open! Here are a few of my favorite ways to remix this recipe.
- Lemon Herb Bliss: Add the zest of one lemon to the seasoning mix and use 1 tablespoon of fresh chopped thyme or rosemary along with the dried oregano. After baking, squeeze fresh lemon juice over the top.
- Sweet & Smoky BBQ Dry Rub: Replace the paprika with smoked paprika. Add 1 teaspoon of brown sugar, 1/2 teaspoon of chili powder, and a pinch of cumin to the seasoning blend. You’ll get that BBQ pit flavor right from your oven!
- Parmesan Herb Crusted: After tossing in oil and spices, dredge each tenderloin in a mixture of 1/2 cup grated Parmesan cheese and 1/4 cup panko breadcrumbs before baking. You get a fantastically crispy, cheesy crust.
- Spicy Buffalo Style: For the seasoning, use 1 teaspoon each of garlic powder and onion powder, but skip the paprika and oregano. Bake as directed. In the last 5 minutes of cooking, brush each tenderloin with your favorite Buffalo sauce. Return to oven to finish. Serve with blue cheese or ranch dressing.
- Gluten-Free & Dairy-Free All-Star: This base recipe is naturally both! Just ensure your spices are certified gluten-free if needed. For a “breading” option, use a gluten-free panko or crushed gluten-free cornflakes in the Parmesan variation, and skip the cheese or use a nutritional yeast blend.
Chef Emily’s Notebook Scribbles
This recipe has lived in my back pocket for years, and it’s evolved in the funniest ways. I once, in a pre-coffee haze, accidentally used cinnamon instead of paprika. (Spoiler: not recommended for savory chicken!). My husband still calls it my “Breakfast Chicken” incident. Lesson learned: always double-check your spice jars!
Over time, I’ve learned the beauty of the double batch. These tenderloins reheat like a dream in the air fryer or a toaster oven, making them the ultimate salad-topper or quick snack for days. I also love making a big batch, letting them cool, and freezing them in a single layer on a sheet pan before transferring to a bag. They’re my secret weapon for last-minute lunches. The core of the recipe—the simple spice blend and high heat—has never changed, because why mess with pure, delicious perfection?
Your Questions, Answered!
Q: My chicken sometimes turns out dry. What am I doing wrong?
A: The most common culprits are overcooking or skipping the rest. The meat thermometer is your best friend! Pull the chicken at 165°F, and remember it will continue to cook a bit as it rests. Also, ensure you’re not using “enhanced” or saltwater-injected chicken, as it can sometimes yield a rubbery texture when baked.
Q: Can I marinate the chicken in this seasoning blend ahead of time?
A> You absolutely can! For even more flavor, toss the chicken with the oil and spice mixture, then let it hang out in the fridge for up to 4 hours. Any longer and the salt can start to draw out too much moisture, affecting the texture. This is a great weekday timesaver.
Q: Why is my chicken not getting golden brown?
A> Two things: moisture and heat. Make sure you pat the chicken bone-dry before adding oil and spices. Also, check your oven temperature with an independent oven thermometer—it might be running cool. Finally, don’t crowd the pan! The broiler trick at the end is also a fantastic fix for this.
Q: What’s the best way to store and reheat leftovers?
A> Store cooled leftovers in an airtight container in the fridge for up to 4 days. To reheat, skip the microwave (which can make them rubbery). Instead, use a toaster oven, conventional oven, or air fryer at 350°F until warmed through. This helps them regain their crisp-tender texture.
A Quick Look at the Good Stuff
While I’m all about flavor first, it’s nice to know what’s fueling your body! This nutritional breakdown is for one serving (approximately 2-3 tenderloins), based on the standard recipe. Remember, values can vary based on specific ingredients used.
This recipe is a fantastic source of lean protein, which helps keep you full and satisfied. The fat comes primarily from the heart-healthy olive oil. It’s naturally low-carb and sugar-free, making it a wonderfully versatile component for many eating styles. The sodium level is moderate and comes from the added salt, which you can adjust to your preference. By serving it with a rainbow of veggies and a complex carb like sweet potato or quinoa, you create a beautifully balanced, nourishing meal that truly satisfies.
Go Forth and Bake Some Magic!
And there you have it, my friend! Your complete guide to the most reliable, delicious, and downright satisfying oven-baked chicken tenderloins. This recipe is more than just a list of ingredients and steps—it’s a promise of a stress-free dinner, a happy table, and the confidence that comes from nailing a kitchen basic.
I hope this recipe finds its way into your regular rotation, becomes scribbled in your own notebook, and maybe even creates a messy-faced, happy memory of your own. Cooking should be fun, nourishing, and shared. So the next time that “what’s for dinner?” panic starts to set in, you can just smile, grab your trusty baking sheet, and know you’ve got this.