Lean Beef Taco Skillet: Your New 20-Minute Weeknight Hero
Hey friends! Emily here, from my (currently flour-dusted) kitchen to yours. Raise your hand if this sounds familiar: it’s 5:30 PM, stomachs are rumbling, and the siren call of Taco Tuesday is strong. But the thought of hauling out six different bowls for toppings, browning meat, warming shells, and creating a mountain of dishes… suddenly makes cereal for dinner look pretty dang appealing.
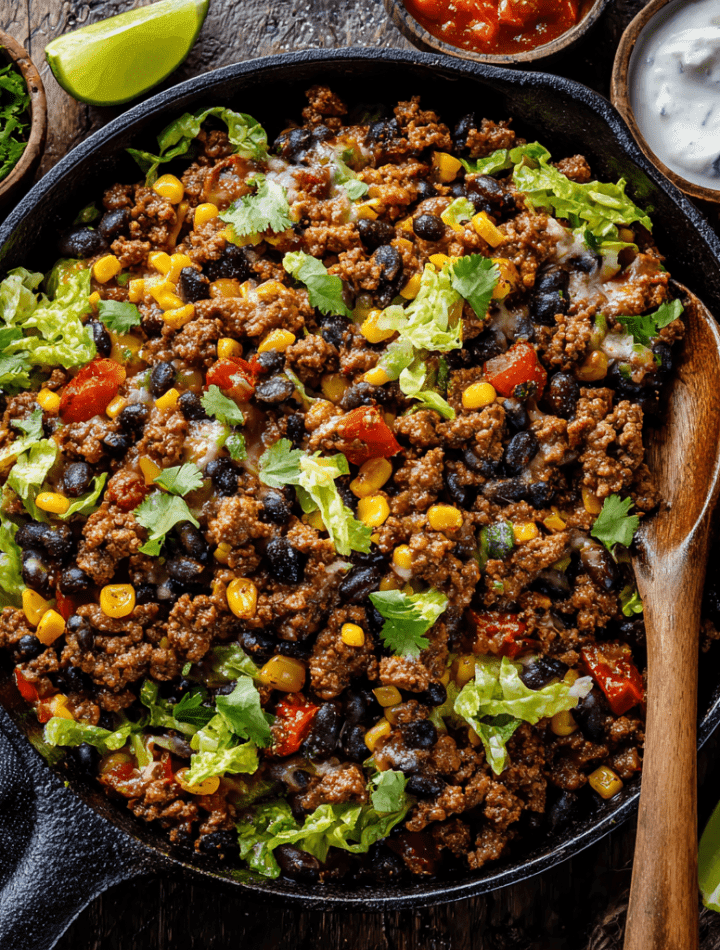
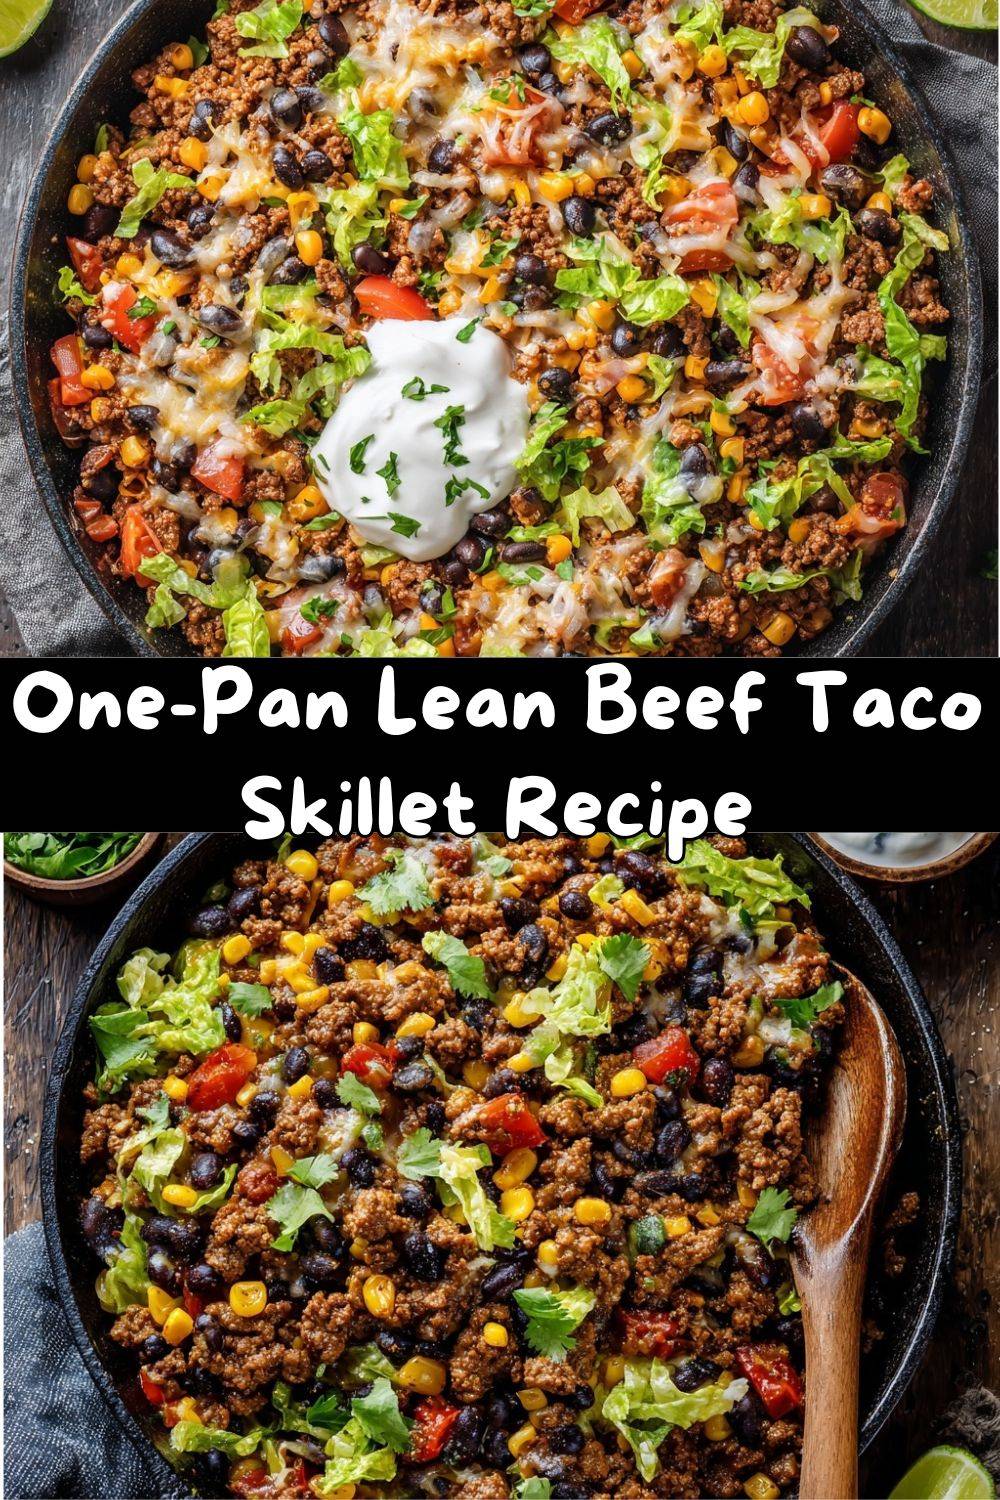
Yeah, I’ve been there too. That exact moment of hungry hesitation is precisely why this Lean Beef Taco Skillet was born. It’s my kitchen’s greatest weeknight magic trick. We’re talking about everything you crave in a fantastic taco—savory, perfectly seasoned beef, hearty black beans, sweet pops of corn—all happily mingling in one single pan, ready in about the time it takes to watch half a sitcom.
This isn’t just a “dump and stir” recipe (though I love those too!). It’s a flavor-packed, protein-powered hug in a skillet. It’s endlessly customizable, secretly healthy, and so darn easy that you’ll make it once and it’ll instantly earn a spot in your regular rotation. So, grab your favorite skillet, and let’s turn that taco craving into a delicious, minimal-cleanup reality. Dinner is about to get a major upgrade!
Why This Skillet Holds a Special Place in My Apron Pocket
This recipe always takes me back to my first apartment after culinary school. My kitchen was the size of a postage stamp, and my roommates and I were perpetually busy, broke, and hungry. Our version of “fancy” was adding an extra ingredient to boxed mac and cheese.
One particularly chaotic week, I stared into our near-empty fridge: half an onion, a can of beans, some freezer-burnt corn, and a lone pound of ground beef from the sale bin. Taco night dreams felt out of reach. But then, in a moment of “what’s the worst that could happen?” inspiration, I threw it all into my one decent skillet with the last of my homemade taco seasoning. Ten minutes later, we were scooping this glorious, messy mixture onto plates, laughing about our day, and going back for seconds. It wasn’t fancy, but it was everything—hearty, satisfying, and made together. That’s the spirit I stir into this skillet every time: good food doesn’t need to be complicated to be absolutely wonderful.
Gathering Your Flavor Team: Ingredients & Chef Insights
Here’s your simple squad. I’ve added my little chef notes because knowing your ingredients is the first step to cooking with confidence!
- 1 lb lean ground beef (90% or higher): The leaner the beef, the less grease you’ll drain, keeping things light. Chef’s Tip: If you can only find 80/20, no sweat! Just drain the excess fat after browning for a similar result.
- 1 tbsp olive oil: Just a splash to get things sizzling, especially if using extra-lean beef. Substitution: Any neutral oil like avocado or canola works perfectly.
- 1 packet or 2 tbsp taco seasoning: The flavor anchor! I’m a huge fan of making a big batch of homemade taco seasoning (it’s just spices you already have!), but a trusted store-bought packet is a fantastic shortcut. No judgment here.
- 1/2 cup water: This is crucial! It helps the seasoning coat every morsel of beef and creates a little saucy magic that brings everything together.
- 1 cup black beans, drained and rinsed: They add fantastic fiber, protein, and a creamy texture. Chef’s Insight: Rinsing them washes away the starchy canning liquid and lets the other flavors shine.
- 1 cup corn (frozen or canned, drained): Little bursts of sweetness that balance the savory spice. I always keep a bag of frozen fire-roasted corn in my freezer for an extra smoky kick!
- Salt and pepper to taste: Your finishing touch. Always taste before you add, as your taco seasoning may have enough salt already.
- The Fun Part: Optional Toppings! This is where you make it your own. Chopped lettuce, fresh salsa, creamy avocado, a dollop of Greek yogurt (my favorite sour cream swap!), shredded cheese, or a squeeze of lime juice. The sky’s the limit!
Let’s Get Cooking: Your Simple, Sizzling Steps
Ready? Apron on (or not, I won’t tell), and let’s fire up the stove! This is where the magic happens, fast.
- Heat & Brown: In a large skillet (I use my trusty 12-inch cast iron), heat the olive oil over medium heat. Once it shimmers, add your ground beef. Now, channel your inner chef and break it apart with a wooden spoon or spatula as it cooks. We want lots of little, flavorful crumbles, not one big meatloaf-in-a-pan. Cook until it’s beautifully browned and no pink remains. Chef’s Hack: Don’t stir constantly! Let it sit for a minute to get some tasty browned bits on the bottom of the pan—that’s pure flavor gold.
- Season & Simmer: If there’s more than a tablespoon or so of grease, go ahead and drain it. Then, sprinkle that glorious taco seasoning all over the beef. Pour in the 1/2 cup of water and give it a really good stir, scraping up any of those browned bits from the pan bottom. This is called “deglazing,” and it’s a simple trick that makes your food taste like you cooked all day.
- Bring in the Veg: Now, stir in your drained black beans and corn. The mixture might look a bit saucy—that’s perfect! Let it simmer for 5-7 minutes, stirring occasionally. You’ll see the liquid reduce and thicken slightly, transforming everything into a cohesive, mouthwatering skillet filling. The smell at this point is absolutely divine.
- The Taste Test: This is the most important step! Grab a spoon (careful, it’s hot!), blow on it, and taste. Does it need a pinch of salt? A crack of black pepper? Adjust to your liking. Remember, you’re the boss of your skillet.
- Serve It Up Hot: Turn off the heat. Your masterpiece is ready! Spoon it directly from the skillet onto plates, over lettuce, into bowls, or alongside warm tortillas.
How to Serve Your Taco Skillet Masterpiece
This is where your dinner becomes your dinner. Here are my favorite ways to dive in:
- The Epic Taco Salad: Pile a big handful of crisp romaine or chopped iceberg into a bowl. Load the warm skillet mixture on top, then go wild with toppings—diced tomatoes, a sprinkle of cheese, a few tortilla chips for crunch. The heat from the beef slightly wilts the lettuce… it’s incredible.
- The Easy Burrito Bowl: Fluffy cilantro-lime rice or quinoa as the base, then the beef skillet, then all your favorite fixings. A giant dollop of guacamole is non-negotiable for me here.
- Classic Taco Night: Warm up some soft flour or crunchy corn tortillas. Set up a topping bar with the skillet in the center and let everyone build their own perfect taco. It’s interactive, fun, and there’s no wrong way to do it.
- The Straight-Up Scoop: Honestly? Sometimes I just eat it right out of a bowl with a fork, topped with a little Greek yogurt and salsa. Zero fuss, maximum enjoyment.
Make It Your Own: Delicious Twists & Swaps
Got a different protein? Need it vegetarian? Craving a different flavor profile? I’ve got you covered. This recipe is a beautiful blank canvas.
- Turkey or Chicken: Swap the beef for ground turkey or chicken for a lighter take. Since they’re leaner, you might need the full tbsp of oil to start.
- Fully Loaded Veggie: Skip the meat! Use two cans of beans (black and pinto are great). Add a extra tbsp of oil, and when you add the taco seasoning, throw in a cup of diced bell peppers and onions with the beans and corn for more texture.
- “Taco Pasta” Skillet: Got leftover cooked pasta? Stir in a cup or two of small shapes (like rotini or shells) at the very end for a hearty, all-in-one meal.
- Sweet Potato Power: Add a dose of extra veggies by stirring in 1-2 cups of finely diced, pre-cooked sweet potato when you add the beans. It adds a lovely sweetness and makes it even more filling.
- White Chicken Chili Vibe: Use shredded rotisserie chicken and a can of diced green chiles. Swap the taco seasoning for 1 tbsp chili powder, 1 tsp cumin, and 1/2 tsp oregano. Use cannellini beans instead of black beans. Finish with a squeeze of lime.
Chef Emily’s Notebook Scribbles
Over the years, this skillet has become my culinary security blanket. I’ve made it for potlucks (just double it and keep it warm in a slow cooker), for new parents, and for myself on a million busy weeknights. The “recipe” has evolved—sometimes I add a tablespoon of tomato paste with the seasoning for depth, sometimes I throw in a handful of spinach at the end to wilt. The core formula is foolproof. My biggest tip? Don’t skip the water. I learned the hard way once when I was rushing, and the seasoning just kind of… stuck to the pan in a dusty, sad way. The water makes the sauce! Also, this is a *fantastic* meal prep star. It keeps beautifully in the fridge for 4 days and reheats like a dream.
Your Questions, Answered!
Here are answers to the things you might be wondering as you cook:
- Can I make this ahead of time? Absolutely! It’s a meal prep champion. Let it cool completely, then store it in an airtight container in the fridge for up to 4 days. Reheat in the microwave or back in a skillet with a tiny splash of water to loosen it up.
- My mixture is too watery/too dry. Help! Too watery? Let it simmer uncovered for a few more minutes until the extra liquid evaporates. Too dry? Add another splash of water, broth, or even a bit of salsa, and stir until it reaches your preferred consistency.
- What’s the best cheese to use? You can’t go wrong with classic sharp cheddar or a Mexican blend. For melting beautifully over the top, try Pepper Jack for a kick or Monterey Jack for creaminess. I often just use what’s in my fridge!
- Is it freezer-friendly? It is! Cool completely, then freeze in a sealed container for up to 3 months. Thaw overnight in the fridge before reheating. The texture of the beans may be a tad softer, but the flavor will still be spot-on.
Nutritional Breakdown (Because Knowledge is Power!)
I’m all about balance—enjoying comforting, flavorful food that also makes you feel good. Here’s a look at what’s in your bowl (estimated for the base skillet recipe without toppings, serving 4):
- Calories: ~350
- Protein: 28g (A fantastic, satisfying amount to keep you full!)
- Carbohydrates: 22g
- Dietary Fiber: 6g (Thanks, beans and corn! That’s about 25% of your daily goal.)
- Total Fat: 18g
Remember, these numbers are a guide. Using 93% lean beef vs. 90%, or adding different toppings, will change them. The beauty of this dish is its nutrient density—you’re getting a great balance of protein, complex carbs, and fiber in every bite. To lighten it up further, serve it over a giant bed of greens or in lettuce cups.
Final Thoughts from My Kitchen to Yours
And that’s it, my friend! Your new secret weapon for delicious, no-stress dinners is ready to roll. This Lean Beef Taco Skillet proves that you don’t need a lot of time, money, or fancy equipment to put a seriously tasty, wholesome meal on the table. It’s the kind of recipe that builds kitchen confidence—it’s forgiving, flexible, and always delivers on flavor.
I hope this recipe brings as much joy and ease to your kitchen as it has to mine. When you make it, I’d love to hear how it turned out! Did you add a special twist? Did your family go crazy for it? Tag me on social @TastyChow so I can see your beautiful creations.
Now, go forth and conquer that weeknight hunger. You’ve got this! Until next time, keep your spatulas handy and your bellies happy.
— Emily 😊