Little Debbie Cake Balls: Your New Favorite Bite-Sized Holiday Treat!
Hey there, my fellow food lovers! Chef Emily here, back in my happy place—the kitchen—and I am just buzzing with excitement to share today’s recipe with you. Have you ever been hit with a wave of pure, unadulterated nostalgia at the grocery store? That’s exactly what happened to me when I spotted those iconic green boxes of Little Debbie Christmas Tree Cakes. You know the ones: fluffy white cake, that irresistible creamy filling, and that thin, crackly layer of white coating dotted with festive sprinkles. They’re a holiday staple, a sweet little symbol of the season.
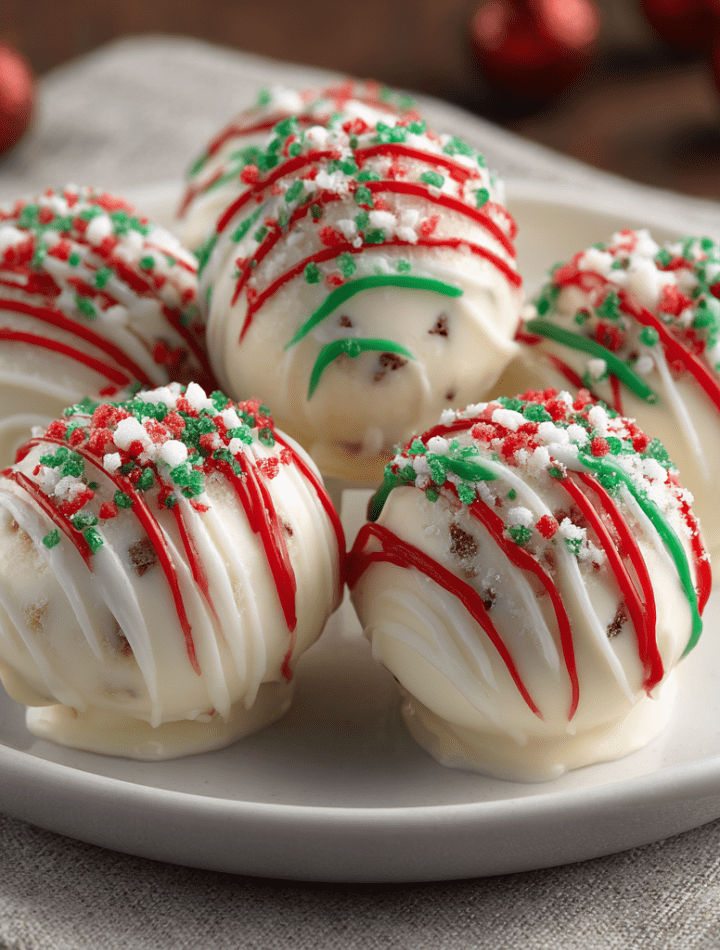
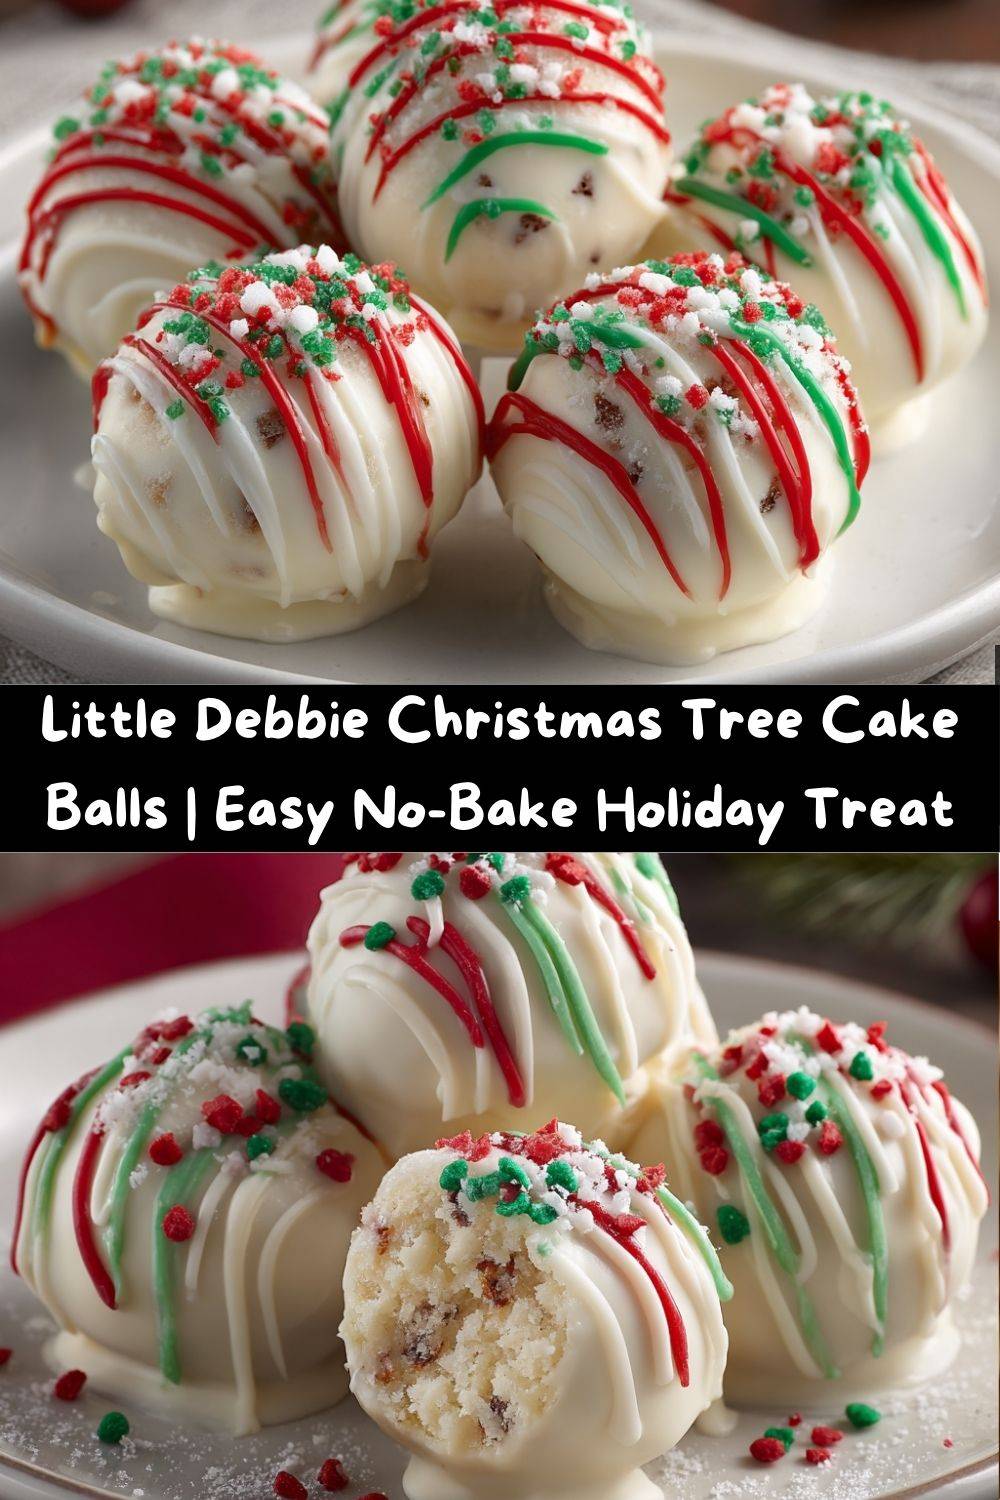
But what if I told you we could take that beloved treat and make it even more fun, more shareable, and honestly, even more delicious? Enter: Little Debbie Cake Balls! We’re taking those delightful snack cakes, blending them with creamy, tangy cream cheese, and dunking them in a luxurious bath of silky white chocolate. A drizzle of red candy melt and a sprinkle of green sugar gives them that perfect festive flair. They’re rich, they’re creamy, they’re bite-sized bursts of holiday joy, and I promise you, they are almost too cute to eat. (Keyword: almost.)
This is the perfect recipe for a holiday party, a cookie exchange where you want to totally stand out, or a cozy weekend baking project with the kids. They’re no-bake, incredibly simple, and deliver a massive payoff in both flavor and presentation. So, tie on your favorite apron (the messy one is always the best one), and let’s turn a box of nostalgic snacks into a show-stopping dessert that will have everyone asking for the recipe!
A Christmas Tree Cake Memory
This recipe takes me right back to my grandma’s kitchen, not long after the first snowfall. The house would smell like pine and simmering soup, and my job was to set the table for dinner. But my real mission was to sneak a peek at the dessert situation. Without fail, sitting right next to her famous pecan pie would be a box of those Little Debbie Christmas Tree Cakes. It was our little secret—a store-bought treat she never felt the need to apologize for.
She’d always let me have one after I finished my vegetables, and I’d savor every single bite, trying to make the swirly green tree and red sprinkles last as long as possible. It wasn’t a fancy, five-star dessert, but it was pure magic. It felt like a special reward, a tiny, sweet celebration of being together. That’s the spirit I wanted to capture with these cake balls. They’re a fun, modern twist on that simple, happy memory, and I think my grandma would get a real kick out of them. They’re a little nod to the past, remixed for all our present-day holiday gatherings.
Gathering Your Cake Ball Crew: The Ingredients
One of the best things about this recipe is the short and sweet ingredient list. You probably have a couple of these things in your fridge already! Here’s what you’ll need, along with a few of my chef-y insights to set you up for success.
- 10 Little Debbie Christmas Tree Snack Cakes: This is the star of the show! That specific cake-to-filling ratio is what makes the magic happen. Don’t unwrap them until you’re ready to use them to keep them soft.
- 8 oz Cream Cheese, softened: This is our binding agent and what takes these from “squished cake” to “luxurious truffle.” Chef’s Tip: FULL FAT is the way to go here for the creamiest texture. Make sure it’s softened to room temperature so it blends seamlessly without any lumps.
- 20 oz White Chocolate Melting Wafers: I highly recommend using wafers (like Candiquik or Ghirardelli) over white chocolate chips. Wafers are formulated to melt smoothly and set with a perfect snap. They’re a total game-changer for dipping!
- 6 oz Red Vanilla Melting Candy Wafers: These are for our festive drizzle. Vanilla melting wafers give a vibrant red color and a sweet flavor that complements the white chocolate beautifully.
- 1 tbsp Green Sanding Sugar Sprinkles: Sanding sugar has larger crystals than regular sprinkles, so it adds a gorgeous, sparkly texture that looks like festive glitter. It’s the perfect finishing touch!
Let’s Get Rolling: Step-by-Step Instructions
Okay, team! It’s time to get our hands a little dirty (in the best way possible). Follow these steps, and you’ll have a tray of perfect cake balls in no time.
Step 1: The Great Crumble
Unwrap all 10 of your Little Debbie cakes and place them in a large mixing bowl. Now, get ready to channel your inner kid! Using your impeccably clean hands, crumble the cakes until you have a bowl of fine, even crumbs. You want no large chunks left—this ensures every bite of your finished cake ball is perfectly smooth. This step is oddly therapeutic, I promise.
Step 2: The Creamy Embrace
Add your softened cream cheese to the bowl of cake crumbs. Now, you can use a hand mixer on low speed, but I often just dive in with a sturdy spatula or even my hands again. Mix, mash, and fold until the cream cheese is fully incorporated and you have a uniform, slightly sticky “dough.” It should hold together when you pinch it. Chef’s Hack: If the mixture feels too dry, you can add another tablespoon of softened cream cheese. If it’s too wet, a 5-minute chill in the fridge will firm it up.
Step 3: Roll, Roll, Roll Your Balls
Line a baking sheet with parchment paper. Using a small cookie scoop (about 1 tablespoon in size) or a spoon, portion out the mixture. Then, roll each portion between your palms to form a smooth, 1-inch ball. Place each ball on the prepared baking sheet. Pro tip: If the mixture starts sticking to your hands, lightly dampen them with water or rub a tiny bit of butter on your palms. This is a game-changer for keeping things neat!
Step 4: The Essential Chill
This is the most important step for dipping success! Pop the entire baking sheet into the freezer for about 15-20 minutes, or the refrigerator for at least 30 minutes. You want the balls to be very firm to the touch. This prevents them from falling apart when you dip them into the warm chocolate. Patience is key here!
Step 5: The Chocolate Bath
While the balls are chilling, melt your white chocolate wafers. Follow the package instructions, but my preferred method is using a double boiler (a heatproof bowl set over a pot of simmering water, making sure the bottom of the bowl doesn’t touch the water). Stir constantly until smooth. If you’re using the microwave, do it in 30-second bursts, stirring well each time to avoid scorching. Chef’s Secret: For an even thinner, smoother coating, you can add a teaspoon of coconut oil to the melted wafers.
Step 6: Dip & Decorate
Remove a few cake balls from the fridge at a time. Using a fork or a specialty dipping tool, submerge a ball completely in the melted white chocolate. Gently tap the fork on the edge of the bowl to let the excess chocolate drip off. Carefully place it back on the parchment paper. Immediately, while the chocolate is still wet, drizzle with the melted red candy wafers (you can use a fork or put it in a small Ziploc bag with the corner snipped off) and sprinkle with the green sanding sugar. Work quickly before the chocolate sets! Repeat with all the balls.
Step 7: The Final Set
Once all your cake balls are beautifully dressed in their holiday finest, let them sit at room temperature until the chocolate coating is completely firm. This usually takes about an hour, or you can speed it up with a 10-minute chill in the fridge.
How to Serve These Little Beauties
Presentation is part of the fun! These cake balls are little gems, so let’s show them off. For a casual gathering, pile them high on a simple white platter or in a rustic wooden bowl—let their festive colors be the star. If you’re feeling fancy, place each one in a mini paper candy cup; this makes them easy to pick up and adds a lovely finished look, perfect for a holiday party or cookie tray.
They are rich, so one or two per person is usually plenty. Serve them alongside a pot of hot coffee, a mug of rich hot chocolate, or a glass of cold milk for the ultimate nostalgic experience. They’re the perfect sweet ending to a big holiday meal or a wonderful treat to leave out for Santa (he deserves an upgrade from the basic cookie, don’t you think?).
Mix It Up! Fun Recipe Variations
The beauty of this recipe is its versatility. While the Christmas version is my favorite, you can make cake balls for any occasion!
- Birthday Party Fun: Use Little Debbie Zebra Cakes or Star Crunch! Dip them in semi-sweet or milk chocolate and decorate with colorful sprinkles or rainbow nonpareils.
- Peanut Butter Lover’s Dream: Swap the Christmas Tree Cakes for Nutty Bars! The peanut butter and wafer layers create an incredible texture. Dip in dark chocolate and sprinkle with chopped peanuts.
- Oreo Cheesecake Balls: Not a Little Debbie fan? No problem! Replace the snack cakes with a full package of regular Oreos (filling included) blitzed into fine crumbs. The method is exactly the same!
- Boozy Bites (For the Grown-Ups): Add a tablespoon of your favorite liqueur to the cake-cream cheese mixture. Peppermint schnapps, Bailey’s, or Kahlúa would be absolutely delicious. Just know this might make the mixture a bit softer, so a longer chill time is essential.
- Gluten-Free/Dairy-Free Swap: Use your favorite gluten-free snack cakes or brownies. For dairy-free, use dairy-free cream cheese and vegan melting wafers. It works like a charm!
Chef Emily’s Notes from the Kitchen
I’ve made these cake balls more times than I can count, and they’ve become a non-negotiable part of my holiday baking. The recipe has evolved a bit—I started by trying to dip them with two spoons, which was a hilarious, chocolate-covered mess. I’ve learned that the freezer is my best friend and that a little coconut oil in the chocolate is a pro-level move I wish I’d known years ago.
One year, I was in such a hurry that I skipped the chilling step. Let’s just say I ended up with something that looked more like “Christmas Tree Cake Soup” than elegant cake balls. We laughed about it, scooped it over ice cream, and it was still delicious—but it was a great reminder that the simplest steps are often the most important. So learn from my messy mistakes, and don’t skip the chill!
FAQs & Troubleshooting: Your Questions, Answered!
Q: My cake ball mixture is too sticky to roll. What did I do wrong?
A: This usually means the cream cheese was a bit too warm, or your snack cakes were extra moist. No worries! Just pop the whole mixture into the fridge for 15-20 minutes to firm up. You can also lightly wet your hands with cold water before rolling to prevent sticking.
Q: Why did my white chocolate crack after it set?
A: This is almost always a temperature issue. If the cake balls are too cold and the chocolate is too hot, the contraction causes cracking. Make sure your melted chocolate isn’t piping hot—it should be warm and fluid, but not scorching. Letting the cake balls sit out for 2-3 minutes after removing them from the fridge can help.
Q: Can I make these ahead of time?
A: Absolutely! They are a fantastic make-ahead dessert. Once fully set, store them in an airtight container in the refrigerator for up to a week. You can also freeze them for up to 3 months. Just thaw in the fridge overnight before serving.
Q: My chocolate coating is too thick and clumpy. Help!
A: This happens if the chocolate gets too hot or is overheated. If it’s seizing up, try stirring in a tiny bit of solid vegetable shortening or coconut oil (about 1/2 teaspoon at a time) to thin it out. Always melt slowly and gently to avoid this!
A Quick Note on Nutrition
Let’s be real, friends—these are a decadent treat, a celebration in a bite! I believe all foods can have a place in a happy, balanced diet, and that includes these indulgent little guys. The nutritional info per cake ball is approximately: 140 Calories, 7g Fat (4g Saturated Fat), 18g Carbohydrates, 13g Sugars, 1g Protein, 65mg Sodium.
Because they are rich and sweet, a little goes a long way. Savoring one or two is the perfect way to satisfy a holiday sweet tooth. If you’re looking for ways to lighten them up, you could try using Neufchâtel cheese (a lighter version of cream cheese) and look for sugar-free melting wafers, though the texture and taste may vary slightly. But for a special occasion, I say enjoy the real deal!
Final Thoughts from My Kitchen to Yours
Well, there you have it! My ultimate guide to creating these unforgettable Little Debbie Cake Balls. This recipe is more than just a list of ingredients and steps; it’s an invitation to play, to create, and to add a little extra sparkle to your holiday season. It’s about taking something simple and familiar and turning it into something new and magical.
I hope you have as much fun making these as I do. I hope your kitchen fills with laughter, your fingers get a little messy with chocolate, and that these cake balls become a new tradition in your home. Remember, the best recipes are the ones made with love and shared with joy.
So, from my cozy, flour-dusted kitchen to yours, happy baking! If you make these, I’d be absolutely thrilled if you tagged me on social @TastyChow so I can see your beautiful creations. Now, go chow down!
— Emily