Little Debbie Christmas Tree Cake Balls: Your New Favorite Holiday Bite!
Hey there, my festive friend! Can you smell that? That’s the scent of pure, unadulterated holiday magic wafting from the kitchen. It’s a mix of sweet vanilla, creamy frosting, and that special kind of joy that only comes from creating something delicious with your own two hands. And guess what? We’re about to make the most adorable, downright irresistible holiday treat you’ve ever laid eyes on: Little Debbie Christmas Tree Cake Balls!
Now, I know what you might be thinking. “Emily, I’m busy! The kids are hyped up on candy canes, my in-laws are arriving tomorrow, and I still haven’t wrapped a single gift.” I hear you! That’s exactly why this recipe is our little secret weapon. We’re taking a beloved holiday classic—those iconic, sprinkle-covered Little Debbie Christmas Tree Cakes—and transforming them into elegant, bite-sized pops of pure joy. No baking required, minimal mess, and maximum wow factor.
Imagine a platter of these at your next holiday party. They’re the perfect treat for a cookie exchange, a stunning addition to a dessert buffet, or a wonderfully sweet homemade gift that says, “I totally have my life together” (even if you really, really don’t). So, tie on your favorite festive apron, put on some holiday tunes, and let’s get rolling. This is going to be fun!
A Sprinkle of Nostalgia: My Love Affair with Christmas Tree Cakes
I have to confess, my love for these little tree cakes runs deep. It’s a tradition that started way back in my childhood. Every year, without fail, my grandma would sneak a box of them into her grocery cart during the holiday season. It was our secret. After a long day of helping her decorate the tree (and by “helping,” I mean mostly untangling lights and arguing with my brother over who got to put the star on top), she’d pull out the box.
We’d sit at her Formica kitchen table, the scent of pine needles filling the air, and we’d each get one. We had a very specific, very serious method: you had to nibble the sprinkles off first, then eat the tree layer by layer. It was a moment of pure, simple happiness. Those cakes weren’t just a snack; they were a signal that the most wonderful time of the year had truly arrived. This recipe is my way of dressing up that cherished memory, giving it a little chef’s twist, and sharing that same feeling of cozy joy with you. It’s nostalgia, reinvented.
Gathering Your Merry Ingredients
One of the best parts of this recipe is the short and sweet ingredient list. We’re keeping it simple, just like the best holiday memories. Here’s what you’ll need to create these magical bites.
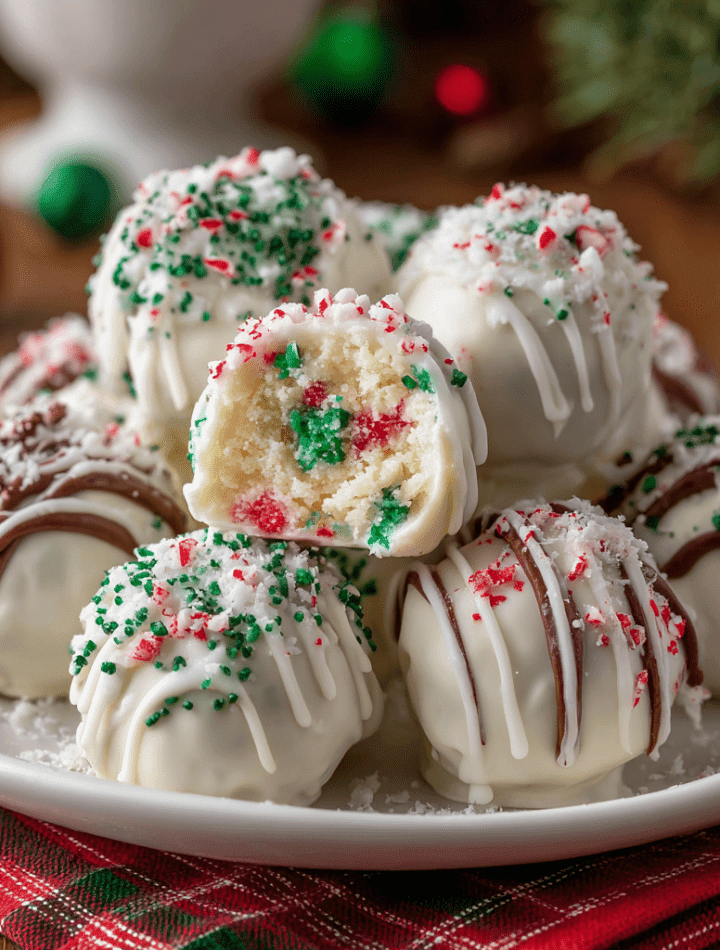
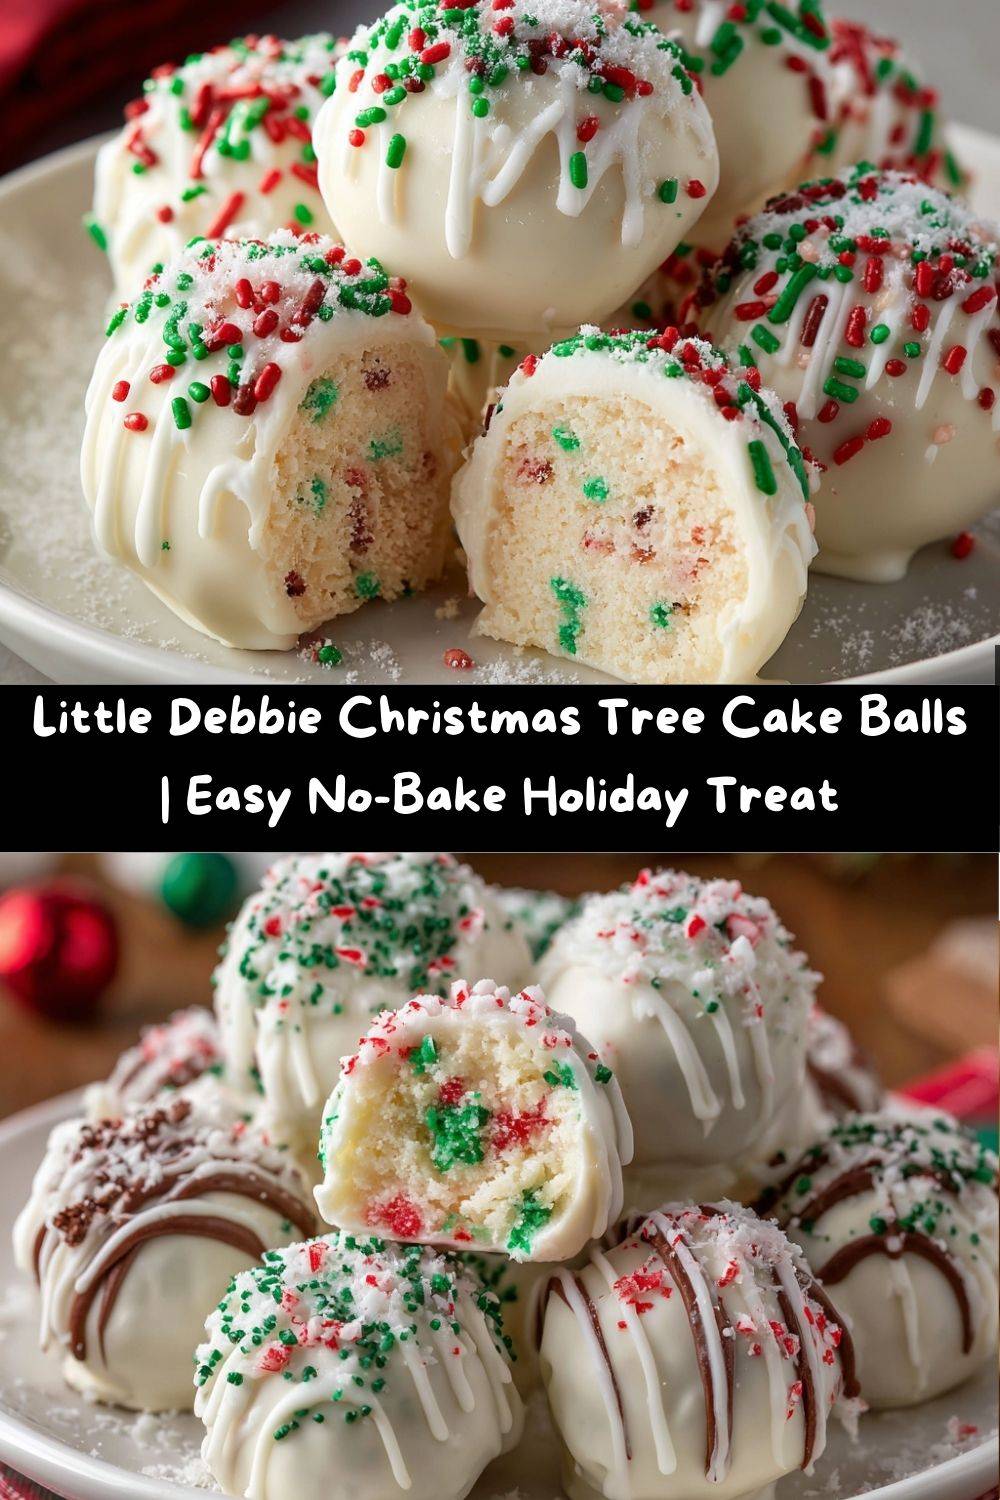
- 12 Little Debbie Christmas Tree Cakes: This is the star of the show! The soft cake and creamy filling create the perfect base. Don’t unwrap them until you’re ready to use them—they’re easier to work with when they’re fresh and firm.
- 4 oz (½ block) Cream Cheese, softened: This is our “secret” binding agent. It adds a lovely tangy richness that balances the sweetness of the cakes and helps everything stick together beautifully. Chef’s Insight: Make sure it’s truly softened to room temperature. If it’s cold, you’ll end up with lumpy cake mixture, and we want it smooth as silk!
- 12 oz White Chocolate or White Candy Melts: This creates that gorgeous, snowy coating. Substitution Tip: Candy melts are often easier to work with as they’re designed for dipping and set firmly. If you prefer the taste of real chocolate, go for high-quality white chocolate bars (chopped) and add a teaspoon of coconut oil when melting to help it thin out.
- ½ teaspoon Vanilla Extract: A little boost of warm, classic flavor that makes the cake pop taste homemade. Fun Twist: This is where you can get creative! Swap it for almond extract for a nutty note, or use peppermint extract for a cool, festive kick.
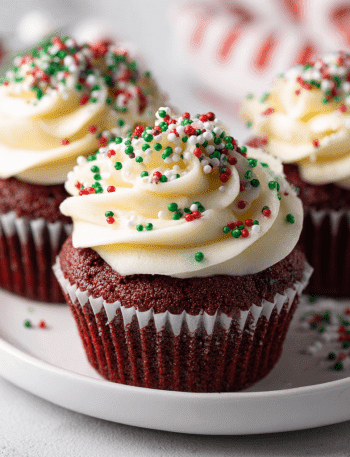
- Green and Red Sprinkles, Sanding Sugar, or Small Holiday Candies: The fun part! This is where you make them your own. I love using a mix of red and green jimmies, along with a little gold sanding sugar for extra sparkle.
Let’s Build Some Christmas Magic: Step-by-Step Instructions
Ready to create some edible holiday cheer? Follow these steps, and you’ll be a cake ball pro in no time. I’ve sprinkled in my best chef hacks to make the process smooth and successful.
- Crumble and Conquer. Unwrap all 12 of your Little Debbie Christmas Tree Cakes and place them in a large mixing bowl. Now, get your hands in there! Crumble the cakes until you have a bowl of fine, even crumbs. No big chunks of cake or frosting should remain. Chef’s Hack: If you want to avoid sticky fingers, you can pulse the cakes a few times in a food processor. But honestly, using your hands is therapeutic and makes you feel like a real kitchen wizard!
- The Binding Agent. Add your softened cream cheese and ½ teaspoon of vanilla extract (or your chosen extract) to the bowl of cake crumbs. Now, mix it all together! I start with a spatula, but I always finish with my hands to ensure everything is perfectly incorporated. You’re looking for a texture that resembles a soft, pliable cookie dough. When you can pinch a bit and it holds its shape without sticking to your fingers, you’re golden.
- Roll Call! Line a baking sheet with parchment paper or a silicone baking mat. Using a small cookie scoop (about 1 tablespoon in size) or a spoon, portion out the mixture. Then, roll each portion between your palms to form a smooth, neat 1-inch ball. Place each ball on the prepared baking sheet. Pro Tip: If the mixture is too sticky, pop it in the fridge for 10-15 minutes. Chilled dough is much easier to roll!
- The Big Chill. This step is non-negotiable, my friends! Slide the entire baking sheet into the refrigerator for at least 30 minutes. This firms up the cake balls, which is crucial for a smooth dipping process. A firm ball won’t fall apart in the warm chocolate. You can even chill them overnight if you want to break up the work.
- Melt Your Coating. Place your white chocolate or candy melts in a microwave-safe bowl. Melt in 30-second intervals on medium power, stirring vigorously between each interval. Stop when there are just a few small lumps left—the residual heat will melt them as you stir. Chef’s Hack: NEVER overheat the coating. If it gets too hot, it can seize up and become a thick, clumpy mess. If it seems too thick for dipping, you can add a tiny, tiny amount of coconut oil or paramount crystals to thin it out.
- The Dip & Decorate. Remove a few cake balls from the fridge at a time (keeping the rest cold). Using a fork or a dipping tool, submerge a cake ball completely in the melted coating. Gently tap the fork on the edge of the bowl to let the excess chocolate drip off. Carefully place it back on the parchment-lined sheet. Now, the most important part: decorate immediately! The coating sets quickly, so have your sprinkles and candies ready to go in small bowls. shower them with festive joy before the chocolate hardens.
- The Final Set. Once all your cake balls are dipped and decorated, return the baking sheet to the refrigerator for about 15 minutes, or until the coating is completely firm and set.
How to Serve Your Festive Masterpieces
Presentation is everything, especially during the holidays! Here are a few fun ways to show off your beautiful Little Debbie Christmas Tree Cake Balls.
The Festive Platter: Arrange them on a beautiful cake stand or a simple white platter. Scatter a few extra sprinkles or even some fresh rosemary sprigs around them to look like little Christmas trees. It’s simple, elegant, and so effective.
As Sweet Gifts: These make incredible homemade gifts! Place a few in a clear cellophane bag, tie it with a festive ribbon, and attach a cute tag. You can also nestle them into a holiday-themed mini muffin liner and box them up. It’s a personal touch that people will absolutely adore.
The Party Spread: If you’re adding them to a dessert table, consider sticking a lollipop stick into each one before dipping to create cake pops. Stand them upright in a styrofoam block covered in wrapping paper for a stunning, vertical display that will have all your guests grabbing their phones for a picture.
Get Creative! Fun Recipe Variations
Once you’ve mastered the basic recipe, the holiday fun is just beginning! Here are a few of my favorite twists to keep things exciting.
- Peppermint Patty: Add ½ teaspoon of peppermint extract to the cake mixture and roll the balls in finely crushed candy canes or peppermint bits after dipping. It’s like a cool, refreshing holiday party in your mouth!
- Chocolate Lover’s Dream: Swap the white chocolate coating for dark or milk chocolate. The rich chocolate pairs amazingly well with the sweet cake. Decorate with white nonpareils for a classic “snowy” look.
- Marbled Magic: Melt a small amount of dark or green candy melts. After dipping a cake ball in white chocolate, drizzle the contrasting color over the top with a fork for a beautiful, marbled effect. No extra sprinkles needed!
- Nutty Delight: Stir ¼ cup of very finely chopped toasted pecans or almonds into the cake mixture for a little crunch and nutty flavor that feels extra special.
- Birthday Cake Balls: Who says these are just for Christmas? Use Little Debbie Birthday Cakes, roll the finished balls in rainbow sprinkles, and you have a perfect treat for any celebration!
Chef Emily’s Kitchen Notes
This recipe has become a staple in my holiday kitchen, but it didn’t start out perfect. The first time I made cake balls, I was impatient and skipped the chilling step. It was a diaster! The balls fell apart in the chocolate, and I ended up with something that looked more like a Christmas swamp than a Christmas tree. I learned my lesson the messy way so you don’t have to!
Over the years, I’ve found that using a fork for dipping is my favorite method, but if you get really into cake pop making, those specialty dipping tools are a game-changer. The recipe is also a fantastic one to make with kids—they love the rolling and decorating parts. Just be prepared for a glittery, sprinkle-covered kitchen afterward. It’s a small price to pay for the memories!
FAQs & Troubleshooting: Your Questions, Answered!
Q: My coating is too thick and clumpy! What did I do wrong?
A: This usually means the chocolate got too hot and “seized.” You can try to save it by stirring in a teaspoon of solid vegetable shortening (like Crisco) or coconut oil until it smooths out. To prevent this, always melt slowly and on a lower power setting.
Q: Can I make these ahead of time?
A: Absolutely! These are fantastic make-ahead treats. Once set, store them in an airtight container in the refrigerator for up to a week. You can also freeze them for up to 3 months. Just thaw in the fridge before serving.
Q: My cake balls are cracking after I dip them. Why?
A: This is almost always a temperature issue. If the cake balls are too cold and the coating is too hot, the shock can cause cracks. Make sure your melted coating isn’t piping hot—it should be warm and fluid. Let it cool for a minute or two after melting before you start dipping.
Q: Can I use a different type of cake?
A> Of course! The beauty of this method is its versatility. You can use any soft, snack-style cake like Swiss Rolls, Star Crunch, or even brownies! Just maintain the general ratio of cake crumbs to cream cheese.
A Quick Note on Nutritional Info
Let’s be real, friends—these are a celebratory treat, a bite of pure holiday joy! While I’m all about balance, sometimes you just need a little indulgence. The estimated nutritional information per cake ball (assuming a batch of 24) is roughly: 220 calories, 10g fat, 32g carbohydrates, and 1g protein.
Remember, this is just an estimate, as ingredients can vary. If you’re looking for a lighter option, you could try using reduced-fat cream cheese, but the texture might be slightly less rich. My philosophy? Enjoy one or two of these delightful treats mindfully, savoring every bite, and balance it out with your other healthy holiday choices. Life—especially around the holidays—is all about enjoying the delicious moments!
Final Thoughts from My Kitchen to Yours
Well, my friend, we did it! You are now the master of the most adorable, delicious, and conversation-starting holiday treat around. These Little Debbie Christmas Tree Cake Balls are more than just a recipe; they’re a fun, easy project that brings a touch of handmade magic to your celebrations.
I hope this recipe brings as much laughter and happiness to your kitchen as it has to mine. The holidays can be hectic, but taking a moment to create something sweet and share it with the people you love is what it’s all about. So, put on those holiday tunes, embrace the sprinkle mess, and make something wonderful.
I’d love to see your creations! Tag me on social @TastyChow with #TastyChowHoliday so I can ooh and aah over your beautiful cake balls. From my messy, flour-dusted kitchen to yours, have a joyful, delicious holiday season!
With love and a full plate,
Emily