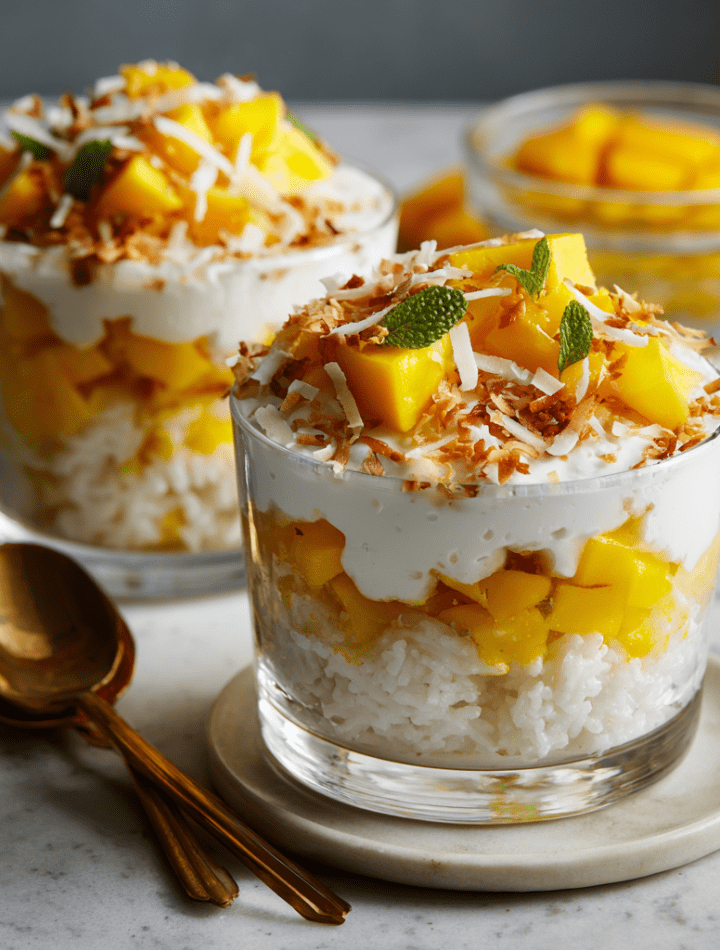
Mango Sticky Rice Trifle: Your Spoonful of Tropical Sunshine
Hey there, friend! Emily here, waving from my perpetually flour-dusted kitchen counter. Have you ever had a flavor memory so vivid it feels like a mini-vacation? For me, it’s the first bite of perfect mango sticky rice from a steamy Bangkok street market. The sweet, floral mango, the rich coconut-infused rice, the creamy-crunchy-sweet harmony… it’s pure, unadulterated joy on a plate.
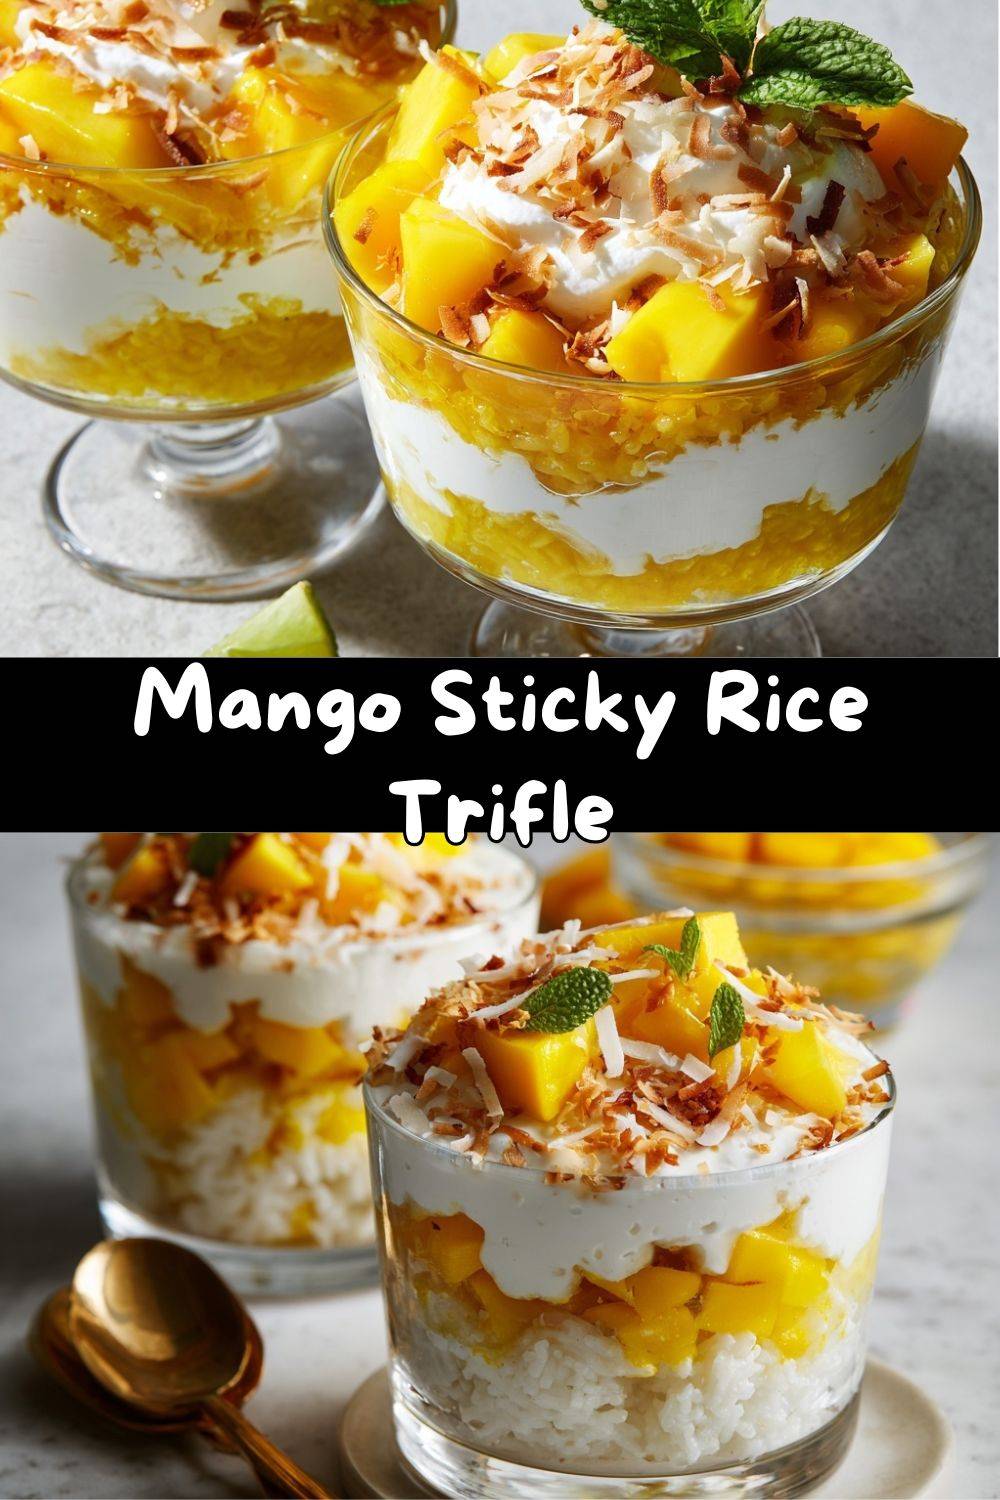
But you know what I love almost as much as a classic? A gorgeous, playful remix. One that keeps the soul of the original but dresses it up for a party. That’s exactly what this Mango Sticky Rice Trifle is all about. We’re taking every magical element of that iconic Thai dessert and layering it up into a stunning, shareable (or, let’s be real, savor-all-by-yourself) masterpiece.
Imagine this: clouds of luscious whipped coconut cream, sweet sticky rice that tastes like a tropical dream, juicy chunks of sun-ripened mango, all finished with a crispy, toasty crunch. It’s a dessert that’s as beautiful in a big trifle bowl on your brunch table as it is in individual glasses for a fancy-pants dinner. Best part? It’s surprisingly simple. No fancy pastry skills required—just a love for big, bold flavors and a little assembly-line fun. So, grab your favorite mixing bowl and let’s turn your kitchen into a tropical getaway. Adventure (and dessert) awaits!
The Night That Sparked a Delicious Obsession
My love affair with mango sticky rice has a very specific, slightly chaotic origin story. Picture this: It’s my first night in Thailand, years ago. Jet-lagged but buzzing with excitement, I’m wandering through a night market that’s a symphony of sizzling woks and fragrant steam. The air is thick with the scent of lemongrass, chili, and something sweet… something coconutty.
I followed my nose to a tiny stall where a woman with the kindest smile was packing little containers of what looked like pure gold and ivory. She handed me a warm, styrofoam box. I found a plastic stool, sat down, took my first bite, and… guys, I swear I saw fireworks. The mango was like candy, the rice was impossibly fragrant and tender, and the salty-sweet coconut sauce tied it all together. In that moment, covered in travel grime and sheer bliss, I was a convert.
Fast forward to last summer, hosting a big backyard BBQ. I wanted to serve that magical flavor to a crowd, but in a way that felt festive and easy to share. My first attempt? A deconstructed mess that tasted great but looked… well, let’s just call it “rustic.” Then it hit me: layers. The trifle was born! It captures every bit of that market magic in a make-ahead, totally show-stopping package. It’s my edible souvenir, and I’m so thrilled to share it with you.
Gathering Your Tropical Treasure Trove
Here’s everything you need to build your flavor paradise. I’ve added my little chef notes because knowing your ingredients is half the fun (and success!) in the kitchen.
- 1 cup glutinous (sweet/sticky) rice, soaked 4+ hours or overnight – This is the star! Don’t let the name “glutinous” scare you—it’s gluten-free. It refers to the glue-like, wonderfully sticky texture when cooked. Chef’s Insight: Soaking is non-negotiable! It ensures the grains steam up perfectly tender and chewy.
- 1 ½ cups coconut milk, divided – We’ll use this two ways. Go for full-fat canned coconut milk for maximum creaminess and flavor. Shake the can well before opening!
- ¼ cup granulated sugar – Sweetens the rice. You can use palm sugar for a more authentic, caramel-like flavor if you have it.
- ½ teaspoon salt – The secret weapon! Salt makes the sweet flavors *pop* and balances the richness of the coconut.
- 2 large, ripe mangoes, diced – Look for Ataulfo or Champagne mangoes if you can find them—they’re intensely sweet, less fibrous, and the perfect golden color. A ripe mango should give slightly to gentle pressure and smell fragrant at the stem.
- 1 cup cold heavy whipping cream – Ice-cold is key for whipping up volume. Pop your bowl and beaters in the freezer for 10 minutes beforehand for extra insurance.
- ¼ cup powdered sugar – Dissolves seamlessly into the cream without any graininess.
- 1 teaspoon pure vanilla extract – Adds a warm, aromatic depth to the cream.
- ½ cup toasted coconut flakes OR puffed rice cereal – The crunch factor! Toasted coconut adds nuttiness, while puffed rice gives a lighter, airy crunch that mimics the toasted mung beans sometimes used in Thailand.
- Optional for garnish: Fresh mint leaves, lime zest – A touch of green or bright citrus zest makes the colors sing and adds a fresh aroma.
Let’s Build the Layers of Happiness!
Ready to create some magic? Follow these steps, and you’ll be a trifle-building pro in no time. I’m chatting you through each one with my favorite tips.
- Prep & Steam the Rice: Drain your soaked sticky rice thoroughly. Line a steamer basket with cheesecloth or a clean kitchen towel (this prevents the grains from falling through). Spread the rice in an even layer. Steam over simmering water for 20-25 minutes, until the grains are fully tender and translucent. Chef’s Hack: No fancy steamer? Use a colander or sieve set over a pot of simmering water, covered with a lid or foil.
- Infuse the Rice with Coconut Goodness: While the rice steams, combine 1 cup of the coconut milk, granulated sugar, and salt in a small saucepan. Warm it over medium heat, stirring, just until the sugar and salt dissolve. Do not let it boil hard—we just want it hot and combined. As soon as the rice is done, transfer it to a heatproof bowl and immediately pour the warm coconut mixture over it. Gently fold it in. Let it sit for 20 minutes. It will drink up that liquid like a dream, becoming incredibly flavorful and sticky.
- Whip the Coconut Cloud Cream: In your chilled bowl, beat the cold heavy cream, powdered sugar, and vanilla extract together. Start on low, then increase to medium-high, until soft peaks form—this means the cream holds its shape when you lift the beaters but the tip gently curls over. Now, gently fold in the remaining ½ cup of coconut milk. Don’t over-mix! We want a luxurious, billowy cream. Pro Tip: Folding keeps the cream airy. Use a spatula and cut through the center, fold over, and turn the bowl. Repeat.
- Dice the Mango: While the rice rests and cools, peel and dice your mangoes into ½-inch cubes. Try to keep them somewhat uniform for pretty layers.
- The Grand Assembly: This is the fun part! Grab your trifle dish, a large glass bowl, or individual parfait glasses. Start with a layer of the coconut sticky rice, pressing it down slightly. Next, a generous layer of the whipped coconut cream. Then, a vibrant layer of mango. Repeat! I usually get 2 full layers in a large dish. Presentation Note: For a “clean” look on the glass, use the back of a spoon to press each layer gently against the side as you build.
- The Finishing Touch: Right before serving, sprinkle the top generously with your toasted coconut flakes or puffed rice. This keeps the crunch intact. Add a few mint leaves or a sprinkle of lime zest for a final flourish.
- Chill & Serve: Cover and refrigerate for at least 1 hour before serving. This allows the flavors to meld and the whole dessert to set up beautifully, making it easy to scoop. It’s worth the wait, promise!
How to Serve This Showstopper
Presentation is half the fun with a layered dessert! For a casual gathering, I love setting out the big trifle bowl with a serving spoon and letting everyone dig in family-style—it’s always a conversation starter. For a more elegant touch, layer everything in individual clear glasses or mason jars. They look adorable and are perfect for parties where people are mingling.
Pair this trifle with something light and refreshing, like a sparkling Prosecco, a crisp white wine, or even a fizzy ginger beer. The brightness cuts through the richness perfectly. And don’t forget to take a picture before the first scoop goes in! The stripes of white, gold, and creamy white are almost too pretty to eat… almost.
Make It Your Own: Fun Flavor Twists
Once you’ve mastered the classic, feel free to play! Here are a few of my favorite riffs on this tropical theme:
- Vegan Dream: Swap the heavy cream for two (13.5 oz) cans of full-fat coconut cream, chilled overnight. Scoop out the solid cream that rises to the top and whip it with the powdered sugar and vanilla. Use the liquid leftover for another purpose (smoothies!).
- Tropical Fruit Medley: Add layers of other fruits alongside the mango. Passion fruit pulp drizzled over a layer, thinly sliced kiwi, or mashed ripe banana mixed into the rice are all fantastic.
- Toasty Sesame Crunch: Replace the toasted coconut topping with a mix of black and white sesame seeds you’ve quickly toasted in a dry pan. It adds a wonderful nutty flavor and stunning contrast.
- Coconut Lime Zest: Add the zest of one lime to the coconut milk mixture for the rice, and another teaspoon of zest to the whipped cream. The citrusy zing is incredible.
- “Cheat’s” Version: In a serious time pinch? Use prepared coconut sticky rice from your favorite Thai restaurant as the base layer. I won’t tell!
Emily’s Kitchen Corner: Notes from My Apron Pocket
This recipe is a living, breathing thing in my kitchen! The first time I made it, I was so excited I tried to layer it while the rice was still piping hot… which immediately melted my beautiful whipped cream into a soupy layer. Lesson learned: let that rice cool to at least room temp! Now, I sometimes even make the rice a day ahead and keep it covered in the fridge. It works like a charm.
I’ve also learned that the ripeness of the mango is EVERYTHING. A bland mango makes a sad trifle. If your mangoes are a bit firm, try tossing the diced pieces with a tiny pinch of sugar and letting them macerate for 30 minutes to draw out their natural juices. It’s a game-changer. This dessert is all about flexibility and joy—so make it yours!
Your Questions, Answered!
Q: My rice isn’t very sticky or tender. What went wrong?
A: The most common culprit is not soaking the rice long enough. It really needs that full 4+ hours to hydrate properly. Also, make sure you’re steaming it, not boiling it in water. Boiling will make it mushy on the outside and hard inside.
Q: Can I make this dessert ahead of time?
A: Absolutely! You can prepare all the components (rice, cream, diced mango) separately up to a day ahead. Store them in airtight containers in the fridge. Assemble the trifle no more than 3-4 hours before serving to keep the layers distinct and the topping crunchy.
Q: My whipped cream became runny or grainy after I folded in the coconut milk.
A: This happens if the coconut milk is too warm or if you over-mix. Make sure the canned coconut milk is at room temperature or cooler before folding it in. And fold *gently* and just until combined—over-beating deflates the cream.
Q: I can’t find glutinous rice. Is there a substitute?
A: For the true sticky texture, glutinous rice is essential in Asian markets or online. In a true pinch, short-grain sushi rice steamed with a bit more water can mimic a sticky texture, but the flavor and chew will be different.
A Quick Note on Nutrition
While we’re definitely in the realm of a celebratory treat, it’s nice to know what’s in our food! This dessert gets its richness from the healthy fats in coconut milk and cream, which also provide a lovely, sustained energy. Mangoes are a fantastic source of vitamins A and C. The sticky rice is a carbohydrate that gives you that satisfying, comforting fullness. As with all good things, it’s about balance and enjoyment. Savor each spoonful mindfully! (Approximate per serving: Calories: ~300, Carbs: 35g, Fat: 16g, Protein: 3g)
One Last Bite of Wisdom
And there you have it, my friend—your passport to a tropical dessert that’s sure to impress. What I love most about this Mango Sticky Rice Trifle is that it’s more than a recipe; it’s an experience. It’s the joy of building something beautiful with your own hands, the anticipation as it chills, and the shared “mmm’s” around the table.
So, whether you’re bringing it to a potluck, ending a weeknight dinner on a high note, or just treating yourself because you deserve it, I hope this dessert brings a little sunshine into your kitchen. Remember, cooking is an act of love—especially when it involves mangoes and coconut. Now, go forth and create something delicious! Don’t forget to tag me @TastyChow if you make it—I love seeing your kitchen creations.
With a full heart and a happy belly,
— Emily 🥭✨