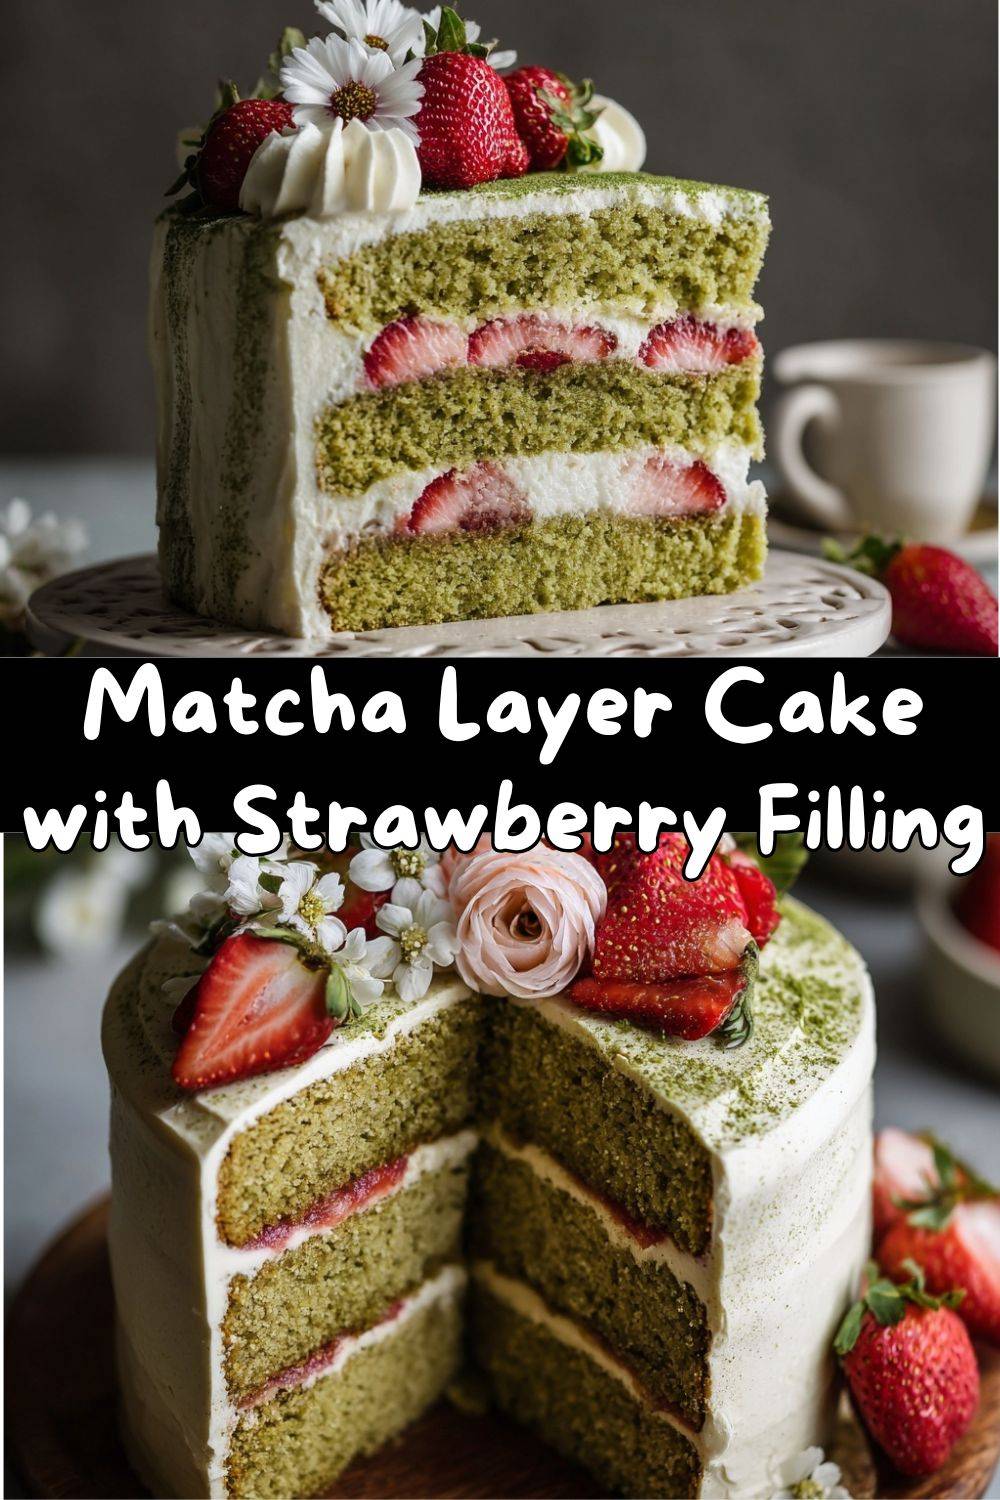
A Matcha Masterpiece: Your New Favorite Layer Cake Awaits
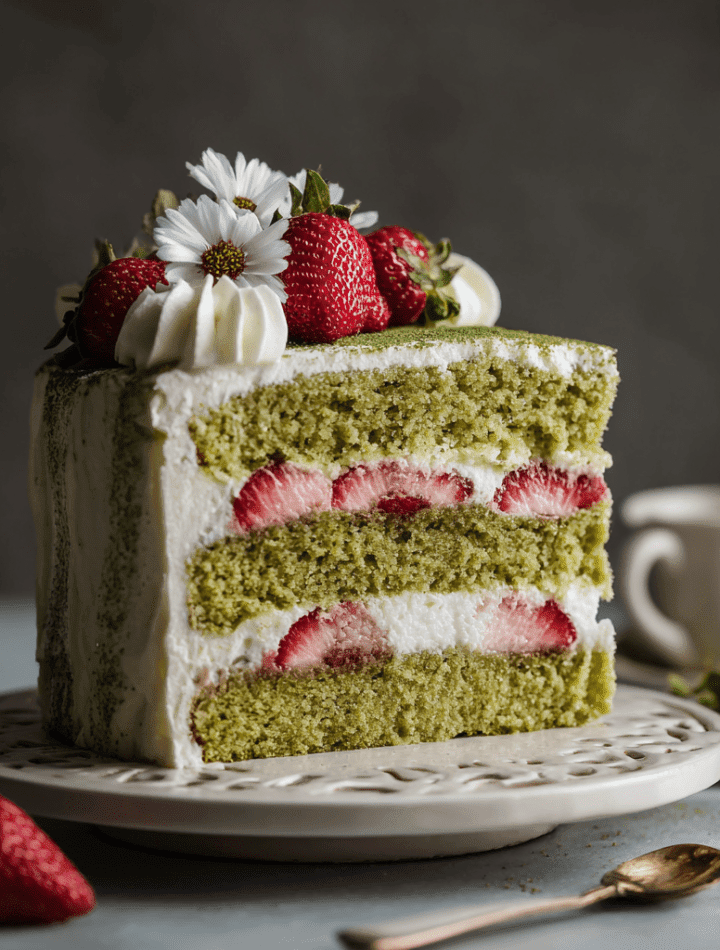
Hey there, my fellow flavor adventurer! Pull up a stool and let’s chat about something truly magical. Picture this: a cake so stunning it stops conversation, with the most beautiful, gentle green hue. Now, imagine cutting into it, revealing tender, earthy matcha layers hugging a ribbon of sweet-tart strawberry jam, all wrapped in a cloud of the silkiest, dreamiest buttercream you’ve ever tasted. That’s what we’re making today. This isn’t just a cake; it’s an experience. It’s the perfect harmony of flavors—the sophisticated, slightly grassy notes of premium matcha playing perfectly with the bright pop of strawberry and the luxurious, not-too-sweet Swiss meringue buttercream. Whether you’re looking to impress at a holiday gathering, celebrate a special someone, or just treat yourself to a weekend baking project that feels like a hug, this Matcha Layer Cake is your answer. It’s elegant without being fussy, and I promise, every step is totally doable. So, tie on that apron (the messy one is fine, that’s how you know you’re having fun!), preheat that oven, and let’s make something absolutely delicious together.
The Cake That Started With a Kitchen “Oops”
This recipe has a special place in my heart because it truly came from a happy accident. Years ago, back in culinary school, I was determined to make a show-stopping dessert for my final project. My plan? A classic vanilla bean layer cake. My reality? I accidentally knocked an entire tin of my prized ceremonial-grade matcha powder into my mixing bowl. Panic set in for about three seconds before my curiosity won out. “Well,” I thought, “in for a penny, in for a pound.” I folded it in, baked it off, and crossed my fingers. What emerged from the oven was the most beautiful pale green cake I’d ever seen—and the flavor was incredible. It was uniquely delicious, but it needed… something. A friend handed me a jar of her homemade strawberry jam, and the second I spread a little between the layers, it was a revelation. The strawberry was the cheerful, fruity counterpoint the earthy matcha needed. That “mistake” taught me one of my favorite kitchen lessons: sometimes the best recipes are born not from perfect plans, but from playful experimentation and a willingness to embrace the beautiful, delicious detours.
Gathering Your Flavor Arsenal
Here’s everything you’ll need to build this masterpiece. I’ve added my little chef-y notes and swaps so you can bake with confidence!
For the Matcha Cake Layers:
- 1½ cups all-purpose flour: The reliable backbone of our cake. For a slightly lighter crumb, you can swap in cake flour, but all-purpose works beautifully.
- 1 tablespoon matcha powder (sifted): This is the STAR. Do not skimp here! Use a culinary-grade or high-quality ceremonial grade matcha for the best color and flavor. The vibrant green and that lovely, nuanced taste depend on it. Chef’s Tip: Always sift your matcha with the other dry ingredients to avoid bitter clumps.
- 1½ teaspoons baking powder: Our little leavening powerhouse that gives the cake its gentle lift.
- ¼ teaspoon salt: The flavor enhancer! It balances the sweetness and makes all the other ingredients sing.
- ½ cup unsalted butter, room temp: Softened butter is key for creaming. It should indent easily when you press it. This creates the airy structure of the cake.
- ¾ cup granulated sugar: Sweetens and tenderizes. I find this amount perfect—it lets the matcha flavor shine without being overly sweet.
- 2 large eggs, room temp: Room temperature eggs incorporate much more smoothly into the batter, giving you a uniform texture.
- 1 teaspoon vanilla extract: The classic flavor friend. It rounds out the matcha beautifully.
- ½ cup whole milk, room temp: Adds moisture and richness. Whole milk is best, but 2% will work in a pinch.
- ¼ cup sour cream, room temp: My secret weapon for supremely tender, moist cake crumb! Greek yogurt is a perfect substitute if that’s what you have on hand.
For the Strawberry Filling:
- 1½ cups fresh strawberries, chopped: Frozen work great too! Just thaw and drain any excess liquid. This simple compote is a burst of fresh flavor.
- 2 tablespoons granulated sugar: Adjust to your berry sweetness. A little lemon juice and sugar make the strawberries’ natural flavor pop.
- 1 teaspoon fresh lemon juice: The bright acid that balances the jam and keeps the flavor from being one-dimensional.
For the Swiss Meringue Buttercream:
- 4 large egg whites: Fresh eggs are great, but pasteurized egg whites from a carton work flawlessly here and ease any salmonella worries.
- 1 cup granulated sugar: We’ll dissolve this completely with the egg whites, resulting in a buttercream that’s smooth, not gritty.
- 1 cup (2 sticks) unsalted butter, room temp but still firm: Cut into tablespoon-sized pieces. The butter must be cool-room-temp—not melty, not fridge-cold. This is critical for the emulsification!
- 1 teaspoon vanilla extract: Pure vanilla adds a lovely depth. You could also add a tiny pinch of salt to balance.
Let’s Build This Beauty, Step-by-Step
Follow along, take your time, and enjoy the process. Baking is a labor of love, and every step is part of the magic!
- Prep Like a Pro: Preheat your oven to 350°F (175°C). Grease the bottoms and sides of two 6-inch round cake pans, then line the bottoms with parchment paper circles. This guarantees a clean release every single time. Trust me, it’s worth the extra 30 seconds.
- Combine the Dry Team: In a medium bowl, whisk together the flour, sifted matcha powder, baking powder, and salt. Whisk it really well to evenly distribute that gorgeous green matcha and the leavening. Set this aside.
- Creaming is Key: In a large bowl (or your stand mixer), beat the softened butter and sugar together on medium-high speed for a full 3-4 minutes. You want it to become pale, fluffy, and almost whipped. This incorporates air, which is essential for a light cake. Scrape down the bowl halfway through.
- Incorporate the Eggs & Vanilla: Add the eggs one at a time, beating well after each addition until fully incorporated. Mix in the vanilla. Don’t worry if it looks a little curdled at this point—the dry ingredients will fix it.
- The Alternate Add: With the mixer on low speed, add about one-third of the dry ingredients. Mix until just combined. Follow with half of the milk and the sour cream. Repeat with another third of dry, the rest of the milk/sour cream, and finish with the remaining dry ingredients. Mix until the last streak of flour disappears, but do not overmix! Overmixing leads to a tough cake.
- Bake to Perfection: Divide the beautiful green batter evenly between your prepared pans. Give them a gentle tap on the counter to release any big air bubbles. Bake for 25-30 minutes, or until a toothpick inserted into the center comes out clean or with just a few moist crumbs. The tops will spring back when lightly touched.
- The Cool Down: Let the cakes cool in their pans on a wire rack for 10 minutes. Then, run a knife around the edges, invert them onto the rack, peel off the parchment, and let them cool completely. Chef’s Mandate: Cakes MUST be completely cool before frosting. Otherwise, you’ll have a melty, sliding mess.
- Simple Strawberry Magic: While the cakes cool, make the filling. In a small saucepan, combine the chopped strawberries, sugar, and lemon juice. Cook over medium heat, stirring often, for 10-12 minutes until the berries break down and the mixture thickens to a jam-like consistency. Remove from heat, let it cool completely (it will thicken more as it cools).
- Master the Swiss Meringue Buttercream: This is easier than it sounds, I promise! Combine egg whites and sugar in the heatproof bowl of your stand mixer. Place it over a pot of simmering water (double boiler), ensuring the bottom of the bowl doesn’t touch the water. Whisk constantly for 5-7 minutes until the sugar is completely dissolved and the mixture is hot to the touch (about 160°F). Test it: Rub a bit between your fingers—it should feel completely smooth, not gritty.
Transfer the bowl to your stand mixer fitted with the whisk attachment. Beat on high speed until you have a glossy, stiff-peaked meringue and the bowl is completely cool to the touch (this is crucial and can take 10+ minutes).
Switch to the paddle attachment. With the mixer on medium-low, add the firm room-temperature butter, one piece at a time, waiting until each is incorporated before adding the next. It may look soupy or curdled—DON’T PANIC! Keep beating. Once all the butter is in, add the vanilla and beat on medium-high until a silky, smooth, and dreamy buttercream magically comes together.
- The Grand Assembly: Place one cooled cake layer on your serving plate or cake stand. Spread a thin dam of buttercream around the top edge (this keeps the filling in place). Spoon the cooled strawberry filling inside the dam and spread it evenly. Gently place the second cake layer on top. Apply a thin “crumb coat” of buttercream over the entire cake and chill for 15 minutes. This locks in crumbs. Finally, frost the cake with the remaining buttercream using an offset spatula. Swirl it, smooth it, have fun with it!
How to Serve Your Show-Stopper
This cake is a star all on its own, but a little presentation flair makes it extra special. I love to keep the decoration simple and elegant. After frosting, you can garnish the top with a ring of fresh, whole strawberries or a sprinkle of reserved, sifted matcha powder for a gorgeous ombre effect. For a festive touch, a dusting of edible gold flakes looks incredible against the green and white. When slicing, use a sharp knife dipped in hot water and wiped dry between cuts for perfectly clean slices. Serve it on its own, or for an extra-decadent treat, add a dollop of lightly sweetened whipped cream on the side. It’s perfect with a cup of hot green tea, a glass of cold milk, or a sparkling prosecco for a true celebration.
Make It Your Own: Delicious Twists & Swaps
Love the base recipe? Here are some fun ways to play with it!
- Lemon & Blueberry: Swap the strawberry filling for a blueberry compote and add the zest of one lemon to the cake batter and buttercream for a bright, zingy twist.
- Black Sesame & Honey: Replace 1 tablespoon of the matcha with 1 tablespoon of finely ground black sesame powder for a nutty flavor. Use honey instead of sugar in the buttercream.
- Dairy-Free/Vegan Version: Use plant-based butter and milk, and replace the eggs with a flax egg and the sour cream with dairy-free yogurt. For the buttercream, use a high-quality vegan butter stick (the kind made for baking).
- Matcha Cheesecake Fusion: Turn it into a naked cake! Use the matcha layers, but fill and frost with a lightly sweetened matcha whipped cream cheese frosting.
- Mini Matcha Cakes: Bake the batter in a sheet pan for about 15-18 minutes. Use a round cutter to stamp out cake circles for adorable individual layer cakes.
From My Kitchen to Yours: A Few Final Nuggets of Wisdom
This cake has evolved from my culinary school “oops” to my most-requested birthday cake among friends. The biggest lesson I’ve learned? Patience with the buttercream. That moment when it looks like a curdled disaster tests every baker’s soul, but just keep the mixer running. It will come together into satiny perfection. I also always make a little extra strawberry compote—it’s divine stirred into yogurt or spooned over ice cream. Most importantly, have fun. If your layers are a little lopsided, just trim them. If your frosting isn’t magazine-smooth, call it “rustic” and pile on some berries. The taste is what people remember, and this cake delivers joy in every single bite.
Your Questions, Answered
Q: My buttercream turned soupy and didn’t thicken up. What happened?
A: This is almost always a temperature issue. Either your meringue wasn’t cool enough before adding the butter, or your butter was too soft. Fix: Chill the entire bowl in the fridge for 15-20 minutes, then beat again. It should come right back.
Q: Can I make any parts ahead of time?
A: Absolutely! The cake layers can be baked, wrapped tightly, and frozen for up to a month. Thaw before frosting. The strawberry filling can be made 3 days ahead and kept in the fridge. The buttercream can be made 2 days ahead and kept in the fridge; let it come to room temp and re-whip before using.
Q: My matcha cake is very dark green/brown after baking. Why?
A> Lower-quality matcha can oxidize and turn brownish when baked. For the best vibrant color, invest in a good culinary-grade matcha. Also, ensure you’re not overbaking the cakes.
Q: I don’t have 6-inch pans. Can I use 8-inch or 9-inch?
A: Yes, but the layers will be thinner and the bake time will be less—start checking at 18-20 minutes. For taller layers, you can double the recipe for three 8-inch layers.
Nutritional Information*
*Please note: This is an estimated breakdown for informational purposes. Values can vary based on specific brands and ingredient sizes.
Per slice (assuming 10 servings):
Calories: ~370 | Total Fat: 21g | Saturated Fat: 13g | Cholesterol: 85mg | Sodium: 115mg | Total Carbohydrates: 42g | Dietary Fiber: 1g | Sugars: 30g | Protein: 5g
This is a celebratory dessert, and like all good treats, it’s meant to be enjoyed mindfully and shared with loved ones. The matcha provides a gentle source of antioxidants, and using real ingredients like butter, eggs, and fresh fruit means you’re enjoying a homemade treat without any artificial additives.
You Did It! Now, Savor Every Bite.
Look at what you created! A stunning, delicious work of art that’s as fun to make as it is to eat. I hope this Matcha Layer Cake brings as much joy to your kitchen as it has to mine. Remember, baking is about the journey—the scent of matcha and vanilla filling your home, the satisfying swirl of buttercream, the proud moment you present your masterpiece. So gather your people, slice it generously, and enjoy every single forkful. 💚
This Matcha Layer Cake isn’t about perfection—it’s about intention. It’s about choosing flavors that feel thoughtful, balanced, and just a little bit magical. It’s about the quiet pride that comes from stacking layers, smoothing buttercream, and stepping back to say, “I made this.” Whether you’re serving it at a celebration or sneaking a slice straight from the fridge with a cup of tea, I hope this cake becomes one of those recipes you come back to again and again.
If you bake it, don’t rush the moment. Let the matcha bloom, let the buttercream shine, let the strawberry surprise people. And if your layers lean a little or your swirl isn’t perfect—congratulations. You baked like a real human, not a robot, and that’s exactly how the best cakes are made.
From my kitchen to yours, thank you for baking along with me. Now go enjoy your masterpiece—you’ve earned it.
With love,
Hannah 🍵🍓