Meatball Parmesan Sliders: Your New Go-To for Feeding a Happy Crowd
Hey there, fellow food lover! Let’s talk about one of life’s greatest simple pleasures: that magical moment when you bring a tray of something hot, cheesy, and incredibly delicious out of the oven. The crowd goes quiet, eyes widen, and you just know you’re about to make someone’s day. That, my friend, is the power of these Meatball Parmesan Sliders.
Imagine everything you adore about a classic, messy, soul-warming meatball sub—the juicy, herb-flecked meatballs, the tangy, robust marinara sauce, the glorious stretch of melted mozzarella—but transformed into a perfectly portioned, impossibly cute, and utterly irresistible bite. We’re taking soft, pillowy slider buns, giving them a generous bath of garlicky butter, and baking them until the cheese is bubbly and the edges are golden and crisp.
Whether you’re gearing up for the big game, hosting a casual family dinner, or need a superstar dish for the holiday potluck, these sliders are your secret weapon. They come together in a flash, they’re fun to eat, and they deliver that epic “cheese pull” we all secretly film for our stories. So, tie on your favorite apron (the messy one is always the best), and let’s make a tray of pure, unadulterated joy.
A Slider Story: From Sub Shop Lines to My Kitchen Counter
My love affair with the meatball sub started long before culinary school, in a booth at a noisy, red-and-white-checkered-tablecloth sub shop with my best friend, Sarah. It was our post-soccer game ritual. We’d pile in, still buzzing from the game, and without fail, we’d both order the “Giant Meatball Marinara.” We’d strategize the entire meal—how to tilt our heads, how many napkins to deploy, and the best angle to attack it without wearing more sauce than we ate.
It was glorious, but it was also a commitment. Years later, when I started hosting my own game days and casual get-togethers, I wanted to capture that same nostalgic, comforting flavor but in a format that was easier to share and eat while mingling. After a few experiments (some involving far too much sauce leakage!), the Meatball Parmesan Slider was born. It’s my kitchen’s tribute to those after-game meals—all the heart and flavor, packed into a neat little package that brings people together. Every time I make them, I think of Sarah, laugh at our messy-faced teenage selves, and feel that same rush of sharing good food with good people.
Gathering Your Flavor Arsenal
Here’s everything you’ll need to create these crowd-pleasing bites. Don’t be afraid to mix and match based on what you have in your fridge and pantry—I’ve included my favorite chef insights and swaps to help you out!
- 12 Slider Rolls: I love using Hawaiian rolls for their touch of sweetness that plays so nicely with the savory ingredients, but any soft, connected slider buns will work beautifully. Chef’s Insight: The key is getting rolls that are connected—it makes assembly so much easier and creates that gorgeous, pull-apart effect.
- 12 Cooked Meatballs (homemade or frozen, warmed): This is your chance to shine! Use your favorite homemade recipe, or for a fantastic shortcut, grab a bag of high-quality frozen meatballs. Just warm them up slightly before assembling so everything bakes evenly. Substitution Tip: For a lighter version, use turkey or chicken meatballs. For a plant-based twist, my favorite veggie meatballs work like a charm!
- 1 ½ cups Marinara Sauce: Use a jarred sauce you genuinely love, or if you’re feeling fancy, whip up a batch of your own. Chef’s Insight: A sauce with a little basil and oregano already in it will deepen the flavor profile perfectly.
- 1 ½ cups Shredded Mozzarella: Ah, the star of our cheesy show! I prefer to shred a block of low-moisture mozzarella myself, as it melts better than the pre-shredded kind (which has anti-caking agents). Chef’s Insight: For an extra-gooey center, you can also add a few small, fresh mozzarella pearls on top of the meatballs.
- ½ cup Grated Parmesan: This is our flavor booster, adding a salty, nutty punch. Substitution Tip: Pecorino Romano is a fantastic, slightly sharper alternative if that’s what you have on hand.
- 3 tbsp Butter, melted: This is the magic that gives our buns that gorgeous, golden, crispy-top finish.
- 2 cloves Garlic, minced: Fresh is best here! It infuses the butter with an aromatic punch that’s simply irresistible.
- 1 tbsp Chopped Parsley (optional): A sprinkle of fresh green at the end adds a pop of color and a fresh flavor note, but your sliders will still be fabulous without it.
Let’s Build Some Slider Magic: Your Step-by-Step Guide
Okay, team! It’s time to assemble. This process is quick, fun, and oh-so-satisfying. I’ll walk you through each step with my favorite little hacks to ensure slider perfection.
- Preheat and Prep: First things first, get your oven preheated to 375°F (190°C). This is our target temperature for melty, golden perfection. Now, take your slider rolls and, without separating them, slice the entire sheet in half horizontally. You should have one large “top” and one large “bottom.” Gently place the bottom half into a 9×13 baking dish or onto a parchment-lined baking sheet. Chef’s Hack: If you want an extra barrier against sogginess, you can very lightly toast the bottom halves in the oven for 2-3 minutes before adding the toppings. It’s a game-changer!
- The Flavor Foundation: Now for the fun part! Place one warm meatball onto each roll on the bottom half. Then, take your marinara sauce and spoon it generously over the meatballs, letting it drizzle down into all the cheesy nooks and crannies we’re about to create. Don’t be shy!
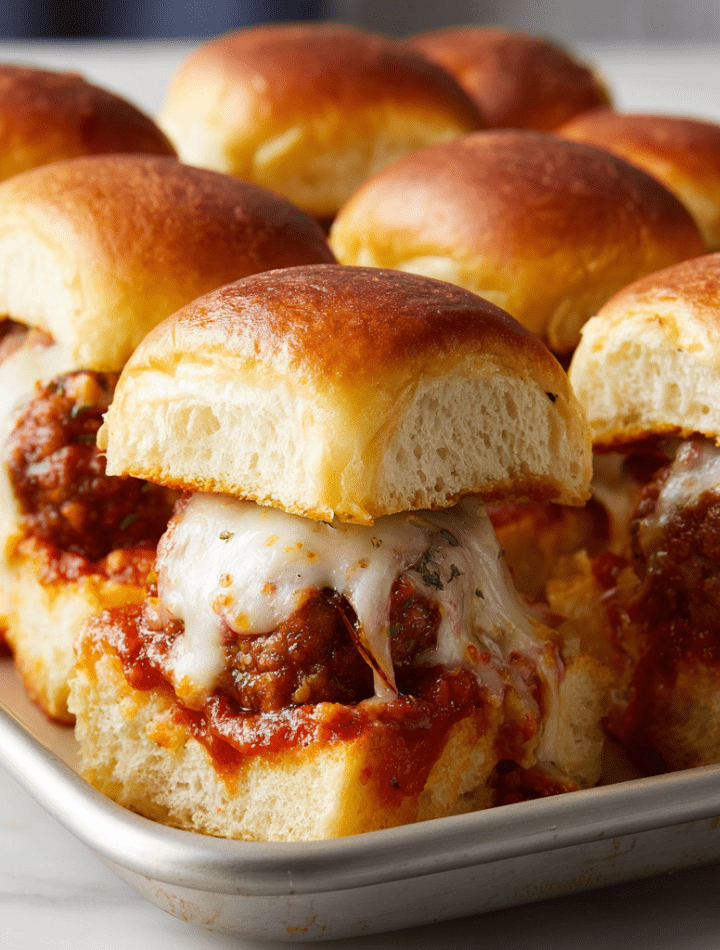
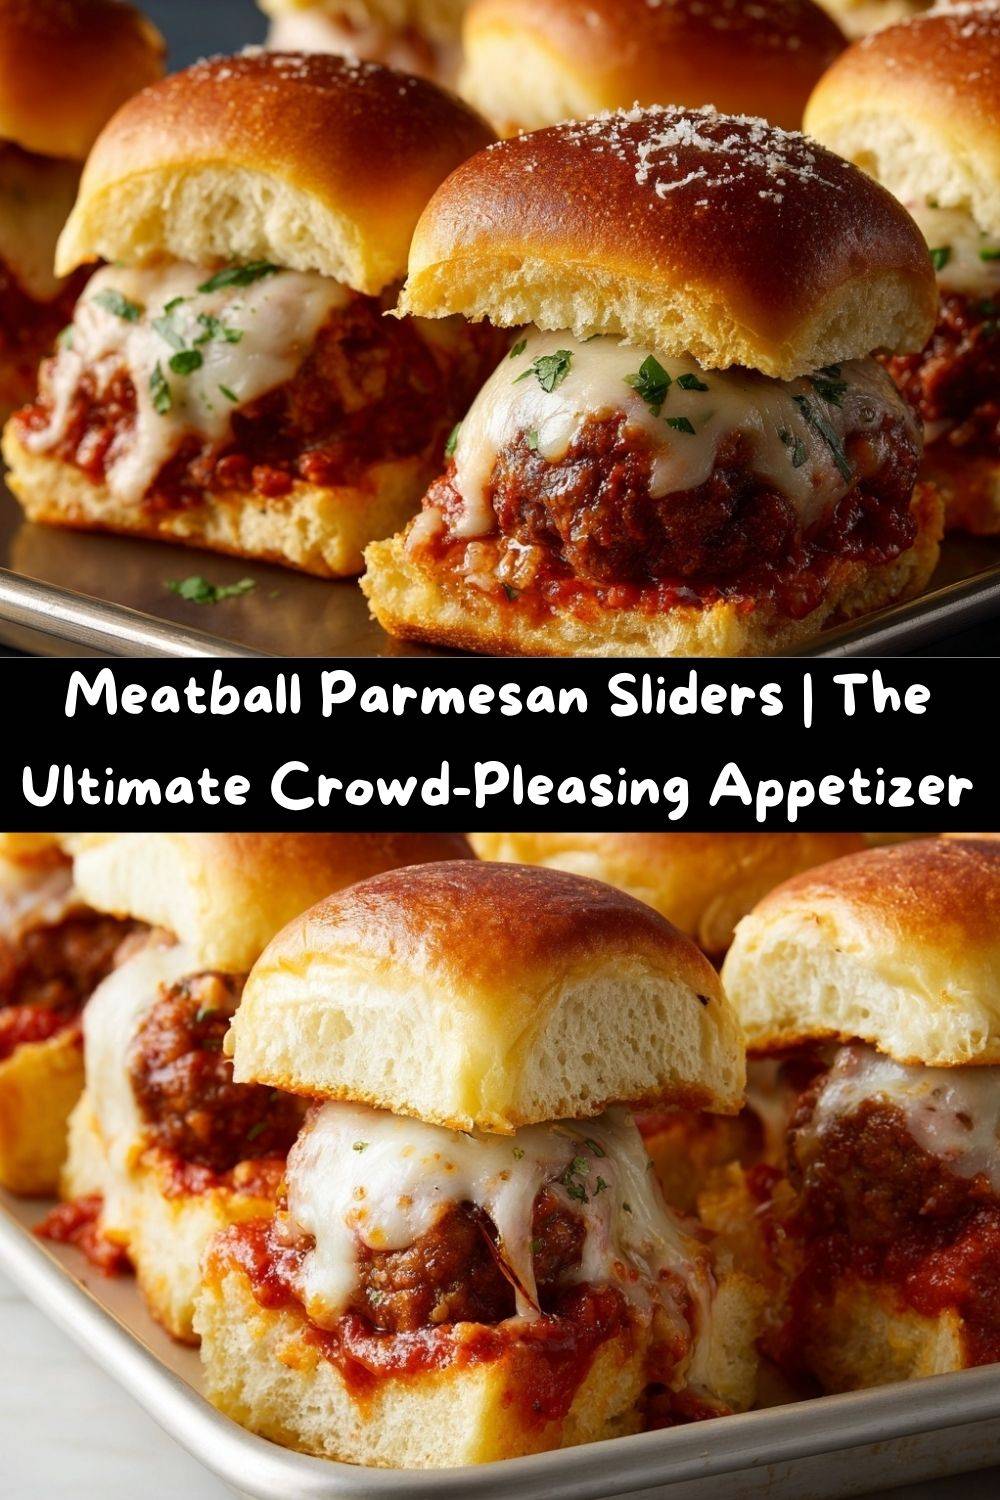
- The Cheese Blanket: Time for the cheese! Sprinkle the shredded mozzarella evenly over all the saucy meatballs. Then, follow it up with a snow-like shower of the grated Parmesan. This double-cheese action creates an incredible flavor and texture combo. Now, carefully place the top half of the rolls back on, like putting a cheesy, meatbally hat on your creation.
- The Golden Glaze: In a small bowl, mix your melted butter, minced garlic, and that optional chopped parsley. Using a pastry brush (or the back of a spoon in a pinch), generously brush this garlic butter mixture all over the top of the buns. Make sure you get the edges! This is what gives them that beautiful color and irresistible flavor. Chef’s Hack: For an extra flavor boost, add a tiny pinch of Italian seasoning or a sprinkle of garlic powder to your butter mix.
- Bake to Perfection: Cover the entire baking dish tightly with aluminum foil. This step is crucial! It traps the steam and ensures the sliders heat through and the cheese melts without the tops burning. Bake for 15 minutes. Then, remove the foil, and let them bake for another 5-7 minutes, uncovered, until the buns are a beautiful golden brown and you can hear the sauce bubbling happily. Your kitchen will smell like an Italian grandmother’s dream.
- The Grand Finale: Carefully remove the tray from the oven. Let it sit for just 2-3 minutes—this allows the cheese to set slightly so they’re easier to slice. Then, use a sharp knife to slice between the rolls, creating 12 individual sliders. Serve them immediately while they’re hot, gooey, and ready for their close-up!
How to Serve These Saucy Little Stars
Presentation is part of the fun! I love serving these sliders right in the baking dish they were cooked in—it’s rustic, inviting, and means less cleanup. Pile them high on a platter or let everyone dig straight from the tray.
While these sliders are a complete meal in themselves, a few well-chosen sides can turn them into a feast. For a casual game-day spread, I love pairing them with a big, crispy garden salad with a sharp vinaigrette to cut through the richness, a bowl of crunchy potato chips, or some crisp, cool carrot and celery sticks. If you’re going for a full Italian-inspired dinner, they are phenomenal alongside a simple pasta salad or a helping of garlic roasted broccoli.
And don’t forget the napkins! Part of the charm is that these are meant to be eaten with your hands, so have plenty on hand for happy, saucy fingers.
Get Creative! 5 Fun Twists on the Classic
Once you’ve mastered the classic, the playground of possibilities opens up! Here are a few of my favorite ways to mix things up:
- The Pizza Lover’s Dream: Swap the marinara for pizza sauce, use a blend of mozzarella and pepperoni slices, and add a sprinkle of red pepper flakes after baking for a little kick.
- The Buffalo Chicken Swap: Replace the meatballs with shredded cooked chicken tossed in buffalo sauce. Use a Monterey Jack cheese instead of mozzarella, and drizzle with a little ranch or blue cheese dressing after baking.
- The Philly Cheesesteak Twist: Skip the meatballs and sauce. Sauté thin slices of ribeye steak with onions and bell peppers. Pile that mixture onto the buns, top with provolone cheese, and proceed with the garlic butter and baking steps.
- Go Lighter with Pesto: For a brighter flavor, use a thin layer of basil pesto instead of marinara sauce. It’s fantastic with turkey or chicken meatballs.
- Everything Bagel Vibe: Before baking, sprinkle the buttered tops with an “Everything Bagel” seasoning blend. The sesame seeds, poppy seeds, garlic, and onion add an incredible savory crunch.
From My Kitchen to Yours: A Few Parting Thoughts
This recipe has truly evolved in my kitchen over the years. The first time I made them, I was so excited I forgot to warm the meatballs first, which led to a slightly longer bake time and some very impatient friends! I’ve also learned that while they are best fresh from the oven, they reheat surprisingly well for next-day lunches—just pop them in the air fryer or a hot oven for a few minutes to bring back that crispy bun texture.
The beauty of this dish is its flexibility. It’s a canvas for your cravings. Don’t be afraid to make it your own. The most important ingredient is the joy you pour into making them. Now, go forth and create some cheesy, saucy memories!
Your Slider Questions, Answered!
Over the years, I’ve gotten a few repeat questions about these sliders. Here are the answers to help you troubleshoot like a pro!
Q: Can I assemble these sliders ahead of time?
A: Absolutely! You can assemble them completely, cover them tightly with plastic wrap and then foil, and refrigerate for up to 24 hours. When you’re ready, bake them straight from the fridge, but add an extra 5-10 minutes to the covered baking time to ensure they’re heated all the way through.
Q: My sliders got a bit soggy on the bottom. How can I prevent that?
A: This is a common one! My top two tricks are: 1) Lightly toasting the bottom buns before assembling (as mentioned in the steps), and 2) Making sure your meatballs and sauce aren’t scalding hot when you assemble. Let them cool for a few minutes to avoid “steaming” the buns from below before they even hit the oven.
Q: Can I use a different cheese?
A> Of course! Provolone is a classic sub-shop alternative to mozzarella and melts beautifully. A sharp white cheddar would add a wonderful tang, or a fontina would be incredibly creamy. Feel free to mix and match!
Q: I don’t have a baking dish. Can I still make these?
A> You sure can! A rimmed baking sheet lined with parchment paper works perfectly. Just be careful when brushing on the butter that you don’t push the rolls apart.
Nourishing Your Body and Soul
I firmly believe that comfort food is part of a balanced life! While these sliders are an indulgent treat, it’s always helpful to know what you’re enjoying. The nutritional information below is an estimate per slider, based on using standard ingredients. Remember, your specific choices (like the type of meatball or cheese) will cause variations.
This dish provides a good amount of protein from the meatballs and cheese, which helps keep you satisfied. To lighten it up, you can easily use part-skim cheeses, lean turkey meatballs, and a marinara sauce with no added sugar. But sometimes, your soul needs the full, cheesy, buttery experience, and that’s more than okay—it’s encouraged! Food is about joy, connection, and flavor, and these sliders deliver all three in every single bite.
Nutrition (Per Slider, estimated):
Calories: 290 | Protein: 15g | Carbs: 22g | Fat: 16g | Sugar: 3g
You Did It! Now, Chow Down.
And there you have it! Your complete guide to creating the most incredible, crowd-thrilling, flavor-packed Meatball Parmesan Sliders. From my cozy, flour-dusted kitchen corner to yours, I hope this recipe brings you as much happiness to make as it does to eat.
Remember, the best meals are the ones shared with laughter and good company. So, gather your people, slice into that tray of golden, cheesy goodness, and watch the smiles spread. Thank you so much for cooking with me today. I’d love to see your creations! Tag me on social @TastyChow with your slider masterpieces.
Until next time, keep chasing flavor and cooking with heart!
— Emily 🧡