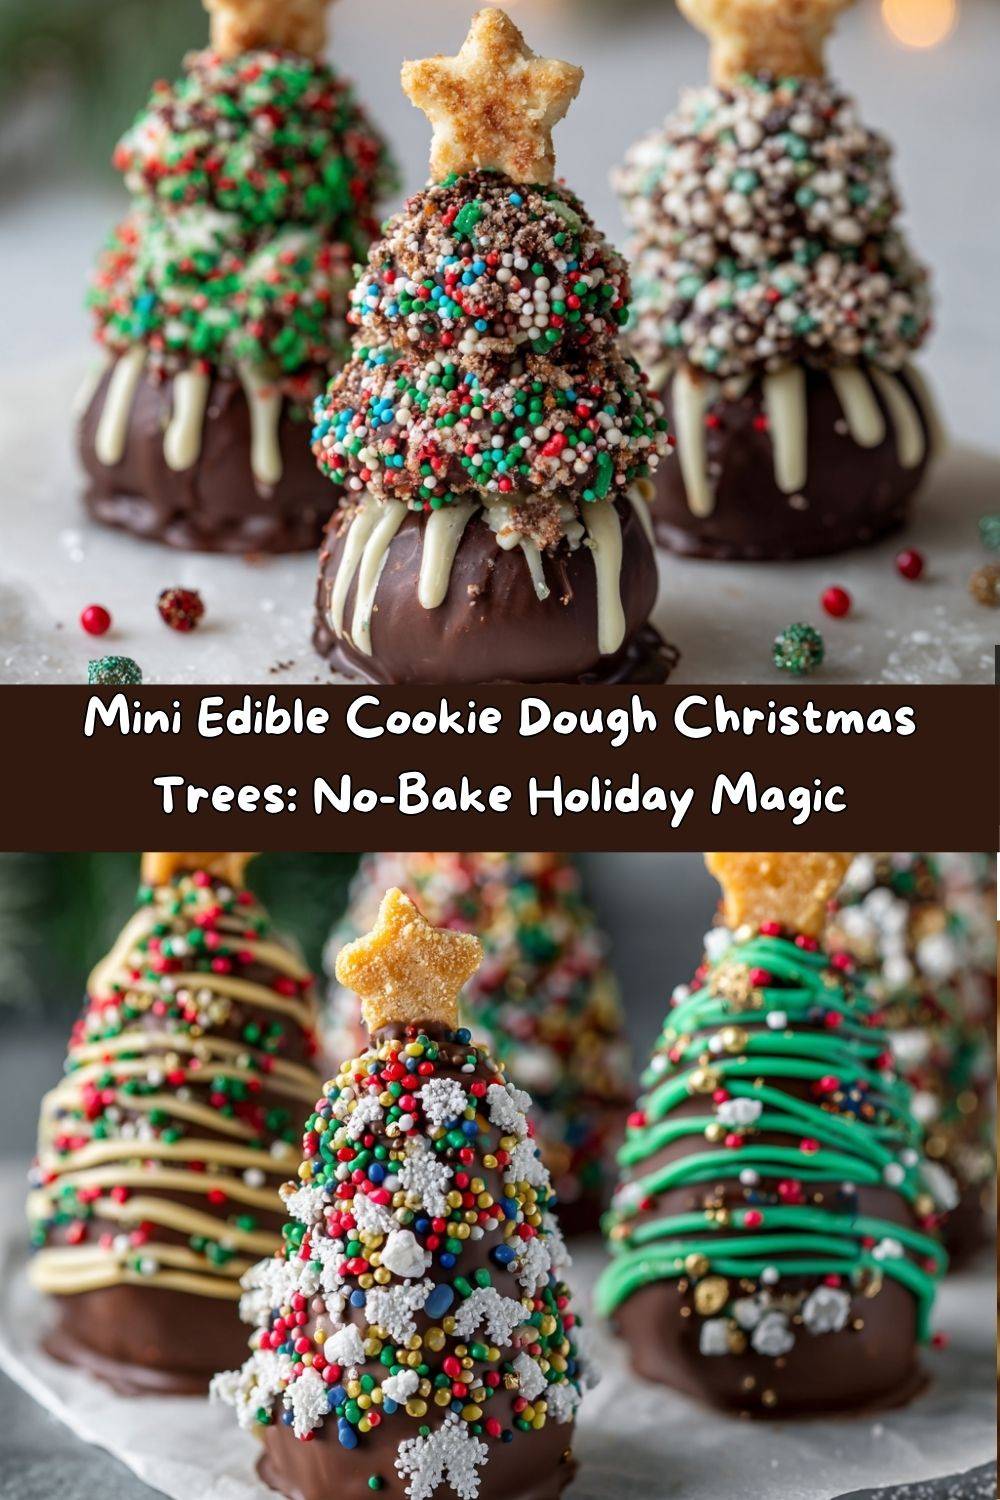
Mini Edible Cookie Dough Christmas Trees: No-Bake Holiday Magic!
Hey there, my festive friend! Can you smell it? That magical blend of pine, cinnamon, and pure, unadulterated joy that only comes around once a year? The holiday season is officially upon us, and my kitchen has transformed into a full-blown winter wonderland workshop. While I adore the classic gingerbread and sugar cookies, sometimes you need a treat that’s a little quicker, a little quirkier, and a whole lot of fun. Enter the star of this year’s dessert table: these unbelievably cute Mini Edible Cookie Dough Christmas Trees.
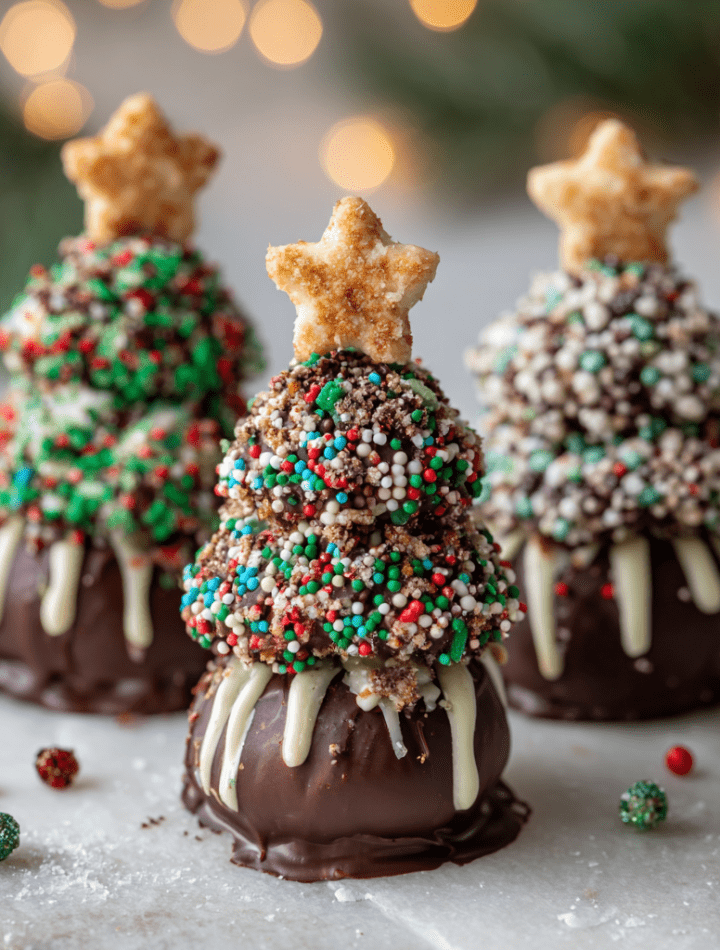
Imagine this: bite-sized pieces of soft, sweet, perfectly safe-to-eat cookie dough, shaped into adorable little trees, dipped in a sleek coat of chocolate, and dressed to the nines with a tiny star and festive sprinkles. They’re no-bake, which means more time for sipping hot cocoa and watching holiday movies, and they are guaranteed to make everyone—from your grumpy uncle to your coolest cousin—stop and smile. This is the kind of project that creates memories. It’s pure, unapologetic holiday magic, and I am so excited to make them with you. So, tie on your favorite messy apron (the one with the candy cane stains is a badge of honor!), and let’s create some delicious, edible evergreens!
A Sweet, Messy Start: My First Kitchen Christmas
My love for holiday baking started not with a perfect cookie, but with a glorious, flour-dusted disaster. I was about six years old, “helping” my grandma make her famous cut-out cookies. My job was sprinkles. I took this duty very, very seriously. Let’s just say that by the end, our cookies looked less like reindeer and more like psychedelic, glittery blobs. The kitchen looked like a craft store exploded, but my grandma just laughed, her eyes twinkling, and said, “Emily, the best creations always come from a happy mess.”
That’s the spirit I bring to these cookie dough trees. They don’t demand perfection. A lopsided star? Charming! A little extra chocolate drizzle? More to love! They are all about the joy of creating something together, about getting your hands a little dirty and your heart a lot full. Every time I shape these little trees, I’m transported back to that floury kitchen, reminded that the sweetest part of any recipe is the love and laughter you stir into it.
Gathering Your Forest-Making Supplies
One of the best things about this recipe is how simple the ingredient list is. We’re using a classic edible cookie dough base, which means no raw eggs and heat-treated flour for total safety and peace of mind. Let’s break it down!
- 1 ½ cups All-Purpose Flour – This is the structure of our dough! Chef’s tip: You MUST heat-treat the flour to kill any potential bacteria. Simply spread it on a baking sheet and bake at 350°F for 5-7 minutes. Let it cool completely before using. For a gluten-free swap, your favorite 1:1 GF flour blend works wonderfully—just heat-treat it the same way!
- ½ cup Unsalted Butter, softened – This gives us that rich, creamy, melt-in-your-mouth texture. If you only have salted butter, that’s totally fine—just omit the extra pinch of salt later. For a dairy-free version, a high-quality plant-based butter works like a charm.
- ½ cup Brown Sugar, packed – Hello, molasses-y depth and moisture! This is what gives our cookie dough that classic, crave-worthy flavor. Light or dark brown sugar will work.
- ¼ cup Granulated Sugar – Our friend for a little extra sweetness and texture. It helps balance the deep notes from the brown sugar.
- 2-3 tablespoons Milk or Heavy Cream – This is our hydration station! It brings the dough together to the perfect rolling consistency. Start with 2 tablespoons and add the third if it feels a bit dry. Any milk you have on hand—dairy or non-dairy—will do the trick.
- 1 teaspoon Pure Vanilla Extract – The non-negotiable flavor booster. It adds that warm, aromatic essence that makes everything taste like home.
- A Pinch of Salt – This is our secret weapon! It balances all the sweetness and makes the flavors pop. Don’t you dare skip it!
- ½ cup Mini Chocolate Chips – Because what’s cookie dough without chocolate chips? They add little pockets of chocolatey joy. Feel free to use standard size or even rainbow sprinkles for a funfetti tree effect!
For Decorating Your Forest:
- 2 cups Chocolate Melting Wafers – I highly recommend using melting wafers (like Ghirardelli or Candiquik) over chocolate chips for dipping. They are specifically formulated to melt smoothly, set firmly, and have a perfect snap. You can use white, dark, or milk chocolate. To make green trees, use white chocolate wafers and mix in a few drops of oil-based green food coloring.
- Festive Sprinkles – This is where your personality shines! Use tiny round sprinkles for “ornaments,” sanding sugar for “snow,” or even crushed candy canes for a peppermint twist. Go wild!
- Star Sprinkles – The crowning glory! You can find edible sprinkle stars online or at craft stores. In a pinch, you can pipe a tiny star with yellow icing after the chocolate sets.
- Toothpicks – Our trusty tools for easy dipping and handling. They’re the temporary trunks for our little trees!
Let’s Build Our Edible Evergreen Forest!
Ready for the fun part? This is where the magic happens. Follow these steps, and you’ll have a forest of cuteness in no time. I’ve packed each step with my best chef hacks to make the process smooth and successful.
Step 1: Make the Edible Cookie Dough. In a medium bowl, use a hand mixer (or a sturdy wooden spoon and some elbow grease!) to cream together the softened butter, brown sugar, and granulated sugar until it’s light and fluffy. This takes about 2 minutes—don’t rush it! This creaming process incorporates air, giving us a softer dough. Beat in the vanilla extract and salt. Gradually add in your heat-treated (and cooled!) flour, mixing on low speed until just combined. The dough will be thick and crumbly. Now, stream in the milk, one tablespoon at a time, until the dough comes together and is soft and pliable, like Play-Doh. Fold in the mini chocolate chips. Chef’s Hack: If your dough feels too sticky, pop it in the fridge for 15-20 minutes. This makes it much easier to handle!
Step 2: Shape the Trees. This is the most meditative part! Pinch off about 1 tablespoon of dough and roll it into a smooth ball. Now, to create the tree shape, you have two fantastic options. The easiest is to use a bead roller—yep, the kind for kids’ jewelry! It creates the perfect conical shape with lovely textured rings. Simply place the ball inside, close the roller, and give it a gentle squeeze. No bead roller? No problem! Use your fingers to gently shape the ball into a cone, pinching the top to a slight point. Chef’s Hack: If the dough is sticking to your hands, lightly dampen your palms with water. This creates a barrier and prevents a sticky situation!
Step 3: The Toothpick Stabilizer. Take a toothpick and gently but firmly insert it about halfway into the flat bottom of your tree shape. Now, find a small box (a shoebox is perfect) and line it with parchment paper. Poke the other end of the toothpick into the box so the tree stands upright. This brilliant setup is your dipping station! It allows the chocolate to set smoothly and gives you a handle for dipping. Place the entire box in the freezer for about 15-20 minutes. Chef’s Hack: A cold dough tree is MUCH easier to dip in warm chocolate. It prevents the dough from softening and sliding off the toothpick.
Step 4: Melt and Dip! While the trees are chilling, melt your chocolate wafers. Do this in a tall, narrow glass or mug! This uses less chocolate and creates a deeper pool for easier, full-coverage dipping. Melt according to package directions, usually in 30-second bursts in the microwave, stirring well between each. If you’re tinting white chocolate green, add the oil-based food coloring now and stir until uniform. Take your box of trees out of the freezer. One by one, hold a tree by the toothpick and carefully dip it into the melted chocolate, swirling gently to coat all sides. Lift it out, gently tap your wrist to shake off any excess chocolate, and return it to its upright position in the box.
Step 5: Decorate While Wet! You have a small window of time here, so move quickly but calmly. Immediately after dipping, while the chocolate is still wet, press a single star sprinkle onto the very top of the tree. Then, use other sprinkles to create little “ornaments” all over the tree. This is the time to get creative! Chef’s Hack: Use a toothpick or tweezers to place sprinkles with precision if your fingers are feeling clumsy.
Step 6: Let Them Set. Allow the chocolate to harden completely. You can leave them at room temperature if it’s not too humid, or pop the whole box back in the fridge for 10-15 minutes to speed things up. The chocolate should be firm to the touch.
Step 7: Create a Stable Base. This is my favorite pro-trick! Once the chocolate is set, carefully twist and remove the toothpick from each tree. You’ll be left with a small hole in the bottom. To create a perfectly flat base so your trees can stand proudly on a plate, warm a non-stick skillet over the lowest possible heat for just 30 seconds, then turn the heat OFF. Working quickly, gently press the bottom of a tree onto the warm pan for just 1-2 seconds. This will melt the chocolate just enough to seal the hole and create a smooth, flat bottom. Place the tree, base-side down, on a parchment-lined tray to re-harden. And voilà! Your tree is ready to stand tall!
How to Serve Your Festive Masterpiece
Presentation is part of the fun! These little trees are so adorable, they deserve a special stage. Here are a few of my favorite ways to serve them:
The Winter Wonderland Platter: Create a scene on a large platter or a wooden board. Dust the surface with a light layer of powdered sugar “snow.” Arrange your trees in a little forest, and add a few gummy bears or other figurines as “forest friends.”
Individual Gift Boxes: These make incredible homemade gifts! Place a few trees in small, clear cellophane bags, tie them with a pretty ribbon, and add a gift tag. They’re the perfect edible favor for a holiday party, teachers, neighbors, or friends.
The Dessert Table Centerpiece: Place them as a topper on a cupcake, or use them to decorate the perimeter of a larger cake. They add an instant festive touch to any dessert.
However you serve them, be prepared for a chorus of “Awwww!” before the “Mmmmm!” These treats are almost too cute to eat… almost.
Branch Out! Fun Flavor Twists & Swaps
Once you’ve mastered the classic, why not get creative? This recipe is a fantastic canvas for your flavor ideas. Here are a few of my favorite variations:
- Peppermint Patty Trees: Omit the chocolate chips from the dough. Add ¼ teaspoon of peppermint extract along with the vanilla. Dip in dark chocolate and decorate with crushed candy canes for a refreshing, cool flavor.
- Gingerbread Cookie Dough Trees: Add 1 teaspoon of ground ginger, ½ teaspoon of cinnamon, and a pinch of cloves and nutmeg to the flour mixture. Use black and white sprinkles for a classic gingerbread look!
- Funfetti Celebration Trees: Swap the chocolate chips for ½ cup of rainbow jimmies or quins. Dip in white chocolate and use colorful sprinkle “ornaments” for a birthday-party-meets-Christmas vibe.
- Double Chocolate Forest: Replace ¼ cup of the heat-treated flour with ¼ cup of unsweetened cocoa powder. Use chocolate chips in the dough and dip in dark chocolate for the ultimate chocolate lover’s treat.
- Nutty Evergreens: Fold in ⅓ cup of finely chopped, toasted pecans or walnuts instead of the chocolate chips. The toasty, nutty flavor is a wonderful contrast to the sweet chocolate coating.
Chef Emily’s Cozy Kitchen Notes
This recipe has become a staple in my holiday lineup, but it didn’t start out perfect. The first time I made them, I skipped the freezer step. Let’s just say I ended up with more of a “cookie dough forest puddle” than a stand of proud evergreens! It was a delicious puddle, but not the look I was going for. I also learned the hard way that not all food colorings are created equal. Using a water-based dye in melted chocolate will cause it to immediately seize up into a grainy mess. Trust me on this—only use oil-based food coloring for tinting chocolate! These little “happy accidents” are how we learn and make a recipe truly our own. Don’t be afraid to play and make your own messes. That’s where the best memories—and sometimes the best new recipes—are born.
Your Questions, Answered!
Q: Do I really have to heat-treat the flour?
A: Yes, chère! Raw flour can contain bacteria, so baking it for a few minutes makes your cookie dough completely safe to eat. It’s a quick, easy step, and it doesn’t change the flavor.
Q: My cookie dough is too sticky to shape—what should I do?
A: Pop it in the fridge for 15–20 minutes! Chilled dough is much easier to roll and shape. A light dusting of powdered sugar on your hands also works like a charm.
Q: Can I make these trees ahead of time?
A: Absolutely! Once decorated, keep them in an airtight container in the fridge for up to 5 days. You can also freeze them (layered with parchment) for up to 2 months. Let them sit at room temp for 15–20 minutes before serving.
Q: My chocolate seized up when I tried to color it. What happened?
A: Ah, that tricky chocolate! Regular water-based food coloring makes chocolate clump. Always use oil-based coloring or candy melts designed for tinting.
Q: How can I get my trees to stand up straight?
A: Use the toothpick trick! Insert a toothpick into the bottom of each cone, dip in chocolate, and let them dry upright in a shoebox or piece of foam. Once set, remove the toothpick and smooth the base on a warm skillet for a flat bottom.
Q: Can I swap out the chocolate coating?
A: Definitely. Try white chocolate for a snowy look, dark chocolate for richness, or even pastel-tinted candy melts for a whimsical forest vibe.
Nutrition Information (per tree, approx. based on 20 trees)
-
Calories: 160
-
Fat: 9g
-
Saturated Fat: 5g
-
Carbohydrates: 19g
-
Sugar: 13g
-
Protein: 1g
-
Fiber: <1g
Note: Values will vary depending on the type of chocolate, sprinkles, and milk you use.
Final Thoughts
And there you have it—Mini Edible Cookie Dough Christmas Trees that are equal parts festive, fun, and oh-so-delicious. These little no-bake beauties prove that holiday desserts don’t need to be complicated to make a big impact. They’re whimsical enough for a centerpiece, easy enough for kids to help with, and tasty enough to disappear the second they hit the table.
The best part? They’re more than just a recipe—they’re a memory in the making. Whether you’re laughing over sticky fingers, sprinkling “snow” together, or sneaking one before they’re fully set, these trees bring joy to the process as much as the final bite.
So, this holiday season, I invite you to make a little mess, share a lot of laughter, and fill your kitchen with edible evergreens. From my kitchen to yours, may your holidays be merry, bright, and filled with sweet little bites of magic.