Your New Favorite Pizza Night is 8 Minutes Away!
Hey there, friend! Let’s have a little heart-to-heart about pizza. Are you, like me, someone whose soul craves that perfect combination of crispy crust, tangy sauce, and gloriously stretchy cheese? But then your brain (or maybe your dietary goals) chimes in with a not-so-fun reminder about carbs, calories, and that dreaded food coma? For the longest time, I felt like I had to choose between joy and my health goals. Well, my fellow foodie, I’m here to tell you that the era of choosing is OVER.
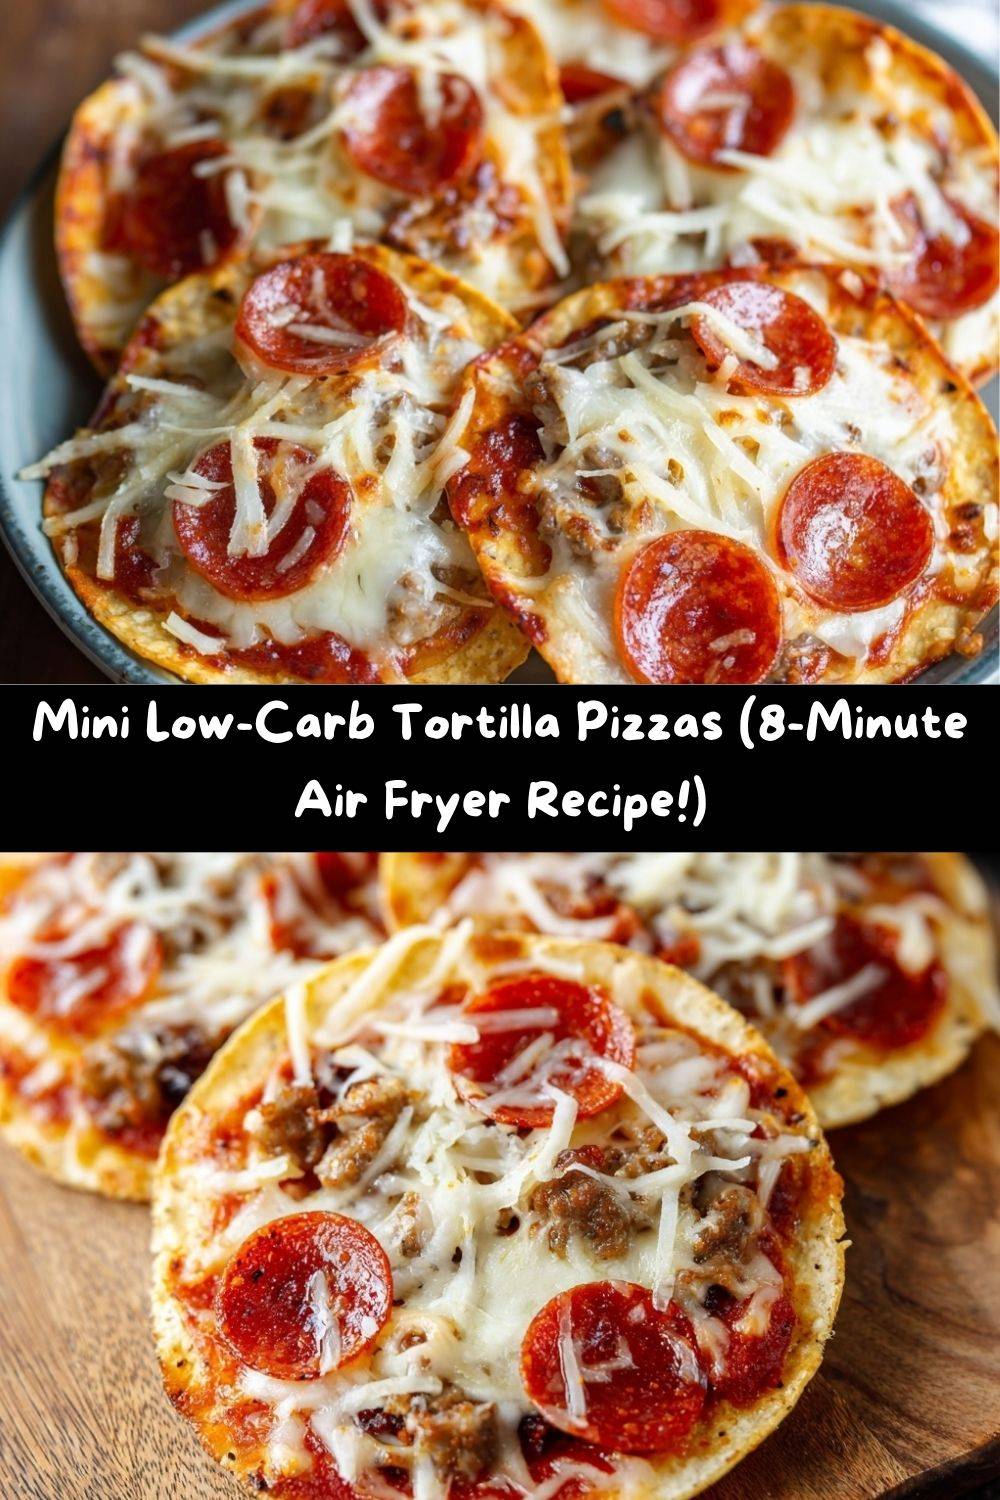
Get ready to meet your new kitchen BFF: Mini Low-Carb Tortilla Pizzas. This isn’t just a “good for a diet” recipe. This is a legitimately crave-worthy, flavor-packed, “why-haven’t-I-been-doing-this-forever” kind of recipe. We’re taking zero net carb street taco tortillas and transforming them into the crispiest, most satisfying personal pizza bases you’ve ever had. And the best part? Your air fryer works its magic in just 8 minutes. That’s faster than ordering delivery! We’re talking about a crispy, cheesy, keto-friendly pizza hack that will completely change your weeknight dinner and snack game. So, tie on your favorite apron (the messy one is always the best), and let’s make something delicious together!
The Little Pizza That Could: A Kitchen Revelation
This recipe was born out of a classic “Emily-in-the-kitchen” moment: a serious pizza craving collided with a fridge full of random ingredients and a serious lack of time. It was a Tuesday, I’d just finished a marathon recipe testing session (read: my kitchen looked like a flour bomb went off), and my husband texted, “What’s for dinner?” with a little pizza emoji. My heart said yes, but my willpower said no to another heavy takeout night.
Then I saw it. A lonely pack of low-carb tortillas, a jar of pizza sauce I’d stashed for a different project, and a treasure trove of cheese and pepperoni. A lightbulb went off. I remembered the little “French bread” pizzas we used to make as kids, and I thought, “What if…?” I grabbed my trusty air fryer, assembled my mini masterpieces with a healthy dose of skepticism, and hit start. Eight minutes later, I was staring at pure gold. The edges were shatteringly crisp, the cheese was a bubbling, beautiful mess, and the first bite… oh, that first bite was a revelation. It was everything I loved about pizza, without the guilt. It was so good, I immediately made a second batch. This little pizza hack wasn’t just a meal; it was a victory.
Gather Your Pizza Party Ingredients
One of the best things about this recipe is its beautiful simplicity. You likely have most of this hanging out in your fridge and pantry right now! Here’s what you’ll need to create your own mini pizza magic.
- 4 Mission Zero Net Carb Street Taco-Sized Tortillas: These are the absolute MVP of this recipe. Their small size is perfect for personal pizzas, and they get incredibly crispy in the air fryer. The “zero net carb” claim is a game-changer for keto and low-carb lifestyles. Chef’s Insight: Don’t have this exact brand? Any small, low-carb tortilla will work, but the street taco size is ideal for the perfect crust-to-topping ratio.
- ½ Cup Pizza Sauce: Look for a sauce with no added sugars to keep it truly low-carb. My grandma always said a great sauce is the soul of the pizza! Substitution Tip: In a pinch, you can use a low-sugar marinara or even whip up a quick sauce with tomato paste, garlic powder, oregano, and a splash of water.
- 1 Cup Shredded Mozzarella Cheese: Ah, the glorious glue that holds our pizza dreams together. I always recommend shredding your own cheese from a block—it melts so much better and doesn’t have the anti-caking agents that pre-shredded bags do. Chef’s Insight: For an extra flavor punch, try a blend of mozzarella and provolone!
- ¼ Cup Hormel Mini Pepperoni: These tiny ‘ronis are just so darn cute and the perfect size for our mini pizzas. They get delightfully crispy and cupped around the edges. Substitution Tip: Regular-sized pepperoni sliced into quarters works just fine, or for a different vibe, try cooked and crumbled bacon.
- ¼ Cup Cooked Italian Sausage, Crumbled: This adds a wonderful savory depth and a bit of hearty texture. I like to cook a big batch of Italian sausage at the start of the week to throw into scrambles, salads, and, of course, these pizzas! Chef’s Insight: For a lighter option, swap this out for some seasoned ground turkey or chicken.
- Optional: Diced Veggies (Peppers, Mushrooms, Olives): This is where you make these pizzas your own! Pro-Tip: If you’re adding veggies like mushrooms or peppers, I recommend giving them a quick sauté first. This releases their water content, so you don’t end up with a soggy pizza!
Let’s Build Some Pizza Magic: Step-by-Step
Okay, the fun part is here! This process is so simple and satisfying. I love setting up a little “pizza bar” and letting everyone in the family customize their own. It turns dinner into a fun, interactive event.
- Preheat Your Air Fryer: Get that air fryer humming at 375°F (190°C). Just like with a traditional oven, a hot start is the secret to a super crispy crust. It kicks the cooking process into high gear the second the pizza hits the basket. Chef’s Hack: If your air fryer doesn’t have a preheat function, just let it run empty for 2-3 minutes at the cooking temperature.
- Assemble Your Mini Masterpieces: Lay your tortillas on a clean work surface. Spread a thin, even layer of pizza sauce over each one, leaving a tiny border around the edge for that classic “crust” look. Remember, a little sauce goes a long way! Too much will make the tortilla soggy. Next, shower on that beautiful mozzarella cheese. Then, artfully arrange your mini pepperoni, savory sausage crumbles, and any other toppings your heart desires. Chef’s Commentary: Don’t overload them! Part of the beauty of these pizzas is their delicate, crisp nature. A moderate amount of toppings ensures everything cooks evenly and the crust holds up.
- Air Fry to Perfection: Carefully place your assembled pizzas into the air fryer basket. You might need to work in batches to avoid overcrowding—they need their personal space for the hot air to circulate properly! Cook for 6-8 minutes. You’re looking for that gorgeous, bubbly, slightly spotted cheese and for the tortilla edges to become a deep, golden brown and incredibly crispy. Chef’s Pro-Tip: All air fryers are a little different, so keep an eye on them after the 5-minute mark. The transformation from floppy to fabulous happens quickly!
- Serve Hot & Enjoy! Use a spatula to gently transfer your culinary creations to a plate. Let them sit for just a minute—that cheese is molten lava! Then, dig in and experience the crispy, cheesy, low-carb joy.
How to Serve Your Mini Tortilla Pizzas
Presentation is part of the fun! I love serving these mini pizzas on a big wooden board or a colorful platter, letting them slightly overlap for a rustic, “help yourself” feel. They are a complete meal on their own, but if you want to turn it into a full feast, here are a few of my favorite pairings:
- The Ultimate Snack Spread: Serve these pizzas alongside a big, vibrant garden salad with a tangy vinaigrette to cut through the richness. It’s the perfect balance!
- Game Day Glory: These are the ULTIMATE finger food for watching the game. Pile them high on a platter with some crispy air fryer chicken wings and a bowl of cool, creamy ranch for dipping.
- Family Fun Night: Set up a DIY topping bar with little bowls of different sauces, cheeses, meats, and veggies. Let everyone design their own pizza masterpiece. It’s a surefire way to make a regular weeknight feel special.
Get Creative! Flavor Twists & Dietary Swaps
The true beauty of this recipe is its versatility. Once you master the basic formula, a whole world of flavor combinations opens up! Here are a few of my favorite ways to mix it up.
- BBQ Chicken: Swap the pizza sauce for your favorite sugar-free BBQ sauce. Top with shredded cooked chicken, red onion, a blend of mozzarella and cheddar cheese, and a sprinkle of fresh cilantro after cooking.
- Garden Veggie Delight: For a vegetarian option, use the classic sauce and cheese, then load up with pre-sautéed mushrooms, bell peppers, spinach, and black olives. A drizzle of balsamic glaze after cooking is divine.
- White Pizza: Skip the red sauce entirely! Brush the tortilla with a little garlic-infused olive oil, then top with ricotta, mozzarella, and a sprinkle of Italian seasoning. Add some fresh spinach and cooked sausage crumbles if you like.
- Everything Bagel Pizza: A reader favorite! Use a schmear of cream cheese as the base, top with smoked salmon (or everything bagel seasoning), red onion, and capers after it comes out of the air fryer. It’s an unreal flavor combo.
- Dairy-Free Delight: Easily make this dairy-free by using your favorite vegan mozzarella shreds and ensuring your meat toppings are dairy-free. The crispy tortilla base is the perfect neutral canvas.
Chef Emily’s Kitchen Notes
This recipe has become such a staple in my house that it’s almost comical. I’ve made these pizzas for last-minute lunches, after-school snacks for my niece and nephew, and even as a fun appetizer when friends pop over unexpectedly. My husband now refers to Tuesday as “Mini Pizza Tuesday,” and I am not complaining!
One of my favorite kitchen memories with this recipe was the time I decided to get fancy and try a “breakfast pizza” version with a scrambled egg base, cheddar, and bacon. Let’s just say I learned that raw, poured egg is a bit too heavy for the delicate tortilla—it was a delicious, but structurally unsound, mess! We ate it with a fork and laughed the whole time. The moral of the story? Don’t be afraid to experiment, but maybe stick to lighter toppings until you get the hang of it. The recipe has evolved from a simple hack to a trusted, beloved template for endless creativity in my kitchen, and I hope it does in yours, too.
Your Pizza Questions, Answered!
I’ve gotten so many wonderful messages from you all about this recipe, and a few common questions pop up. Here’s the scoop to ensure your pizza success every single time!
- Q: My pizza got soggy. What happened?
A: The number one culprit for sogginess is over-saucing! You really only need a thin, 1-2 tablespoon layer. The second culprit is wet toppings. Always sauté veggies like mushrooms, zucchini, and peppers before adding them to draw out excess moisture.
- Q: Can I make these in a regular oven?
A: Absolutely! Preheat your oven to 400°F (200°C). Place the assembled pizzas directly on the oven rack (this helps the bottom get crisp) and bake for 8-10 minutes, or until the cheese is bubbly and the edges are brown.
- Q: Can I meal prep these?
A: You can! Assemble the pizzas (without cooking) and place them on a parchment-lined baking sheet. Freeze until solid, then transfer to a freezer bag. Cook straight from frozen, adding 2-3 extra minutes to the air frying time.
- Q: The edges are burning before the cheese melts. Help!
A: This can happen in some super-powerful air fryers. Try lowering the temperature to 360°F (182°C) and adding a minute or two to the cook time. You can also place a small, heat-safe bowl of water in the bottom of the air fryer basket to create a gentler heating environment.
Nutritional Breakdown (Because Knowledge is Power!)
I know many of you are mindful of what you’re eating, and I love being transparent about what goes into our food. Here’s an approximate nutritional breakdown for one mini pizza (using the base recipe with mozzarella, pepperoni, and sausage). Remember, this can vary based on your specific brand of ingredients and any additions you make!
- Calories: ~180
- Protein: 14g (Fantastic for keeping you full and satisfied!)
- Carbohydrates: 4g
- Net Carbohydrates: 0g (Total Carbs minus Fiber and Sugar Alcohols)
- Fat: 12g
- Fiber: 4g
- Sugar: 1g
This nutritional profile makes these mini pizzas an excellent choice for those following a keto, low-carb, or high-protein lifestyle. They’re a fantastic way to satisfy a pizza craving without derailing your progress. It’s all about working smarter, not harder, in the kitchen!
Final Thoughts from My Kitchen to Yours
Well, my friend, we’ve done it. We’ve taken back pizza night and made it quick, easy, healthy, and unbelievably delicious. This recipe is a testament to what I truly believe: that eating well should never mean sacrificing flavor or joy. It’s about finding those brilliant little hacks that make your life better, one crispy, cheesy bite at a time.
This isn’t just a recipe; it’s a tool for busy weeks, a solution for cravings, and a ticket to fun, customizable meals that the whole family will love. I can’t wait for you to try it and make it your own. When you do, I’d be absolutely thrilled if you tagged me on social @TastyChow so I can see your beautiful creations! Now, go forth and conquer that pizza craving. Your future self, with a happy belly and a satisfied smile, will thank you.
With love and a fully stocked cheese drawer,
Emily