Goodbye, Morning Chaos! Hello, Pancake Bites.
Raise your hand if your ideal morning involves sipping a warm beverage while a delicious, homemade breakfast magically appears before you. Now, keep it raised if your actual morning more closely resembles a frantic search for matching socks while simultaneously convincing a small human that toast is, in fact, a valid breakfast. Yeah, me too. For years, my dream of a peaceful, pancake-filled morning felt totally at odds with the reality of my busy life. I’d wistfully flip through food magazines, looking at stacks of fluffy pancakes, knowing I barely had time to flip a light switch, let alone stand over a griddle.
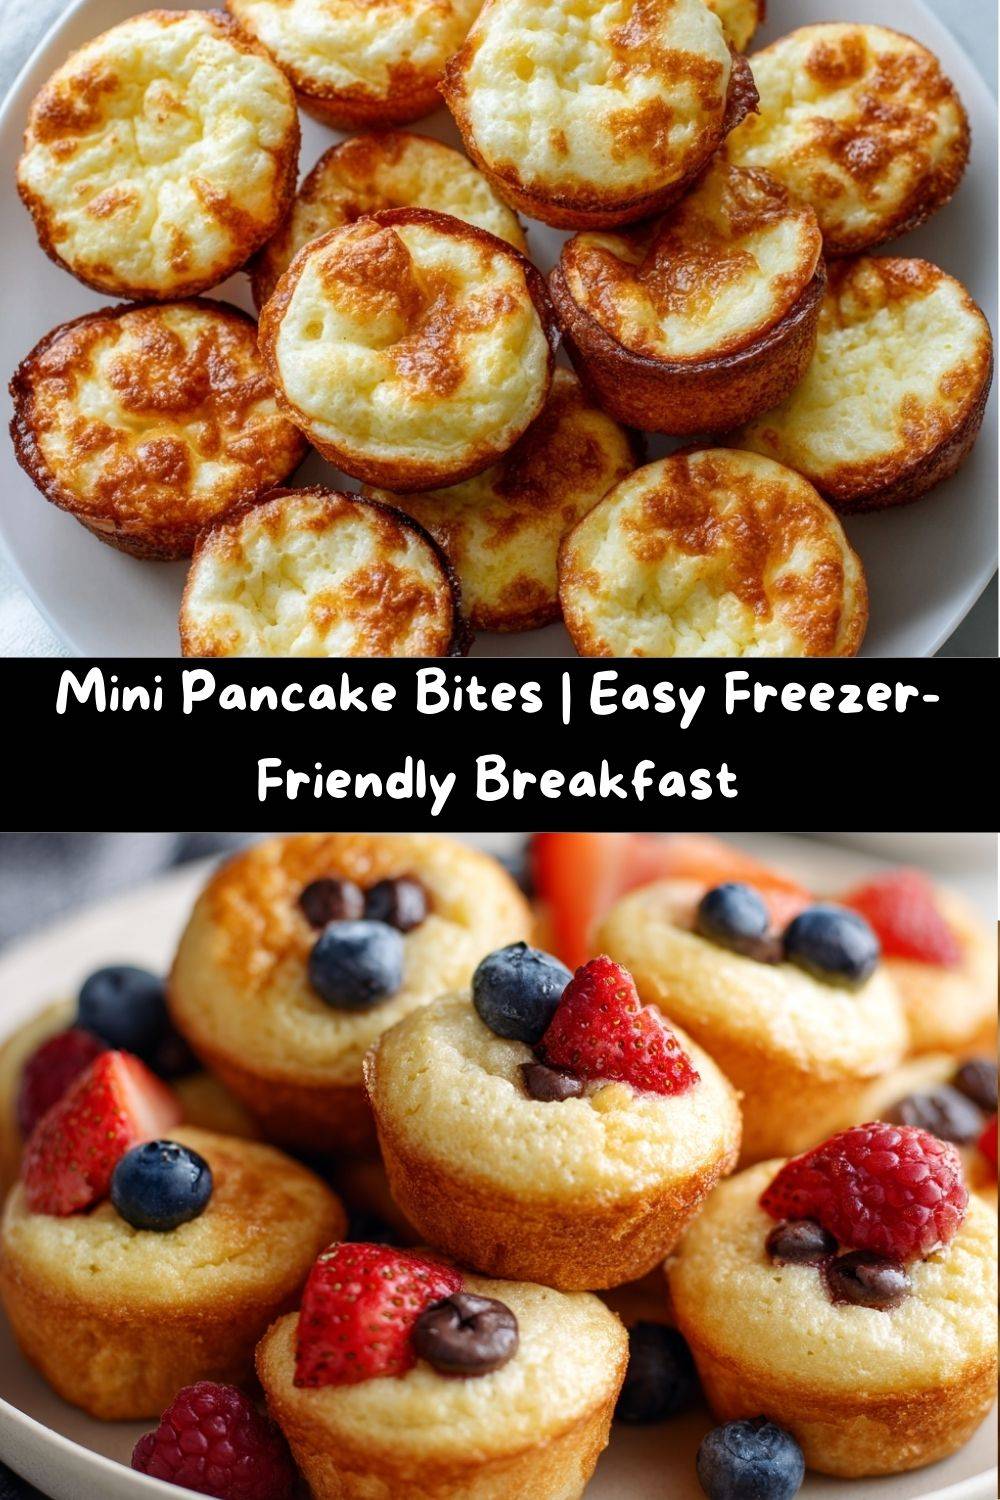
That’s why I became borderline obsessed with creating a solution. I wanted all the cozy, comforting joy of a weekend pancake breakfast, packed into a form that could survive a Tuesday. After more experiments than I care to admit (let’s just say my husband was a very patient taste-tester of some… dense… early versions), I finally landed on pure gold: Mini Muffin Tin Pancake Bites.
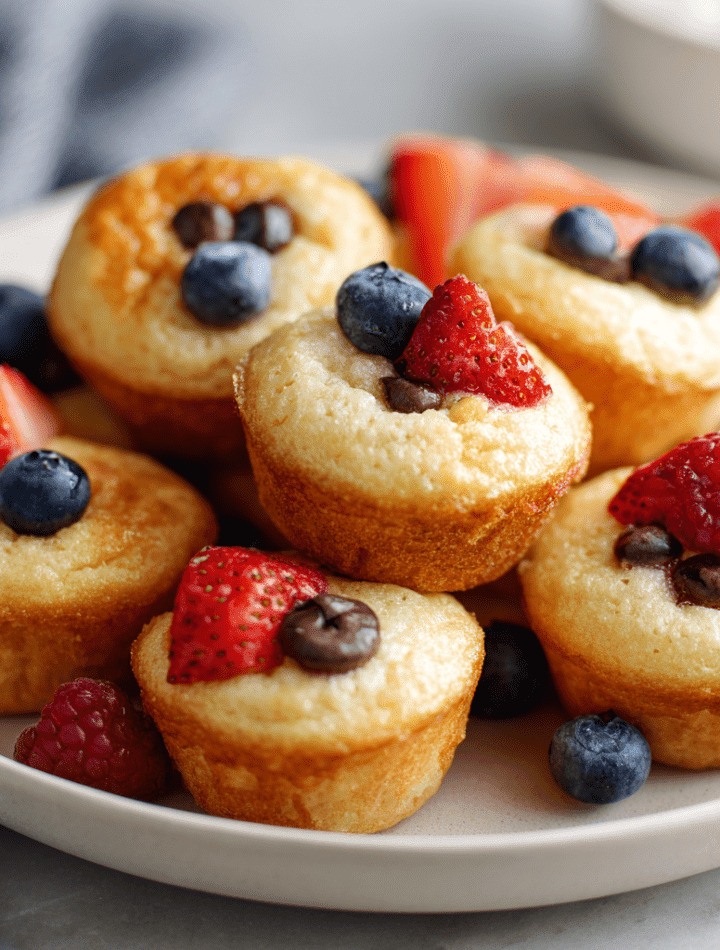
These little guys are nothing short of a breakfast revolution. Imagine the fluffiest, most buttery pancake you’ve ever had, baked into a perfect, poppable, golden-brown bite. They’re endlessly customizable, crazy easy to make in one big batch, and they freeze like a dream. We’re talking about warm, homemade pancakes, ready in 60 seconds from your freezer or fridge. This isn’t just a recipe; it’s your ticket to reclaiming those precious morning minutes without sacrificing an ounce of flavor or joy. Let’s make your breakfast dreams deliciously achievable.
The Pancake Epiphany: A Tale of Two Breakfasts
My love affair with pancake bites didn’t start in a fancy test kitchen. It started at my Grandma Lorraine’s worn laminate countertop. Sunday mornings at her house meant one thing: buttermilk pancakes. The ritual was sacred. She’d mix the batter in her big yellow bowl, and I’d get the coveted job of dropping the blueberries in just as the batter hit the hot griddle. We’d stand there together, flipping and chatting until we had a tower high enough to feed our whole family.
But on weekdays? Grandma was pragmatic. She’d often bake her pancake batter in a sheet pan and cut it into squares—a genius “pancake bake” for hurried mornings. That idea of a hands-free, batchable pancake always stuck with me. Years later, during a particularly chaotic week of recipe testing, I was scrambling for a fun, grab-and-go snack for my niece. I saw a mini muffin tin sitting on the shelf, and Grandma’s sheet-pan pancakes flashed in my mind. What if…?
I whipped up a quick batter, poured it into the tiny cups, and crossed my fingers. Twelve minutes later, I opened the oven to find a tray of perfectly puffed, adorable pancake morsels. My niece popped one in her mouth, her eyes got wide, and she declared, “Auntie Em, these are the best pancakes EVER. They’re like little cakes!” And just like that, the weekday pancake dilemma was solved, with a sweet nod to the Sunday mornings of my past.
Gathering Your Flavor Arsenal
Here’s everything you’ll need to create these little bites of bliss. I’ve added my chef-y notes and substitution hacks so you can bake with confidence!
- 2 cups all-purpose flour: The trusty foundation. For a lighter bite, you can swap in 1 cup of whole wheat pastry flour for one of the all-purpose cups. For a gluten-free version, a 1:1 gluten-free baking blend works wonderfully.
- 2 tablespoons sugar: Just enough to coax out a gentle sweetness and aid in browning. You can reduce this to 1 tbsp if you’re loading up on sweet add-ins like chocolate chips.
- 2 teaspoons baking powder + ½ teaspoon baking soda: Our dynamic leavening duo! The baking powder gives the initial lift in the oven, and the baking soda reacts with the buttermilk for that signature tender, fluffy crumb. Make sure they’re fresh for maximum poof!
- ½ teaspoon salt: The essential flavor enhancer. It makes all the other ingredients sing. Don’t skip it.
- 1 ½ cups buttermilk: The secret weapon for irresistible tang and tenderness. Chef Hack Alert! No buttermilk? No problem. Add 1 tablespoon of white vinegar or lemon juice to a measuring cup, then fill with regular milk to the 1 ½ cup line. Stir and let it sit for 5 minutes until it thickens slightly. Voilà—“soured” milk that works like a charm.
- 2 large eggs: Our binders and richness-bringers. Bring them to room temperature if you can—they incorporate into the batter more smoothly, leading to a better texture.
- ¼ cup melted butter or neutral oil: Butter equals incredible flavor. Oil equals ultimate moisture and tenderness. I’m Team Butter for taste, but avocado or melted coconut oil are fantastic dairy-free options.
- 1 teaspoon vanilla extract: The warm, aromatic backdrop that makes everything taste more like a treat. A dash of almond extract is also a delicious friend here.
- Your Favorite Add-Ins (about 1 cup total): This is where you become the artist! I love a mix of:
- Mini chocolate chips: They distribute evenly in the small bites.
- Fresh blueberries: Toss them in a pinch of flour first to prevent sinking.
- Diced strawberries or chopped bananas: Adds little bursts of fruity freshness.
- Cooked crumbled bacon or sausage: For a savory twist!
Let’s Bake Some Bites! (Step-by-Step)
Ready to see some magic happen? Follow these steps, and you’ll have a crowd-pleasing tray of pancake bites in no time. I’ve sprinkled in my best tips to ensure your success.
Step 1: Prep Your Pan & Oven. Preheat your oven to 375°F (190°C). This is a slightly higher heat than for regular muffins, which helps us get that lovely golden, slightly crisp exterior we love in pancakes. Generously grease a 24-cup mini muffin tin with non-stick spray or butter. I’m a huge fan of using silicone mini muffin liners—they make popping the bites out absolutely foolproof and cleanup is a breeze.
Step 2: Mix the Dry Team. In a large bowl, grab your whisk and combine the flour, sugar, baking powder, baking soda, and salt. Whisk it really well for about 30 seconds. This isn’t just mixing; it’s aerating the flour and ensuring those leaveners are evenly distributed, which is key for an even rise in every single bite.
Step 3: Unite the Wet Team. In a separate medium bowl or large measuring cup, whisk together the buttermilk, eggs, melted (and slightly cooled) butter, and vanilla. Whisk until it’s a smooth, homogenous, beautiful pale yellow liquid.
Step 4: The Grand (Gentle) Union. Here’s the most important tip for fluffy results: DO NOT OVERMIX. Pour the wet ingredients into the dry ingredients. Using a spatula or wooden spoon, gently fold them together. It’s okay if there are a few lumps and streaks of flour! The moment the last dry patch disappears, STOP STIRRING. Overmixing develops the gluten in the flour, leading to tough, dense bites. We want tender, cloud-like bites. Embrace the lump!
Step 5: Fill ‘Er Up! Using a small cookie scoop, a tablespoon, or even a piping bag for less mess, divide the batter among the prepared muffin cups. Fill them about ¾ of the way full. They need a little room to puff up and create their perfect muffin-top shape.
Step 6: Add Your Personality. If you’re using add-ins like berries or chocolate chips, now’s the time. I like to drop a few pieces into each cup and gently press them in. This method ensures every bite gets a good mix of goodies. You can also fold them into the batter before portioning, but I find the “press-in” method gives you more control.
Step 7: Bake to Golden Perfection. Slide the tin into your preheated oven. Bake for 10-12 minutes. You’re looking for beautifully golden tops and a toothpick inserted into the center of a middle muffin bite coming out clean (unless you hit a melted chocolate chip, of course!). They’ll feel springy to the touch.
Step 8: The Cool Down. Let the pancake bites cool in the tin for about 5 minutes. This allows them to set and makes them much easier to remove. Then, run a small offset spatula or butter knife around the edges and pop them out onto a wire rack to cool completely if you’re storing them. If you’re serving immediately, well, just try not to eat them all straight from the pan!
How to Serve & Devour
The beauty of these bites is in their versatility! Here’s how I love to serve them up:
The Classic Stack: Pile 5-6 bites on a plate, drizzle with warm maple syrup, and add a pat of butter. Instant pancake stack, zero flipping!
The Dipping Platter: This is a HUGE hit with kids (and adults who are kids at heart). Arrange the bites on a platter with little bowls of dipping sauces: warm maple syrup, strawberry jam, whipped cream, or even a nutella-yogurt blend. It’s interactive, fun, and lets everyone customize.
On-the-Go Power-Up: Toss a handful into a reusable container or a small baggie. They’re the perfect, mess-free breakfast for the car, the stroller, or your desk.
Fancy Brunch Upgrade: Skewer 2-3 bites on small cocktail sticks or skewers. Alternate with fresh berries and dust the whole platter with a flurry of powdered sugar. It looks impressive and is so easy!
Pair them with a side of crispy bacon, scrambled eggs, or a fresh fruit salad for a complete, satisfying breakfast that makes you feel like a superhero.
Get Creative! 5 Fun Twists to Try
Once you’ve mastered the base recipe, the flavor world is your oyster! Here are a few of my favorite spins:
- Lemon Blueberry Bliss: Add the zest of one lemon to the wet ingredients and use blueberries as your add-in. The bright lemon is a game-changer with the sweet berries.
- Chocolate Banana “Muffin” Bites: Add 1 mashed ripe banana to the wet ingredients and use mini chocolate chips. They taste like the love child of a pancake and a banana muffin!
- Apple Cinnamon Spice: Fold in ¾ cup of finely diced apple (peeled) and 1 teaspoon of ground cinnamon into the dry ingredients. A dash of nutmeg is fabulous here too.
- Savory Cheddar & Chive: Omit the sugar and vanilla. Fold in ¾ cup of shredded sharp cheddar cheese and 2 tablespoons of finely chopped fresh chives. Amazing with a dollop of sour cream.
- Funfetti Birthday Cake: For a treat, fold in ¼ cup of rainbow sprinkles! Serve with a simple vanilla glaze (powdered sugar + milk + vanilla) for a birthday morning surprise.
Emily’s Kitchen Confidential
This recipe has become a staple in my own freezer, and it’s evolved in the best way. I used to be so precise about mixing in the add-ins, but one sleepy morning, I just dumped a handful of leftover chocolate chips and diced strawberries into the batter and gave it one haphazard stir. The result? Marbled, colorful bites where every one was a slightly different, delicious surprise. It was a happy accident that reminded me not to stress perfection.
My biggest tip? Double the batch. Seriously. The effort to make two trays is barely more than one, and having a gallon bag full of these in your freezer is like having a breakfast insurance policy. I’ve been known to pack them in my lunchbox for a sweet afternoon pick-me-up, too. They’ve been lifesavers on road trips, early morning meetings, and those days when you just need a warm, comforting bite without any fuss.
Your Questions, Answered!
Q: Can I make these in a regular muffin tin?
A: Absolutely! Use a standard 12-cup muffin tin. Fill the cups halfway and increase the baking time to 15-18 minutes. They’ll be bigger, more like muffin-top pancakes, and just as delicious.
Q: My pancake bites are dense, not fluffy. What happened?
A: The #1 culprit is overmixing the batter. Remember, lumps are your friend! The second most common issue is old or inactive baking powder/soda. Test your baking powder by dropping ½ tsp into hot water—it should fizz vigorously. If not, it’s time for a new can.
Q: What’s the best way to freeze and reheat them?
A: Let the bites cool completely. Place them in a single layer on a baking sheet and “flash freeze” for 1 hour. Then, transfer them to a freezer bag or airtight container. This prevents them from sticking together. To reheat: from frozen, microwave for 30-60 seconds, or pop them in a toaster oven/regular oven at 350°F for 5-8 minutes until warm.
Q: Can I make the batter ahead of time?
A: I don’t recommend it. The baking powder starts working as soon as it gets wet, so letting the batter sit will result in less-rise-y bites. The power of this recipe is in the make-ahead baked product, not the batter.
A Quick Nutritional Glance
While these are a treat, it’s helpful to know what you’re enjoying! The following information is an estimate for 3 plain pancake bites (without add-ins), calculated using 2% milk and butter. Remember, ingredients and add-ins will alter the values.
- Calories: ~150
- Total Fat: 6g
- Saturated Fat: 3.5g
- Cholesterol: 55mg
- Sodium: 220mg
- Total Carbohydrates: 20g
- Dietary Fiber: 0.5g
- Sugars: 5g
- Protein: 3g
Prep Time: 10 minutes | Bake Time: 12 minutes | Total Time: 22 minutes | Servings: About 24 mini bites
Final Thoughts & Happy Baking!
And there you have it, my friend—your new secret weapon for happy, hassle-free mornings. These Mini Pancake Bites are more than just a recipe; they’re a little packet of warmth, convenience, and homemade love. They prove that you don’t need hours to create something special for yourself and your people.