The Magic of Mini Pavlovas: Crispy Clouds of Sweet & Tangy Joy
Hey there, friend! Pull up a stool and let’s talk about one of my all-time favorite desserts to make—and more importantly, to eat. If you’ve ever walked past a gorgeous, berry-topped pavlova in a bakery case and thought, “That’s way too fancy for me to make,” I’m here to tell you: you’ve got this. And I’m going to show you exactly how.
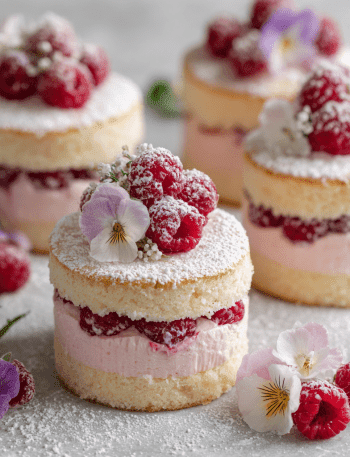
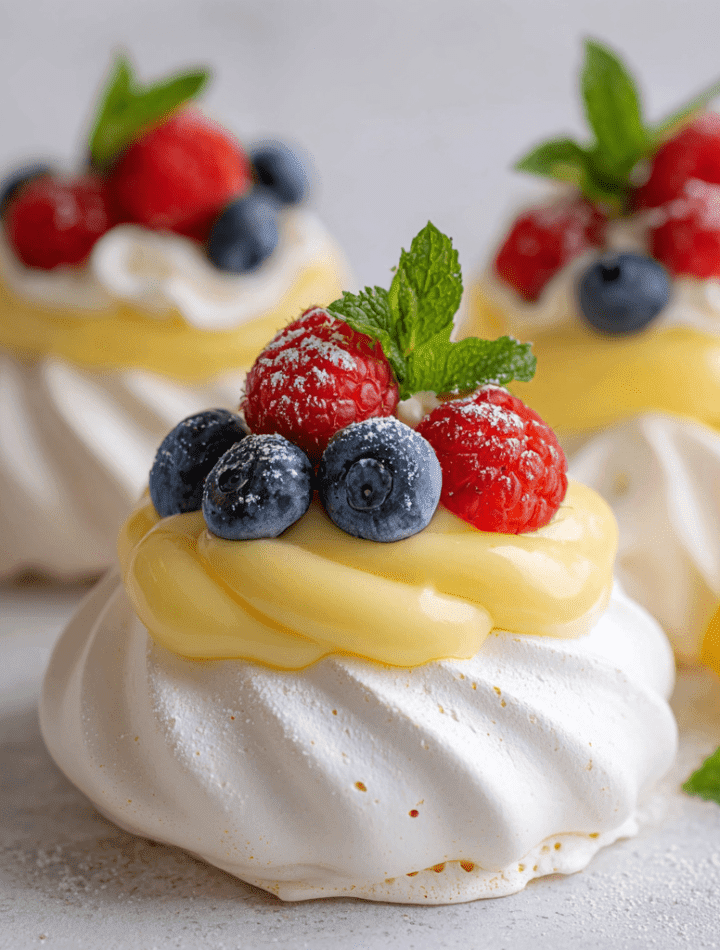
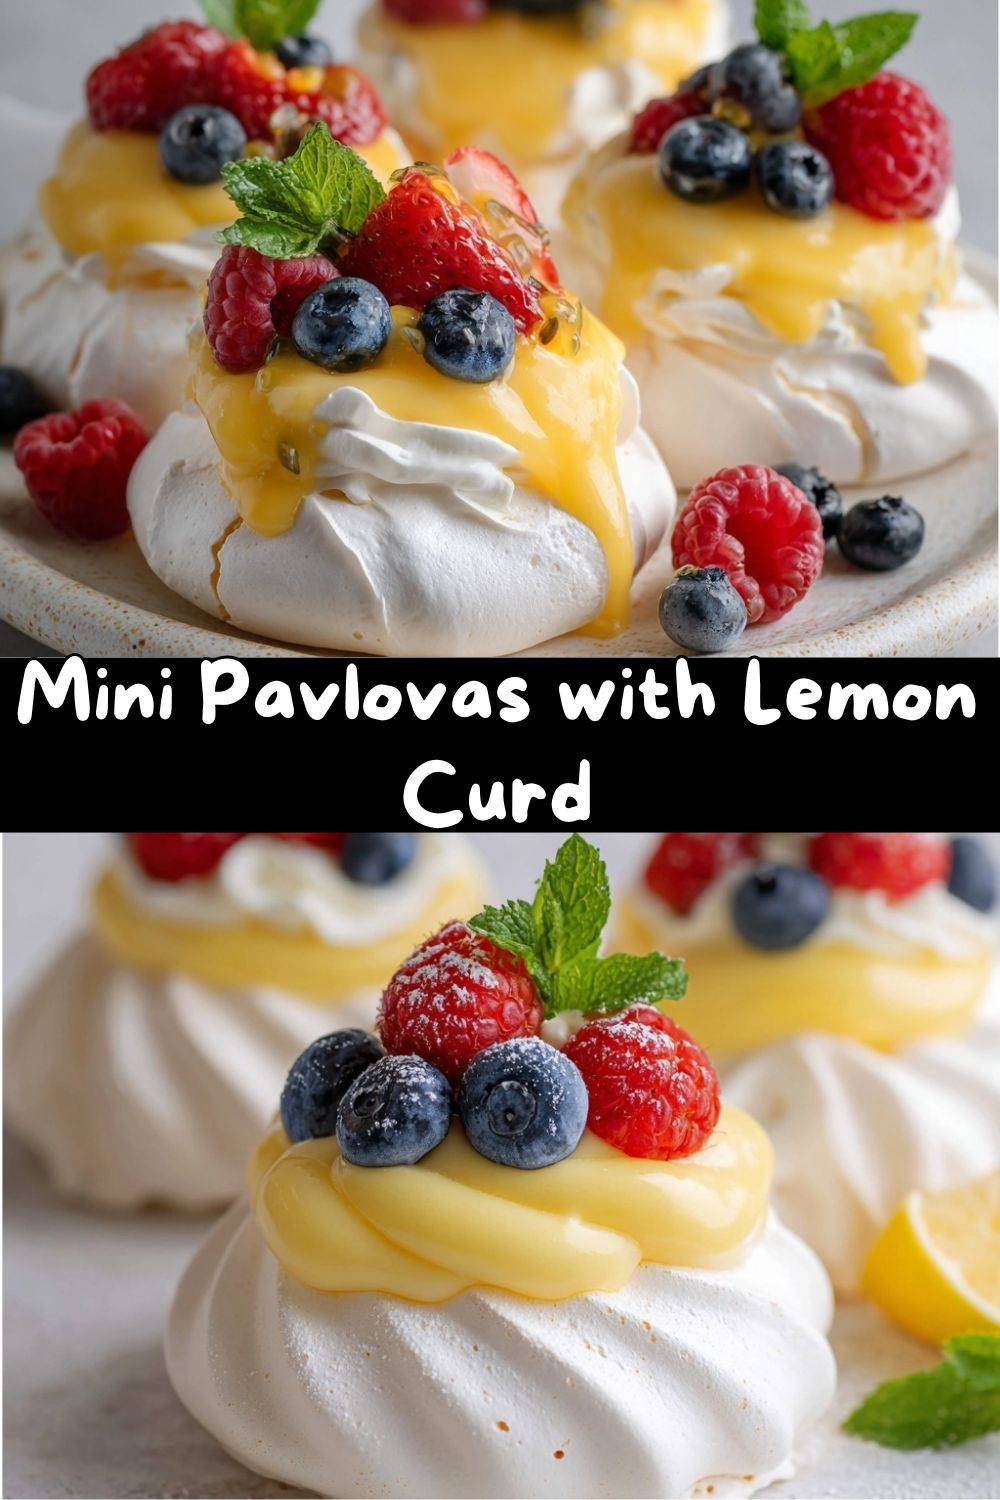
Today, we’re making Mini Pavlovas with Lemon Curd. Imagine this: a crisp, shatteringly delicate meringue shell that gives way to a soft, marshmallow-like center. Now, fill that little edible bowl with a punchy, sunshine-bright lemon curd that’s so silky it feels like luxury on a spoon. Top it all off with a handful of juicy, fresh berries that burst with every bite. It’s a symphony of textures and flavors—sweet, tangy, crisp, creamy, and utterly divine.
These minis are my go-to for spring gatherings, Easter brunch, Mother’s Day, or just a Tuesday that needs a little sparkle. They look like you spent all day in a professional pastry kitchen, but the secret? They’re surprisingly simple, deeply forgiving, and an absolute joy to create. So, tie on your favorite apron (the messy one tells the best stories), and let’s turn some basic eggs and sugar into edible magic.
My Grandma’s (Failed) Meringue & The Lesson It Taught Me
My love affair with meringue didn’t start with a perfect pavlova. Oh no. It started with my Grandma Betty’s legendary lemon meringue pie… and the time we completely, hilariously botched the meringue topping. I was about ten, standing on a step-stool, determined to help. We beat those egg whites, we added the sugar, but we got impatient. We piled it onto the pie and into the oven it went. What emerged was a beautiful, golden-brown… puddle. A weeping, soupy mess that slid right off the pie.
Grandma just laughed, scooped a spoonful of the lemony, meringue-swirled filling into a bowl, handed it to me, and said, “Honey, sometimes the kitchen humbles you. But it always feeds you.” We ate our “deconstructed” dessert with glee. That day, I learned that perfection is overrated, but flavor is forever. It also ignited a curiosity in me: what makes meringue behave? This recipe is the happy, confident answer to that childhood question. Every time I bake a pavlova, I think of her, and I know that even the “failures” are delicious.
Gathering Your Sunshine: Ingredients & Why They Matter
Great desserts start with great ingredients, and understanding the “why” behind them makes you a more confident cook. Here’s what you’ll need for our mini edible clouds.
For the Pavlovas (The Crispy, Chewy Clouds):
- 4 large egg whites, room temperature: This is non-negotiable! Room temp whites whip up higher and firmer than cold ones. Chef’s Tip: Separate your eggs when they’re cold (it’s easier), then let the whites sit on the counter for 30 minutes. No trace of yolk allowed!
- 1 cup granulated sugar: Superfine or caster sugar is fantastic if you have it (it dissolves faster), but regular granulated works perfectly. We’ll add it slowly to ensure a glossy, stable meringue.
- 1 teaspoon cornstarch: Our secret weapon! It stabilizes the meringue from the inside, giving the pavlova its signature soft, marshmallow center and helping prevent cracks and weeping.
- 1 teaspoon white vinegar: Another stabilizer. It reacts with the sugar and egg whites, creating a crisp shell and a chewy interior. Don’t worry, you won’t taste it.
- 1 teaspoon pure vanilla extract: For a whisper of warm flavor. For a truly classic pavlova, you can omit it, but I love the depth it adds.
For the Filling & Topping (The Tangy, Juicy Heart):
- 1 cup lemon curd: You can absolutely use a high-quality store-bought jar for convenience (I do it all the time!). But if you’re feeling adventurous, my homemade lemon curd recipe is easier than you think and tastes like pure sunshine.
- 1 cup fresh berries: I use a mix of blueberries, raspberries, and sliced strawberries for a gorgeous color pop. Use whatever is in season and looks best at the market!
- Optional: whipped cream, mint leaves: A dollop of lightly sweetened whipped cream adds extra luxury, and a mint leaf makes it look professionally styled.
Step-by-Step: Building Your Edible Masterpiece
Ready? Let’s transform these simple ingredients. Read through all the steps first, then move with confidence. You’re the boss of this meringue!
- Prep Your Stage. Preheat your oven to 250°F (120°C). This low-and-slow heat is KEY for drying out the meringue without browning it. Line a large baking sheet with parchment paper. Chef’s Hack: Dab a little meringue under each corner of the parchment to glue it to the pan so it doesn’t slide around when you’re piping.
- Whip It Real Good. In the bowl of a stand mixer fitted with the spotlessly clean whisk attachment (or using a large bowl and electric hand beaters), beat the room-temperature egg whites on medium speed until soft peaks form. This means when you lift the whisk, the peaks curl over softly. Pro Tip: A pinch of cream of tartar added at this stage can add extra stability, but it’s optional with our other stabilizers.
- The Sugar Shower. Now, with the mixer running on medium-high, add the sugar one tablespoon at a time, letting each incorporate fully before adding the next. This patience is what gives you a thick, glossy, stiff meringue that holds its shape. Once all the sugar is in, keep beating for 4-5 minutes until the meringue is very stiff, glossy, and the sugar is completely dissolved. Rub a bit between your fingers—it should feel smooth, not gritty.
- The Gentle Fold. Sprinkle the cornstarch over the meringue. Add the vinegar and vanilla. Now, using a flexible spatula, gently fold everything together until just combined. Be gentle to keep all that precious air in the meringue.
- Shape Your Clouds. Here’s the fun part! You can spoon the meringue onto the parchment in 6-8 mounds, or for more uniform cuties, pipe them using a large round tip. Either way, use the back of a spoon to create a well in the center of each mound—this is where our luscious lemon curd will live later. They will spread a little, so leave about 2 inches between them.
- The Long, Slow Bake. Place the baking sheet in the center of your preheated oven and bake for 60-70 minutes. They are done when the outsides are dry to the touch and sound hollow if you tap the bottom (carefully!). They should be a pale, creamy white, not browned. DO NOT OPEN THE OVEN DOOR during baking. Sudden temperature drops are a pavlova’s worst enemy.
- The Patient Cool. This is critical! When baking time is up, turn off the oven. Crack the oven door open with a wooden spoon handle and let the pavlovas cool completely inside the oven, for at least 1 hour (or even overnight). This gradual cooling prevents cracking and shrinking.
- Fill & Celebrate! Once completely cool, carefully peel them off the parchment. Just before serving, fill the wells with a generous spoonful of lemon curd, top with berries and a dollop of whipped cream if using. The meringue shells will stay crisp for several hours once filled, but they’re best enjoyed the same day.
How to Serve These Stunning Minis
Presentation is part of the fun! I love arranging these mini pavlovas on a large wooden board or a beautiful vintage platter. Scatter a few extra berries and mint leaves around them for a lush, garden-fresh look. For individual servings, place each one on a small salad or dessert plate—it makes everyone feel special.
The beauty of these is that you serve them assembled. Have all your components ready (cooled shells, curd, berries, cream) and put them together right before you bring them to the table. That way, the meringue stays crisp, the berries stay perky, and you get all the glorious, contrasting textures in every single bite. They’re perfect with a cup of afternoon tea or as the grand, glittering finale to a dinner party.
Mix It Up! Creative Pavlova Twists
Once you master the basic mini pavlova, a world of flavor combinations opens up! Here are a few of my favorite twists:
- Berry Bliss: Swap the lemon curd for a homemade raspberry or passionfruit curd. The vibrant pink or yellow is stunning.
- Tropical Escape: Fill with coconut cream or a mango puree. Top with toasted coconut flakes, diced mango, and a slice of kiwi.
- Chocolate Indulgence: Fold 2 tablespoons of sifted cocoa powder into the meringue with the cornstarch. Fill with a dark chocolate ganache and top with fresh raspberries and a sprinkle of sea salt.
- Boozy Berry: Lightly toss the berries in a tablespoon of Chambord (raspberry liqueur) or Grand Marnier before topping.
- Dairy-Free/Vegan Option: Use aquafaba (the liquid from a can of chickpeas) instead of egg whites! Substitute 1/2 cup of aquafaba for the 4 egg whites and follow the same method. Fill with a dairy-free coconut whipped cream and berries.
Chef Emily’s Kitchen Notes
This recipe has evolved in my kitchen from a “special occasion only” treat to a “sunny Sunday afternoon” kind of project. I’ve learned that humid days can make meringues a bit softer, so if it’s really muggy, I’ll bake them for an extra 10 minutes. I’ve also been known to bake the shells a day ahead, let them cool in the oven overnight, and store them in an airtight container at room temperature. It makes day-of entertaining a breeze!
The biggest lesson? Don’t fear the cracks. A few little fissures in your pavlovas add character and show they’re homemade with love. They still taste incredible. My Grandma Betty’s “failed” meringue taught me that the joy is in the making and the sharing, not just in a picture-perfect result.
FAQs & Your Pavlova Questions, Answered
Q: My meringue is weeping (beads of syrup on the surface). What happened?
A: This usually means the sugar didn’t fully dissolve into the egg whites. Next time, make sure to add the sugar very slowly and beat until the meringue is completely smooth and glossy between your fingers. The cornstarch and vinegar also help prevent weeping!
Q: Can I make these ahead of time?
A: Absolutely! The unfilled meringue shells can be baked, cooled, and stored in an airtight container at room temperature for 2-3 days. Always fill them just before serving to keep that perfect crisp texture.
Q: Why did my pavlovas crack a lot or collapse?
A: Sudden temperature changes are the usual culprit. Avoid opening the oven door during baking, and always let them cool slowly in the turned-off oven. Also, ensure your meringue is at stiff peaks before shaping—it should hold its shape firmly.
Q: Can I use frozen berries?
A: For the topping, fresh is best as frozen berries will release a lot of juice and make the meringue soggy. However, frozen berries are excellent for making a puree or coulis to drizzle around the plate!
A Quick Note on Nutrition
While dessert is always about joy first, here’s a general nutritional breakdown per mini pavlova (based on 8 servings, including lemon curd and berries). Remember, these are estimates and can vary based on specific ingredients used, especially the type of lemon curd.
- Calories: ~160
- Total Fat: 4g
- Carbohydrates: 26g
- Sugars: 23g
- Protein: 2g
Pavlovas are naturally gluten-free, and the fat content primarily comes from the egg yolks in the lemon curd. Using a lighter store-bought curd or reducing the sugar in a homemade version can adjust these numbers. But as always, I’m a firm believer in enjoying real, beautiful food in celebration.
Your Turn to Create Magic
And there you have it, my friend! Everything I know about creating these gorgeous, crisp, airy, and tangy little bites of heaven. I hope this recipe demystifies the pavlova and fills your kitchen with confidence (and the amazing scent of baking meringue).
Remember, cooking is an adventure. If your first shell isn’t picture-perfect, it will still be delicious. That’s a promise. Share it with someone you love, laugh about the lopsided one (that’s always the chef’s treat anyway), and know that you’ve created something truly special from the simplest of ingredients.
I’d love to hear how your mini pavlovas turn out! Tag me on Instagram @TastyChow so I can see your beautiful creations. Now, go preheat that oven and whip up some joy. Happy baking!
— Emily 🧡