Mini Protein Cheesecakes: Your New Favorite Guilt-Free Indulgence
Hey there, fellow food lovers! If you’re anything like me, you adore desserts that make you feel like you’re indulging while keeping things light and nutritious. Well, buckle up, because today, we’re diving into a delicious recipe for Mini Protein Cheesecakes that are sure to make your taste buds sing and satisfy your sweet tooth without the guilt!
Picture this: it’s a cozy Saturday afternoon, you’re lounging around, and the thought of sweet, creamy cheesecake starts to float through your mind. But wait! You want something that won’t derail your health goals, right? Enter the world of mini cheesecakes packed with protein! These bite-sized delights strikingly blend flavor and nutrition, making them the perfect choice for a snack, a light dessert, or even to impress your friends at your next get-together.
If you’ve ever been overwhelmed by the thought of making a cheesecake from scratch, fear not. These mini gems are not only simpler to whip up than traditional cheesecakes, but they also allow you to customize flavors and toppings to your liking. And let me tell you, the joy of treating yourself to a creamy, decadent cheesecake while knowing it’s protein-packed and with fewer calories is simply unmatched.
Throughout this blog post, I’ll guide you through every step of making these mini treats, share some personal memories that will get your creative juices flowing, and arm you with plenty of tips to ensure that your cheesecakes turn out perfect every time. So gather your ingredients, roll up your sleeves, and let’s dive into the delicious world of Mini Protein Cheesecakes!
Personal Story
Let me take you back in time to my childhood—a time when the kitchen was my playground and my grandma was my favorite teacher. I still remember weekends at her house, the dynamic aroma of baked goods wafting through the air like a heavenly perfume. One of my favorite memories is helping her make classic cheesecake for family gatherings. I would mix the ingredients, sneaking spoonfuls of the creamy batter while her laughter echoed around the room.
Grandma had this magical ability to make everything feel special, and she always insisted that desserts should be both delicious and nourishing. Fast forward to today, and those cherished moments inspired me to create my own recipes that maintain that spirit. With the rise of health consciousness, I wanted to recreate the joy of eating cheesecake without the hefty calorie count. That’s when I came up with these Mini Protein Cheesecakes! They’re not just a treat; they’re a celebration of those sweet Saturday afternoons filled with love.
Ingredients
Let’s gather our ingredients! Here’s what you’ll need for these delightful Mini Protein Cheesecakes, along with some chef insights on each:
-
Cream Cheese (8 oz)
Rich and creamy, this is the base of your cheesecake. Opt for reduced-fat cream cheese for fewer calories without sacrificing taste. -
Greek Yogurt (1 cup)
This adds creaminess and is a fantastic source of protein! You can use plain or flavored Greek yogurt based on your desired taste. For dairy-free options, try cashew or coconut yogurt. -
Protein Powder (1 scoop)
Adds a healthy protein punch! Choose your favorite flavor—vanilla works well for a classic cheesecake vibe. -
Honey or Maple Syrup (1/4 cup)
This natural sweetener helps to keep things guilt-free. Substitute with agave syrup or stevia for a lower-calorie option if you prefer. -
Vanilla Extract (1 tsp)
Adds warmth and depth to the flavor. Pure vanilla extract is always my go-to, but if you’re in a pinch, the imitation version works fine too. -
Eggs (2 large)
These help bind your cheesecake and give it that perfect creamy texture. If you’re looking to go egg-free, unsweetened applesauce (1/4 cup) can work as a substitute. -
Graham Crackers (for crust)
Crushed graham crackers give a classic cheesecake base. You can use whole wheat for a healthier twist or gluten-free crackers for dietary needs. -
Butter (2 tbsp)
Melted butter adds richness and helps hold the crust together. Coconut oil is a delightful and healthier substitute if you want to go dairy-free! -
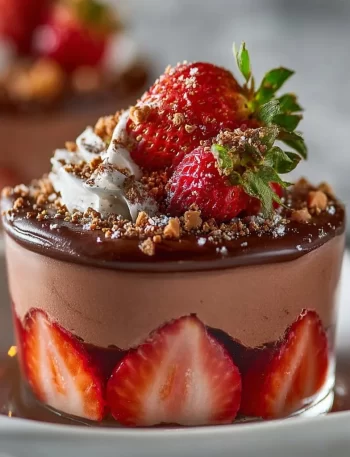
Fruit or Chocolate Toppings (optional)
Fresh berries, chocolate sauce, or a sprinkle of nuts create a lovely finishing touch and colorful presentation!
Step-by-Step Instructions
Alright, my culinary friends, let’s roll up our sleeves and create these mini masterpieces! Follow along with these simple steps, and I promise you’ll be amazed at how easy it is!
Step 1: Preheat Your Oven
Start by preheating your oven to 325°F (160°C). This ensures your cheesecakes bake evenly and come out just right. I like to preheat at least 10-15 minutes ahead of time—you can even pop in a ready-to-go pie crust to warm up.
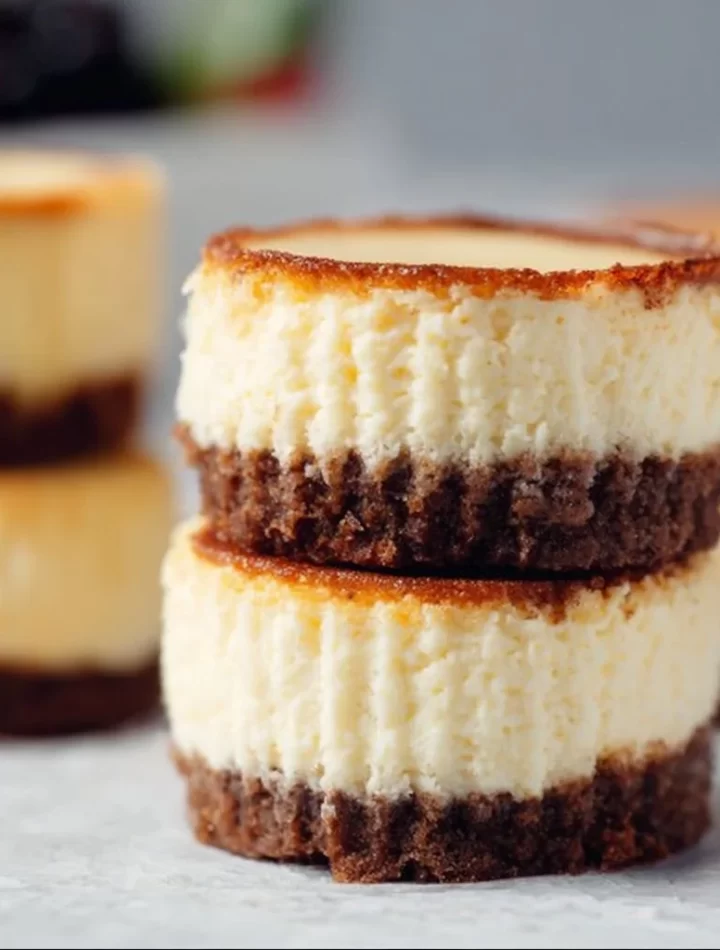
Step 2: Prepare the Mini Cheesecake Crust
In a mixing bowl, combine your crushed graham crackers with melted butter. Use a fork to mix until the texture resembles wet sand. Here’s a little chef hack: if you like a thicker crust, just add more cracker crumbs or adjust the butter to your liking.
Next, line a muffin tin with cupcake liners (or grease it lightly if you prefer). Press the graham cracker mixture evenly into the bottom of each liner, ensuring it’s tightly compacted. This makes all the difference when it comes to slicing and serving!
Step 3: Mix the Cheesecake Filling
In another bowl, mix the cream cheese and Greek yogurt until smooth—use an electric mixer for the best results. Add the protein powder and honey (or maple syrup), and continue mixing until creamy and deliciously combined. Pro tip: scrapping down the sides ensures all ingredients are well incorporated!
Next, blend in the eggs one at a time, then stir in the vanilla extract. The filling should be velvety and delicious—feel free to sneak a taste (I won’t tell!).
Step 4: Assemble and Bake
Spoon the cheesecake mixture over the prepared crusts, filling each one about 2/3 full. This way they won’t overflow while baking. Place the muffin tin in the preheated oven and bake for about 20–25 minutes, until the centers are set but still a bit jiggly. Remember, they’ll firm up as they cool!
Step 5: Cool and Chill
Once out of the oven, let your cheesecakes cool in the tin for about 10 minutes before transferring to a wire rack. After cooling, pop them into the fridge for at least 2 hours, but for the best results, leave them chill overnight. Trust me; they’ll taste that much better!
Step 6: Serve and Enjoy
When you’re ready to enjoy these treats, top with your favorite fruit or a drizzle of chocolate sauce. The bright colors of berries or the lovely sheen of melted chocolate transform your mini cheesecakes into a showstopper.
And there you have it—mini protein cheesecakes to die for!
Serving Suggestions
When it comes to serving your mini cheesecakes, presentation is key! Here are a few suggestions to make them pop:
-
Plate Them Up: Arrange them on a beautiful serving platter. You can create a mini dessert tower or a cheeky row of cheesecakes—options are endless.
-
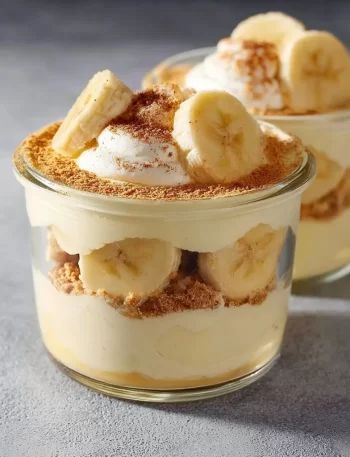
Mix and Match Toppings: Use a variety of fresh fruits: strawberries, blueberries, or even caramelized bananas for a twist! A small dollop of whipped cream or Greek yogurt on top adds a fabulous touch too.
-
Add a Drizzle: Take things up a notch with a drizzle of chocolate sauce or a sprinkle of shredded coconut for a tropical vibe. It’s all about making these little bites Instagram-ready!
Recipe Variations
Feeling adventurous? Here are four scrumptious variations to give your mini cheesecakes some flair:
-
Chocolate Chip Cookie Cheesecake: Fold in mini chocolate chips into the batter for extra sweetness and texture.
-
Pumpkin Spice Pleasure: Swap out half of the yogurt for pumpkin puree and add spices like cinnamon and nutmeg for a delightful fall treat.
-
Lemon Zest Delight: Mix in the zest of one lemon and a tablespoon of lemon juice for a refreshing citrus twist.
-
Matcha Green Tea Bliss: Add a teaspoon of matcha powder for a vibrant green color and a unique earthy flavor to your cheesecake.
-
Peanut Butter Swirl: Mix in some creamy peanut butter for nutty richness. Swirl a little more on top before baking for an eye-catching design!
Chef’s Notes
As a chef, I encounter my fair share of culinary epiphanies—and these mini protein cheesecakes have been no exception! I once had a mini pity party after my first batch cracked while baking. They tasted amazing but looked like a hot mess. But that led me to learn about cooling techniques, and now my cheesecakes come out perfectly fluffy, not to mention beautiful!
Over the years, this recipe has evolved to incorporate healthier ingredients while keeping the same scrumptious taste that makes cheesecakes so delightful. So don’t worry if things don’t come out perfect on the first try—embrace the messiness and have fun!
FAQs and Troubleshooting
1. Why did my cheesecakes sink in the middle?
This can happen if they were overbaked. Keep an eye on them towards the end and remember they will continue to set as they cool!
2. Can I use flavored protein powder?
Absolutely! Flavored protein powders can enhance your mini cheesecakes even further—just be sure to adjust sweetness to your liking.
3. How do I store leftovers?
Store any leftovers in an airtight container in the fridge. They’ll stay fresh for up to five days—though I doubt they’ll last that long!
4. Can I freeze these mini cheesecakes?
Yes! Wrap them tightly in plastic wrap and place them in a freezer-safe container. Thaw in the fridge before serving.
Nutritional Info
One mini protein cheesecake (based on a standard recipe) contains approximately:
- Calories: 120
- Protein: 8g
- Carbohydrates: 14g
- Fat: 5g
- Fiber: 1g
This varies depending on ingredient choices, but overall, we’re packing a lot of flavor into a mini package!
Final Thoughts
Creating these Mini Protein Cheesecakes is not only an enjoyable cooking experience but a wonderful way to connect with the essential comfort of food—and what’s more comforting than cheesecake? By making them mini, you end up with delightful little bites that are perfect for every occasion.
Whether you’re treating yourself after a long day, prepping for a gathering, or making some self-care treats for meal prep, these cheesecakes are versatile and always a hit. I hope you feel inspired to take on this recipe and even make it your own!
So what are you waiting for? Grab your ingredients, whisk away your worries, and let’s dive into the delicious world of Mini Protein Cheesecakes—perfectly guilt-free and irresistibly divine. Let’s make something delicious together! Happy baking!
Print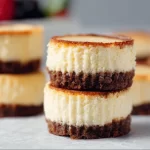
Mini Protein Cheesecakes
- Total Time: 40 minutes
- Yield: 12 servings 1x
- Diet: High Protein
Description
Delicious mini cheesecakes packed with protein, perfect for a guilt-free indulgence.
Ingredients
- 8 oz Cream Cheese
- 1 cup Greek Yogurt
- 1 scoop Protein Powder
- 1/4 cup Honey or Maple Syrup
- 1 tsp Vanilla Extract
- 2 large Eggs
- Graham Crackers (for crust)
- 2 tbsp Butter
- Fruit or Chocolate Toppings (optional)
Instructions
- Preheat your oven to 325°F (160°C).
- In a mixing bowl, combine crushed graham crackers with melted butter. Press mixture into the bottom of muffin tin lined with cupcake liners.
- In another bowl, mix cream cheese and Greek yogurt until smooth. Add protein powder and sweetener, mixing until combined. Mix in eggs one at a time, then stir in vanilla extract.
- Spoon the cheesecake mixture over the crusts, filling each about 2/3 full. Bake for 20-25 minutes or until set but slightly jiggly.
- Cool in the tin for 10 minutes, then transfer to a wire rack and chill in the refrigerator for at least 2 hours.
- Top with your favorite fruit or chocolate sauce before serving.
Notes
For a thicker crust, adjust the amount of graham crackers and butter. Always let the cheesecakes cool completely for best results.
- Prep Time: 15 minutes
- Cook Time: 25 minutes
- Category: Dessert
- Method: Baking
- Cuisine: American
Nutrition
- Serving Size: 1 cheesecake
- Calories: 120
- Sugar: 8g
- Sodium: 150mg
- Fat: 5g
- Saturated Fat: 3g
- Unsaturated Fat: 1g
- Trans Fat: 0g
- Carbohydrates: 14g
- Fiber: 1g
- Protein: 8g
- Cholesterol: 30mg
Keywords: cheesecake, dessert, protein, healthy dessert, mini cheesecakes