Easy No-Knead Bread Recipe – Perfect Rolls or Loaf Every Time
Hey there, friend! Let’s talk about one of life’s simplest, most magical pleasures: the smell of fresh-baked bread wafting through your kitchen. That warm, yeasty, heavenly scent that makes your house feel like a home. If you’ve ever thought, “I could never make bread,” or been intimidated by complicated recipes, I’m here to tell you something important: you absolutely can.
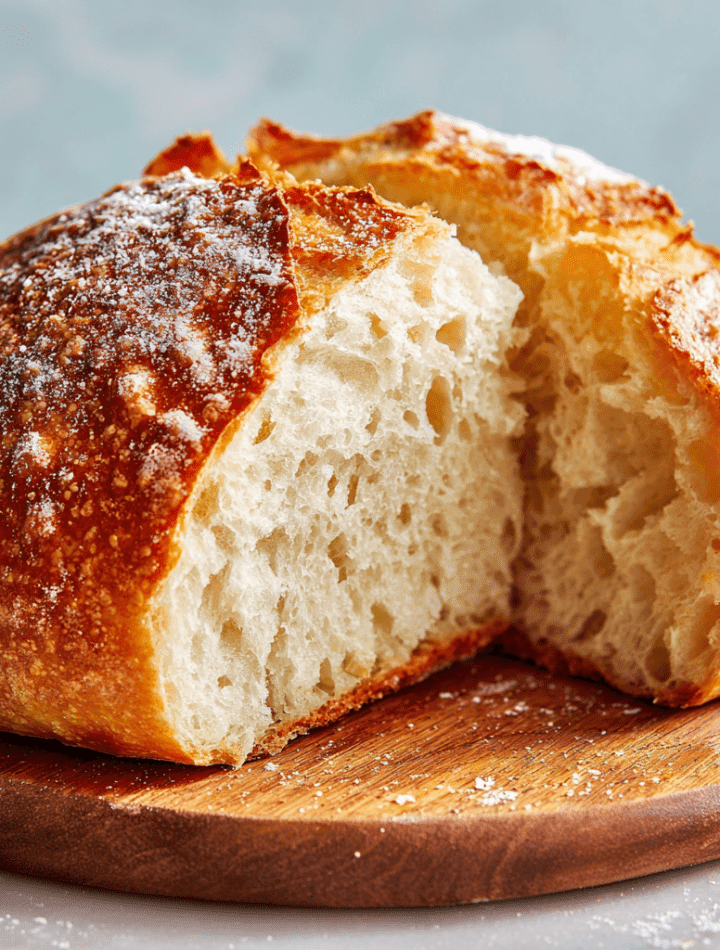
This isn’t just any bread recipe. This is the one. The one I’ve shared with countless friends, the one my readers email me about weekly, the one that turns bread-baking skeptics into full-on flour-dusted enthusiasts. It’s a soft, fluffy, and incredibly forgiving no-knead bread that you can shape into a gorgeous golden loaf or a batch of perfect, pull-apart dinner rolls. It’s the kind of recipe that becomes a part of your family’s story, the bread you’ll make for Sunday dinners, holiday gatherings, and just because Tuesdays deserve a little extra love, too.
So, tie on your apron (the messy one is always the best), and let’s make some kitchen magic together. I promise, this is going to be fun.

The Bread That Started It All
This recipe always takes me back to my grandma’s kitchen. She wasn’t a fancy chef—she was a master of comfort. Her hands, dusted with flour, moved with a quiet confidence I so admired. She never measured with cups or spoons; it was a “glug” of oil, a “pinch” of salt, and she’d judge the yeast by the bubbles it made in a glass of warm water.
I remember one chilly afternoon, I was about ten, and she let me “help” her make the rolls for supper. My job was to gently punch down the risen dough. I was so nervous! But she just smiled, her eyes crinkling at the corners, and said, “Don’t be shy, Emily. The dough can feel it. Just give it a friendly poke.” That simple act—punching down that soft, pillowy mass—felt like a secret initiation into a sacred club. When those rolls came out of the oven, golden and steaming, and I slathered one with butter, I knew. This was more than food. This was love, patience, and a little bit of kitchen alchemy. This recipe is my homage to her, a measured-out version of her intuitive art, designed for all of us to share that same feeling.
Gather Your Simple Ingredients
One of the best things about this bread is its beautiful simplicity. You likely have everything you need in your pantry right now! Here’s your shopping list, along with a few of my chef-y insights to help you understand the “why” behind each ingredient.
- 1 ½ teaspoons instant yeast: This is our little engine of joy! Instant yeast (sometimes called rapid-rise) is a superstar because you can mix it right in with the dry ingredients—no proofing required. If you only have active dry yeast, that’s okay! Just activate it in the warm water with the sugar for 5-10 minutes until it’s foamy before adding the flour.
- 2 tablespoons sugar: Don’t worry, your bread won’t taste sweet! The sugar is here as a quick snack for the yeast, helping it get bubbly and active. It also contributes to that beautiful golden-brown crust. You can swap it for honey or maple syrup for a subtle flavor twist.
- 1 cup all-purpose flour (for the sponge): We start by making a “sponge.” This initial mixture of yeast, water, sugar, and flour gives the yeast a head start, developing a deeper flavor and ensuring a light, airy crumb.
- ¾ cup warm water: The temperature is key here! You want it warm to the touch, like a pleasant bath, not hot. Too hot, and you’ll send our yeast friends to an early demise. Aim for around 105-115°F (40-46°C).
- 2 tablespoons oil: This adds tenderness and moisture to the crumb. I typically use a neutral oil like avocado or canola, but olive oil will give you a slightly more rustic, flavorful bread that’s fantastic for dipping.
- 1 egg: The egg is our secret weapon for a rich, soft texture and a gorgeous, golden-brown top. It adds structure and a lovely tenderness that makes this bread irresistible.
- ½ teaspoon salt: Salt is crucial for flavor! It balances the yeast and sugar. Never add it directly on top of the yeast in the beginning, as it can hinder growth. Mixing it in with the second round of flour is perfect.
- 1 ½ cups all-purpose flour (additional): This is the remaining flour that brings our dough together. The exact amount can vary slightly depending on humidity, so I’ll guide you on the texture to look for.
Let’s Make Some Bread! (Step-by-Step)
Ready? Let’s do this. I’ll walk you through every step, sharing all my favorite tips and hacks along the way. Read through once, then just go for it—you’ve got this!
- Create the “Sponge”: In a large mixing bowl, combine the instant yeast, sugar, that first 1 cup of flour, and the warm water. Give it a good stir with a wooden spoon or a Danish dough whisk (my personal favorite tool!) until it’s a thick, sticky batter. Now, walk away. Let it sit for 5 to 10 minutes. You’ll come back to a bubbly, frothy, alive mixture. This is the sound of success! Chef’s Tip: If your mixture doesn’t get bubbly after 10-15 minutes, your yeast might be old or your water was too hot/cold. It’s okay to start over—it happens to the best of us!
- Bring the Dough Together: To your bubbly sponge, add the oil, egg, salt, and the remaining 1 ½ cups of flour. Now, get your hands in there (or use the dough hook on a stand mixer on low speed) and mix for a full 3 minutes. The dough will be soft and a bit sticky—this is exactly what we want! A sticky dough often leads to a softer, lighter bread. Don’t be tempted to add a ton of extra flour. Chef’s Hack: Lightly oil or wet your hands to prevent the dough from sticking to you like glue.
- The First Rise (Let it Nap!): Scrape down the sides of the bowl, cover the bowl tightly with plastic wrap or a clean, damp kitchen towel, and find a warm, draft-free spot for it. On top of the fridge or in a turned-off oven are perfect spots. Let it rise until it’s doubled in size. This usually takes about 1 to 1.5 hours, but it’s not a race. The dough will tell you when it’s ready. Chef’s Tip: To check if it’s ready, gently poke the dough with a floured finger. If the indentation remains, it’s perfectly risen!
- Shape with Love: Once your dough is beautifully puffed up, it’s time to shape it. Gently punch it down to release the air (a very satisfying step!). Turn it out onto a lightly floured surface.
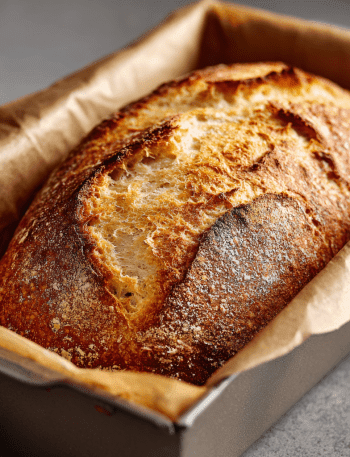
- For a Loaf: Gently pat the dough into a rectangle, then tightly roll it up, pinching the seam closed. Place it seam-side down in a greased 9×5 inch loaf pan.
- For Dinner Rolls: Divide the dough into 12 equal pieces. A kitchen scale is great for this, but eyeballing is just fine! Gently roll each piece into a smooth ball and place them in a greased 9×13 inch baking dish, just touching.
- The Second Rise (Almost there!): Cover your shaped dough again and let it rise for a second time until it’s puffy. This will take about 30-45 minutes. Meanwhile, preheat your oven to 400°F (200°C) for rolls, or 350°F (175°C) for a loaf.
- Bake to Golden Perfection:
- For Rolls: Bake at 400°F for about 15 minutes, until the tops are a deep, golden brown.
- For a Loaf: Bake at 350°F for about 30 minutes. You’ll know it’s done when you tap the top and it sounds hollow.
Chef’s Pro-Move: For an extra glossy, professional-looking top, brush the shaped dough with an egg wash (1 egg beaten with 1 tbsp water) before baking.
- The Hardest Part: Let it Cool! I know, I know. The smell is intoxicating, and you just want to tear into it. But trust me on this—let it cool in the pan for about 5-10 minutes, then transfer it to a wire rack to cool completely. This allows the steam to escape and the internal structure to set, preventing a gummy texture.
How to Serve Your Homemade Masterpiece
Okay, the bread is baked, it’s cooled (mostly… I won’t judge a warm slice!), and it’s time for the best part. Here’s how to make it a star:
For the Loaf: Slice it thick and slather it with high-quality salted butter that melts into all the nooks and crannies. It’s sublime for sopping up soup or stew, making the world’s best turkey sandwich, or simply enjoying with a drizzle of olive oil and a sprinkle of flaky sea salt.
For the Rolls: Serve them in a basket lined with a checkered cloth napkin for that down-home feel. They are the ultimate sidekick to a big, cozy pasta dinner, perfect for building mini sliders, or simply pulling apart and sharing with loved ones right there on the baking sheet. A pat of butter and a tiny sprinkle of coarse salt on top of each warm roll is pure heaven.
Get Creative! Flavor Twists & Swaps
Once you’ve mastered the basic recipe, the fun really begins! This dough is a blank canvas for your culinary creativity. Here are a few of my favorite variations:
- Everything Bagel Loaf: Before the second rise, brush the shaped loaf with water or egg wash and generously sprinkle with everything bagel seasoning. It’s savory, oniony, and absolutely addictive.
- Garlic Herb Parmesan Rolls: Knead ½ cup of grated Parmesan cheese, 1 teaspoon of garlic powder, and 2 tablespoons of finely chopped fresh herbs (like rosemary and thyme) into the dough during the final mixing stage.
- Whole Wheat Version: For a heartier bread, substitute up to 1 cup of the total all-purpose flour with whole wheat flour. The result will be slightly denser but packed with nutty flavor.
- Cinnamon Swirl Loaf: After the first rise, roll the dough out into a rectangle. Brush with melted butter and sprinkle liberally with a mix of cinnamon and sugar. Roll it up, place it in the loaf pan, and bake as directed. Hello, French toast!
- Dairy-Free/Vegan Swap: You can easily make this vegan! Use a flax egg (1 tbsp ground flaxseed mixed with 3 tbsp water, let sit 5 mins) instead of the egg, and ensure your sugar is vegan-friendly.
A Few More Thoughts from My Kitchen
This recipe has evolved with me over the years. I’ve made it in tiny city apartments, in a friend’s kitchen during a power outage (we proofed it by the fireplace!), and for massive holiday feasts. It has never, ever let me down.
The biggest lesson it’s taught me? Don’t fear the sticky dough. So many beginner bakers add cup after cup of flour, resulting in a tough, dense brick. Embrace the stickiness! A well-floured surface and confident, quick hands are all you need. The texture you get from a slightly wetter dough is worth a little mess on your fingers. Some of my best kitchen memories involve me covered in flour, laughing with a friend, with this very dough stuck to my apron. That’s the real secret ingredient, I think.
Your Bread Questions, Answered!
I’ve heard it all over the years! Here are answers to the most common questions to make sure you’re successful.
- Q: My dough didn’t rise. What happened?
A: The most common culprits are old yeast (check the expiration date!) or liquid that was too hot, which killed the yeast. Your water should be warm, not hot. If it’s a cold day in your kitchen, the rise will just take longer. Be patient! - Q: The dough is SO sticky. Should I add more flour?
A: Resist the urge! A sticky dough is a soft bread. Instead of adding more flour, lightly oil your hands and the work surface. The dough will become easier to handle as you gently shape it. - Q: Can I make this ahead of time?
A: Absolutely! After the first rise, punch the dough down, place it in a greased bowl, cover tightly, and refrigerate for up to 24 hours. When you’re ready, let it come to room temperature, shape it, let it have its second rise, and bake. The slow, cold fermentation actually develops even more flavor! - Q: My bread is dense. Why?
A: This usually happens if the dough was over-kneaded (not a big risk here!), if you used too much flour, or if you didn’t let it rise long enough. Make sure your yeast is fresh and give it the time it needs to get nice and puffy.
Nutritional Information (Because We’re Curious!)
While we all know homemade bread is really just a vehicle for butter (wink), it’s always good to know what you’re enjoying. This information is an estimate per dinner roll, based on the recipe making 12 equal rolls.
Remember, because you’re making it yourself, you control the ingredients. There are no preservatives or unpronounceable additives—just simple, wholesome components.
- Calories: ~120 kcal
- Fat: 3g
- Carbohydrates: 18g
- Protein: 3g
Bread is a beautiful source of energy and, when enjoyed as part of a balanced diet, is a wonderful comfort and joy. So savor every single, buttery bite without an ounce of guilt.
You Did It! Now, Keep Baking.
Look at you, you magnificent baker! You’ve just created something from scratch that will nourish both body and soul. There is a unique pride that comes from placing a loaf of bread, warm from your own oven, onto the family table.
I hope this recipe becomes a trusted friend in your kitchen, just like it is in mine. I hope it gives you the confidence to try more, to get a little messy, and to share the delicious results with the people you love.