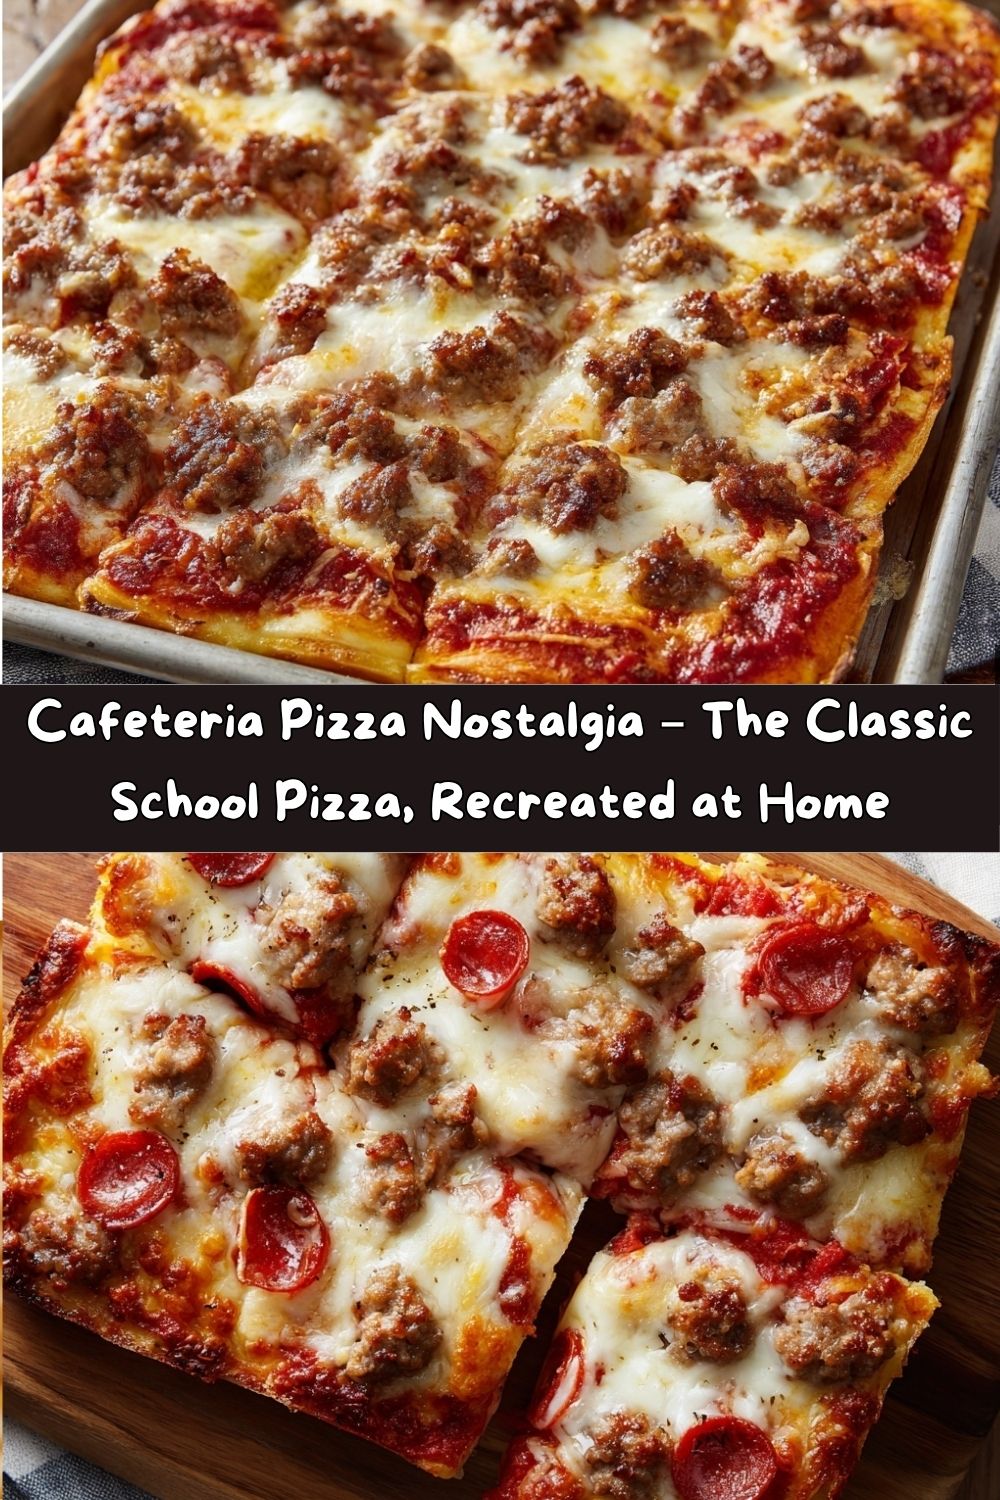
Remember the Best Part of School? It’s Pizza Day, All Over Again.
Hey there, friend! Let’s play a little game. Close your eyes for a second. (Well, read this first, then close them!) I want you to think back. Way back. To the sound of squeaking sneakers on linoleum, the smell of textbooks and chalk dust, and the unmistakable, electrifying announcement over the intercom: “It’s pizza day in the cafeteria.”
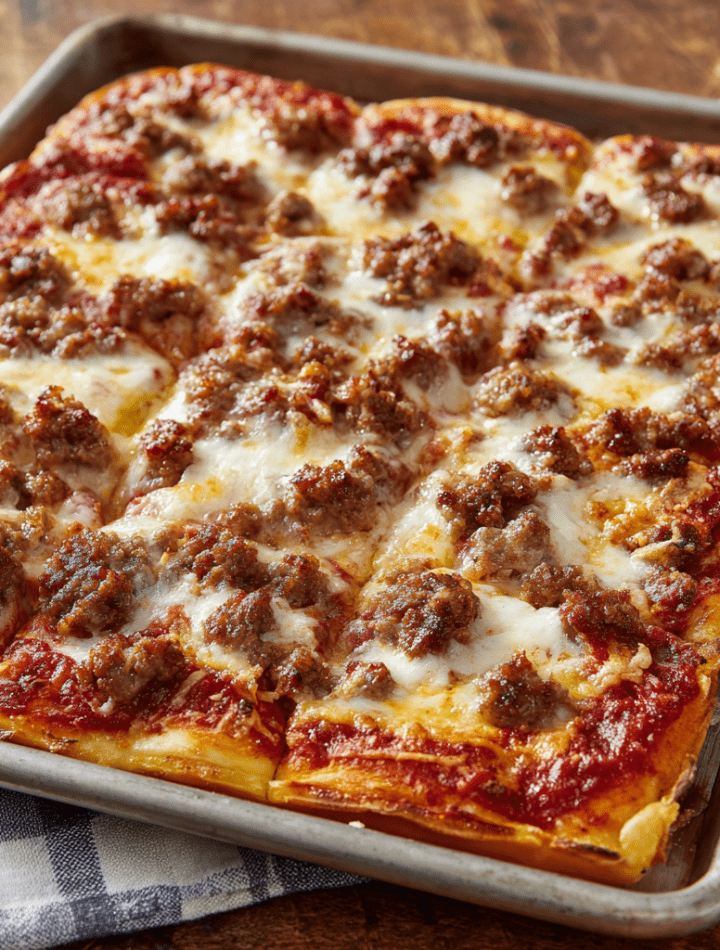
Do you remember it? That specific feeling of pure, unadulterated joy? The lunch line suddenly felt like the red carpet. And at the end of it, waiting for you on a thick, white melamine tray, was a beautiful, greasy, glorious rectangle of heaven. It wasn’t fancy wood-fired Neapolitan pizza. It wasn’t artisanal sourdough. It was cafeteria pizza. A soft, almost chewy crust, a tangy, simple sauce, a blanket of perfectly melted, slightly orange-tinged mozzarella, and those little nubs of savory sausage. You’d eat it with a spork, and life was good.
If you’ve been chasing that specific flavor ghost, that particular texture memory, you have officially found your home base. Today, we’re pulling that iconic slice straight out of our own ovens. This recipe is my love letter to lunch ladies, to Friday fundays, and to the simple, comforting flavors that stick with us for a lifetime. So, tie on your apron—it’s okay if it gets a little messy—and let’s make a sheet pan of pure, unapologetic nostalgia. Get ready, because we’re about to bring pizza day home!
The Magic of the Rectangular Slice: A Personal Story
My obsession with this pizza started long before culinary school, in the bustling cafeteria of my own elementary school. For me, the magic wasn’t just in the eating—it was in the trading. I was a notoriously picky eater as a kid (I know, a chef, picky? The irony isn’t lost on me!), and my mom, in her infinite wisdom, would pack my lunch. But on pizza days, the entire social ecosystem of the lunchroom shifted.
I’ll never forget the specific negotiation tactics required to secure an extra slice. My friend Sarah always had a chocolate pudding cup I coveted, and she, for reasons I still don’t understand, wasn’t a fan of the cafeteria pizza’s “floppy crust.” We had a standing deal: my pudding cup for her pizza square. It was the trade of the century! That first bite of that second slice, eaten triumphantly while sitting cross-legged on the colorful rug during indoor recess, was a taste of victory. It taught me that food is more than fuel; it’s connection, it’s memory, and sometimes, it’s the best bargaining chip a third-grader could ask for. This recipe is my attempt to bottle that feeling, no trading required.
Gathering Your Pizza Day Toolkit: The Ingredients
This isn’t a complicated list, and that’s the beauty of it! We’re using simple, straightforward ingredients to create a masterpiece of memory. Here’s what you’ll need and why each one matters.
- 1 packet (2 ¼ tsp) active dry yeast: This is the tiny living organism that makes our crust puff up and become soft and airy. Think of it as the magic fairy dust of baking!
- 1⅓ cups warm water (110°F): The temperature is KEY here. Too hot, and you’ll kill the yeast. Too cold, and it won’t wake up. Aim for water that feels warm to the touch, like a perfect bath. No thermometer? It should feel warm but not scalding.
- 1 tbsp sugar: This is the yeast’s favorite snack! It gives the little guys a quick burst of energy to get them foaming and ready to work.
- 3½ cups all-purpose flour: The backbone of our crust. We’re not using bread flour or 00 pizza flour here—all-purpose gives us that tender, chewy texture we remember. Chef’s Tip: Fluff your flour with a spoon before measuring, then level it off. Don’t scoop directly from the bag or you’ll pack in too much!
- 1 tsp salt: The flavor enhancer. It balances the sweetness of the sauce and cheese and strengthens the gluten in our dough.
- 2 tbsp olive oil: This adds a subtle richness and helps keep the crust tender. It also makes the dough easier to work with.
- 1 cup pizza sauce: You can use your favorite jarred brand for ultimate ease (think Prego or Ragu-style for authenticity!), or a simple, plain canned tomato sauce. We’re not going for a fancy, herby San Marzano sauce here—simplicity is our guide.
- 2–3 cups shredded mozzarella: The classic! For that true cafeteria look, a whole-milk, low-moisture mozzarella is perfect. The pre-shredded kind works in a pinch, but shredding your own from a block will give you a meltier, less clumpy result.
- 1 cup cooked ground sausage or toppings of choice: This is where the signature flavor comes in! Mild ground breakfast sausage, cooked and crumbled, is the classic move. But feel free to get creative—pepperoni, plain cheese, or even a veggie mix are all welcome at this party.
Let’s Get Our Hands Doughy: The Step-by-Step Guide
Ready to create some magic? Follow these steps, and you’ll be a cafeteria pizza hero in no time. Don’t be intimidated by the dough—it’s a forgiving process, and I’m walking you through every step.
- Wake Up the Yeast: In a large mixing bowl, combine your warm water, sugar, and yeast. Give it a quick stir and then walk away for 5-10 minutes. This is the “proofing” stage. You’re waiting for it to get foamy and creamy on top, like a little root beer float. If it doesn’t foam, your yeast might be old, or your water was too hot/cold. Start over—it’s worth it! Chef’s Hack: I like to do this in the bowl of my stand mixer to save on dishes.
- Make the Dough: Once your yeast is alive and bubbly, add the flour, salt, and olive oil. If using a stand mixer, attach the dough hook and mix on low speed until a shaggy dough forms, then increase to medium for 5-7 minutes until the dough is smooth and elastic. No mixer? No problem! Stir with a wooden spoon until it becomes too difficult, then turn it out onto a floured surface and knead by hand for a good 7-10 minutes. It’s a great arm workout! The dough is ready when it’s smooth and springs back slowly when you poke it.
- The Rise & Shine: Form the dough into a ball. Lightly oil the same mixing bowl (see, less dishes!), place the dough ball back in, and turn it over to coat it in oil. Cover the bowl with a clean kitchen towel or plastic wrap and place it in a warm, draft-free spot. Let it rise for 45-60 minutes, or until it has doubled in size. My favorite warm spot? On top of the fridge, or in an oven that has been turned off but was warmed by the light bulb.
- Preheat and Prep: About 20 minutes before your dough is ready, preheat your oven to a hot 450°F (232°C). This is crucial for a good crust! While it’s heating, generously grease a standard 10×15-inch rimmed baking sheet (a half-sheet pan) with olive oil or non-stick spray. Don’t be shy with the grease—this helps create that golden, slightly fried bottom crust.
- Shape the Classic Rectangle: Punch the risen dough down to release the air. It’s very satisfying! Transfer it to your greased sheet pan. Now, using your fingertips, press and stretch the dough to fit the entire pan. Don’t have a rolling pin? You don’t need one! This is a hands-on job. If the dough keeps springing back, let it rest for 5 minutes and then try again. We want an even layer across the whole pan. Chef’s Insight: Prick the dough all over with a fork before adding toppings. This is called “docking” and it prevents big air bubbles from forming!
- Top It Like a Pro: Now for the fun part! Spread your pizza sauce in an even layer, leaving just a tiny border around the edges. Sprinkle on a generous amount of cheese—this is no time to be shy. Finally, scatter your cooked sausage or other toppings evenly over the cheese.
- Bake to Bubbly Perfection: Place your pan in the hot oven and bake for 13-16 minutes. You’re looking for a few key signs: the crust should be golden brown on the edges and bottom, the cheese should be completely melted, bubbly, and have those lovely golden-brown spots, and your kitchen should smell incredible.
- The Most Important Step: I know it’s tempting to dive right in, but you MUST let the pizza cool in the pan for at least 5-10 minutes before slicing. This allows the cheese to set slightly so you get a clean slice instead of a cheesy landslide. Trust me on this one!
- Slice and Serve: Using a pizza cutter or a large chef’s knife, slice the pizza into classic squares or rectangles. Serve it up and get ready for the wave of nostalgia!
How to Serve Your Slice of Nostalgia
Presentation is part of the fun! To truly recreate the experience, serve your pizza on a partitioned tray or a simple plate. The classic cafeteria accompaniments are a must:
- A handful of baby carrot sticks and a small cup of ranch dressing for dipping.
- A big, crisp, green side salad with Italian dressing.
- A small, paper cup of chocolate milk or a juice box for the full effect.
And for the adults? A frost-cold craft beer or an icy cola is the perfect pairing. The goal is to make it a fun, casual, shareable meal. Put the whole sheet pan in the middle of the table and let everyone grab a square—it’s the ultimate crowd-pleaser for game day, family movie night, or just because it’s Tuesday.
Make It Your Own: Delicious Recipe Variations
While the original is perfection, sometimes you wanna mix it up! Here are a few fun twists on the classic:
- Fiesta Mexican Pizza: Swap the pizza sauce for seasoned refried beans. Top with a blend of mozzarella and cheddar cheese, cooked taco-seasoned ground beef or chicken, and after baking, add a fresh pile of shredded lettuce, diced tomatoes, and a dollop of sour cream.
- Breakfast for Dinner Pizza: Use a gravy or creamy sausage gravy as the base. Scatter cooked, crumbled breakfast sausage and scrambled egg pieces over the gravy, then top with a mix of mozzarella and cheddar cheese. Bake as directed. You’ll be a legend.
- Veggie Lover’s Delight: Keep the classic sauce and cheese, but load it up with finely chopped veggies like bell peppers, mushrooms, black olives, and red onions. Pro-tip: Sauté the veggies first to release their water so your pizza doesn’t get soggy!
- Pepperoni Supreme: Sometimes, you just can’t beat the classic. Use sliced pepperoni instead of sausage for a different kind of nostalgic vibe. For extra flair, place some pepperoni under the cheese and some on top!
- Gluten-Free/Dairy-Free Swap: You can still join the party! Use your favorite 1:1 gluten-free flour blend for the dough and a plant-based mozzarella shred. The method remains exactly the same.
Chef Emily’s Kitchen Notes & Stories
This recipe has become a staple in my own home, and it’s evolved in the funniest ways. The first time I made it, I was so excited that I forgot to prick the dough with a fork. The result was a truly monstrous, giant air bubble right in the middle that I had to dramatically pop with a knife, causing cheese and sauce to fly everywhere. My kitchen looked like a pizza crime scene! My husband still brings it up. So learn from my messy mistake—dock that dough!
I’ve also learned that this dough is incredibly forgiving. If you’re short on time, you can skip the hour-long rise. The crust will be a little denser and more “focaccia-like,” but it’s still absolutely delicious. Sometimes, a 30-minute rise is all the patience I have, and it still turns out wonderfully.
Your Pizza Questions, Answered!
Let’s tackle some common questions to ensure your pizza is a slam dunk.
Q: My crust turned out too hard/crispy. What happened?
A: This usually means the oven was too hot, or it was baked for too long. Oven temperatures can vary, so an oven thermometer is a great tool. Also, make sure you’re using a light-colored aluminum sheet pan. Dark pans absorb more heat and can lead to a darker, harder crust.
Q: Can I make the dough ahead of time?
A: Absolutely! After the first rise, you can punch the dough down, wrap it tightly in plastic wrap, and store it in the fridge for up to 24 hours. When you’re ready, let it sit at room temperature for 30 minutes before pressing it into the pan. You can also freeze the dough ball for up to 3 months; thaw overnight in the fridge before using.
Q: My pizza was soggy in the middle. How do I fix that?
A: Sogginess is almost always a moisture issue. First, make sure your toppings aren’t too wet (e.g., pat canned mushrooms dry). Second, don’t overload the pizza with sauce. A thin, even layer is all you need. Finally, that cooling step is non-negotiable for letting everything set up!
Q: This tastes great, but how do I get that distinct “cafeteria pizza sauce” flavor?
A> Ah, you have a refined palate! The secret is often a touch of sweetness. Try adding a teaspoon of sugar or a splash of milk to your jarred pizza sauce and give it a stir before spreading. It mimics that uniquely sweet-and-savory profile perfectly.
Let’s Talk Nourishment (Because Balance is Everything!)
While we’re here for a glorious, nostalgic treat, I believe in knowing what’s in your food. This nutritional info is an estimate per square (assuming 12 slices), but it can vary based on your specific ingredients, especially the cheese and sausage.
- Calories: ~280
- Protein: 14g (A nice boost from the cheese and sausage!)
- Carbohydrates: 28g (The energy from that soft, chewy crust.)
- Fat: 12g
- Fiber: 2g
- Sodium: 550mg
Remember, food is more than numbers on a page. It’s joy, it’s memory, it’s connection. This pizza is a celebration of all those things. Enjoy every single bite without guilt, and balance it out with those carrot sticks and a healthy lifestyle the rest of the time!
Final Thoughts from My Kitchen to Yours
Well, my friend, we did it. We successfully time-traveled with a sheet pan and a handful of pantry staples. One bite, and suddenly you’re ten years old again — sitting at that wobbly cafeteria table, laughing with friends, trying to peel melted cheese off the tray with your spork. Isn’t it wild how food can do that? How it can bring you right back to a moment that smelled like tomato sauce, sounded like chatter and sneakers, and felt like pure, uncomplicated joy?
That’s what I love most about recipes like this. They’re not just about taste — they’re about the stories that live in our senses. About reclaiming those simple pleasures that remind us where we came from and what makes us smile.
When I pull this pizza from the oven, my kitchen fills with the same smell that floated through my school’s hallways on Fridays, and I swear, for just a minute, I’m back there again — grinning, carefree, and covered in pizza grease. I hope you get to feel that, too.
So make this on a Friday night. Make it for your kids, your partner, or just yourself (because yes, you absolutely deserve it). Line up the slices, grab a paper plate, pour a tall glass of chocolate milk, and let the nostalgia wash over you. The world can wait — it’s pizza day again.
From my kitchen to yours — here’s to melted cheese, warm memories, and the delicious simplicity of being a kid at heart.
![[Make-Ahead] Turkey Wrap with Bacon](https://tastychow.com/wp-content/uploads/2025/07/0_2-45.png)