Peanut Butter & Jelly Cheesecake Bites: Your New Favorite Bite of Nostalgia
Hey there, my fellow flavor-chaser! Let’s be real for a second. Is there any food pairing more iconic, more perfectly balanced, more straight-up joyful than peanut butter and jelly? It’s the taste of sunny afternoons, packed lunches, and life’s simple pleasures. But what if I told you we could take that beloved classic and transform it into the most elegant, creamy, and downright irresistible dessert?
Well, grab your favorite apron (the one with the questionable stains that tells the best stories) because we’re about to do exactly that. Welcome to my kitchen, where we’re whipping up a batch of these Peanut Butter and Jelly Cheesecake Bites.
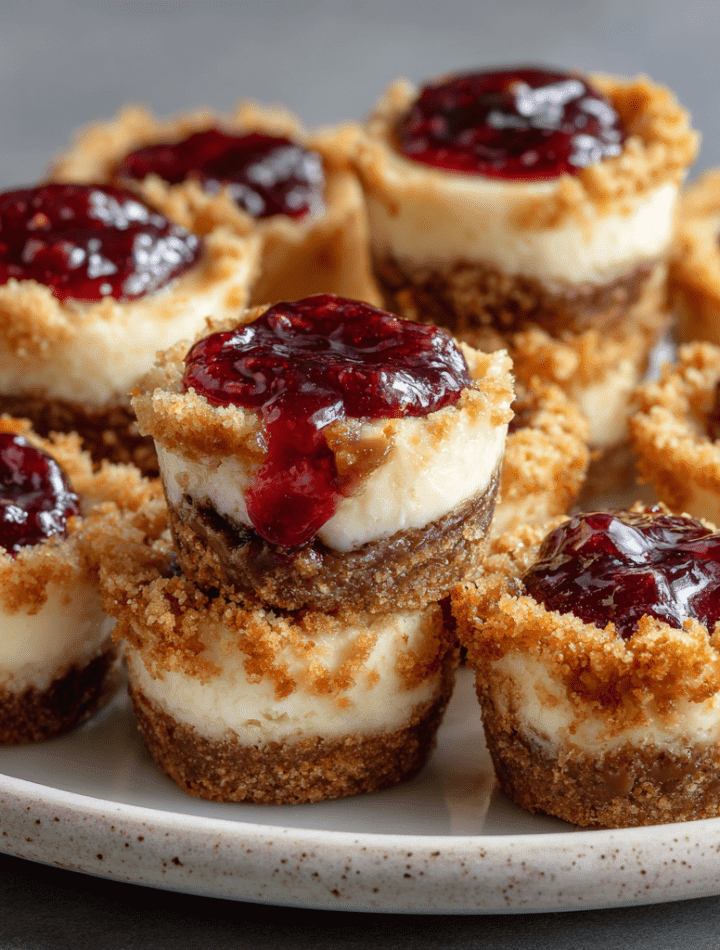
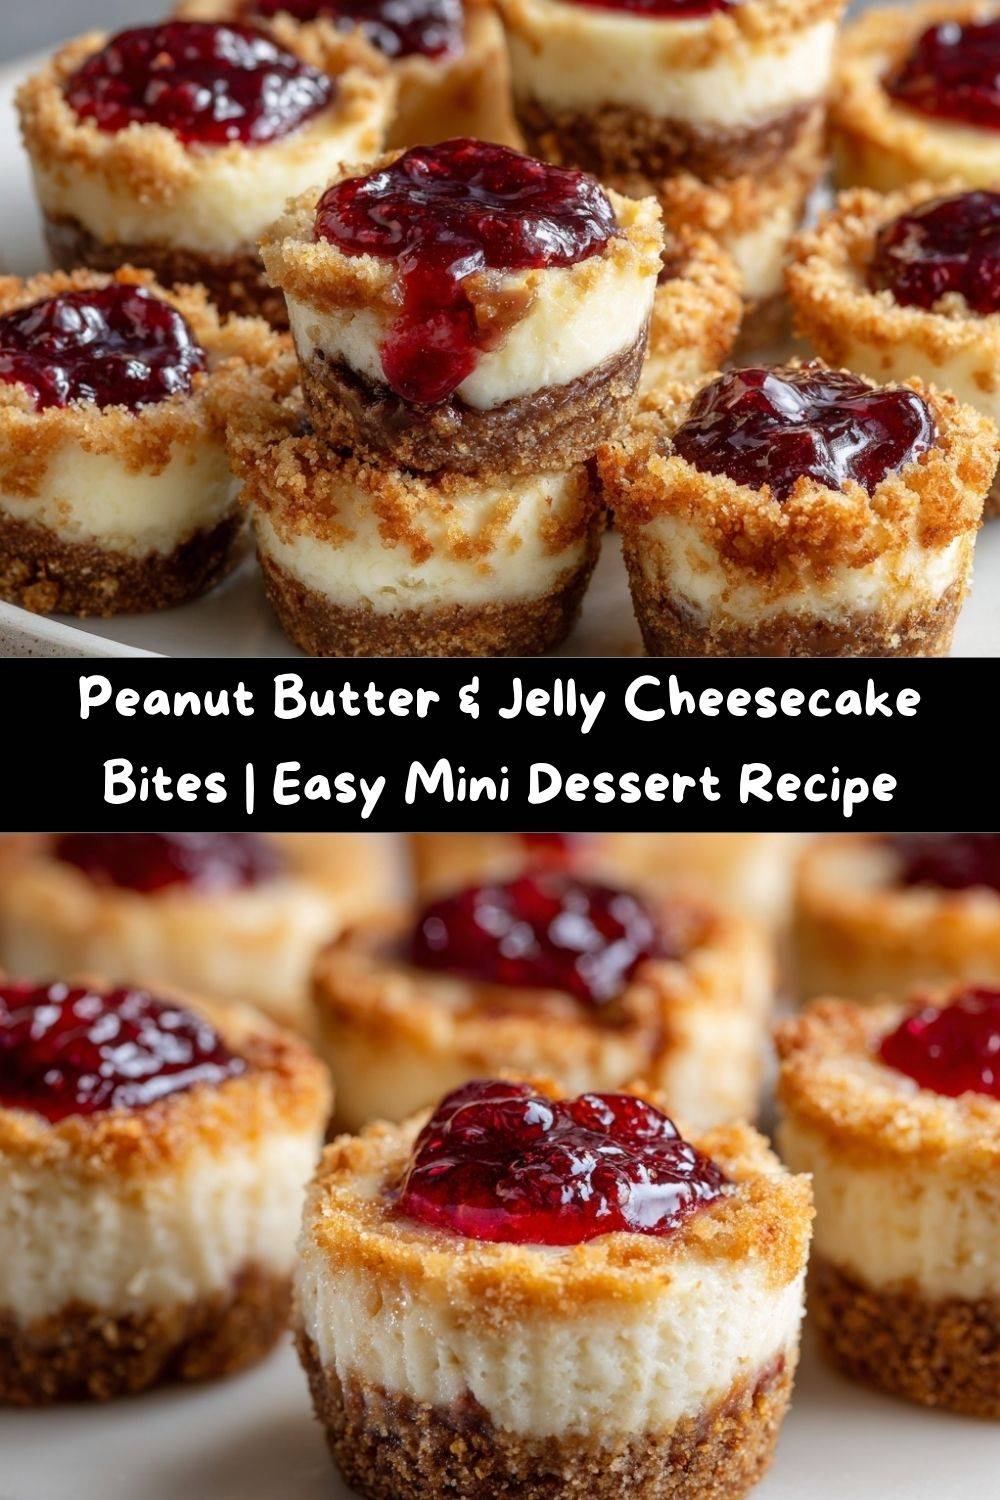
Imagine this: a buttery, subtly spiced almond crust that crumbles at the slightest touch. A cloud-like, impossibly creamy peanut butter cheesecake filling that’s rich but not heavy. And right in the heart of it all, a hidden pocket of sweet, tangy raspberry jelly that bursts with flavor in every single bite. They’re mini, they’re mighty, and they pack a one-two punch of pure, unadulterated happiness. These aren’t just desserts; they’re edible memories, all gussied up for a party. So, preheat that oven, and let’s make something delicious that will have everyone asking for the recipe!
The Lunchbox Legend That Inspired It All
This recipe has a special little story, and it starts with my son, Leo. He’s a PB&J purist. For years, it was creamy peanut butter and strawberry jam on soft white bread, crusts meticulously cut off. It was his non-negotiable lunch, a daily ritual. One day, while packing his lunchbox, I had a lightning-bolt moment. What if we took his ultimate comfort food and turned it inside out? What if the sandwich became a dessert?
I started tinkering in the kitchen, determined to capture that magic. The first batch was… a learning experience. Let’s just say the jelly sank straight to the bottom, creating a sticky, albeit tasty, lake. But the look on Leo’s face when he tried the final, successful version? Priceless. His eyes lit up, and he said, “Mom, it’s like my sandwich went to fancy school!” And just like that, these cheesecake bites earned a permanent spot in our family’s recipe hall of fame. They’re a reminder that the best food ideas often come from the heart—and sometimes, from a second grader’s lunchbox.
Gathering Your PB&J Dream Team
Here’s everything you’ll need to create these little bites of bliss. I’ve included some of my favorite chef-y insights and substitutions so you can make this recipe your own!
For the Buttery Almond Crust:
- 1 cup almond flour: This gives us a wonderfully nutty, tender crust that’s naturally gluten-free. It toasts up beautifully and pairs perfectly with the peanut butter. Chef’s Tip: If you don’t have almond flour, you can use the same amount of graham cracker crumbs or crushed digestive biscuits!
- 4 tbsp melted butter: This is the glue that holds our crust together and gives it that irresistible, rich flavor. Salted butter adds a lovely depth, but unsalted works perfectly too.
- 2 tbsp powdered sugar: Just a touch of sweetness to balance the nuttiness of the flour. It also helps create a finer, more delicate crumb.
- ½ tsp ground cinnamon: This is my secret weapon! A hint of warm spice makes the entire dessert smell incredible and adds a layer of complexity that will have people wondering, “What is that amazing flavor?”
For the Cloud-Like Peanut Butter Filling:
- 12 oz cream cheese, softened: This is non-negotiable – your cream cheese MUST be at room temperature. This is the single most important step for a smooth, lump-free filling. I leave mine out on the counter for at least an hour.
- ½ cup creamy peanut butter: Use a standard, no-stir creamy peanut butter for the best texture and consistency. The natural, oily kinds can sometimes separate. This is the star of the show, so use a brand you love!
- 1 cup powdered sugar: We’re using powdered sugar here because it dissolves instantly into our filling, ensuring a silky-smooth texture.
- 2 large eggs: They should also be at room temperature to incorporate easily into the batter. They provide structure and that classic cheesecake richness.
- 1 tsp vanilla extract: The flavor enhancer! It rounds out all the other ingredients and makes the whole thing taste more… well, more.
- ½ tsp salt: Trust me on this. Salt makes the sweet and nutty flavors pop. It’s the difference between “yum” and “WOW.”
For the Gooey, Surprise Center:
- 12 tsp raspberry jelly: I love the tangy kick of raspberry against the sweet peanut butter, but this is your chance to get creative! Strawberry, grape, or even a sophisticated fig jam would be absolutely divine.
Let’s Build Some Bite-Sized Magic: A Step-by-Step Guide
Don’t let the fancy look fool you—these mini cheesecakes are surprisingly simple to make. Follow these steps, and you’ll be a PB&J dessert hero in no time!
- Preheat and Prep: First things first, get that oven going! Preheat it to a cozy 325°F (163°C). Now, line a standard 12-cup muffin pan with parchment liners. Chef’s Hack: Give the liners a very light spritz with cooking spray. This guarantees a flawless release later—no torn cheesecakes!
- Make the Crust: In a medium bowl, combine your almond flour, melted butter, powdered sugar, and that secret ingredient, cinnamon. Mix it with a fork until it looks like wet sand and all the flour is hydrated. Press about one firmly packed tablespoon of this mixture into the bottom of each muffin cup. I use a small glass or the back of a measuring spoon to press it down firmly and evenly. Pop the pan in the oven for 7-8 minutes, just until you smell that lovely toasty-nut aroma. Let it cool on a rack while you make the filling. Why we do this: Part-baking the crust (called “blind baking”) ensures it stays crisp and doesn’t get soggy from the filling.
- Whip Up the Filling: Now, for the main event! In a large mixing bowl, beat your softened cream cheese and peanut butter together until they’re completely smooth and there are zero lumps. This is where your patience pays off! Scrape down the sides of the bowl, then add in the powdered sugar, eggs, vanilla, and salt. Beat on medium speed for another 1-2 minutes, just until everything is combined and the mixture is fluffy. Pro-Tip: Don’t overbeat once the eggs are in! Too much air can cause the cheesecakes to puff up and crack while baking.
- The Fun Part: Assembly! Grab your cooled crusts and your filling. Spoon the cheesecake mixture over each crust, filling each cup about ¾ of the way full. Now, take 1 teaspoon of your chosen jelly and gently drop it right into the center of each cheesecake cup. Take a toothpick and give it one or two very gentle swirls. Key word: gentle! You just want to marble it, not mix it in completely. We want that juicy jelly pocket!
- Bake to Perfection: Carefully transfer the pan to your preheated oven. Bake for 20-24 minutes. You’re looking for the edges to be set, but the centers should still have a slight jiggle—like Jell-O. They will firm up as they cool. This is the secret to a creamy, not rubbery, texture.
- The All-Important Cool Down: Once they’re out of the oven, let the cheesecake bites cool completely in the pan on a wire rack. Then, and this is crucial, you need to chill them. Cover the pan with plastic wrap and refrigerate for at least 2 hours, but ideally 4 or even overnight. This sets the structure and makes the flavor incredible.
How to Serve These Show-Stopping Bites
Presentation is part of the fun! You’ve put in the love, now let’s make these beauties shine.
I love to arrange them on a beautiful wooden board or a pristine white platter. Just before serving, I give them a light dusting of powdered sugar using a fine-mesh sieve—it looks like a light snowfall. For an extra decadent touch, gently warm a tablespoon of peanut butter with a tiny splash of milk to make it drizzle-able, and zig-zag it over the top. A few fresh raspberries and a tiny mint leaf on the side of the platter add a pop of color that says, “I’m a professional, but I also know how to have fun.”
These are perfect for parties, potlucks, or just because it’s Tuesday. They’re a guaranteed conversation starter and the ultimate finger-food dessert!
Get Creative! Fun Flavor Twists & Swaps
Once you’ve mastered the classic, the kitchen playground opens up! Here are a few of my favorite ways to mix things up:
- The Chocolate Lover’s Dream: Add ¼ cup of sifted cocoa powder to the filling and use a chocolate graham cracker crust. The center? A dollop of cherry pie filling. Hello, Black Forest PB&J!
- Grown-Up Gourmet: Swap the raspberry jelly for a high-quality fig jam or a spicy pepper jelly. The complex, savory-sweet notes will blow your mind.
- Nut-Free Necessity: Have an allergy? No problem! Use SunButter (sunflower seed butter) instead of peanut butter, and pair it with an apricot or apple jelly. It’s just as delicious.
- Berry Blast: Instead of jelly, place 3-4 fresh blueberries or a raspberry in the center of the filling before baking. They’ll burst and create a natural, fruity core.
Chef Emily’s Kitchen Confidential
This recipe has seen a few iterations in my kitchen. The first time, as I mentioned, was the Great Jelly Sinkhole of 2021. Lesson learned: a slightly thicker filling and a gentle hand with the swirling is key! I also found that adding that tiny pinch of cinnamon to the crust was a game-changer; it makes the whole house smell like a bakery and adds a warmth that people can’t quite place but always love.
These bites have become my go-to for last-minute guests. I almost always have a batch in the freezer (they freeze beautifully for up to a month!). I just pull them out, let them thaw in the fridge, and I look like a domestic goddess who has it all together. Spoiler alert: I do not, but these cheesecake bites are my secret weapon!
Your Questions, Answered!
Let’s tackle some common questions so you can bake with confidence!
Q: My cheesecakes cracked on top! What did I do wrong?
A: Don’t worry, they’ll still taste amazing! Cracking usually happens from overmixing the batter (incorporating too much air) or from a sudden temperature change. To prevent it, mix just until combined after adding the eggs, and make sure you cool them gradually in the pan before refrigerating.
Q: Can I make these dairy-free?
A> Absolutely! Use your favorite plant-based cream cheese and butter alternatives. I’ve had great success with both almond and oat-based cream cheeses. Just make sure they are also softened well.
Q: Why is room temperature cream cheese so important?
A> This is the golden rule of cheesecake! Cold cream cheese will never blend smoothly, no matter how long you beat it. You’ll end up with a lumpy batter. Room-temperature ingredients emulsify perfectly, creating that dreamy, silky texture we’re after.
Q: How long will these keep in the fridge?
A> Stored in an airtight container, they are perfectly delicious for up to 5 days. If they last that long!
Nutritional Nibbles (Per Bite)
Okay, let’s talk real quick about what’s in these delightful bites. Remember, these are estimates and can vary based on the specific brands of ingredients you use. But here’s a general idea per cheesecake bite:
- Calories: 210
- Protein: 5g
- Carbohydrates: 10g
- Fat: 18g
- Sugar: 8g
- Fiber: 1g
- Sodium: 140mg
While these are certainly a treat, using almond flour adds a bit of healthy fat and fiber, and each one is a perfectly portioned indulgence to satisfy your sweet tooth without going overboard!
Final Thoughts from My Kitchen to Yours
Well, my friend, we’ve done it! We’ve taken a humble, beloved childhood sandwich and turned it into a dessert that’s worthy of any celebration (or just a really good Wednesday). I hope these Peanut Butter and Jelly Cheesecake Bites bring as much joy to your kitchen as they have to mine.
Remember, baking is about the journey, not just the destination. So if your swirl isn’t perfect, or you eat one before it’s fully chilled (guilty!), you’re still winning. You’re creating, you’re sharing, and you’re filling your home with love and incredible smells.
I’d love to see your creations! If you make these, tag me on social @TastyChow so I can cheer you on. Now, go forth and chow down!
With love and a full heart,
Emily