The Dip That Will Steal the Show (And All the Apple Slices)
Hey there, my fellow flavor fanatic! Let’s talk about that moment. You know the one. You’re at a gathering, maybe a fall potluck or a game day party, and you’re casually grazing the snack table. You take one bite of something and your eyes go wide. You immediately need to know who made it, what’s in it, and how you can get the recipe before you leave. You might even strategically position yourself near it for the rest of the night.
Friends, this Peanut Butter Caramel Apple Dip is that dish.
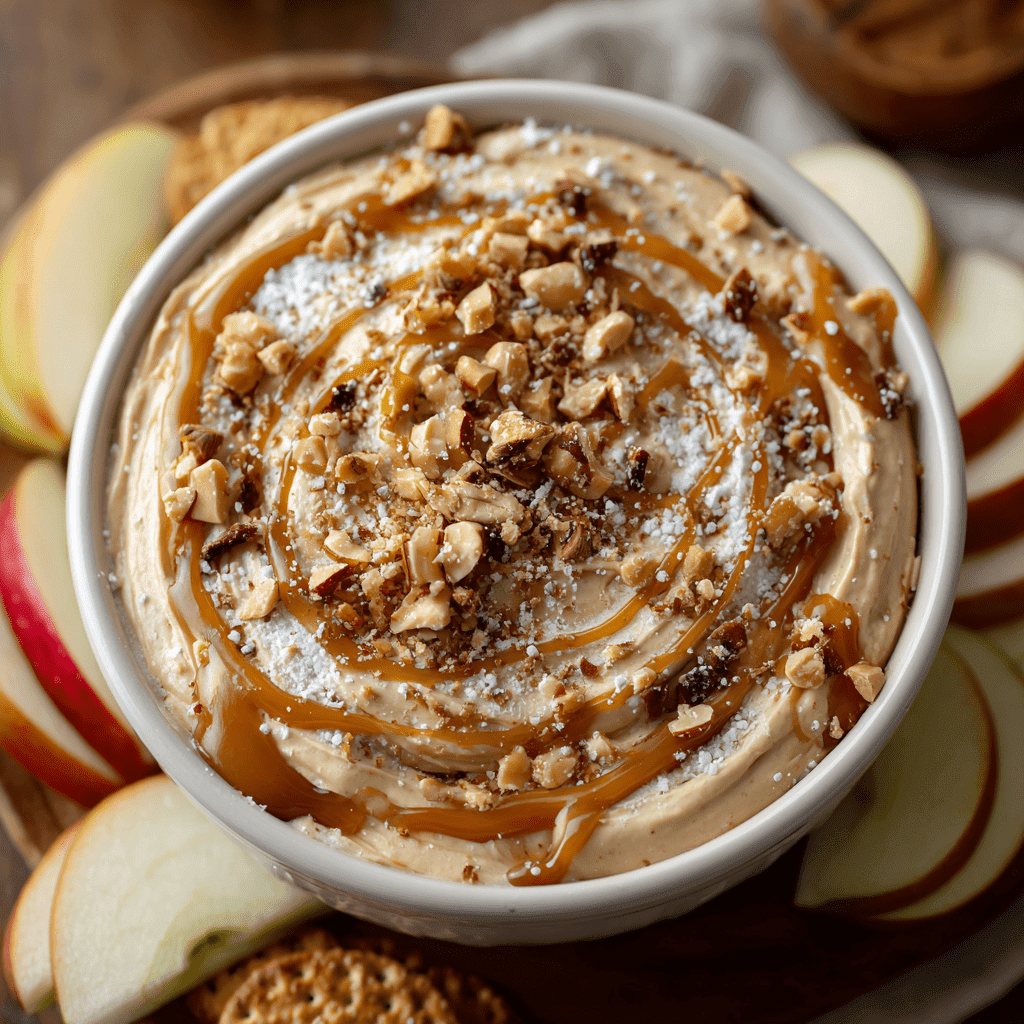
This isn’t just a dip; it’s a creamy, dreamy, sweet-and-salty cloud of pure joy. Imagine the best parts of a candy apple and a peanut butter cup decided to get together and throw a party in your mouth. That’s what we’re making today. With a base of lush cream cheese, swirled with rich peanut butter and gooey caramel, it’s the ultimate partner for a crisp, tart apple slice. It’s the kind of no-bake, 10-minute miracle that looks like you fussed for hours, and I am absolutely here for that kind of kitchen magic.
So, grab your favorite mixing bowl and that trusty spatula. We’re about to make the easiest, most crowd-pleasing dip of your life. Let’s get mixing!
A Sweet Slice of Nostalgia
This recipe takes me right back to my grandma’s kitchen table, surrounded by the chaotic, beautiful mess of a family apple-picking weekend. We’d always come home with a bushel of apples—way more than any sensible person could handle—and the mission would begin: pies, sauces, and of course, apple slices for snacking.
But my favorite creation was always the “concoction,” as my brother called it. Grandma would let me soften cream cheese in her big yellow bowl, and we’d stir in spoonfuls of peanut butter and this thick, jarred caramel ice cream topping she always had. We’d dollop it onto plates next to piles of apple slices, and my job was to artfully drizzle extra caramel on top. It felt so fancy, so chef-like, even at eight years old. It was more than a snack; it was a moment of connection, of feeling like a creative genius in a flour-dusted apron. This dip is that childhood memory, all grown up and perfected. Every time I make it, I can still smell the crisp autumn air and hear my family laughing around that old table.
Gathering Your Dream Team of Ingredients
Here’s the beautiful part: this dip comes together with just a handful of pantry heroes. Let’s break them down, because knowing your ingredients is the first step to kitchen confidence!
- 8 oz (226g) Cream Cheese, softened: This is the lush, tangy foundation of our dip. Pro Chef Tip: PLEASE take the time to let it get to true room temperature. I’ll say it louder for the folks in the back! Soft cream cheese blends into a silky-smooth dream. Cold cream cheese will leave you with lumpy, sad results. If you forget, you can microwave it on 50% power for 15-second bursts, but room temp is always best.
- 1/2 cup (120g) Creamy Peanut Butter: I use the standard shelf-stable, creamy kind for that perfect, smooth texture. You can use natural peanut butter, but be aware that the oil separation can sometimes make the dip a bit greasy. If you do, give it a really good stir first!
- 1/2 cup (160g) Caramel Sauce, plus more for topping: The star of the show! I love using a thick, high-quality jarred caramel ice cream topping for its rich flavor and perfect consistency. Homemade is amazing if you’re feeling fancy!
- 1/4 cup (30g) Powdered Sugar: This sweetens the deal without any grittiness, thanks to its fine texture. It helps balance the tang of the cream cheese and the saltiness of the PB.
- 1/2 tsp Vanilla Extract: The secret weapon! A splash of vanilla adds a warm, cozy depth that makes the whole dip taste more complex and homemade.
- Pinch of Sea Salt or Cinnamon (optional): A tiny pinch of flaky sea salt stirred in or sprinkled on top amplifies all the flavors spectacularly. A dash of cinnamon leans into those classic fall apple vibes.
For Toppings & Serving: This is where you get to play! Chopped peanuts for crunch, toffee bits for buttery sweetness, mini chocolate chips because… chocolate! Serve with sliced apples (Granny Smith for tartness, Honeycrisp for sweetness), pretzels for a salty crunch, or graham crackers for a s’mores-like feel.
Let’s Make Some Magic: Step-by-Step
Ready? This is seriously the easiest process ever. Let’s walk through it together!
- Beat the Cream Cheese: Grab your trusty hand mixer or stand mixer fitted with the paddle attachment. Plop your beautifully softened cream cheese into a medium-sized bowl and beat it on medium speed for about 30 seconds to 1 minute. You’re looking for it to be completely smooth, pale, and lump-free. This first step is crucial for that luxuriously creamy base, so don’t rush it! Scrape down the sides of the bowl with a spatula to make sure every bit gets incorporated.
- Add the Good Stuff: Now for the fun part! To the smooth cream cheese, add the creamy peanut butter, 1/2 cup of caramel sauce, powdered sugar, and that magical half-teaspoon of vanilla. If you’re using that optional pinch of salt or cinnamon, add it in now too.
- Whip It Good: Start beating on low speed at first (unless you want a powdered sugar cloud in your kitchen—been there, cleaned that!), then gradually increase to medium-high. Beat for 1-2 minutes, stopping to scrape the bowl once or twice, until everything is perfectly combined, smooth, and gloriously creamy. You should see the color become a uniform, inviting light tan. Taste it! This is your reward. Is it perfect? Does it need a touch more caramel or a tiny pinch more salt? Adjust to your heart’s content.
- The Grand Finale (Topping Time!): Transfer your masterpiece to a serving bowl. Use your spatula to smooth the top into beautiful, swoopy waves. Now, take that extra caramel sauce and drizzle it artfully over the top. Don’t be shy! Then, sprinkle on your chosen toppings—a generous handful of chopped peanuts and toffee bits is my personal favorite combo.
- To Chill or Not to Chill? You can serve this dip immediately if you just can’t wait (I don’t blame you!). But if you have time, popping it in the fridge for at least 30 minutes allows the flavors to really mingle and marry, and it firms up the texture just slightly, making it perfect for dipping.
How to Serve This Dip Like a Pro
Presentation is part of the fun! Here’s how to make your dip look as incredible as it tastes.
I love using a wide, shallow bowl so everyone can easily access it. For a real show-stopping look, create a “snack board” around your dip! Place the bowl in the center of a large wooden board or platter. Artfully arrange piles of crisp apple slices (a mix of red and green looks gorgeous!), pretzel rods, sturdy graham cracker sticks, and even some shortbread cookies around it. The variety of colors, textures, and flavors makes it a total centerpiece.
For individual portions, you can even layer a little dip into the bottom of small mason jars, add apple slices, and screw on the lid for a cute, portable treat. However you serve it, make sure you have plenty of napkins handy—this is gloriously messy business!
Get Creative! Recipe Variations
Once you’ve mastered the classic, the world is your oyster! Here are a few fun twists to keep things exciting:
- Cookie Butter Twist: Swap out the peanut butter for an equal amount of speculoos or biscoff cookie butter. The warm spices paired with the caramel are absolutely divine.
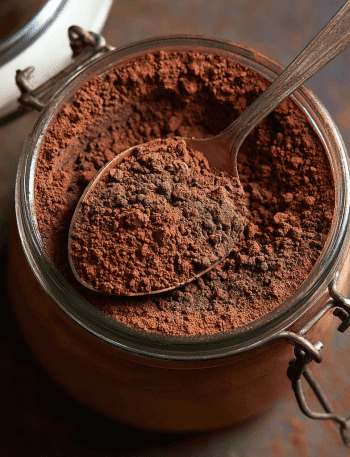
- Chocolate Lover’s Dream: Add 2 tablespoons of unsweetened cocoa powder to the mix and use chocolate caramel sauce if you can find it. Top with mini chocolate chips and serve with strawberries!
- Lighter Option: Use Neufchâtel cheese (the 1/3 less fat kind) or even plain Greek yogurt for a tangier, protein-packed base. The texture will be slightly less firm but still delicious.
- Nut-Free Version: Have an allergy? No problem! Sunflower seed butter is a fantastic, nut-free alternative that gives a very similar look and taste.
- Boozy Kick for the Grown-Ups: Stir in a tablespoon of bourbon or spiced rum along with the other ingredients for a sophisticated, adult-only version. It adds a wonderful warmth.
Chef Emily’s Notes & Kitchen Stories
This recipe has been my go-to for years, and it’s evolved from that simple childhood “concoction.” I once, in a frantic pre-party rush, tried to make it with cold cream cheese. Big mistake. I ended up with more lumps than a bad mashed potato situation and had to start over. I learned my lesson the hard way so you don’t have to!
Another time, I brought it to a friend’s Thanksgiving, and her toddler attempted to eat it with his hands, declaring it “happy clouds.” I consider that the highest compliment. The beauty of this dip is its flexibility and forgiving nature. Don’t stress, have fun with it, and make it your own!
FAQs & Troubleshooting
Q: My dip is too thick! How can I thin it out?
A: No worries! This is an easy fix. Simply beat in a tablespoon of milk (or a splash of apple cider!) at a time until it reaches your desired, dippable consistency.
Q: Can I make this dip ahead of time?
A: Absolutely! It’s a great make-ahead appetizer. Prepare it up to 2 days in advance, store it covered tightly in the fridge, and just add your toppings right before serving. Give it a quick stir if needed.
Q: How do I prevent the apple slices from browning?
A: The best trick is to give them a quick bath! Toss your sliced apples in a little lemon juice (about 1 tbsp mixed with 1 cup water) or even some lemon-lime soda. This will keep them looking fresh and bright for hours.
Q: My dip is too sweet for my taste. How can I balance it?
A: Great question! Next time, you can reduce the powdered sugar slightly. To fix this batch, try beating in an extra ounce of cream cheese and a bigger pinch of sea salt. The salt will help cut the sweetness perfectly.
Peanut Butter Caramel Apple Dip
- Total Time: 10 minutes
- Yield: 8 - 10 1x
Description
Creamy, sweet, and just a little salty—this dip brings the best of fall flavors into one addictive bowl. With peanut butter, caramel, and a smooth cream cheese base, it’s the perfect match for crisp apple slices. Whether it’s for game day, holidays, or a last-minute treat, this one’s always a hit.
Ingredients
8 oz (226g) cream cheese, softened
1/2 cup (120g) creamy peanut butter
1/2 cup (160g) caramel sauce, plus more for topping
1/4 cup (30g) powdered sugar
1/2 tsp vanilla extract
Optional twists: pinch of sea salt or cinnamon for extra depth
Toppings: chopped peanuts, toffee bits, mini chocolate chips, or extra caramel drizzle
Serve with: sliced apples (Granny Smith, Honeycrisp), pretzels, or graham crackers
Instructions
In a medium bowl, beat cream cheese until smooth.
Add peanut butter, caramel sauce, powdered sugar, and vanilla. Beat until creamy and well combined.
Spoon into a serving bowl and smooth the top.
Drizzle with additional caramel and sprinkle with toppings of choice.
Chill until ready to serve, or serve immediately with dippers.
- Prep Time: 10 minutes
Nutrition
- Calories: 150 / serving
- Fat: 10g / serving
- Carbohydrates: 13g / serving
- Protein: 2g / serving
Nutritional Info (Because We’re Curious!)
Okay, let’s be real—this is a treat, and it’s meant to be enjoyed as such! But it’s always good to know what you’re enjoying. The following information is an estimate per 2-tablespoon serving (without additional toppings or dippers).
Per Serving: Approximately 150 calories | 10g fat | 13g carbs | 2g protein
Remember, you’re pairing it with healthy dippers like apple slices, which adds fiber and vitamins! To lighten it up, see the variation above using Greek yogurt. But my philosophy? Life is all about balance. Enjoy a generous scoop of this delicious dip with your apples, savor every single bite, and don’t spend a second feeling guilty about it.
Final Thoughts
And there you have it! Your new secret weapon for potlucks, parties, cozy nights in, or just because it’s Tuesday. This Peanut Butter Caramel Apple Dip is more than just a recipe—it’s a vessel for joy, for connection, and for creating your own delicious memories.
I hope you have as much fun making it as I do. I can’t wait for you to experience that moment when your friends and family take their first bite and their eyes light up. You’ll know you’ve created something truly special.
If you make it (and I really hope you do!), please tag me @TastyChow on social media so I can see your beautiful creations! Now, go forth and dip everything in sight.
With a full heart and a hungry belly,
Chef Emily
