The Pie That Will Steal Your Heart: Peanut Butter Chocolate Chip Pecan Pie
Hey there, my fellow food lover! Let’s have a little heart-to-heart. Have you ever been to a potluck, a holiday gathering, or just a regular old Tuesday night and found yourself dreaming of a dessert that truly has it all? I’m talking about that magical, elusive combination of sweet, salty, crunchy, and gooey—all in one single, glorious bite. Well, my friend, stop dreaming and start preheating your oven, because I’m about to share the recipe that will become your new secret weapon: my legendary Peanut Butter Chocolate Chip Pecan Pie.
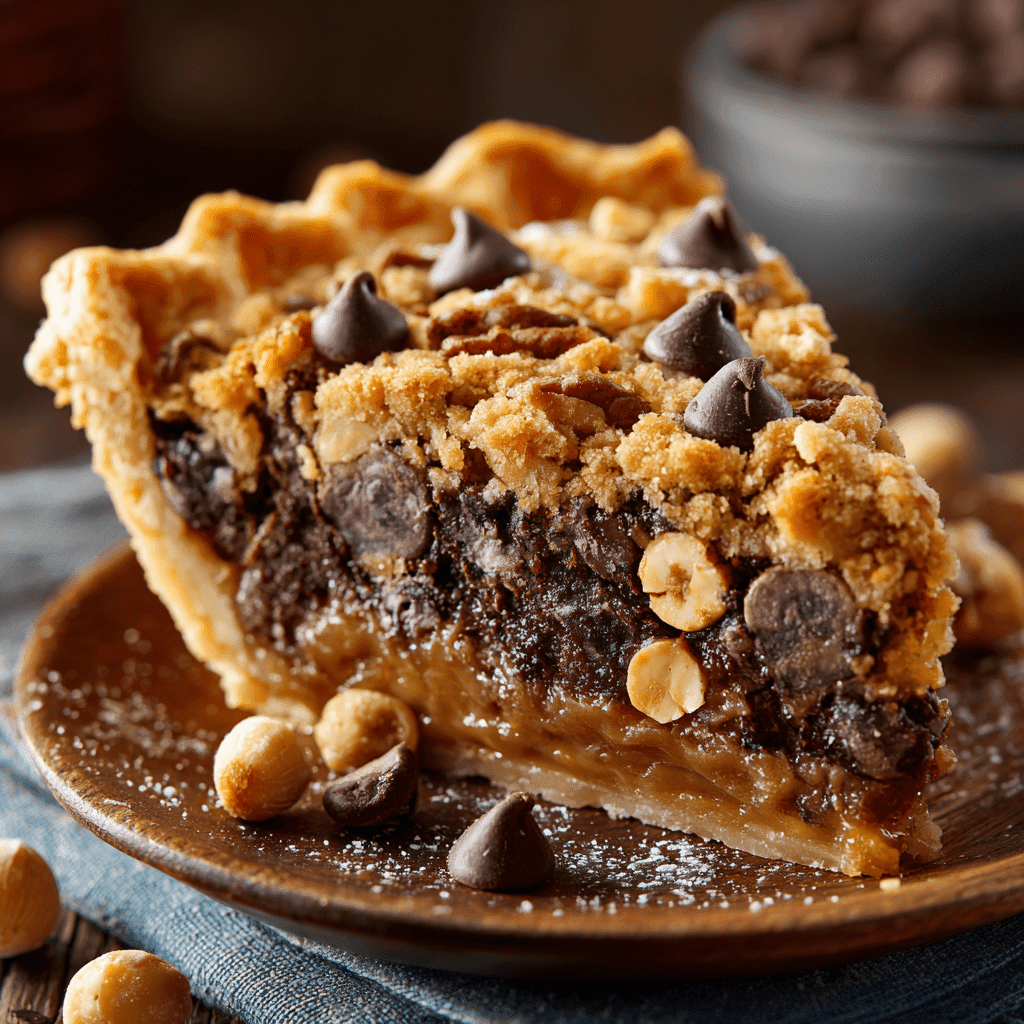
This isn’t just any pie. This is a dessert that hugs you from the inside out. It’s the love child of a classic pecan pie and your favorite peanut butter cup candy bar, all nestled into a flaky, buttery crust. The rich, custardy peanut butter base is studded with pockets of melty chocolate and the satisfying crunch of roasted peanuts. It’s the kind of dessert that makes people’s eyes go wide with delight after the first forkful. It’s surprisingly simple to whip up but delivers a “wow” factor that suggests you spent all day in the kitchen. So, tie on your favorite apron (the messy one with the stains tells the best stories, trust me), and let’s make something utterly irresistible together.
A Slice of Memory: My Grandma’s Kitchen & A Happy Accident
This pie, in all its decadent glory, actually has its roots in a happy little kitchen accident. Picture this: it’s a crisp autumn afternoon at my grandma’s house. The air is thick with the scent of cinnamon, roasting turkey, and her famous, straight-out-of-a-dream classic pecan pie. My job, as her eager little sous-chef, was to measure the corn syrup. In my excitement to sneak a taste of the chocolate chips waiting on the counter, I knocked over the nearly full jar of creamy peanut butter. A huge glob of it landed right in the pecan pie filling!
My heart sank. I thought I’d ruined Thanksgiving. But my grandma, being the kitchen wizard she was, just chuckled, gave it a stir, and said, “Well, Emily-girl, let’s see what we invented.” What emerged from the oven was nothing short of magic. That happy accident created a richer, deeper, more complex flavor that had everyone at the table asking for her “secret new recipe.” This version is my homage to her—a perfected, chocolate-chip-studded tribute to the woman who taught me that the best dishes often come from a little bit of love and a willingness to play with your food.
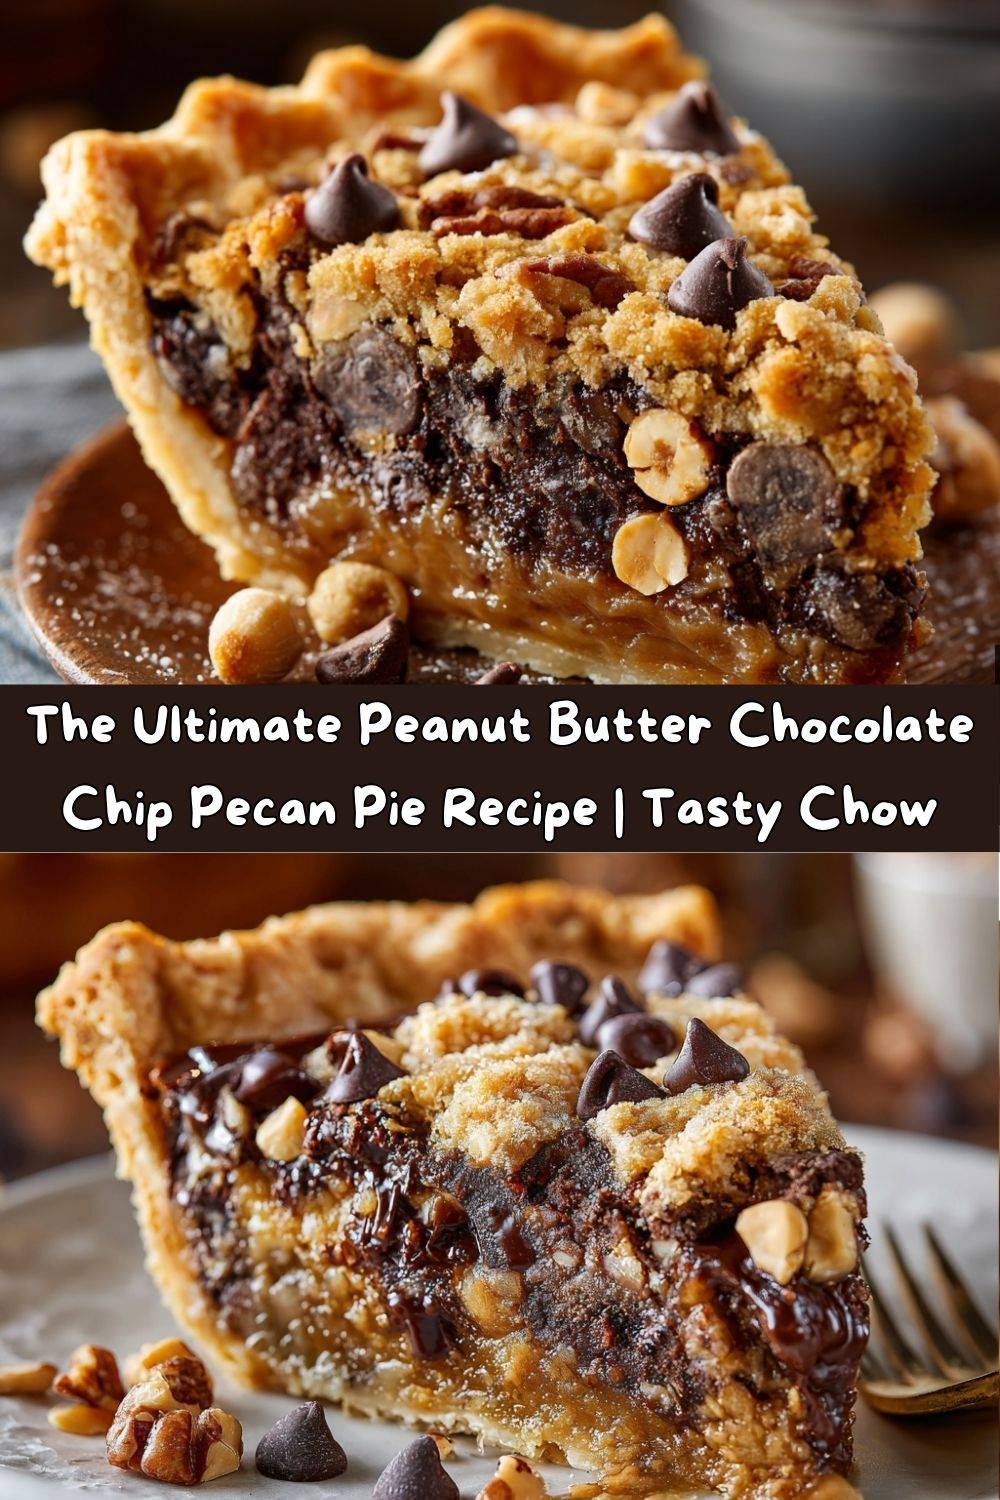
Gathering Your Delicious Arsenal: The Ingredients
Here’s everything you’ll need to create this masterpiece. I’ve included some of my favorite chef insights and substitutions because I believe in making recipes work for you and what you have in your pantry!
- 1 9-inch pie crust (store-bought or homemade) – No shame in the store-bought game! It’s a huge time-saver. If you’re going homemade, my go-to is an all-butter crust for that unbeatable flaky, rich flavor.
- 3 large eggs – These are the workhorses of our filling, providing structure and that classic custardy texture. Make sure they’re at room temperature for a smoother, easier-to-mix filling.
- 1/3 cup (67g) granulated sugar – This adds the perfect amount of sweetness to balance the salty peanuts.
- 1 cup (237ml) light corn syrup – This is key for that iconic gooey, sticky-sweet pecan pie texture. Chef’s Tip: You can swap this for pure maple syrup for a deeper, more nuanced flavor, but note the color will be darker.
- 1/4 cup (67g) creamy peanut butter – Use a standard, no-stir kind like Jif or Skippy. The emulsifiers in them help create a smoother filling. Natural, oily peanut butter can separate and make the texture greasy.
- 1/4 cup (57g) unsalted butter, melted – Unsalted is best so we can control the salt level ourselves. This adds incredible richness.
- 1/4 tsp salt – Crucial for making all the other flavors pop! It cuts the sweetness and highlights the peanut butter and chocolate.
- 1 cup (170g) chocolate chips – I use semi-sweet to balance the sweetness, but milk chocolate is a dreamy alternative for true candy bar vibes.
- 1 3/4 cups peanuts – This is where you can have fun! I love a mix of salted and honey-roasted for maximum flavor. Dry-roasted work great too if you want to control the salt separately.
- Optional: 1 tsp vanilla extract or a dash of cinnamon – My little “secret” additions. Vanilla enhances all the other flavors, and cinnamon adds a whisper of warmth that’s just divine.
Let’s Build the Magic: Step-by-Step Instructions
Ready? Let’s do this! This process is wonderfully straightforward, but I’ve packed these steps with all my best tips to ensure your pie is absolutely perfect.
Step 1: Preheat your oven to 350°F (175°C). This is our sweet spot for baking—hot enough to set the filling and brown the crust, but gentle enough to prevent burning. While it’s heating up, place your pie crust into a 9-inch pie dish. If you’re using a store-bought crust, just press it in gently. If homemade, trim and crimp the edges as fancy as you like! Chef’s Hack: I like to blind bake my crust for just 10 minutes before adding the filling. It guarantees a crisp, flaky bottom and prevents sogginess. Just line the crust with parchment paper, fill with pie weights or dried beans, and bake!
Step 2: In a large bowl, let’s make the filling. Crack in the 3 eggs and whisk them until they’re just broken up and smooth. You don’t want to whisk in too much air here. Add the granulated sugar, light corn syrup, creamy peanut butter, melted butter, and salt (and vanilla/cinnamon if using). Now, whisk it all together until it’s completely smooth and homogenous. You shouldn’t see any streaks of peanut butter or egg. A few little lumps are okay, but try to get it as smooth as you can. This is the foundation of our pie!
Step 3: This is the fun part! Using a spatula, gently fold in the chocolate chips and peanuts. “Folding” means you’re carefully turning the mixture over from the bottom until everything is evenly distributed. We do this instead of stirring aggressively to avoid deflating the mixture. You want every single slice to be packed with goodies!
Step 4: Carefully pour the luxurious filling into your prepared pie crust. Use the spatula to smooth out the top and make sure the peanuts and chocolate chips are evenly distributed, not all clumped in the center.
Step 5: Place the pie on a baking sheet (this is a lifesaver for catching any potential bubble-overs and makes it easier to handle). Slide it into your preheated oven and bake for 45-50 minutes. You’ll know it’s done when the edges are set and slightly puffed, and the center has a very slight jiggle—like Jell-O—when you gently shake the pan. If the crust starts getting too brown, don’t panic! Just tent the edges with some aluminum foil.
Step 6: This is the hardest step of all: let it cool completely! I know, the aroma will be driving you crazy, but slicing into a warm pecan pie is a recipe for a soupy, delicious mess. Let it cool on a wire rack for at least 2-3 hours, or even better, pop it in the fridge for an hour after it’s reached room temperature. This allows the filling to set perfectly for those clean, beautiful slices we all crave.
How to Serve This Masterpiece
Okay, it’s cooled, it’s set, and you’re ready for your moment of glory. How do you serve it? Well, a slice on its own is pure heaven. But if you want to take it to legendary status, here are my favorite ways to plate it up:
The Classic: A generous, room-temperature slice with a giant dollop of freshly whipped cream. The cool, airy cream against the rich, dense pie is a match made in dessert heaven.
The À La Mode Dream: Warm the slice very gently in the microwave for about 15 seconds—just enough to make the chocolate chips get a little melty again. Top it with a scoop of high-quality vanilla bean ice cream. The hot-and-cold contrast is an absolute showstopper.
The Gourmet Touch: Drizzle the plate with a little caramel or chocolate sauce before placing the slice down. Add a sprinkle of flaky sea salt on top of the pie itself. This enhances the salty-sweet vibe and makes it look like it came from a fancy bakery.
No matter how you serve it, use a sharp, thin-bladed knife dipped in hot water and wiped dry for the cleanest cuts through those crunchy peanuts!
Make It Your Own: Delicious Recipe Variations
I love this recipe as-is, but playing with flavors is what cooking is all about! Here are a few twists to suit your mood or dietary needs:
- Triple Nut Bliss: Swap out the peanuts for a mix of pecans, walnuts, and almonds. You get a more complex nutty flavor that’s incredible.
- Dark Chocolate Decadence: Not a milk chocolate fan? Use dark chocolate chips or even chopped up chunks of your favorite dark chocolate bar for a more sophisticated, less sweet profile.
- Gluten-Free Friendliness: This is so easy to make gluten-free! Simply use your favorite certified gluten-free pie crust. The filling is naturally GF, so it’s a perfect safe dessert for everyone to enjoy.
- Boozy Bourbon Kick: For a grown-up version, add 1-2 tablespoons of bourbon or whiskey to the filling mixture. It adds a wonderful depth of flavor that pairs beautifully with the nuts and chocolate.
- Cookie Butter Swap: Out of peanut butter or have an allergy? Try using Biscoff or speculoos cookie butter instead! It creates a wonderfully spiced, unique pie that will have everyone asking for the recipe.
Chef Emily’s Notes from My Kitchen to Yours
This recipe has evolved so much since that first accidental plop of peanut butter in my grandma’s bowl. I’ve made it for birthdays, holidays, “I had a bad day” days, and “I just need pie” days. It’s my go-to. One of my favorite kitchen stories involves this pie and my dog, Baxter. I left a freshly baked pie on the stovetop to cool and walked out of the kitchen for two minutes. I came back to find him, guilt written all over his furry face, with a single, perfect peanut-shaped dent taken out of the side of the pie. He knew exactly where the good stuff was! Now, I’m a firm believer in using pie crust shields and keeping pies safely out of reach of sneaky, four-legged food critics.
The beauty of this recipe is its flexibility and foolproof nature. Don’t stress over perfection. Even if your crust tears, you can patch it with a little extra dough. Even if your filling bubbles over a bit, it just adds character. It’s all part of the story, and it will all taste incredible.
Your Pie Questions, Answered!
Q: Why did my filling bubble over and make a mess in my oven?
A: This usually happens if the pie dish is overfilled or if the oven temperature is too high. Always bake your pie on a rimmed baking sheet to catch any drips! Using a deep-dish pie plate can also help.
Q: My pie is super jiggly after the bake time. Is it done?
A: A little jiggle in the center is perfect—it will set as it cools. If the entire pie is sloshy and liquid, it needs more time. If the edges are getting too dark, cover them with foil and give the center more time to cook.
Q: Can I make this pie ahead of time?
A: Absolutely! This pie is an excellent make-ahead dessert. Bake it, let it cool completely, and then store it covered at room temperature for up to a day, or in the refrigerator for up to 3 days. The cold from the fridge makes it even easier to slice neatly.
Q: Can I freeze peanut butter chocolate chip pecan pie?
A: You sure can! Once cooled, wrap the whole pie or individual slices tightly in plastic wrap and then aluminum foil. Freeze for up to 2 months. Thaw overnight in the fridge or at room temperature for a few hours.
Peanut Butter Chocolate Chip Pecan Pie
- Total Time: 55 minutes
- Yield: 1 9-inch Pie 1x
Description
This pie is pure indulgence—sweet, salty, crunchy, and gooey all in one bite. A rich peanut butter base meets melty chocolate chips and roasted peanuts in a buttery crust. It’s part candy bar, part pie, and all comfort. Easy to prep and impossible to resist.
Ingredients
1 9-inch pie crust (store-bought or homemade)
3 large eggs
1/3 cup (67g) granulated sugar
1 cup (237ml) light corn syrup
1/4 cup (67g) creamy peanut butter
1/4 cup (57g) unsalted butter, melted
1/4 tsp salt
1 cup (170g) chocolate chips
1 3/4 cups peanuts (use honey-roasted, salted, or dry-roasted—or a mix)
Optional twist: Add 1 tsp vanilla or a dash of cinnamon for warmth
Instructions
Preheat oven to 350°F (175°C). Place pie crust in a 9-inch pie dish.
In a large bowl, whisk eggs, sugar, corn syrup, peanut butter, melted butter, and salt until smooth.
Fold in chocolate chips and peanuts.
Pour filling into prepared crust and smooth the top.
Bake for 45–50 minutes, or until filling is set and slightly puffed.
Cool completely before slicing for clean cuts.
- Prep Time: 15 minutes
- Cook Time: 50 minutes
Nutrition
- Calories: 470
- Fat: 27g
- Carbohydrates: 45g
- Protein: 9g
Nutritional Information (Because Knowledge is Power!)
Okay, let’s be real: this is a celebratory dessert, a treat to be savored and enjoyed with joy, not guilt! But I know many of you like to have the info, so here’s a general breakdown per slice (assuming you get 8 generous slices from the pie). Remember, these are estimates and can vary based on the specific brands of ingredients you use.
Per Serving: Approximately 470 calories | 27g fat | 45g carbohydrates | 9g protein
It’s a rich, energy-dense slice thanks to the nuts, peanut butter, and sugars. The protein from the nuts and eggs helps make it satisfying. My philosophy? Enjoy a slice mindfully, savor every single bite, and share the rest with people you love. That’s what good food is all about!
Final Thoughts from My Kitchen
Well, my friend, there you have it. My heart and soul poured into one peanut-buttery, chocolatey, nutty pie. This recipe is more than just a list of ingredients; it’s an invitation to create a little bit of magic in your own kitchen and make some memories along the way. Whether you’re recreating my grandma’s happy accident or starting a new tradition of your own, I hope this pie brings as much joy to your table as it has to mine.
So, what are you waiting for? Preheat that oven, grab that jar of peanut butter, and let’s get baking. I can’t wait for you to experience the magic. When you make it, please share your creation with me! Tag me on social @TastyChow so I can see your beautiful work and cheer you on. Happy baking!
With love and a full belly,
Emily
