Your New Favorite Snack is Here: No-Bake Peanut Butter Cup Granola Bars!
Hey there, friend! Let’s talk about one of life’s greatest simple pleasures: that perfect, grab-and-go snack that actually makes you excited for your 3 PM slump. You know the one. It’s the snack you hide from the kids (and maybe your significant other) in the very back of the pantry. The one that feels like a treat but is secretly wholesome enough to call a responsible choice. Well, get ready to clear some shelf space, because these Peanut Butter Cup Granola Bars are about to become your kitchen’s new superstar.
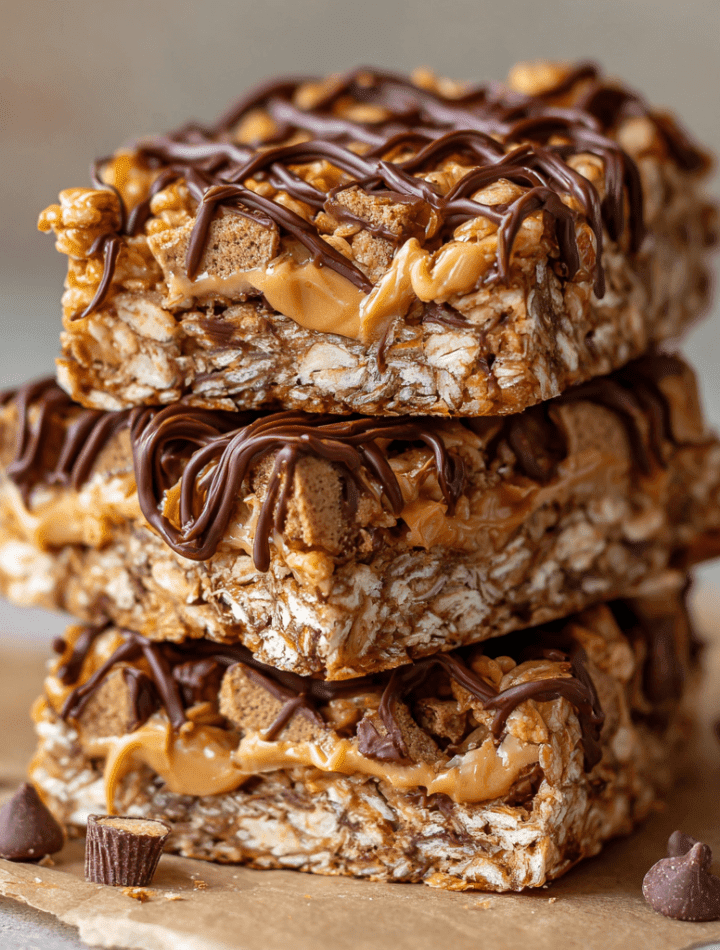
Imagine this: a chewy, hearty base of oats, held together by a rich, sweet blend of creamy peanut butter and golden honey. Every bite is packed with that salty-sweet peanut butter flavor we all adore, and then—BAM—you hit a little pocket of melty, chocolatey goodness from a chopped-up Reese’s mini. And just when you think it can’t get any better, there’s a luxurious drizzle of dark chocolate on top, because we believe in going the extra mile for joy around here.
The best part? You don’t even need to turn on your oven. That’s right, these are gloriously no-bake. In about 15 minutes of active kitchen time, you can have a whole pan of these beauties setting up in the fridge, filling your home with the irresistible, warm, nutty aroma of melting peanut butter and honey. They’re the ultimate lunchbox hero, the perfect pre-workout fuel, and the most satisfying midnight snack. So, tie on your favorite apron (the messy one is always the best), and let’s make something delicious together!

A Spoonful of Peanut Butter and a Whole Lot of Love
This recipe takes me right back to my grandma’s linoleum-tiled kitchen. She was the queen of “thrifty and delicious,” and her counter always had a jar of homemade granola bars sitting on it, ready for any hungry grandkid who came bursting through the screen door. Her version was simple—oats, honey, peanut butter—and I thought they were absolute magic.
One summer afternoon, I was “helping” her make a batch (which mostly involved me sneaking tastes of the peanut butter straight from the jar). My uncle had just visited and left behind a giant bag of miniature Reese’s cups. Grandma, with that twinkle in her eye, looked at the bag, looked at our sticky granola bar mixture, and said, “Well, Emily, let’s experiment.” We chopped up a handful and stirred them in. The result was nothing short of revolutionary in my eight-year-old mind. The way the warm mixture made the chocolate and peanut butter centers get all soft and swirvy… it was a core memory in the making. This recipe is my homage to her—a simple, no-fuss base with a little extra “wow” factor she would have wholeheartedly approved of.
Gathering Your Granola Bar Goodies
Here’s the beautiful lineup of simple ingredients you’ll need. This is where the magic starts!
- 3 cups old-fashioned oats: These are the backbone of our bars, providing that wonderful chewy texture and heartiness. Don’t use quick oats—they can get a bit mushy. If you need a gluten-free option, just make sure your oats are certified GF!
- 1 ¼ cups creamy peanut butter: The star of the show! I recommend using a standard, no-stir kind for the best binding power. Natural peanut butter that separates can sometimes make the bars a little oily, but if that’s all you have, give it a really good stir first! For a nut-free version, sunflower seed butter works like a dream.
- ½ cup honey: Our natural sweetener and another key binder. Honey gives that classic, floral sweetness that pairs so perfectly with peanut butter. For a vegan swap, maple syrup is a fantastic alternative.
- 1 teaspoon vanilla extract: A little splash of vanilla is my secret weapon for making desserts taste… well, more dessert-like! It rounds out all the flavors beautifully.
- ½ teaspoon salt: Trust me on this! Salt is crucial for balancing the sweetness and making the peanut butter flavor truly pop. If your peanut butter is already salted, you can reduce this to a scant ¼ teaspoon.
- ½ cup chopped Reese’s minis (optional but highly recommended): This is the “fun” part! Chopping the minis gives you little pockets of peanut butter cup bliss throughout the entire bar. If you can’t find minis, you can chop up regular-sized cups, or even use Reese’s pieces!
- ½ cup semisweet chocolate chips (for drizzle): Because we’re fancy like that. A dark chocolate drizzle takes these from “amazing” to “absolutely irresistible.”
- 1 teaspoon coconut oil or butter (for melting chocolate): This little bit of fat helps thin the chocolate just enough for a perfect, smooth drizzle that hardens nicely.
Let’s Make These No-Bake Wonders! A Step-by-Step Guide
Ready to see how easily these come together? Follow along with me—I’ve got some chef-y tips for you at every step to ensure granola bar perfection.
- Create the Glue: In a medium saucepan over low heat, combine the peanut butter and honey. Warm them gently, stirring constantly with a spatula, until the mixture is smooth, liquid, and perfectly combined. This should only take 2-3 minutes—we’re just melting it, not cooking it! Chef’s Hack: If you’re in a hurry, you can do this in a microwave-safe bowl in 30-second bursts, stirring between each one.
- Flavor Boost: Once you’ve removed the saucepan from the heat, stir in the vanilla extract and salt. Take a moment to inhale—that’s the smell of happiness right there.
- Combine the Goods: In a large mixing bowl, combine the old-fashioned oats and the chopped Reese’s minis. Now, pour that glorious, warm peanut butter mixture over the top. Use your spatula to stir, stir, stir until every single oat is gleaming and coated in the peanut butter honey goodness. This is an arm workout, but it’s so worth it!
- The Pack-Down (The Most Important Step!): Line a 9×9-inch baking pan with parchment paper, leaving some overhang on two sides. This will create a “sling” that makes it super easy to lift the whole block of granola out later. Transfer the mixture into the pan. Now, for the secret to chewy, not crumbly, bars: PRESS, PRESS, PRESS! Use the bottom of a flat measuring cup, a glass, or a small spatula to compact the mixture as firmly and evenly as you can across the entire pan. The more you press, the better they’ll hold together.
- The Fancy Drizzle: In a small, microwave-safe bowl, combine the chocolate chips and coconut oil. Microwave in 20-second intervals, stirring well each time, until completely smooth. Using a fork or a small spoon, drizzle the melted chocolate artistically (or enthusiastically!) over the pressed granola base.
- The Patience Game: Carefully place the pan in the refrigerator. Let it chill for at least 1-2 hours, or until the bars are completely firm. This is the hardest part—waiting!
- Slice and Serve: Once set, use the parchment paper sling to lift the entire granola slab out of the pan. Place it on a cutting board and use a sharp knife to slice it into bars or squares. For super clean cuts, you can wipe your knife blade with a warm, damp cloth between slices.
How to Serve & Savor Your Masterpiece
Okay, the bars are set, sliced, and ready for their close-up! How you serve them can make the experience even more fun.
For a simple, on-the-go treat, just wrap them individually in parchment paper and tie them with a bit of baker’s twine. They look adorable and stay fresh in the fridge or lunchbox. If you’re serving them as a dessert or for a party, place them on a beautiful platter and maybe add a little sprinkle of flaky sea salt on top right after you drizzle the chocolate—it elevates everything!
I love pairing one of these bars with a cold glass of milk for an afternoon pick-me-up, or crumbling one over a bowl of Greek yogurt and fresh berries for a next-level breakfast. They’re incredibly versatile. Just remember, because they’re held together by peanut butter and honey, they do best when stored in the fridge. They’ll stay firm and chewy for up to a week… if they last that long!
Get Creative! Fun Flavor Twists & Swaps
One of the best things about this recipe is its flexibility. Feel like mixing it up? Here are some of my favorite variations:
- The Double Chocolate Chunk: Swap out the Reese’s minis for ½ cup of dark chocolate chunks and add 2 tablespoons of cocoa powder to the oat mixture before adding the wet ingredients. It’s a chocolate lover’s dream!
- The Tropical Escape: Stir in ⅓ cup of chopped dried mango and ¼ cup of unsweetened shredded coconut along with the oats. The bright, fruity flavor is a delightful surprise.
- The Protein Powerhouse: Add 2 scoops of your favorite vanilla or chocolate protein powder to the dry ingredients. You may need to add an extra tablespoon or two of peanut butter or honey to compensate for the dryness—just mix and see how the texture feels.
- The “Everything but the Kitchen Sink”: This is your chance to clean out the pantry! Add ¼ cup of flax seeds, ¼ cup of sunflower seeds, and ¼ cup of dried cranberries for a bar packed with texture and flavor.
- The Nut-Free Nirvana: As mentioned, use sunflower seed butter instead of peanut butter and swap the Reese’s for Enjoy Life or other allergy-friendly chocolate chips. Everyone gets to join the party!
A Few More Thoughts From My Kitchen to Yours
This recipe has been a living, evolving thing in my kitchen for years. I’ve made it for countless bake sales, new-parent care packages, and cross-country road trips. One time, I was so excited to make them for a friend’s visit that I accidentally used quick oats. The result was a bit… pasty. We still ate them, of course (waste not, want not!), but it was a great reminder that old-fashioned oats really are key for that perfect chew.
Another fun memory: I once tried to make a quadruple batch for a big family reunion. Let’s just say my arm got a serious workout from all that stirring, and my husband had to step in as the official “packer-downer.” The point is, don’t be afraid to make this recipe your own. Cooking is about joy, connection, and a little bit of delicious mess. I hope this recipe finds its way into your regular rotation and creates some happy kitchen memories of your own.
Granola Bar Questions? I’ve Got Answers!
Over the years, I’ve gotten a lot of questions about this recipe. Here are the most common ones to help you out!
Q: My bars are too crumbly and falling apart! What did I do wrong?
A: This is almost always a packing issue! When you transfer the mixture to the pan, you really need to press it down with all your might. Use something flat and sturdy, and compact it until it feels like a solid, dense block. Also, make sure you’re chilling them for the full time—this allows the “glue” to fully set.
Q: Can I use maple syrup instead of honey?
A: Absolutely! Maple syrup is a wonderful vegan-friendly substitute. The flavor will be slightly different, but just as delicious. The bars might be a tiny bit softer, so ensure you chill them thoroughly.
Q: Why are my bars so hard/rock-solid?
A: This usually means the peanut butter and honey mixture was heated for too long or at too high a temperature, causing it to harden more than intended. Remember, low and slow is the way to go—just warm it until it’s smooth and pourable.
Q: How long will these keep, and how should I store them?
A: Store them in an airtight container in the refrigerator for up to 1 week. They can also be frozen for up to 3 months! Just layer them between parchment paper in a freezer-safe bag or container. Thaw in the fridge or at room temperature for 30 minutes before enjoying.
Nutritional Breakdown (A Quick Peek!)
While I’m all about the joy of eating, I know many of you like to keep track of what you’re enjoying! Here’s a general nutritional breakdown per bar (assuming you get 14 bars from the pan). Remember, this is an estimate and can vary based on the specific brands of ingredients you use.
- Calories: ~240
- Protein: 6g
- Fat: 12g
- Carbohydrates: 27g
- Sugar: 15g
- Fiber: 2g
These bars provide a great balance of complex carbs from the oats for sustained energy, healthy fats and protein from the peanut butter to keep you full, and a touch of natural sweetness to satisfy that craving. They’re a much healthier and more satisfying alternative to many store-bought granola bars that are loaded with refined sugars and preservatives.
Happy Snacking, My Friend!
And there you have it! Your very own guide to creating the most delicious, chewy, peanut-buttery, chocolate-drizzled granola bars right in your own kitchen. I hope you feel empowered, excited, and maybe a little bit hungry.
This recipe is a testament to the fact that the best food doesn’t have to be complicated. It’s about using simple, wholesome ingredients to create something that brings a genuine smile to your face. So, go on, make a batch, share one with a friend (or don’t, I won’t judge!), and savor every last bite.
If you make them, I’d be absolutely thrilled to see your creation! Tag me on social @TastyChow so I can cheer you on. Now, get out there and chow down!
With love and a full heart,
Emily