Your New Favorite Comfort Food Muffin
Hey there, my fellow food lover! Let me ask you a question. Did you ever have one of those childhood lunches that just felt like a warm hug? For me, it was always the classic, no-fuss, utterly perfect peanut butter and jelly sandwich. There was something magical about that sweet-and-salty combo, all smooshed between two slices of soft bread. It was my edible security blanket.
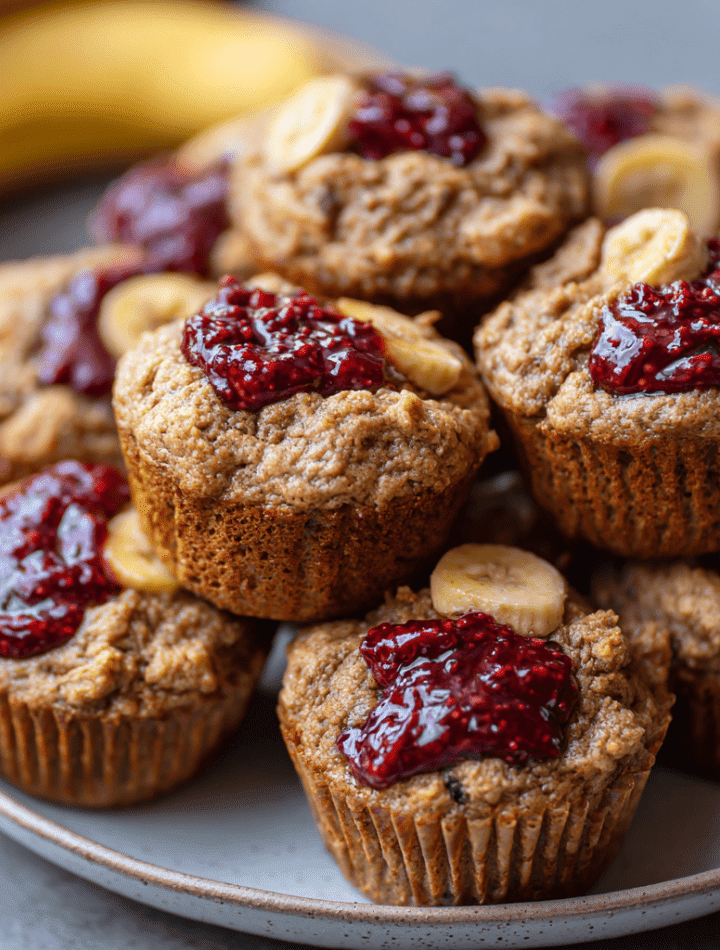
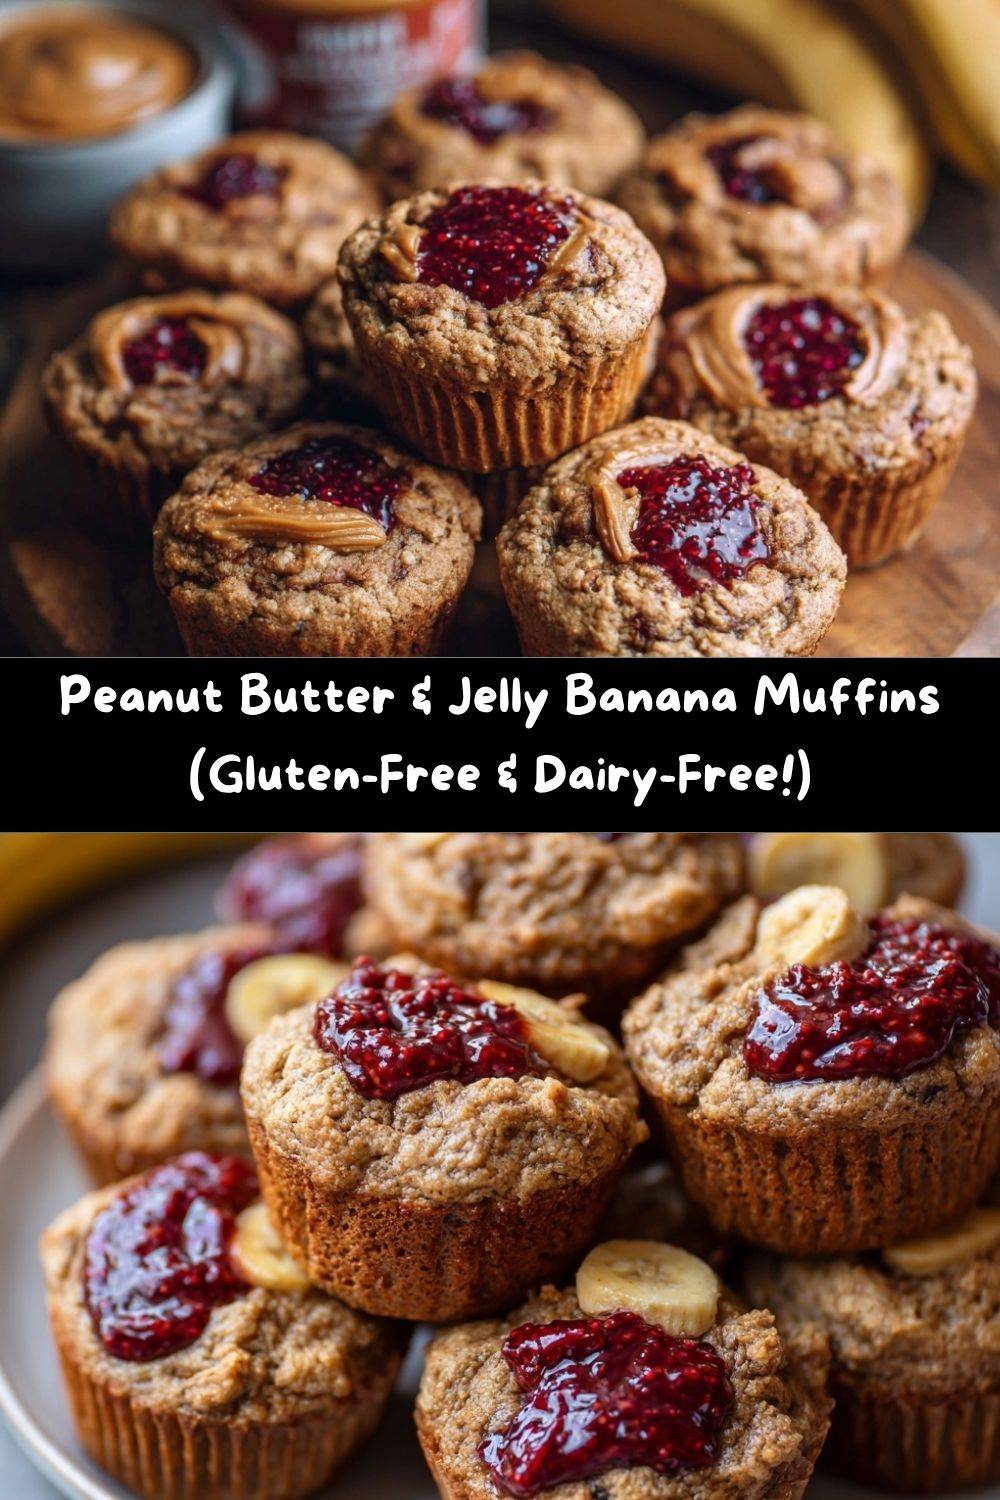
But what happens when that beloved flavor combo grows up? It transforms into these incredibly soft, moist, and dreamily delicious Peanut Butter & Jelly Banana Muffins! Imagine this: a tender, gluten-free banana muffin base, rich with the taste of real peanut butter, hiding a sweet, gooey pocket of raspberry jam in its center. It’s a flavor explosion that will have you feeling like a kid again, but in the best, most sophisticated way.
And the best part? These muffins are secretly a powerhouse of wholesome goodness. They’re naturally sweetened with ripe bananas and a touch of maple syrup, completely gluten-free thanks to oat flour, and have no dairy in sight. They’re the ultimate feel-good treat you can enjoy for breakfast, a snack, or even dessert without a single ounce of guilt. So, tie on your favorite apron (the messy one is always the best!), and let’s make your kitchen smell absolutely incredible.
A Smooshed Sandwich & A Happy Memory
This recipe always takes me back to my grandma’s kitchen table. She’d make me a PB&J for lunch, but she had a special trick. She’d press down on the sandwich with the palm of her hand just before handing it to me, giving it a gentle, compact smoosh. “It tastes better that way, Em,” she’d whisper with a wink. And you know what? She was right. That simple act made the flavors meld together in the most wonderful way.
I wanted to capture that exact feeling in a muffin—that perfect marriage of peanut butter and jelly in every single bite. The first time I pulled a batch of these out of the oven and bit into the warm, jammy center, I was instantly transported back to that sunlit table. It’s more than a recipe; it’s a little edible time machine to a simpler, sweeter time. I hope it becomes a happy little tradition in your home, too.
Gathering Your Muffin-Making Magic
This is where the fun begins! One of the things I love most about this recipe is its flexibility. Let’s walk through the ingredients—your building blocks for muffin perfection.
- 4 ripe spotty bananas, mashed: The spottier, the better! These brown-speckled beauties are nature’s sweetener and add incredible moisture. No ripe bananas? No problem! Bake a couple at 350°F for 15-20 minutes until the skins turn black, let them cool, and you’re in business.
- 4 large eggs: Our trusty binders, giving the muffins structure and a lovely, tender crumb.
- 4 tablespoons avocado oil: A neutral-tasting oil that keeps things super moist. If you prefer, melted coconut oil works beautifully here too.
- 1/2 cup maple syrup: Pure maple syrup adds a deep, caramel-like sweetness that refined sugar just can’t match. It’s my go-to for natural baking.
- 1/2 cup natural creamy peanut butter: The star of the show! Make sure to use the natural, runny kind for the best texture and flavor. Feel free to swap in almond or sunflower seed butter if you have a nut allergy.
- 2 teaspoons vanilla extract: A splash of vanilla is like the bass player in a band—it supports all the other flavors and makes everything sound (or taste!) better.
- 3 cups oat flour: My favorite gluten-free flour for its mild flavor and fluffy texture. Chef’s Hack: You can easily make your own by blitzing rolled oats in a high-speed blender or food processor until they reach a fine, powdery consistency!
- 1 teaspoon cinnamon: A warm, cozy spice that pairs perfectly with banana and peanut butter. It’s the secret background singer you’ll love.
- 1 teaspoon baking powder: Our leavening agent, responsible for that beautiful muffin rise.
- 1/2 cup unsweetened jam, chia jam, or mashed berries: The “J” in our PB&J! I’m a raspberry jam girl at heart, but strawberry, blackberry, or even a handful of mashed fresh berries will create that iconic swirl.
Let’s Bake! Your Step-by-Step Guide to Muffin Bliss
Ready to see some magic happen? This process is as easy as, well, PB&J! Follow these steps, and you’ll be a muffin master in no time.
- Preheat and Prep: First things first, get that oven going to 350°F (175°C). This ensures it’s perfectly hot and ready for our batter. Line your muffin tin with parchment liners. I love these because they never stick and make cleanup a dream.
- Mix the Wet Team: Grab a large bowl and add your mashed bananas, eggs, avocado oil, maple syrup, peanut butter, and vanilla extract. Now, take your whisk and go to town! You want to whisk until the mixture is completely smooth and beautifully emulsified. No streaks of egg or pools of oil should remain. This is the foundation of a perfectly textured muffin.
- Bring in the Dry Team: Now, gently sprinkle the oat flour, cinnamon, and baking powder over your wet ingredients. Here’s a crucial chef tip: switch from a whisk to a spatula and fold the dry ingredients in. You want to mix until the flour is *just* incorporated. A few lumps are totally fine! Overmixing is the enemy of a tender, soft muffin—it develops the gluten in the oats and can make them tough.
- Fill and Swirl: Using a cookie scoop or a large spoon, divide the batter evenly among your prepared muffin cups, filling each one about 3/4 full. Now for the fun part! Take a small spoonful of your jam and drop it right into the center of each muffin cup. You can gently swirl it with a toothpick for a marbled effect, or just leave it as a hidden surprise in the middle. Both ways are delicious!
- Top It Off (Optional but Awesome): Feeling fancy? Now is the time to sprinkle on some chopped peanuts for a crunchy texture or a few dark chocolate chips for a next-level flavor experience. A little extra drizzle of peanut butter on top before baking never hurt anybody, either!
- Bake to Golden Perfection: Slide your muffin tin into the preheated oven and bake for 22-25 minutes. You’ll know they’re done when the tops are springy to the touch and a toothpick inserted into the muffin part (not directly into the jam pocket) comes out clean.
- The Cool Down: This is the hardest part—waiting! Let the muffins cool in the pan for a solid 10 minutes before transferring them to a wire rack. This allows them to set and makes them much easier to remove without falling apart.
How to Serve & Savor Your Masterpiece
Okay, the muffins are cooled, and your kitchen smells like a bakery. Now what? Here are my favorite ways to enjoy these PB&J delights!
For the ultimate experience, I highly recommend enjoying one slightly warm. Pop it in the microwave for 10-15 seconds to re-melt that jammy center. It’s pure bliss! For breakfast, I’ll pair one with a big scoop of Greek yogurt and a few fresh berries for a balanced start to the day.
They are also the undisputed champion of packed lunches and picnics. Toss one in a lunchbox, and it’s a guaranteed smile. And for a simple, satisfying dessert, try splitting one open and topping it with a small scoop of vanilla bean ice cream. Trust me on this one.
Get Creative! Fun Flavor Twists & Swaps
One of my core kitchen beliefs is that a recipe should be a starting point for your own creativity. Don’t be afraid to play with this one!
- Chocolate Lover’s Delight: Fold 1/2 cup of dark chocolate chips into the batter before baking. The combination of chocolate, peanut butter, and banana is legendary for a reason.
- Triple Berry Blast: Instead of jam, gently fold 1/2 cup of mixed fresh or frozen berries (like blueberries, raspberries, and chopped strawberries) right into the batter.
- SunButter & Apple Jelly: For a nut-free version, swap the peanut butter for SunButter and use apple jelly for the filling. It’s a whole new nostalgic flavor profile!
- Peanut Butter Cup: Place a few mini dark chocolate peanut butter cups at the bottom of each muffin liner before adding the batter for a fun, hidden treat.
- Protein Power-Up: Add a scoop or two of your favorite vanilla or chocolate protein powder. You may need to add a tablespoon or two of milk (dairy or non-dairy) to keep the batter from getting too thick.
Emily’s Kitchen Notes & Stories
This recipe has been a fun journey of delicious experimentation. The first time I made it, I was a little overzealous with the jam swirling and ended up with a batch of gorgeous, but slightly lava-like, muffins that erupted beautifully! It was a delicious mess, and it taught me that a gentle hand with the swirl is key, but even the “failures” are still a win.
Over time, I’ve found that letting the batter rest for 5 minutes after mixing before scooping it into the tin helps the oat flour absorb the moisture, resulting in a perfect, non-gummy texture. These little muffins have become a staple in my freezer; I double the batch every time! They are my go-to gift for new neighbors or friends who need a little pick-me-up. Food is love, after all.
Your Muffin Questions, Answered!
I’ve gotten so many wonderful questions about this recipe over the years. Here are the most common ones to help you bake with confidence!
- Q: My jam sunk to the bottom! What did I do wrong?
A: This is a common one! It usually happens if the batter is a little too thin or if the jam is very runny. To prevent this, make sure your batter is nice and thick (thank you, oat flour and bananas!). You can also try chilling your jam for 15 minutes before using it, or even tossing your jammy spoonful in a light dusting of oat flour before placing it in the batter. - Q: Can I make these muffins vegan?
A: You can definitely try! I’ve had good results using a flax egg substitute (1 tbsp ground flax + 3 tbsp water per egg, left to gel for 5 minutes). The texture will be a bit denser but still delicious. Make sure your jam is vegan, as some are made with gelatin. - Q: Why are my muffins gummy in the middle?
A: This is almost always a sign of overmixing. Remember, fold that flour in gently until it’s *just* combined. Also, ensure your oven is at the correct temperature with an oven thermometer—an oven that runs too cool can cause the muffins to steam rather than bake. - Q: How do I store these, and can I freeze them?
A: Absolutely! They freeze like a dream. Let them cool completely, then store them in a freezer-safe bag or container for up to 3 months. To thaw, just leave them on the counter or pop them in the toaster oven to warm up. They keep in an airtight container on the counter for 2 days, or in the fridge for up to 5 days.
Nourishing Your Body & Soul
While I’m all about flavor first, I also love knowing that what I’m eating is fueling my body. These muffins are a fantastic example of a treat that’s also packed with goodness.
Thanks to the oat flour, they’re a great source of whole grains and fiber, which helps keep you full and satisfied. The bananas and maple syrup provide natural sugars for energy, while the peanut butter and eggs add a solid punch of protein to power you through your morning or afternoon slump. The healthy fats from the avocado oil and peanut butter are great for sustained energy.
Please note: The following nutritional information is an estimate calculated using a third-party tool and will vary based on the specific brands and ingredients you use. The estimate is for 1 muffin, assuming the recipe yields 12 muffins.
- Calories: ~180
- Protein: 5g
- Carbohydrates: 18g
- Fat: 10g
- Fiber: 3g
One Last Bite of Wisdom
Well, my friend, we’ve done it! We’ve taken the simple, timeless joy of a peanut butter and jelly sandwich and turned it into a portable, wholesome, and utterly irresistible muffin. I hope this recipe brings as much warmth and happiness to your kitchen as it has to mine.
Remember, baking is about the journey, not just the destination. Don’t stress about a perfect swirl or a few crumbs. What matters is the love you put into it and the people you get to share it with. So, go on, grab a muffin, pour yourself a cup of coffee, and enjoy the delicious fruits of your labor.
I’d love to see your creations! Tag me on social @TastyChow with #TastyChow so I can see your beautiful muffins and give your post a little chef’s kiss! Happy baking!
— With love and a full muffin tin,
Emily