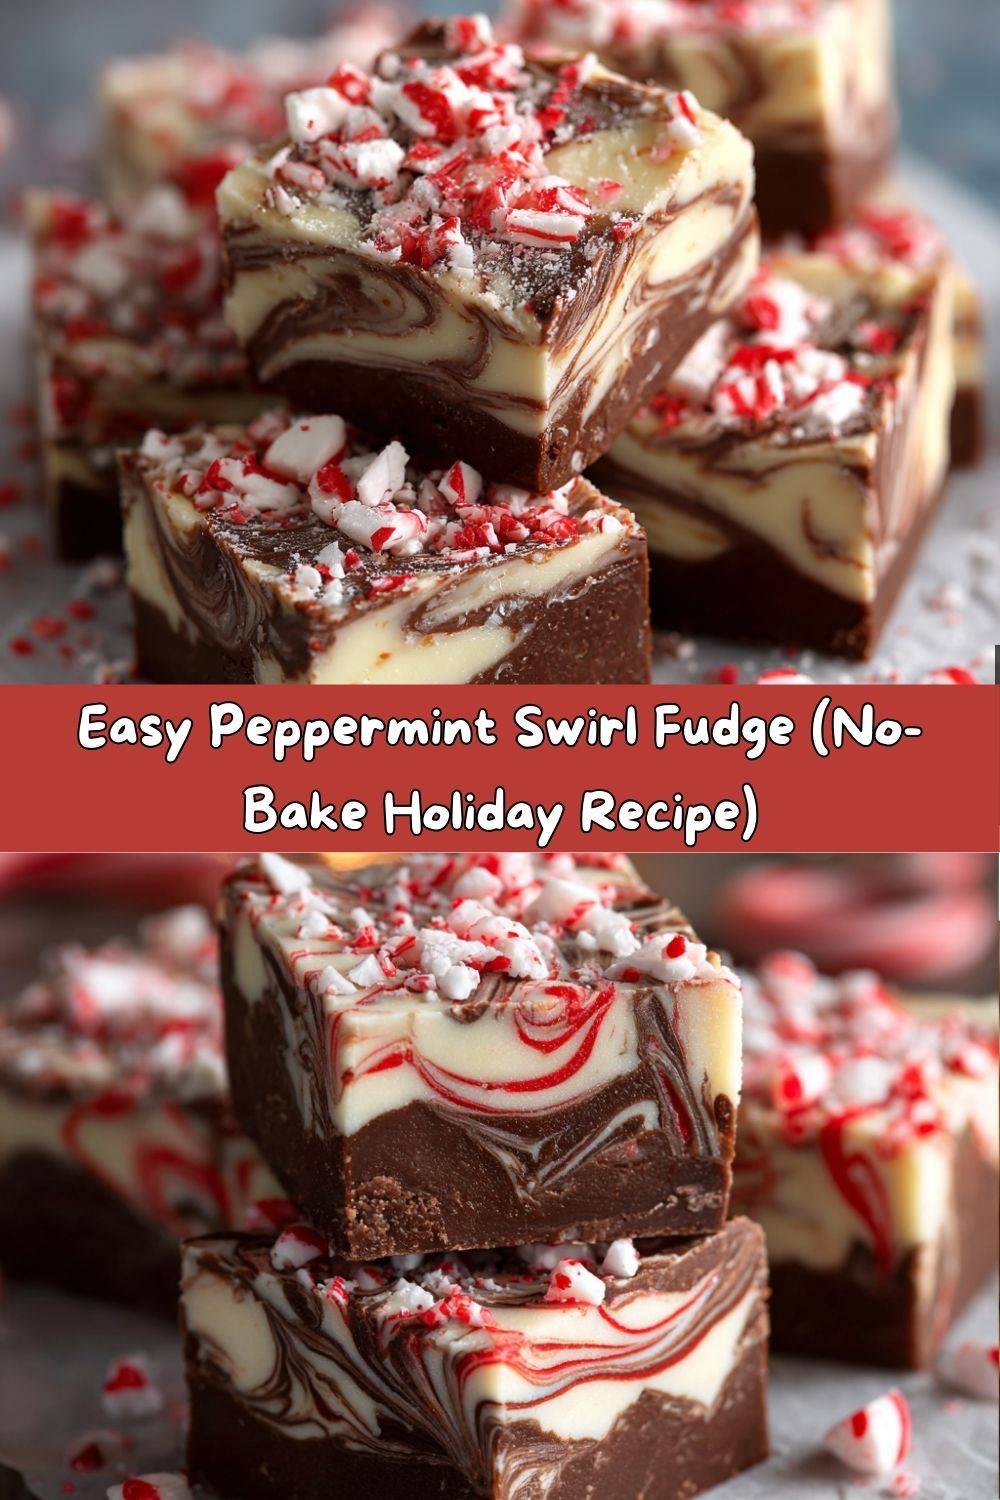
The Magic of Peppermint Swirl Fudge: Your New Holiday Tradition
Hey there, my fellow food lover! Is there anything that screams “holiday season” more than the cheerful crunch of a candy cane and the rich, decadent smell of melting chocolate? I don’t think so. It’s a combination that instantly transports me to a world of twinkling lights, cozy sweaters, and the joyful chaos of a kitchen filled with loved ones.
If you’ve been scrolling through endless complicated holiday recipes, feeling that familiar pang of “I-don’t-have-time-for-this,” then stop right here. You, my friend, have just found your holiday baking hero. This Peppermint Swirl Fudge is the ultimate crowd-pleaser. It’s unbelievably creamy, perfectly sweet with a cool peppermint kick, and it looks like a million bucks with that gorgeous marbled swirl. The best part? We’re talking 15 minutes of active kitchen time. No oven, no fuss, just pure, unadulterated festive magic.
So, tie on your favorite festive apron (the one that might already have a smudge of chocolate on it—no judgment here!), and let’s make something incredibly delicious together. This isn’t just a recipe; it’s your secret weapon for potlucks, neighbor gifts, and those moments when you need a little sweet something to make the season bright.
A Spoonful of Memories: My First Fudge Fiasco
I have to confess, my relationship with fudge didn’t start out as this beautiful, smooth love affair. Oh no. My first attempt, back in my grandma’s kitchen, was a grainy, seized-up mess that we eventually dubbed “chocolate peppermint sandstone.” I was so determined to get it right, to recreate the smooth, melt-in-your-mouth fudge she used to buy from a little candy shop in town. I remember the frustration, followed by a fit of giggles as we tried to actually break a piece off with a hammer.
That “failure” was one of my best kitchen lessons. It taught me patience, the importance of low, gentle heat, and that sometimes the messiest kitchen disasters make for the best stories. This recipe is the glorious, foolproof result of all those lessons learned. It’s the one I’ve perfected over years of holiday baking, and it’s virtually impossible to mess up. It’s my way of ensuring your fudge story starts with a triumph, not a trip to the hardware store for tools to break it apart!
Gathering Your Festive Fudge Ingredients
Simplicity is the name of the game here! Here’s what you’ll need to create this holiday masterpiece. I’ve included my favorite chef-y insights and swaps to make this recipe truly yours.
- 14 oz (1 can) Sweetened Condensed Milk: This is the magic glue that gives our fudge its legendary creamy, soft texture. Chef’s Tip: Do not substitute with evaporated milk; they are not the same! For a dairy-free version, look for canned coconut condensed milk.
- 3 cups White Chocolate Chips: They form the beautiful, creamy base for our peppermint layer. Chef’s Tip: Use a high-quality brand like Ghirardelli or Guittard for the best melt and flavor. Cheap chips can sometimes be stubborn to melt smoothly.
- 3 cups Semi-Sweet Chocolate Chips: This provides the rich, deep chocolatey contrast to the sweet white chocolate. Chef’s Tip: Feel free to swap in dark chocolate chips if you prefer a less sweet, more intense chocolate flavor. It’s a fantastic balance to the sweetness.
- 1 teaspoon Peppermint Extract: This is where the holiday spirit comes alive! Chef’s Tip: Start with a full teaspoon for a pronounced, refreshing flavor. If you’re sensitive, you can scale back to ¾ tsp. Always use extract, not oil, for the best flavor.
- ½ cup Crushed Peppermint Candies or Candy Canes: This is for that iconic crunch and festive look on top. Chef’s Tip: Unwrap your candies and place them in a zip-top bag. Use a rolling pin to crush them into a mix of fine dust and small pieces for the perfect texture.
- Red Food Coloring (optional): This is purely for that gorgeous visual swirl effect. Chef’s Tip: Gel food coloring is best as it provides vibrant color without thinning out the fudge mixture. A little goes a long way!
Let’s Make Some Magic: Step-by-Step Fudge Instructions
Ready? Let’s do this! I’ll walk you through every step with my favorite hacks to ensure fudge perfection.
- Prep Your Pan: Line an 8×8 or 9×9 inch baking pan with parchment paper, leaving some overhang on two sides. This is your secret weapon for easily lifting the entire block of fudge out later for pristine slicing. Give the paper a light spritz with cooking spray for absolute non-stick insurance.
- Melt the Chocolate Layer: In a double boiler over simmering water (or carefully in the microwave in 30-second bursts), melt the semi-sweet chocolate chips with half of the can of sweetened condensed milk. Stir, stir, stir until it’s one gloriously smooth and glossy chocolate pool. Chef’s Hack: If using a microwave, stop before it looks fully melted. The residual heat will finish the job as you stir, preventing you from overheating and seizing the chocolate.
- First Layer Down: Pour this lush chocolate mixture into your prepared pan. Use an offset spatula or the back of a spoon to spread it into a smooth, even layer. Pop this into the fridge for about 10 minutes while you work on the next layer. This just helps prevent the two layers from blending too much when you add the white chocolate.
- Create the Peppermint Layer: Now, melt the white chocolate chips with the other half of the sweetened condensed milk using the same gentle method. Once smooth, stir in the peppermint extract. Now, if you’re going for the swirl, add a few drops of red gel food coloring. Don’t mix it in completely! Just gently fold it once or twice to create beautiful red streaks and swirls.
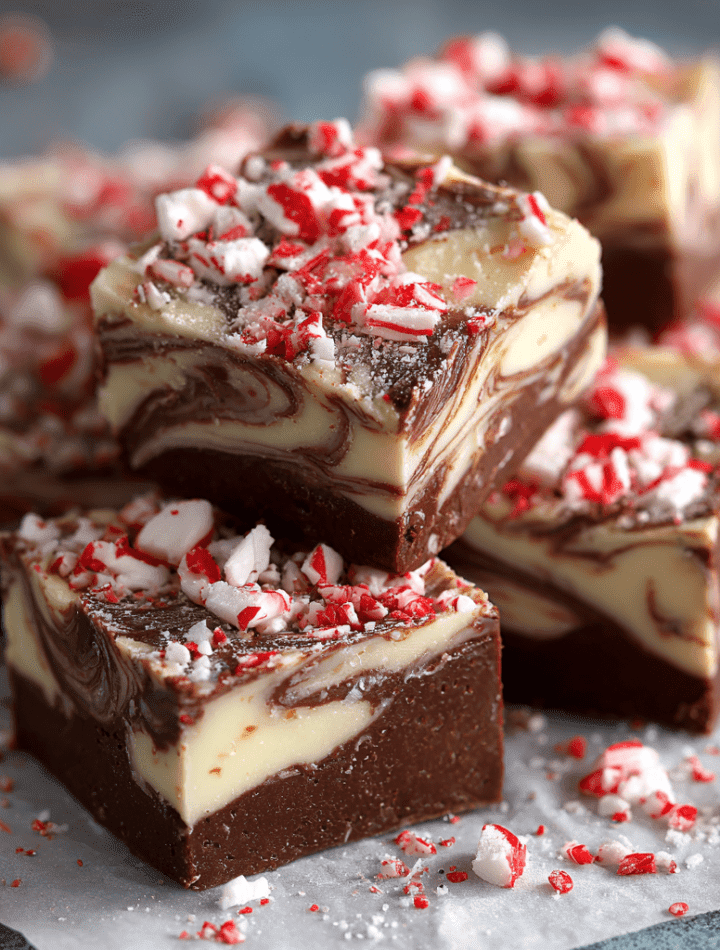
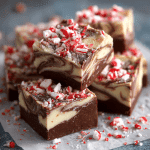
- Swirl & Top: Take the pan out of the fridge. Pour the peppermint mixture over the chocolate layer. If you want a more marbled effect, you can take a knife or a toothpick and gently swirl the two layers together. Next, generously sprinkle the crushed peppermint candies all over the top and press them down lightly so they stick.
- The Patience Game: Now, the hardest part: waiting. Carefully transfer the pan to the refrigerator and let it chill for at least 4 hours, or ideally overnight. This allows it to set up perfectly for clean, sharp cuts.
- Slice and Serve: Once fully set, use the parchment paper overhang to lift the fudge block out of the pan. Place it on a cutting board and use a large, sharp knife to slice it into small squares. For super clean cuts, wipe your knife blade with a hot, damp cloth between slices.
How to Serve Your Holiday Masterpiece
This fudge is a star all on its own, but a little presentation goes a long way!
Arrange the squares on a beautiful festive platter for your holiday party. They look stunning nestled between other cookies. For gifting, stack a few pieces in a clear cellophane bag, tie it with a rustic ribbon and a holiday tag. It’s a heartfelt, homemade gift everyone truly appreciates. I also love serving a square of this fudge alongside a piping hot mug of dark hot chocolate or a fresh coffee—the contrast of temperatures is divine. For an extra touch, you can even lightly dust the platter with a little extra crushed candy cane before arranging the fudge squares. It’s all about that festive flair!
Get Creative: Delicious Recipe Variations
Once you’ve mastered the classic, the world of fudge is your oyster! Here are a few of my favorite twists:
- Dark Chocolate Orange: Swap the semi-sweet chocolate for dark chocolate and replace the peppermint extract with orange extract. Top with candied orange peel instead of candy canes.
- Cookies and Cream: Omit the peppermint extract and food coloring. Stir 1 cup of crushed Oreo cookies into the white chocolate layer before pouring. Top with more crushed Oreos.
- Mocha Swirl: Add 1 tablespoon of instant espresso powder to the dark chocolate layer when melting. The coffee depth enhances the chocolate flavor beautifully.
- Rocky Road: After pouring the chocolate layer, sprinkle mini marshmallows and chopped almonds over it before adding the white chocolate layer.
- Almond Joy: Use the chocolate layer as a base. For the top layer, use the white chocolate/condensed milk mix but omit the peppermint. Stir in 1 cup of shredded coconut and top with slivered almonds.
Chef Emily’s Notes from My Kitchen to Yours
This recipe has been my faithful holiday companion for years, and it’s evolved in the best ways. I once, in a pre-coffee haze, accidentally used mint extract instead of peppermint. It was… interesting. A little too much like toothpaste for my liking! So learn from my mistake: peppermint and mint are different. Peppermint is what you want here!
I also highly recommend making a double batch. One for gifting, and one for your family to secretly nibble on straight from the fridge. It freezes like an absolute dream—just layer it between parchment paper in an airtight container and freeze for up to 3 months. Thaw in the fridge overnight. It’s like finding a hidden treasure in January!
Fudge FAQs & Troubleshooting
Q: My chocolate is clumpy and grainy instead of smooth. What happened?
A: This means the chocolate likely got too hot and “seized.” The best fix is prevention: use low, gentle heat. If it happens, you can try stirring in a teaspoon of neutral oil (like vegetable or coconut) to smooth it out.
Q: Can I use store-bought candy cane pieces instead of crushing my own?
A: Absolutely! It’s a great time-saver. Just make sure the pieces aren’t too large, or they might be difficult to bite into once the fudge is set.
Q: How long will this fudge keep?
A: Stored in an airtight container in the refrigerator, it stays perfectly fresh and creamy for up to 2 weeks. It never lasts that long in my house, though!
Q: My fudge is too soft to cut. What can I do?
A: It just needs more time! Pop it back in the fridge for another few hours, or even overnight. Ensure you’re using a sharp knife warmed under hot water for clean cuts.
Peppermint Swirl Fudge
- Total Time: 4 hours 15 minutes
- Yield: 30–36 pieces 1x
Description
This peppermint swirl fudge is the ultimate holiday indulgence—rich, creamy layers of chocolate laced with cool peppermint and topped with crushed candy canes. With just a few ingredients and a festive flair, it’s a no-bake treat that looks as good as it tastes.
Ingredients
14 oz (1 can) sweetened condensed milk
3 cups white chocolate chips
3 cups semi-sweet chocolate chips
1 teaspoon peppermint extract
½ cup crushed peppermint candies
Red food coloring (optional, for swirl effect)
Instructions
Line an 8×8 or 9×9 inch pan with parchment paper.
In a double boiler or microwave, melt semi-sweet chocolate chips with half the condensed milk. Stir until smooth.
Pour into the prepared pan and spread evenly.
In another bowl, melt white chocolate chips with remaining condensed milk. Stir in peppermint extract.
Add a few drops of red food coloring and swirl gently for a marbled effect.
Pour over the chocolate layer and spread. Swirl the two layers together with a knife if desired.
Sprinkle crushed peppermint candies on top and press lightly.
Chill in the fridge for 4 hours, or until set. Slice into small squares.
- Prep Time: 15 minutes
- Cook Time: 4 hours
Nutrition
- Calories: 160 / Piece
- Sugar: 17g / Piece
- Fat: 9g / Piece
- Carbohydrates: 18g/ Piece
- Protein: 2g / Piece
Nutritional Information (Because Balance!)
Okay, let’s be real—this is a decadent holiday treat! But I believe in mindful indulgence. Here’s a rough breakdown per piece (based on 36 pieces):
Calories: 160 | Fat: 9g | Saturated Fat: 5g | Carbohydrates: 18g | Sugar: 17g | Protein: 2g
This fudge is rich and sweet, so a small square is incredibly satisfying. It’s a perfect treat to enjoy mindfully with a cup of tea or coffee. The joy and community it brings are just as nourishing as the ingredients themselves!
Final Sweet Thoughts
And there you have it! Your guide to creating the most incredible, show-stopping Peppermint Swirl Fudge that’s sure to become a new holiday tradition in your home.
Remember, the best recipes are the ones made with a dash of love and a heaping spoonful of joy. Don’t stress about perfection. If your swirl isn’t Instagram-worthy or your cuts aren’t perfectly straight, I promise it will still taste absolutely amazing. The real magic is in the making, the sharing, and the memories you create around it.
I’d love to hear how your fudge turns out! Tag me on social @TastyChow so I can see your beautiful creations and share in your holiday baking joy. Now, go forth and make something delicious!
With love and a full plate,
Emily