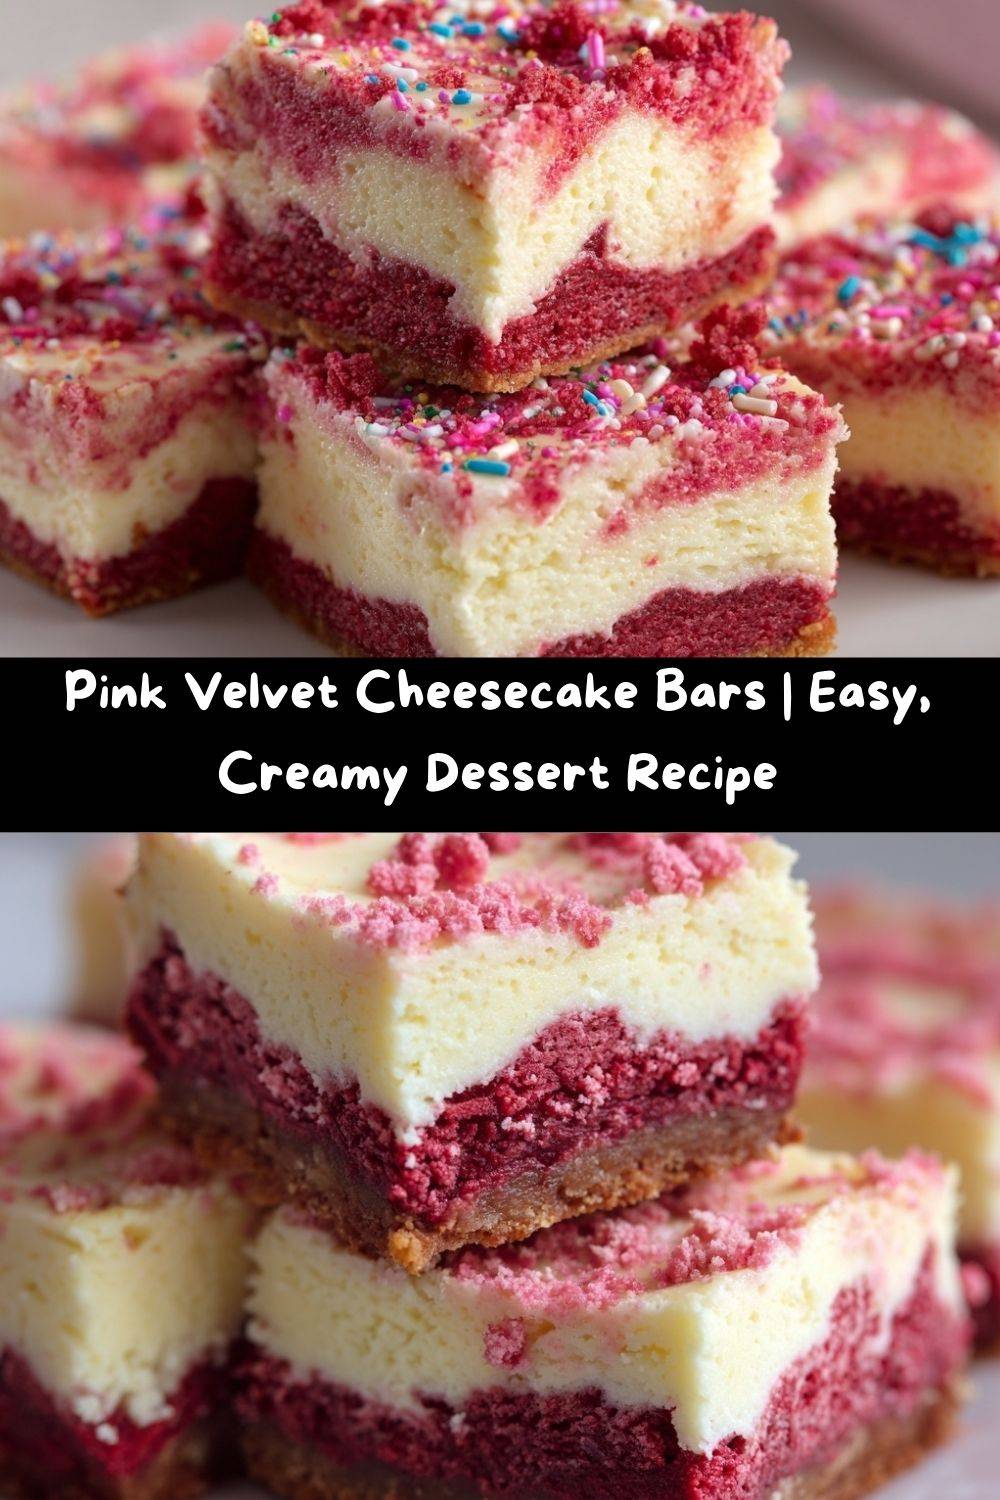
The Ultimate Pink Velvet Cheesecake Bars: A Hug in Dessert Form
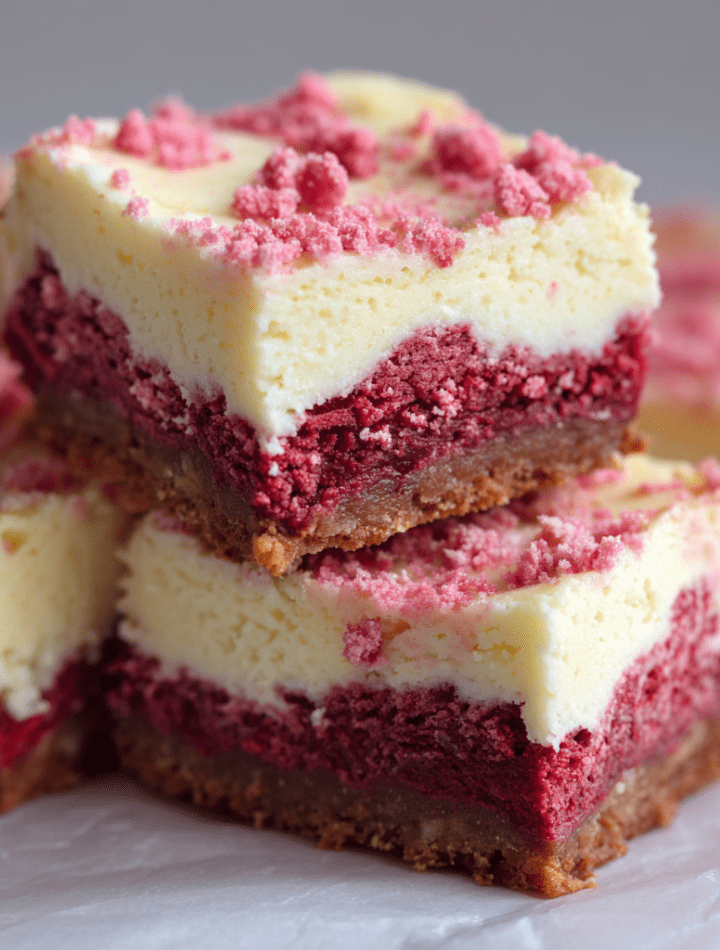
Hey there, friend! Come on in, grab an apron, and let’s talk about something magical. We’re diving fork-first into the world of Pink Velvet Cheesecake Bars. Imagine the tender, buttery crumb of classic red velvet cake, but with a fun, flirty pink twist, all swirled together with a layer of the creamiest, dreamiest cheesecake you’ve ever tasted. These bars are the love child of a cozy bake sale treat and a fancy patisserie dessert, and I am so excited to show you how to make them.
If your heart does a little happy dance at the sight of a swirly, pink dessert that’s equal parts stunning and simple, you are my people. This recipe is for the busy weeknights when you need a sweet win, for the celebrations that call for something special, and for those “just because” moments that deserve a little extra sparkle. They’re ultra-moist, perfectly sweet, and that tangy cream cheese layer? Pure bliss. Let’s turn your kitchen into the happiest, pinkest corner of the world and make something utterly delicious together.
A Slice of Nostalgia & a Splash of Pink
This recipe takes me right back to my grandma’s linoleum kitchen floor, dotted with flour and sunlight. She wasn’t one for fancy gadgets, but she had a wooden spoon, a well-loved bowl, and a magical touch with a box of cake mix. She’d whip up a “snack cake” for no reason at all, and that simple act of sweetness felt like a secret celebration. My twist? Adding that lush cheesecake layer and, of course, the pink!
The pink hue came from a happy accident, honestly. One Valentine’s Day, I was out of red food coloring and only had pink gel paste left. I went for it, and when I pulled those rosy bars out of the oven, I knew I’d stumbled onto something special. It wasn’t just red velvet anymore; it was something softer, playful, and uniquely joyful. It reminded me that the best kitchen memories aren’t about perfection—they’re about the fun, the experiments, and the shared smiles over something made with love (and maybe a little food coloring).
Gathering Your Sweet Symphony
Here’s everything you’ll need to create these beauties. I’ve added my little chef-y notes to help you understand the “why” behind each ingredient and to give you swap-out ideas if you’re in a pinch!
- 1 box red velvet or white cake mix – This is our secret weapon for flavor and ease! Red velvet mix gives that classic cocoa-vanilla taste. If you use white cake mix, you’ll get a pure vanilla base that lets the pink color shine brilliantly. Chef’s Insight: The mix already has the perfect blend of flour, leavening, and flavor, so we can focus on the fun parts!
- Pink gel food coloring (if using white cake mix) – Gel coloring is my MVP. It gives vibrant color without thinning the batter. A little drop or two will do!
- 1/2 cup unsalted butter, melted – This binds our crust and gives it that rich, tender, shortbread-like texture. Using unsalted lets you control the saltiness. Sub Tip: In a hurry? You can use an equal amount of melted coconut oil for a slight twist.
- 1 large egg (for the crust) – The binder! It helps the crust hold together and adds a bit of lift.
- 8 oz cream cheese, softened – NON-NEGOTIABLE for the creamy layer. Full-fat, brick-style cream cheese is key for that perfect, sliceable texture. Let it sit on the counter for a good 30-60 minutes until it’s pliable. Chef’s Hack: To soften quickly, microwave the unwrapped brick on 50% power for 15-second intervals.
- 1/3 cup granulated sugar – Sweetens the cheesecake layer just right. Not too much, so the tangy cream cheese flavor still sings.
- 1 large egg (for the cheesecake) – This gives the cheesecake layer its structure and slight custardy set.
- 1 tsp pure vanilla extract – The flavor enhancer. It rounds out all the sweet notes. Always use pure, not imitation, if you can!
Let’s Build Some Sweet Layers! (Step-by-Step)
Alright, let’s get our hands into it! This is where the magic happens, and I’ll be right here with you, sharing my best tips to ensure your bars are flawless.
- Preheat & Prep: Fire up your oven to 350°F (175°C). This ensures it’s perfectly hot and ready when your beautiful bars go in. Line an 8×8-inch baking pan with parchment paper, leaving some overhang on two sides. Why? This creates a “sling” so you can lift the entire block of bars out later for super-clean, crumble-free cutting. It’s a game-changer!
- Make the Pink Velvet Dough: In a medium bowl, combine the cake mix, melted butter, and 1 egg. If you’re using white cake mix, add a few drops of pink gel color now. Stir with a sturdy spoon (or get in there with clean hands!) until a soft, slightly sticky dough forms. It will look and feel like a thick cookie dough. Chef’s Note: Don’t overmix! Just combine until no dry streaks remain. The warmth of your hands can help incorporate the color if using gel.
- Create the Crust: Here’s a little portion hack: scoop out and set aside about ¾ cup of the dough for the topping. Press the remaining dough evenly into the bottom of your prepared pan. I like to use the bottom of a measuring cup or my fingers to press it down firmly and smoothly. A solid, even base means every bite has the perfect crust-to-filling ratio.
- Whip Up the Cheesecake Heart: In another bowl (or use a stand mixer), beat the softened cream cheese on medium speed until it’s completely smooth and creamy, about 1 minute. Scrape down the sides. Add the sugar, egg, and vanilla. Beat again on medium until everything is blended into a silky, lump-free, pale yellow mixture. Pro Tip: Over-beating can incorporate too much air, so stop once it’s smooth and combined. Pour this glorious cream cheese filling over your crust and spread it gently into an even layer.
- Add the Pink Perfection Top: Take that reserved dough and crumble it in small pieces evenly over the cream cheese layer. Don’t press it down! The uneven, crumbly topping is what creates those beautiful texture pockets and peek-a-boo pink spots after baking.
- Bake to Set: Slide the pan into your preheated oven. Bake for 28-32 minutes. You’re looking for the edges of the crust to be lightly golden and the center of the cheesecake layer to be set—it should jiggle just slightly like Jell-O when you gently shake the pan. A toothpick inserted near the center should come out mostly clean, maybe with a few moist crumbs. Watch out! Over-baking can make the cheesecake layer dry and crack.
- The Patience Game (The Hardest Part!): Remove the pan from the oven and place it on a wire rack. Let it cool completely at room temperature. THEN, cover it and refrigerate for at least 2 hours, or ideally overnight. This chill time is crucial for the cheesecake to firm up perfectly, making slicing clean, dreamy bars possible.
How to Serve These Showstoppers
Presentation is part of the fun! Once fully chilled, use the parchment paper sling to lift the entire block onto a cutting board. Using a sharp knife (run it under hot water and wipe it dry for the cleanest cuts), slice into 9 even squares.
Serve these bars straight from the fridge for a cool, firm treat. I love placing them on a simple white plate for the pink to really pop. A tiny dusting of powdered sugar looks like a light snowfall, or a dollop of freshly whipped cream and a single raspberry on the side screams “fancy bakery.” They’re perfect with a cold glass of milk, a hot cup of coffee, or as the star of your dessert table. No matter how you plate them, get ready for the “oohs” and “aahs.”
Make It Your Own! Fun Flavor Twists
Love the base recipe? Let’s play! Here are a few of my favorite ways to switch it up:
- Chocolate Chip Bliss: Fold ½ cup of mini chocolate chips into the cake mix dough before pressing it into the pan. The melty chocolate pockets are incredible.
- Lemon Berry Burst: Use a white cake mix. Add the zest of one lemon to the cheesecake filling. After spreading the filling, scatter a handful of fresh raspberries or chopped strawberries over it before adding the crumb topping.
- Cookies & Cream: Use a chocolate fudge cake mix (no pink coloring). After baking and chilling, drizzle the top with white chocolate ganache and sprinkle with crushed Oreo pieces.
- Gluten-Free Friendly: Use your favorite gluten-free cake mix (a vanilla or yellow mix works great with pink coloring). Ensure all other ingredients are certified GF.
- Fruity Funfetti: Use a classic white or funfetti cake mix and pink coloring. Add 2-3 tablespoons of rainbow sprinkles to the crust dough for a confetti-filled surprise!
Chef Emily’s Kitchen Notes
This recipe has become a staple in my house, and it’s evolved with every batch. The first time I made it, I was so impatient that I cut into it after just an hour of chilling. Let’s just say we had “pink velvet cheesecake *soup* bars” – delicious, but not blog-photo-ready! The lesson? The chill time is your friend. I also started using the parchment sling after one frustrating incident where my beautiful bars decided to become one with the pan. We’ve learned, we’ve laughed, and now you get the benefit of all those messy-apron moments.
These bars also freeze like a dream! Wrap individual bars tightly in plastic wrap and store them in a freezer bag for up to 2 months. Thaw in the fridge for a ready-made sweet treat anytime.
Your Questions, Answered!
Q: My cheesecake layer cracked on top. What did I do wrong?
A: Don’t worry, they’ll still taste amazing! Cracking usually happens from over-mixing the cheesecake batter (adding too much air) or over-baking. Next time, mix just until smooth and take them out as soon as the center is set but still has a slight jiggle. The crumb topping hides a multitude of sins, anyway!
Q: Can I use a 9×13 pan instead?
A: You can, but the layers will be thinner and the bake time will be less—start checking around 20-22 minutes. I’d recommend a 1.5x batch of the recipe for a 9×13 pan to keep those lovely, distinct layers.
Q: Why gel food coloring and not liquid?
A> Gel coloring is more concentrated, so you need less, and it doesn’t add extra liquid to throw off the dough’s texture. Liquid coloring can make the dough too wet and sticky. If it’s all you have, use it sparingly!
Q: My crust seems greasy. Help?
A: This is likely from the butter separating. Make sure your melted butter has cooled slightly before mixing it with the cake mix and egg. Also, ensure you’re pressing the crust in firmly so it binds together during baking.
Nutritional Information*
*Please note: This is an estimated nutritional breakdown based on the specific ingredients listed and using a standard red velvet cake mix. Values can vary based on the brands you use.
Per Bar (1 of 9 bars):
Calories: ~280 | Total Fat: 17g | Saturated Fat: 9g | Cholesterol: 75mg | Sodium: 220mg | Total Carbohydrates: 25g | Dietary Fiber: 0g | Sugars: 18g | Protein: 4g
Remember, friends, these Pink Velvet Cheesecake Bars are a celebratory treat, meant to be enjoyed in the context of a balanced diet. Savor every single bite, share them with people you love, and enjoy the sweet moment without a side of guilt. Life’s too short not to have dessert!
Final Sweet Thoughts
And there you have it! My go-to recipe for turning an ordinary day into a pink, creamy, utterly delightful celebration. I hope these bars bring as much joy to your kitchen as they have to mine. Remember, cooking is about the journey—the slight mess of pink dough on your fingers, the heavenly smell that fills your home, and the shared smiles when you present your creation.
So, did you make them? Did you add your own twist? I’d love to hear all about it! Tag me on social or leave a comment over on the blog. Now, go forth and bake something wonderful. Until next time, keep your whisks busy and your hearts full.
With love and a sprinkle of sugar,
Emily 🧁