Welcome to a Little Slice of Pretty
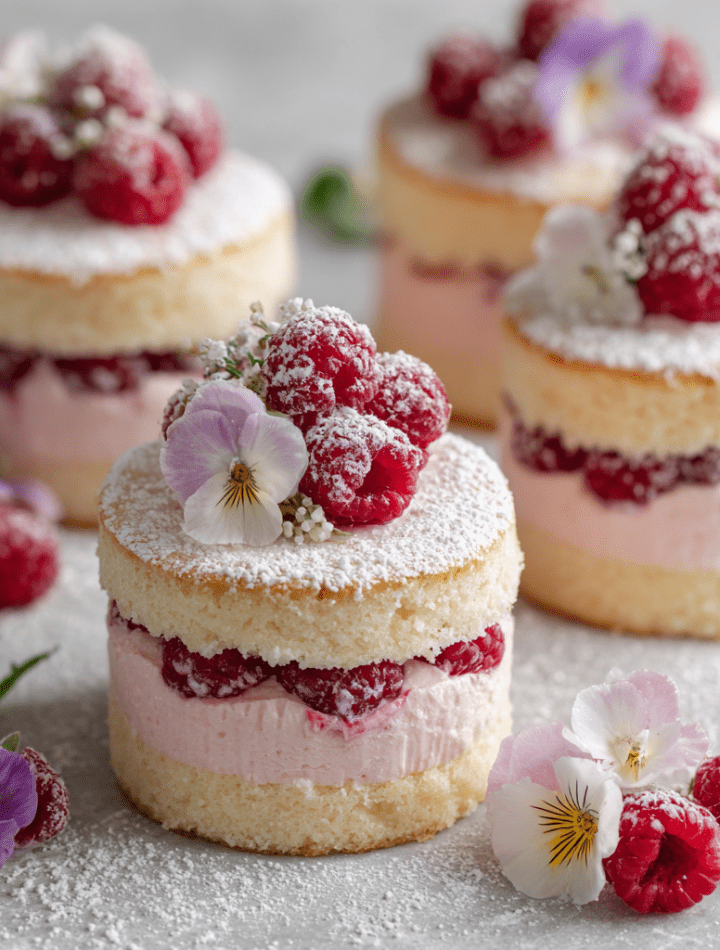
Hey friend! Come on in, pull up a stool. Do you ever have one of those days where you just need a dessert that feels like a celebration? Not a heavy, fork-clunking slice of cake, but something light, bright, and beautiful? Something that makes you smile just looking at it? That’s exactly the vibe I was craving when I dreamed up these Pretty Pink Raspberry Vanilla Mini Cakes.
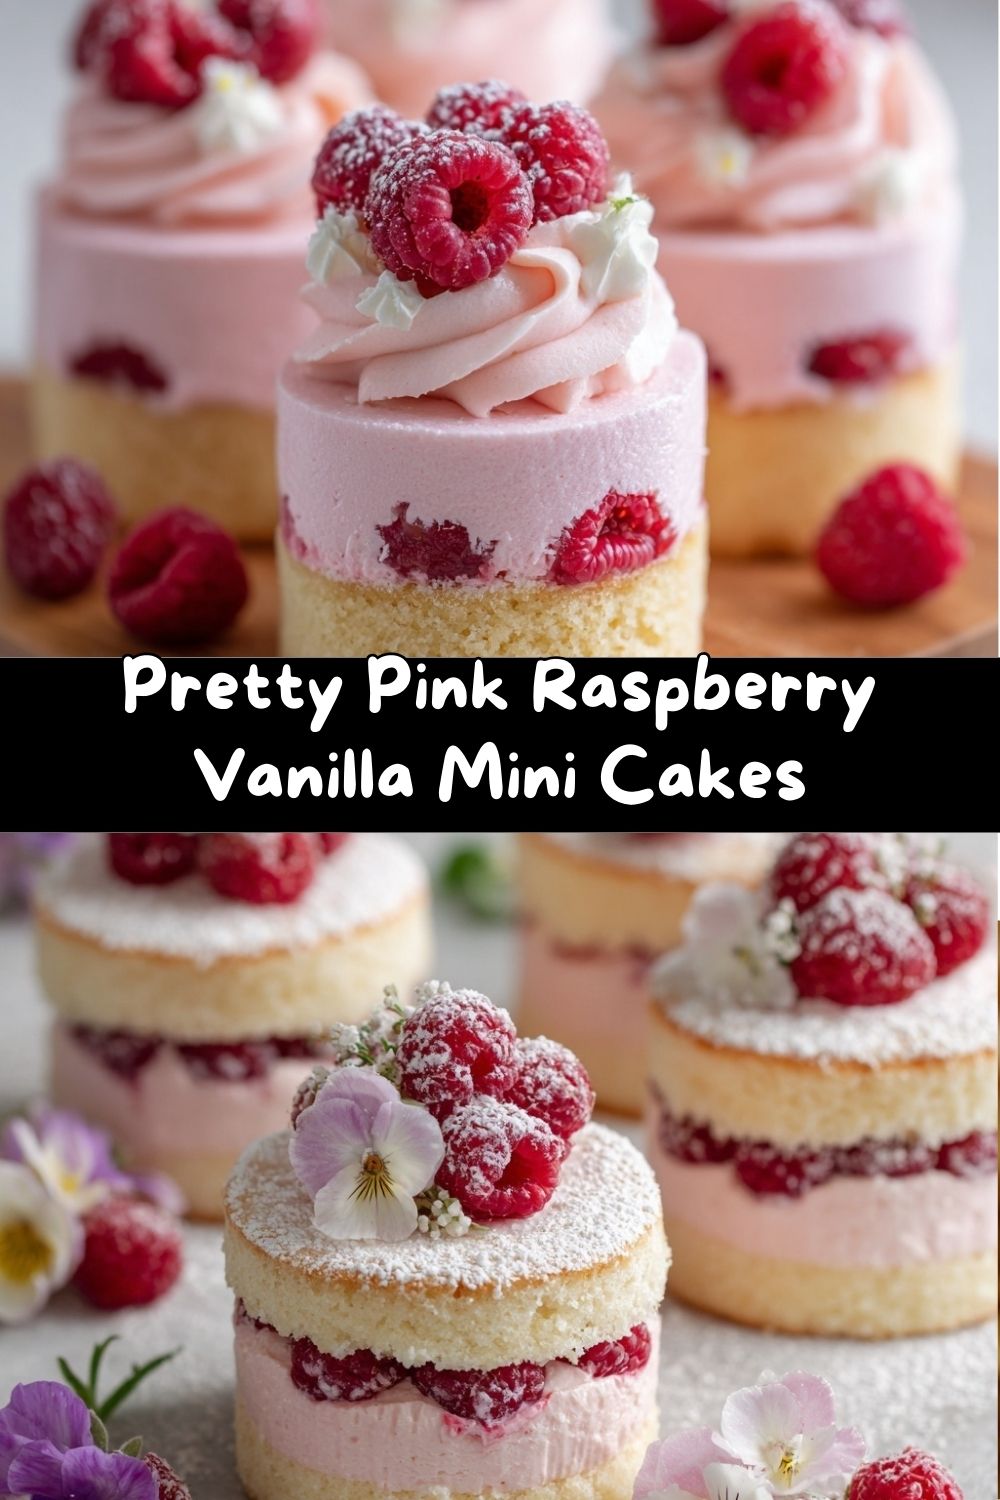
Picture this: tender, soft-as-a-cloud vanilla cake, layered with a swoosh of the dreamiest, naturally pink raspberry cream, and a pop of juicy berry in every single bite. They’re elegant enough for a bridal shower or a fancy brunch, but honestly? I make them on random Tuesdays just because. They’re that simple to whip up, and the “wow” factor is 100% real.
This isn’t about fussy techniques or hard-to-find ingredients. It’s about creating a little moment of magic in your kitchen. So, if you’ve got a sweet tooth and a love for all things pretty (and delicious), you are in the perfect place. Let’s ditch the stress and bake some joy. Trust me, your inner foodie (and your Instagram feed) will thank you.
My Grandma’s Berry Bowl & The Magic of Pink
This recipe takes me right back to my grandma’s linoleum kitchen floor, sunshine streaming through the curtain. She always had this old, white ceramic bowl with a little chip on the rim that she’d fill to the brim with berries from the farmer’s market. Raspberries were my favorite prize. I’d sneak them by the handful, loving the way they burst with tart-sweet flavor.
One summer afternoon, she let me “help” make a simple vanilla cake. I decided, with the solemn seriousness only a 7-year-old can muster, that it needed to be pink and fancy. I proceeded to mash a handful of my precious raspberries and smear them between the layers. It was a glorious, drippy, beautiful mess. Grandma didn’t scold me; she just laughed, dusted it with powdered sugar, and declared it a “masterpiece.” That feeling—of creating something joyful and beautiful out of simple ingredients—is the heart of this recipe. Every time I see that swirl of pink cream, I think of her, that chipped bowl, and the lesson that the best desserts are often the happiest accidents.
Gathering Your Sunshine & Berries
Here’s everything you’ll need to create these mini masterpieces. I’ve added my little chef notes to help you understand the “why” behind each ingredient and give you easy swaps!
For the Vanilla Cake
- 1 ½ cups (180g) all-purpose flour: The trusty foundation. For a slightly lighter crumb, you can swap in cake flour. If you need a gluten-free version, a 1:1 GF blend works beautifully here.
- 1 ½ tsp baking powder: Our lift and fluff agent! Make sure it’s fresh for the best rise.
- ¼ tsp salt: Do not skip this! It balances the sweetness and makes all the flavors pop.
- ½ cup (115g) unsalted butter, softened: “Softened” is key! It should leave a slight indent when you press it. This creams into the sugar to create a light, airy cake texture.
- ¾ cup (150g) granulated sugar: Sweetness and structure. I don’t recommend reducing this, as it affects texture.
- 2 large eggs, at room temperature: Room temp eggs blend smoothly into the butter mixture, creating a lovely emulsion. Quick hack: place cold eggs in a bowl of warm water for 5 minutes.
- 1 tsp pure vanilla extract: The soul of the cake! Use the good stuff—it makes a world of difference.
- ½ cup (120ml) whole milk, at room temperature: Room temp liquids prevent the batter from seizing. 2% works, but whole milk gives a richer crumb.
- 2 tbsp sour cream or full-fat Greek yogurt: My secret weapon for ultra-moist cake! The tang also balances the sweetness perfectly.
For the Raspberry Cream Filling
- 1 cup heavy whipping cream, very cold: The colder the cream, the faster and better it whips. I sometimes chill my bowl and beaters, too!
- 4 oz full-fat cream cheese, softened: This adds a lovely tangy depth and incredible stability to the whipped cream, so your filling holds its shape.
- 3 tbsp powdered sugar: Sweetens and dissolves smoothly. You can adjust to taste, but this gives a subtle sweetness that lets the raspberries shine.
- 1 tsp vanilla extract: A flavor bridge between the cake and the berry filling.
- ½ cup fresh raspberries, lightly mashed: We’re using fresh berries for the brightest, purest flavor and that gorgeous natural pink hue. Frozen, thawed, and well-drained berries can work in a pinch.
To Assemble
- Extra fresh raspberries for garnish: For that “wow” on top!
- Optional: powdered sugar for dusting: A snowy finish makes them look like they came from a Parisian patisserie.
- A 2.5 to 3-inch round biscuit cutter or glass: For cutting out our perfect mini cake rounds.
Let’s Build Some Cake Magic: Step-by-Step
Ready? Apron on, favorite playlist on, let’s do this! We’ll tackle this in two acts: the cake, then the cream, then the fun assembly.
Act 1: The Fluffy Vanilla Cake Base
Step 1: Preheat your oven to 350°F (175°C). Grease a 9×13 inch sheet pan or two 8-inch round pans with butter or non-stick spray, then line the bottom with parchment paper. This guarantees no-stick success! Chef’s Tip: I’m a sheet pan evangelist for this recipe—it bakes evenly and gives you plenty of surface area to cut out rounds.
Step 2: In a medium bowl, whisk together the flour, baking powder, and salt. Give it a good aerating whisk—this distributes the baking powder so our cake rises evenly.
Step 3: In a large bowl (or your stand mixer), cream the softened butter and granulated sugar together on medium-high speed for a full 2-3 minutes. Don’t rush this! You want it pale, fluffy, and almost creamy. This is the foundation of a light texture.
Step 4: With the mixer on medium, add the eggs one at a time, beating well after each until fully incorporated. Scrape down the bowl. Mix in the vanilla.
Step 5: In a small jug, stir together the milk and sour cream (or yogurt). With your mixer on low, add about one-third of the dry ingredients, then half the milk mixture. Repeat, ending with the last third of the dry ingredients. Mix just until the flour disappears. A few streaks are okay—overmixing is the enemy of tenderness! Chef’s Hack: This alternating method keeps the batter smooth and prevents it from curdling.
Step 6: Pour and spread the batter evenly into your prepared pan. Bake for 20-25 minutes (for a sheet pan) or until the top is springy to the touch and a toothpick inserted in the center comes out clean. Let the cake cool in the pan for 10 minutes, then turn it out onto a wire rack to cool completely. Patience is key here—a warm cake will melt our lovely cream!
Act 2: The Dreamy Pink Raspberry Cream
Step 7: While the cake cools, make the filling. In a medium bowl, beat the softened cream cheese, powdered sugar, and vanilla together until completely smooth and lump-free.
Step 8: In a separate, clean, cold bowl, whip the heavy cream to stiff peaks. Chef’s Tip: Start on low, then go to high. You’ll know it’s done when you lift the beaters and the peaks stand straight up without flopping over.
Step 9: Gently fold the whipped cream into the cream cheese mixture in two additions. Use a big spatula and a light hand to keep it airy.
Step 10: In a small bowl, lightly mash your ½ cup of raspberries with a fork—you want them juicy and broken down, but not pureed. Fold these gorgeous pink juices and berries into the cream mixture. You’ll see it turn into the most beautiful pastel pink swirl. Cover and pop it in the fridge to firm up a bit while you prep the cake rounds.
Act 3: The Grand (and Easy!) Assembly
Step 11: Once your cake is stone-cold, use your biscuit cutter or glass to cut out as many rounds as you can. You should get about 12 rounds from a sheet pan. Fun Fact: Save the cake scraps! They’re chef’s treats, or perfect for a trifle.
Step 12: Time to layer! Place one cake round on a plate. Dollop or pipe a layer of raspberry cream on top. Add a second cake round, then another layer of cream. Top with a third cake round. Chef’s Hack: Want them extra stable? Put a tiny dab of cream on the plate first to “glue” the bottom layer down.
Step 13: Finish each mini cake with a final pretty swoosh or dollop of cream and a crown of fresh raspberries. If you’re feeling fancy, a light dusting of powdered sugar is magical.
Step 14: Chill the assembled cakes for at least 15-30 minutes before serving. This lets the flavors meld and makes them easier to eat. Then, get ready for the compliments!
How to Serve These Little Beauties
Presentation is half the fun with these! Here are a few ways to make them shine:
- The Classic Elegant Plate: Place one mini cake slightly off-center on a simple white plate. Add a few stray raspberries and a mint leaf for a touch of green. Perfection.
- Family-Style Charm: Arrange all the mini cakes on a beautiful cake stand or a rustic wooden board. Let everyone grab their own—it creates such a joyful, shareable centerpiece.
- The Drizzle Effect: Warm a couple tablespoons of seedless raspberry jam with a teaspoon of water and drizzle it over the plated cakes just before serving for a glossy, pro finish.
- Beverage Pairing: These pair wonderfully with a glass of sparkling Prosecco, a cup of earl grey tea, or a cold glass of milk for the ultimate nostalgic treat.
Make It Your Own: Fun Flavor Twists!
Love the base recipe? Let’s play! Here are some delicious ways to switch it up:
- Lemon-Raspberry Bliss: Add the zest of one lemon to the cake batter and a tablespoon of lemon juice to the cream cheese mixture. The citrusy zing with the raspberries is a match made in heaven.
- White Chocolate Raspberry: Fold ½ cup of finely chopped white chocolate into the whipped cream mixture. Decadent and dreamy.
- Berry Medley: Swap the raspberries for mashed strawberries, blackberries, or a mix! The color and flavor will be different but equally stunning.
- Dairy-Free Delight: Use your favorite plant-based butter and milk in the cake. For the cream, use a thick coconut cream (chilled overnight) and a dairy-free cream cheese alternative.
- “Naked” Cake Style: Skip the layered look and make a quick raspberry buttercream to frost the outside of the stacked mini cakes for a more traditional, cozy feel.
From My Kitchen to Yours: A Few Final Thoughts
This recipe has evolved from that first messy, wonderful creation in my grandma’s kitchen. I’ve learned that the sour cream is the true MVP for moisture, and that chilling the cream bowl is never a step I regret. The biggest laugh in testing was the time I tried to use frozen berries without draining them… let’s just say I invented “raspberry soup” instead of cake filling! Lesson learned.
These cakes are at their absolute best the day they’re made, but they’ll hold up covered in the fridge for a day. If you’re planning ahead, I recommend baking the cake a day early, wrapping it tightly, and assembling the next day. Most of all, have fun with it. If your pink cream isn’t perfectly swirled or your cake rounds aren’t exact, I promise they will still taste incredible. That’s the beauty of homemade, made-with-love food.
Your Questions, Answered!
Q: Can I make one big layer cake instead of minis?
A: Absolutely! Bake the batter in two 8-inch round pans. Once cooled, split each layer in half horizontally to create four thin layers. Spread the raspberry cream between each and on top for a stunning naked-style cake.
Q: My whipped cream/cream cheese mixture seems runny. What happened?
A: Two likely culprits:
-
Your cream wasn’t cold enough, or
-
Your cream cheese wasn’t fully softened before mixing.
Quick fix: Pop the bowl into the fridge for 15–20 minutes, then gently re-whip by hand or on low speed. If it’s still loose, add 1–2 tablespoons of powdered sugar to help stabilize.
Q: Can I use frozen raspberries?
A: Yes—with care. Thaw them completely, then drain very well and blot with paper towels. Excess liquid will thin the cream and dull the pink color.
Q: How far ahead can I make these?
A: Bake the cake up to 1 day ahead (wrap tightly). Make the cream and assemble the day of serving for best texture. Fully assembled cakes hold well in the fridge for up to 24 hours.
Q: How do I get clean, sharp layers?
A: Chill the cake rounds and the filling for 20–30 minutes before stacking. Use a piping bag (or zip-top bag with the corner snipped) for neat, even layers.
Q: Can I freeze them?
A: Freeze unfilled cake rounds only. Wrap tightly and freeze up to 2 months. Thaw at room temp, then assemble with fresh cream.
Nutrition Snapshot
Approximate values per mini cake (1 of 6–8, depending on size). Values vary by brands used.
-
Calories: ~290
-
Total Fat: 18g
-
Saturated Fat: 11g
-
Carbohydrates: 29g
-
Sugars: 18g
-
Fiber: 2g
-
Protein: 4g
-
Sodium: 170mg
These are light, celebratory treats—sweet, airy, and satisfying without feeling heavy.
Final Thoughts
These mini cakes are pure joy in dessert form—light, lovely, and made to celebrate the little moments. Whether you bake them for a special gathering or just because your week needs something pretty, I hope they bring a smile to your table.
Remember: perfection isn’t the goal—pleasure is. Let the pink be imperfect, the layers a little rustic, and the joy very real. From my kitchen to yours, happy baking—and keep making sweet moments.
—Jackson