Your New Favorite Fall Bite: Pumpkin Bread Truffles That’ll Steal the Show!
Hey there, my fellow flavor fanatic! Can you feel it? That crisp, cool snap in the air, the way the leaves are starting to put on their fiery fashion show, and the undeniable, almost magnetic pull towards anything and everything pumpkin spice? Oh, I live for this time of year. It’s the season of cozy sweaters, crackling bonfires, and most importantly, baking up a storm in the kitchen.
But let’s be real for a second. Sometimes, as much as we adore the process of baking a gorgeous, warm loaf of pumpkin bread, we don’t always have the time. Or maybe you’re like me and you end up with a few extra slices that are just a teensy bit past their prime. Instead of letting that glorious loaf go to waste, I’m going to let you in on one of my all-time favorite kitchen magic tricks. We’re transforming humble pumpkin bread into the most adorable, impossibly delicious, and downright show-stopping treat you’ll make all season: Pumpkin Bread Truffles.
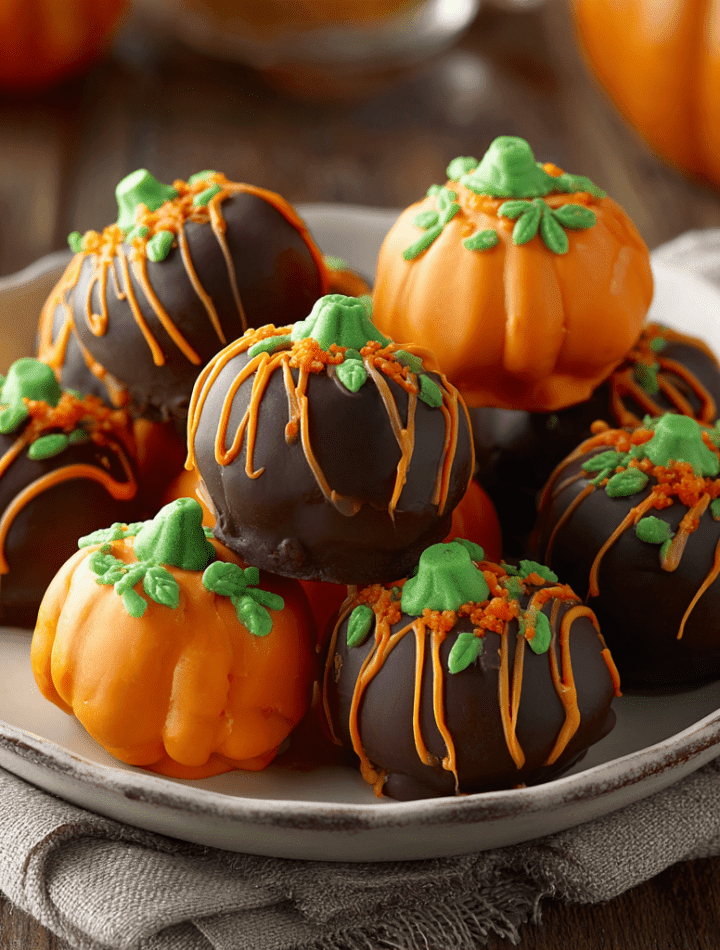
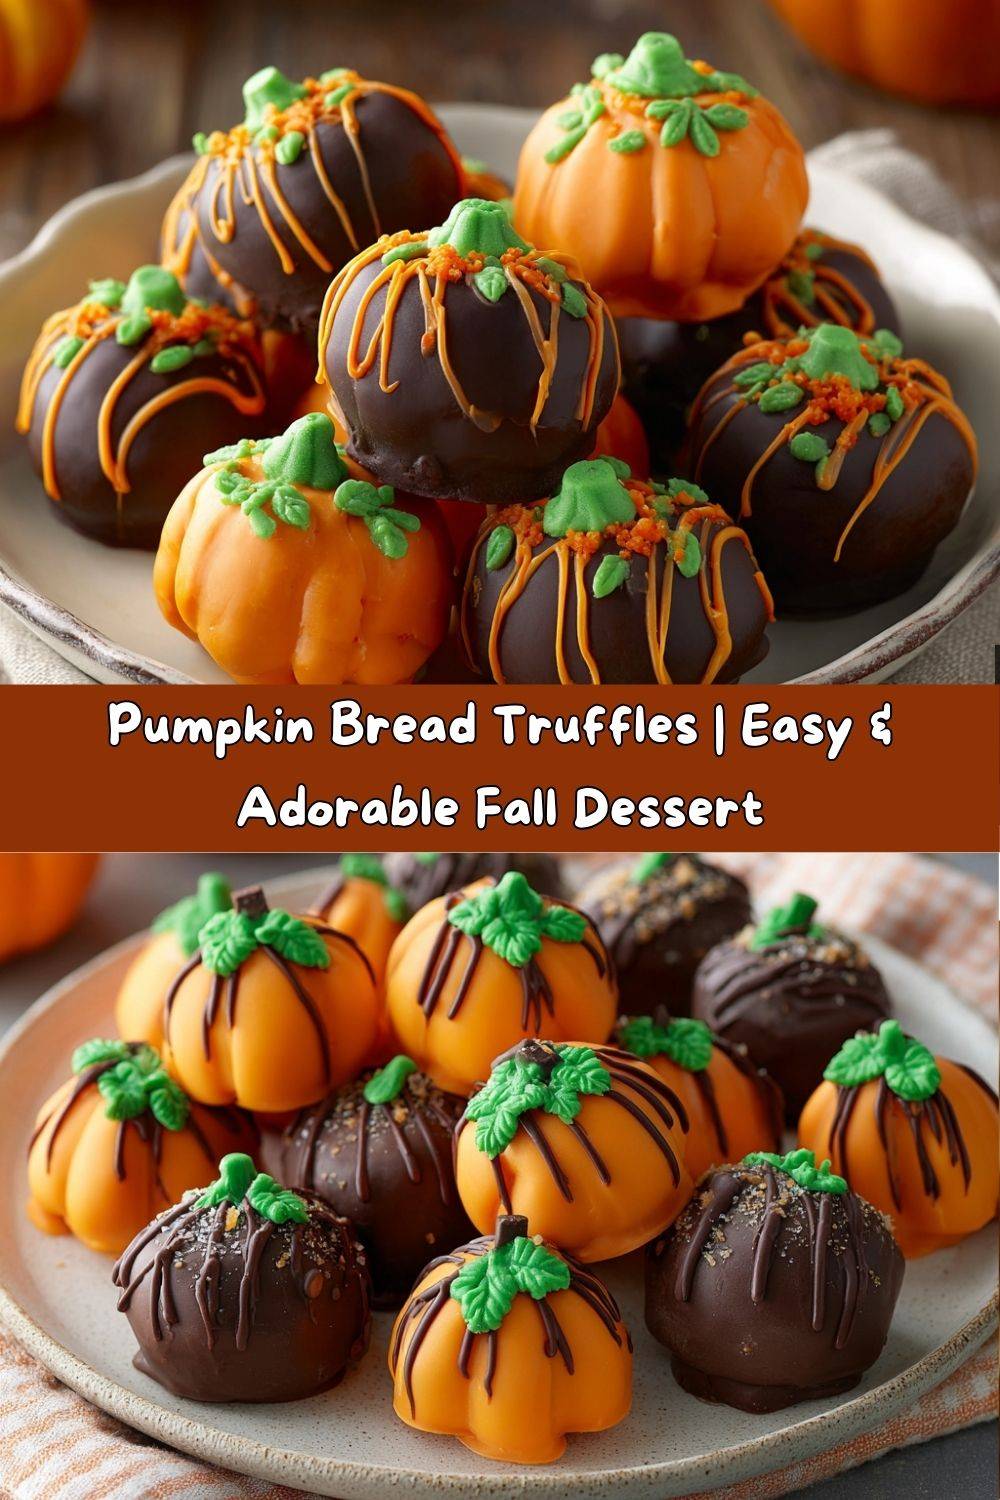
Imagine this: the moist, spiced crumb of your favorite pumpkin bread, mixed with a touch of rich cream cheese, rolled into a perfect little bite, and then dunked in a shell of vibrant orange chocolate. We’re not stopping there, though. With a quick little piping bag flourish, we turn them into miniature pumpkins that are almost too cute to eat. (I said almost!). They’re the perfect project for a fun weekend baking session with kids, the ultimate party pleaser for Halloween or Thanksgiving, and honestly, just a fantastic little bite of joy to have waiting for you in the fridge. So, tie on your favorite apron—the one that’s already seen some flour fights—and let’s make something delicious together!
A Happy Kitchen “Oops!” That Turned Into Pure Magic
This recipe, like so many of the best ones, was born from a beautiful kitchen mistake. A few years back, I was testing a new pumpkin bread recipe for the blog. I was so focused on getting the spice blend just right that I completely lost track of time. The result? A loaf that was deliciously moist but, let’s be generous, a little too dark around the edges. My heart sank. I couldn’t serve it up to you all looking like that!
But my grandma’s voice popped into my head, clear as day: “Waste not, want not, Emily.” So, I started cutting away the overly dark crusts, saving the soft, perfect interior. As I stood there looking at a bowl of pumpkin bread scraps, I had a flash of inspiration. I remembered making cake pops for my niece’s birthday and thought, “Why not pumpkin bread truffles?” I grabbed some cream cheese, rolled the mixture into balls, and the rest was history. It was one of those glorious, messy, happy accidents that reminds me that some of the best creations don’t come from a perfect plan, but from a little bit of love and a willingness to play with your food. Now, I sometimes bake a loaf just to make these truffles!
Gathering Your Pumpkin Patch: The Ingredients
The beauty of this recipe is its simplicity and flexibility. Here’s what you’ll need to create your own edible pumpkin patch. Don’t stress about having the exact brands—this is about using what you have and making it work!
- 1 loaf of pumpkin bread (homemade or store-bought) – This is your foundation! Using your own homemade loaf gives you total control over the spices, but a high-quality store-bought loaf is a fantastic shortcut. You’ll need about 4 cups of crumbs. Stale bread actually works better than fresh—it soaks up the cream cheese perfectly!
- 4 oz cream cheese, softened – This is our binding agent, and it adds a lovely tang that cuts through the sweetness of the bread and chocolate. For a lighter option, you can use Neufchâtel cheese. Chef’s Insight: Make sure it’s truly at room temperature! This prevents a lumpy truffle mixture and makes blending a breeze.
- 2 cups orange candy melts or orange melting wafers – These are my go-to for dipping. They set hard, have a vibrant color, and are much more forgiving than real chocolate for beginners. You can find them in the baking aisle of most craft or grocery stores.
- ½ cup green candy melts or green melting wafers – This is for our cute little pumpkin stems and vines. A tiny bit of green goes a long way!
- Optional Twist: 2 tbsp crushed gingersnaps or biscoff cookies – This is my secret weapon! Stirring this into the truffle mixture adds a wonderful crunch and a warm, spicy depth that takes these to a whole new level.
- Optional Twist: Cream cheese frosting or Nutella for filling – Want a surprise in the middle? Place a tiny dollop of frosting or Nutella in the center of your truffle ball before you roll it up. It’s a gooey, delightful secret!
Let’s Get Rolling: Step-by-Step Instructions
Don’t let the fancy look fool you—these truffles are seriously easy to make. We’re just crumbling, mixing, rolling, and dipping. You’ve totally got this!
- Crumble and Combine: Take your pumpkin bread and crumble it up into a large mixing bowl. You want the crumbs to be fairly fine and uniform, with no huge chunks. Now, add your softened cream cheese. Using a hand mixer, a stand mixer with the paddle attachment, or just good old-fashioned clean hands, mix it all together until it’s completely combined and has a smooth, almost Play-Doh-like consistency. If you’re adding the crushed cookies, now’s the time to mix them in! Chef’s Hack: If the mixture feels too dry and isn’t sticking together, add another half-ounce of cream cheese. If it feels too wet and sticky, you can add a tablespoon of crushed graham cracker crumbs or even a bit of powdered sugar to help it firm up.
- Scoop and Shape: Using a small cookie scoop (a melon baller or even a teaspoon works too), portion out the mixture. Roll each portion between your palms to form a nice, smooth, one-inch ball. The more even your balls are, the more professional your final truffles will look. Place them on a parchment or wax paper-lined baking sheet. Chef’s Tip: If the mixture is sticking to your hands, lightly dampen them with a bit of water or rub a tiny bit of butter on your palms. This creates a non-stick barrier!
- The Big Chill: Pop the entire baking sheet into the refrigerator for at least 20 minutes, or into the freezer for about 10. This step is NON-NEGOTIABLE, friends! Chilling the balls firmes them up and prevents them from falling apart when we dip them into the warm candy coating.
- Melt and Dip: While the truffles are chilling, melt your orange candy melts according to the package directions. I prefer using a deep, narrow microwave-safe bowl or cup for dipping—it requires less coating to fully submerge the truffle. The key to a smooth coating is to melt them slowly, in short 30-second bursts, stirring vigorously between each burst. Chef’s Hack: If your melted candy coating seems too thick for dipping, you can add a tiny, tiny amount of coconut oil or paramount crystals (about ½ tsp at a time) to thin it out to a perfect dipping consistency.
- The Dip: Remove your truffle balls from the fridge. Using a fork, a dipping tool, or even a toothpick, spear a truffle ball and dunk it completely into the melted orange coating. Lift it out, gently tap the fork on the side of the bowl to shake off any excess coating, and then carefully slide it off the fork and back onto the parchment paper. Repeat with all truffles. Don’t worry if the first one is a little messy—you’ll be a pro by the third one! If you used a toothpick, you can gently twist it to release the truffle and then use a little extra coating to cover the hole.
- Create Your Pumpkin Patch: Now for the really fun part! Melt your green candy melts the same way you did the orange. Transfer the melted green candy to a small piping bag or a zip-top bag with a very tiny corner snipped off. Before the orange coating fully sets, quickly pipe a small green stem on top of each truffle. Then, get creative with a little curlicue vine. They’ll start to look like real pumpkins right before your eyes! Let them sit at room temperature, or pop them back in the fridge for a few minutes, until the candy coating is completely firm and set.
How to Serve These Adorable Autumn Bites
Presentation is half the fun with these little guys! You’ve put in the work to make them look amazing, so let’s show them off.
For a simple, elegant look, arrange them on a beautiful white platter or a rustic wooden board. They pop against a neutral background. If you’re going full autumn celebration, nestle them amongst some real mini pumpkins, gourds, and a few fallen leaves (make sure they’re clean and dry!).
These truffles are rich, so serving them alongside a cup of hot coffee, a mug of spiced chai tea, or even a glass of cold milk is the perfect pairing. They are the star of any dessert table at a Halloween party or a fantastic sweet ending to your Thanksgiving feast. Place a few in a little cellophane bag tied with a ribbon, and you’ve got the most thoughtful homemade gift for a neighbor, teacher, or hostess.
Mix It Up! Delicious Recipe Variations
Once you’ve mastered the basic recipe, the flavor world is your oyster! Here are a few of my favorite ways to switch things up:
- The Ginger Snap Spice: As mentioned, add 2 tablespoons of finely crushed ginger snaps or Biscoff cookies to the truffle mixture. It’s a game-changer for spice lovers!
- White Chocolate Drizzle: Instead of a full orange coating, dip the truffles in melted white chocolate and then drizzle with the orange coating for a marbled effect. They’ll look like fancy little gourmet pumpkins.
- Nutty Delight: Roll the formed truffle balls in very finely chopped pecans or walnuts before chilling. The nutty crust adds a wonderful texture and flavor that pairs beautifully with the pumpkin.
- Dairy-Free Delight: Use your favorite vegan pumpkin bread and swap the cream cheese for a dairy-free alternative. Most candy melts are accidentally dairy-free, but always check the label to be sure!
- Bourbon Caramel Swirl: For a truly decadent adult-only version, add a tablespoon of bourbon to the truffle mixture and fill the center with a small dot of thick caramel sauce before rolling.
Chef Emily’s Notes from My Kitchen to Yours
This recipe has evolved so much since that first “failed” loaf! I’ve learned that the type of pumpkin bread you use really affects the final flavor. A bread that’s heavy on nutmeg and clove will make spicier truffles, while a sweeter, plainer bread will let the chocolate coating shine more.
My funniest kitchen fail with these? The first time I tried to pipe the stems, I didn’t snip a small enough hole in my bag. I ended up with giant green blobs on top of my pumpkins that looked more like alien heads than stems! My husband still calls them my “Martian Pumpkins.” So remember, you can always make the hole bigger, but you can’t make it smaller—start tiny!
FAQs & Troubleshooting: Your Questions, Answered!
Q: My truffle mixture is too wet and sticky to roll. What did I do wrong?
A: This usually means your pumpkin bread was very fresh and super moist, or you might have added a touch too much cream cheese. No worries! Just add a tablespoon of powdered sugar or crushed graham cracker crumbs at a time until the mixture is rollable.
Q: Why is my candy coating cracking after it sets?
A: This is almost always a temperature issue. If the truffle centers are too cold and the coating is too hot, the contraction can cause cracks. Make sure your melted coating isn’t scalding hot—let it cool for a minute or two after melting. Also, ensure your truffles are chilled but not frozen solid.
Q: Can I make these ahead of time?
A: Absolutely! These are a fantastic make-ahead treat. Store them in a single layer in an airtight container in the refrigerator for up to 5 days. You can also freeze the undipped truffle balls for up to 3 months. Thaw in the fridge before dipping.
Q: My coating is too thick and clumpy. How can I fix it?
A: Candy melts can sometimes seize up if overheated or if a drop of water gets in. To thin it, try adding a very small amount of coconut oil or vegetable shortening (½ tsp at a time) and stir vigorously until smooth.

Pumpkin Bread Truffles
- Total Time: 24 Truffles
Description
These adorable pumpkin-shaped truffles bring cozy fall flavors into bite-sized treats. Moist pumpkin bread gets rolled into rich truffle balls and dipped in vibrant orange chocolate, then decorated to look like mini pumpkins. Perfect for Halloween, Thanksgiving, or any autumn celebration.
Ingredients
1 loaf pumpkin bread (homemade or store-bought)
4 oz cream cheese, softened
2 cups orange candy melts
½ cup green candy melts (for decorating)
Optional twist: add 2 tbsp crushed gingersnaps to the dough
Optional twist: fill the center with cream cheese frosting or Nutella
Instructions
Crumble pumpkin bread into fine crumbs in a large bowl.
Mix in cream cheese until smooth and dough-like.
Scoop and roll into 1-inch balls. Chill 20 minutes.
Melt orange candy melts and dip each truffle using a fork or toothpick. Tap off excess.
Set on parchment to harden.
Melt green melts and pipe on vines and stems using a piping bag or zip-top bag.
Chill again until fully set.
- Prep Time: 30 minutes
- Chill Time: 20 minutes
Nutrition
- Calories: 120 / Truffle
- Fat: 6g / Truffle
- Carbohydrates: 14g / Truffle
- Protein: 1g / Truffle
Nutritional Information (Approximate)
Please note: This is an approximate calculation based on the ingredients listed and can vary greatly depending on your specific choices, especially the type of pumpkin bread used.
Per Truffle (1 of 24): Calories: ~120 | Total Fat: 6g | Saturated Fat: 3.5g | Cholesterol: 5mg | Sodium: 55mg | Total Carbohydrates: 14g | Dietary Fiber: 0.5g | Sugars: 10g | Protein: 1g
These are a treat, through and through! Enjoy them mindfully as part of a balanced diet. The joy they bring is part of their nourishment, too!
Final Thoughts: Share the Joy!
Well, my friend, there you have it! Your guide to creating the most whimsical, delicious, and conversation-starting treat of the fall season. I hope this recipe brings as much fun and joy to your kitchen as it has to mine. Remember, baking isn’t about perfection; it’s about the love you stir into every bowl and the smiles you create. So don’t fret if your pumpkin stems are a little wobbly or if one truffle looks a little… abstract. They will taste incredible regardless.
I would absolutely love to see your creations! If you make these Pumpkin Bread Truffles, please share a picture and tag me @TastyChow on social media so I can cheer you on. You’re not just making truffles; you’re making memories.
Now, go forth and create your own little pumpkin patch. Happy baking!
With love and a full heart,
Emily