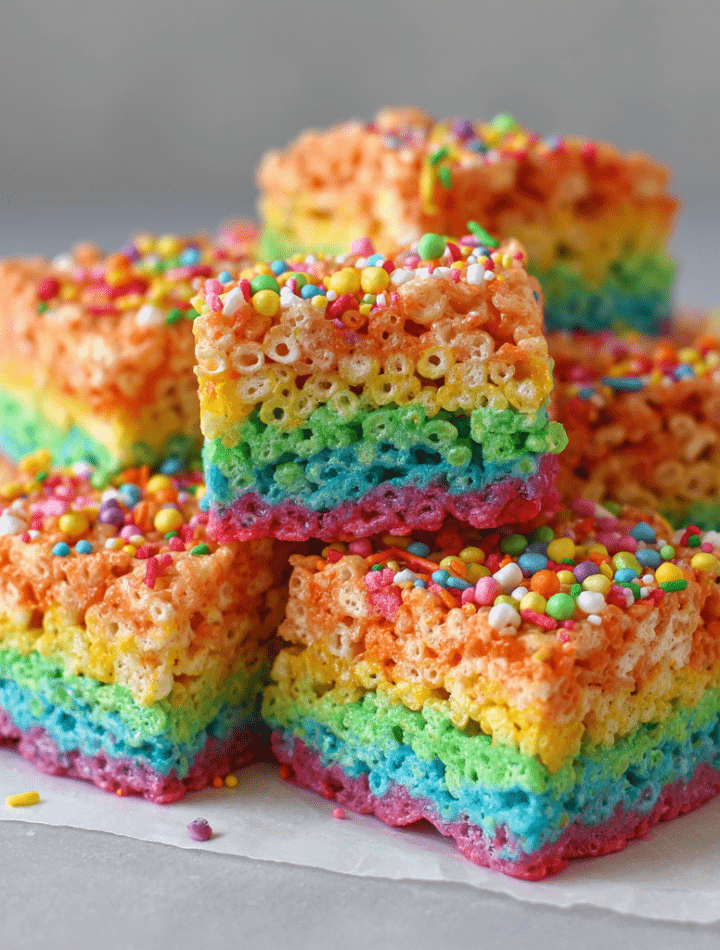
Rainbow Krispie Squares – Colorful, Chewy & Kid-Friendly Fun!
Hey there, friend! Emily here, from my flour-dusted kitchen to yours. Have you ever looked at a box of cereal and seen pure, unadulterated magic? I’m not talking about just any breakfast bowl—I’m talking about the snap, crackle, pop potential for joy, color, and the kind of treat that makes kids (and let’s be real, adults too) light up like a firework show.
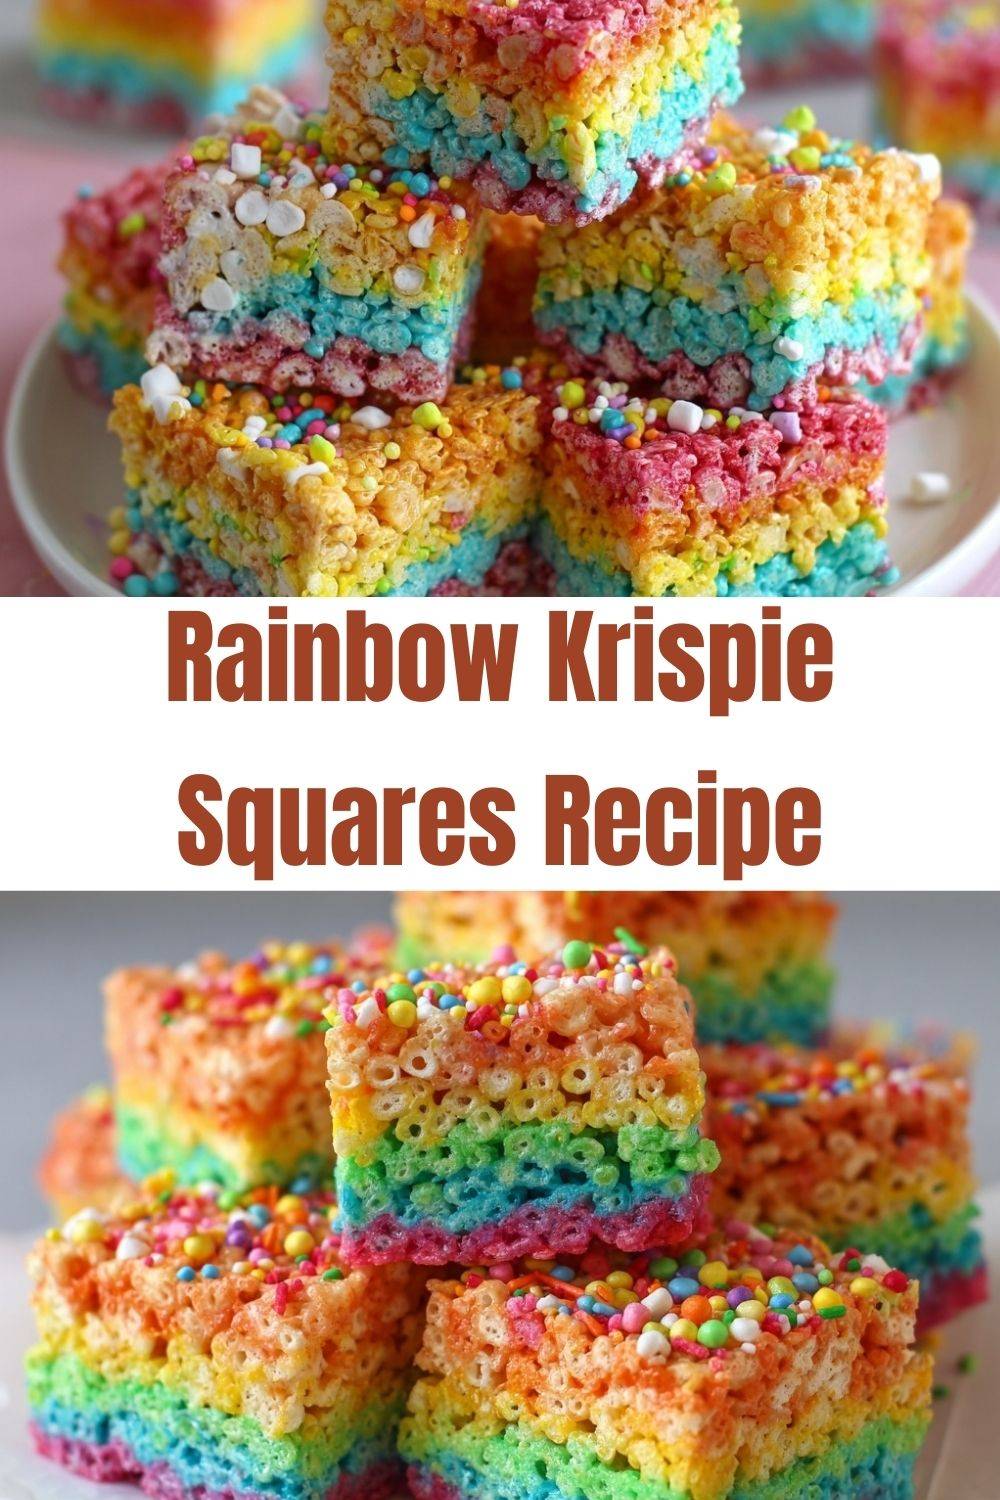
Today, we’re not just making Rice Krispie Treats. Oh no. We’re crafting Rainbow Krispie Squares. We’re turning a classic into a celebration, a simple snack into a memory. Imagine layers of vibrant color, that perfect chewy-gooey texture, and the fun of building a treat that’s as exciting to make as it is to eat. Whether it’s for a birthday party, a rainy-day project, or just because Tuesday needed some sparkle, these squares are your ticket to Fun Town.
So, tie on that apron—the messy one with the stains of past kitchen adventures is the best kind—and let’s create something that’s guaranteed to bring a smile. This is more than a recipe; it’s a little bite of happiness. Ready to play with your food? Let’s go!
The Day My Grandma’s Kitchen Turned Technicolor
This recipe takes me straight back to my Grandma Mae’s linoleum-floored kitchen. She was the queen of the “kitchen sink cookie” and believed any day could be improved with a little butter and sugar. One particularly gray, drizzly afternoon, I was moping about canceled plans. Without a word, she pulled out her giant melty pot, a box of cereal, and a bag of marshmallows.
“We’re making sunshine,” she declared. But then, her eyes twinkled as she rummaged in the back of a drawer and pulled out these tiny, ancient bottles of food coloring—the kind with the dropper lids. “No,” she corrected herself with a grin, “we’re making a whole rainbow.” What followed was pure, sticky, colorful chaos. We divided the gooey mixture into bowls and took turns mixing in colors, our hands turning into a tie-dye mess. The act of carefully layering each color felt like painting with food. When we finally cut into that set slab, revealing the bold stripes, my gloom was utterly forgotten. It taught me a powerful lesson I carry into Tasty Chow every day: cooking isn’t just about feeding the body; it’s about nourishing the spirit with color, creativity, and shared, sticky-fingered joy.
Gathering Your Rainbow: Ingredients & Insights
Here’s the beautiful part: the ingredient list is wonderfully simple. The magic is in the assembly! Grab these basics and let’s add some flair.
- 6 cups Rice Krispies cereal: The classic! That iconic crisp texture is non-negotiable for the perfect bite. Chef’s Insight: Make sure your cereal is fresh and crispy, not stale. For a fun twist, you could use a puffed rice cereal for a slightly different texture.
- 1 (10 oz) bag mini marshmallows: The glue that holds our rainbow together! Minis melt faster and more evenly than large ones. Substitution Tip: For a vegan version, seek out vegan marshmallows—they work beautifully!
- 4 tbsp unsalted butter: Butter adds rich flavor and helps create that luscious, smooth texture. Using unsalted lets you control the saltiness. Chef’s Insight: Don’t skimp! This is what gives the treat its signature decadence.
- Food coloring (gel or liquid – red, orange, yellow, green, blue, purple): The star of the show! Pro Tip: Gel food coloring is my absolute favorite for this. It’s more concentrated, so you get vibrant colors without adding extra liquid that can make the treats soggy. Liquid works in a pinch, though!
- Non-stick spray or extra butter for the pan: Trust me, you want that parchment paper AND a light greasing. It’s your insurance policy for perfect, easy-to-remove squares.
- Optional: Rainbow sprinkles or edible glitter: Because more is more when it comes to rainbows! Press a few on top of the final layer for an extra festive touch.
Building Your Rainbow: Step-by-Step Fun
Okay, team! Let’s get building. This process is simple but a bit like a kitchen science project—in the best way possible. Read through once, then dive in!
- Prep Your Canvas: Line a 9×13-inch baking pan with parchment paper, letting a little overhang on the sides (this will be your lifesaver for lifting out the whole slab later!). Give the paper a very light spray with non-stick spray. Set aside. Chef’s Hack: Use binder clips to secure the parchment to the pan sides if it’s being unruly!
- Divide and Conquer: This is the key to clean layers! In 6 separate bowls, measure out roughly 1 cup of Rice Krispies into each. Also, divide your mini marshmallows into 6 roughly equal portions (no need for perfection here!). Have your butter ready by the stove. Organizing everything before you start melting is a game-changer.
- Melt for Layer One: In a large pot (big enough to stir in the cereal later), melt 2/3 of a tablespoon of butter (that’s about 2 tsp) over low heat. Add one portion of marshmallows. Stir constantly with a silicone spatula until they’re completely melted, smooth, and look like a white, glossy cloud. Key Tip: LOW HEAT IS YOUR FRIEND. High heat will scorch the marshmallows and make them tough. Patience makes perfect gooeyness.
- Color It In! Remove the pot from the heat. Quickly stir in your first color of food coloring. Start with a few drops (gels are potent!) and mix until you have a vibrant, uniform hue. Remember the rainbow order: I like to start with purple on the bottom and work up to red on top, but it’s your rainbow—make it your way!
- Crunch Time: Immediately add one bowl (1 cup) of the reserved cereal to the colored marshmallow mixture. Stir, stir, stir until every last piece is beautifully coated in that sticky, colorful glue. It will be thick and a bit of a workout!
- Press and Layer: Quickly dump the mixture into your prepared pan. Now, here’s the trick: lightly grease your fingers with butter or non-stick spray (or use a piece of wax paper). Gently press the mixture into one even layer, covering the bottom of the pan. Don’t press too hard, or you’ll crush the cereal and make it dense—just enough to make it even. Rinse and dry your pot quickly, or grab a second pot to start the next layer!
- Repeat the Rainbow: Repeat steps 3-6 with each remaining color, working one at a time. Layer each new color directly on top of the previous one, pressing gently to make them stick together. The warmth from the new layer will help them fuse. Admire your growing rainbow as you go!
- The Final Set: Once your final layer is pressed in, if you’re using sprinkles, scatter them over the top now and give one last gentle press so they adhere. Let the entire pan sit at room temperature for at least 1 hour, until completely set and firm to the touch. Resist the urge to cut early! This waiting period is what gives you clean, non-gooey slices.
- Slice and Celebrate! Use the parchment paper overhang to lift the entire rainbow slab out of the pan onto a cutting board. Use a sharp knife (lightly buttered if it’s sticking) to cut into squares. Wipe the knife between cuts for super clean edges. Now, behold your masterpiece!
How to Serve These Colorful Bites of Joy
Presentation is part of the fun! Pile these squares high on a vibrant platter or a cake stand. For a party, you could even arrange them in the shape of a rainbow on a large board. They’re perfect as a standalone sweet treat, but why stop there? Serve them alongside a scoop of vanilla ice cream for a next-level sundae, or crumble one over a bowl of frozen yogurt. For a kid’s party, package them in clear cellophane bags tied with curly ribbon as a delightful favor. They’re the ultimate shareable treat that says, “Let’s have some fun!”
Make It Your Own: Rainbow Variations
The basic framework is your playground. Here are some ways to mix it up!
- Unicorn Swirl: Skip the strict layers! After coloring each portion, drop spoonfuls of each color randomly into the pan, then use a knife to gently swirl them together for a marbled, magical effect.
- Chocolate Drizzle: After the squares are set, melt some white or dark chocolate and drizzle it artfully over the top. It adds a delicious flavor contrast and looks incredibly professional.
- Fruity Pebbles Twist: Swap out 1 cup of the Rice Krispies in one or two layers for Fruity Pebbles cereal! It adds an extra pop of flavor and color. You could do a “tie-dye” version by mixing a handful into a plain colored layer.
- Pastel Party: For a baby shower or Easter, use just a tiny drop of gel coloring to create soft, beautiful pastel layers. So elegant and sweet!
- Gluten-Free & Vegan: Easily adaptable! Use a certified gluten-free crispy rice cereal and vegan marshmallows and butter. The method stays exactly the same.
Chef Emily’s Notes from a Colorful Kitchen
This recipe has seen many iterations in my kitchen! I once attempted a “galaxy” version with black food coloring and star sprinkles… let’s just say it turned our mouths an interesting shade of midnight and the kitchen looked like a glitter bomb went off. Worth it for the laughs! Over time, I’ve learned that the simple, bright rainbow is always a crowd-pleaser. The real secret ingredient isn’t the food coloring—it’s the laughter and conversation that happens while you’re layering and waiting for the set. Don’t worry about perfection; slightly wobbly layers have more character. This is a recipe built for joy, not stress.
Your Questions, Answered!
Q: My treats turned out really hard. What did I do wrong?
A: This usually means the marshmallows were cooked over too high heat or for too long. Next time, keep the flame on low and remove the pot from the heat as soon as the last marshmallow melts. They continue to cook in the residual heat of the pot!
Q: Can I make these ahead of time?
A: Absolutely! They keep beautifully. Store them in an airtight container at room temperature for up to 3 days. For longer storage (up to a week), you can refrigerate them, but note they may become a bit firmer.
Q: The colors are bleeding between layers. How do I prevent that?
A> Two tips: 1) Make sure each layer is completely cool to the touch before adding the next, warm layer on top. You can pop the pan in the fridge for 5 minutes between colors to speed this up. 2) Press gently! Over-compacting can force the colors to mix.
Q: My hands are a sticky mess when pressing! Help!
A> Welcome to the club! The buttered or spray-greased hands trick is essential. If it’s still too sticky, a small sheet of wax paper or parchment pressed on top of the mixture works like a charm as a barrier.
Nutritional Info (For Your Curiosity!)
Hey, we’re all about balance here! These are a treat, through and through, and it’s good to know what you’re enjoying. This approximate info is based on a recipe yielding 15 squares. Remember, using vegan butter and marshmallows will alter these values.
Per Square: Calories: ~130 | Total Fat: 3g | Saturated Fat: 2g | Cholesterol: 10mg | Sodium: 100mg | Total Carbohydrates: 26g | Dietary Fiber: 0g | Sugars: 13g | Protein: <1g
The beauty of homemade is you control the ingredients. These are free from the preservatives and artificial flavors often found in store-bought versions. Enjoy them mindfully as part of a fun-filled day!
Go Forth and Create Your Rainbow
And there you have it, my friend! Your guide to creating pure, chewy, colorful happiness in a pan. I hope you grab a helper (big or small), crank up some fun music, and embrace the joyful mess of making these. Food memories aren’t just about the taste—they’re about the experience. The laugh when you get food coloring on your nose, the pride in a kid’s eyes when they press in their layer, the shared “Mmmm!” with the first bite.
I’d love to see your rainbow creations! Tag me @TastyChow on social media so I can cheer you on. Now, go make your kitchen a little brighter, one colorful square at a time. Until next time, keep chasing flavor and fun!
With love and a sprinkle of rainbow crumbs,
Emily 🥄💖