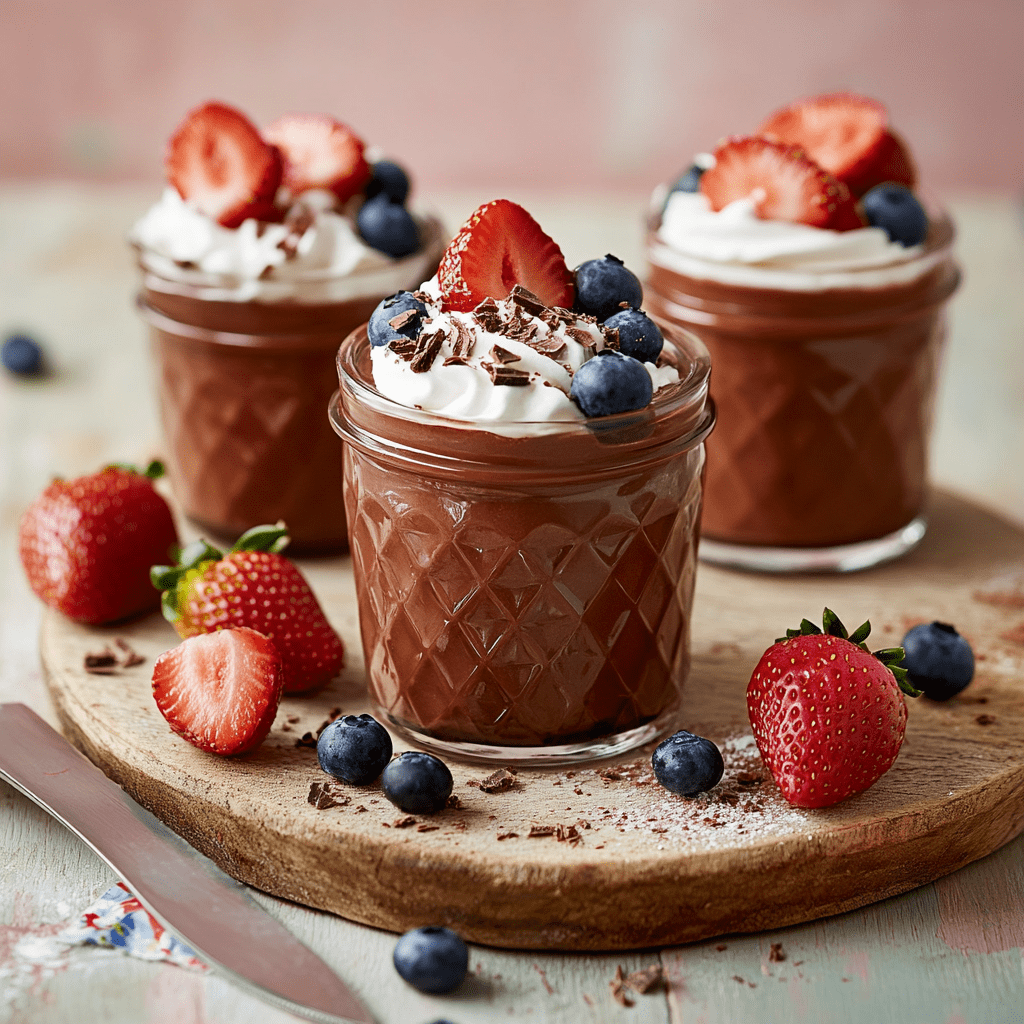
Red, White and Blue Mini Cheesecakes: A Sweet Celebration of Flavor and Fun
Hey there, fellow food lovers! 🌟 It’s your girl, Emily Walker, and today we’re diving into a delightful dessert that’s perfect for any celebration: Red, White, and Blue Mini Cheesecakes! Whether you’re gearing up for a summer barbecue, a festive holiday gathering, or just want to treat yourself (because why not?), these adorable mini cheesecakes will have everyone singing your praises.
Now, let’s be honest—cheesecake is one of those desserts that never fails to impress. The creamy texture, rich flavor, and that glorious graham cracker crust? Pure magic! But enough about me; let’s talk about what really creates the magic in these mini cheesecakes. Each bite is a celebration of creamy cheesecake swirl, a burst of fresh fruit, and a sprinkle of love, making them not just a dessert, but an experience.
What makes these cheesecakes truly special isn’t just the striking red, white, and blue theme. Oh no! It’s the heartfelt memories that often accompany them. Picture this: family barbecues, sunny afternoons, laughter ringing in the air, and those sweet little mini cheesecakes making their debut on the dessert table. Trust me, folks—after one bite, you’ll find it hard to eat just one!
So, grab your mixing bowl and apron, and let’s bring a little cheer to your kitchen with this easy, fun, and oh-so-delicious recipe. Trust me, your taste buds are going to thank you! Let’s get started! 🎉
Personal Story
Ah, the scent of baking cheesecakes—there’s nothing quite like it! My love affair with cheesecake began in my grandma’s kitchen. I can still remember her teaching me the basics of cream cheese and sugar, all while mixing in her favorite spices. She always said that good cheesecake starts with love and laughter—something that holds a special place in my heart.
One summer afternoon, grandma and I decided to whip up a dessert for our family reunion. We stumbled upon the idea of a mini cheesecake to make it easier to serve—and voilà, our first batch was born! We used bright berries to honor the colors of the American flag, turning a simple bite into a festive treat. It was a smashing success! Every time I see mini cheesecakes, I’m transported back to that sunlit afternoon filled with laughter, sticky fingers, and a whole lot of joy. That’s what inspired today’s Red, White, and Blue Mini Cheesecakes! 🍰
Ingredients
Let’s talk ingredients! Here’s what you’ll need for these scrumptious mini cheesecakes, along with some tips to make your baking experience a breeze:
-
Cream Cheese: The star of the show! Use full-fat cream cheese for that rich, creamy texture. If you want to lighten things up, Neufchâtel cheese is a fantastic low-fat alternative—just be ready for a slightly softer cheesecake.
-
Granulated Sugar: Adds sweetness to the creamy mix. Feel free to substitute with coconut sugar or a granulated sugar alternative if you prefer a lower glycemic index.
-
Sour Cream: This is what gives your cheesecakes a tangy flavor and silky texture. Greek yogurt works great as a substitute for a healthier twist!
-
Vanilla Extract: A splash of pure vanilla extract elevates the flavor and makes everything warmer and more inviting. Don’t skimp on this one; it’s worth it!
-
Eggs: The binding agent that holds the cheesecake together. If you’re looking for vegan options, you can try a flax egg or use unsweetened applesauce in place of each egg (though the texture might differ slightly).
-
Graham Cracker Crumbs: This forms the buttery crust. You can use store-bought crumbs or crush your own graham crackers for a fresher taste. Gluten-free options are available too!
-
Butter: A must-have to bind the crumbs together. Use unsalted butter for better control over the saltiness. Coconut oil can be a delicious substitute if you want a dairy-free option.
-
Fresh Berries (Blueberries and Strawberries): Not only do they add bold flavors, but they’re also the stars of our red, white, and blue theme! If fresh isn’t available, frozen berries can work in a pinch; just be sure to thaw and drain them well.
-
Whipped Cream: A dollop on top makes these mini cheesecakes extra special and gives that dreamy finish. You can use store-bought or whip your own at home for maximum fluffiness!
Step-by-Step Instructions
Ready to whip up these dreamy mini cheesecakes? Let’s get baking! Here are the detailed steps to guide you through the process. Trust me, it’s easier than you might think!
Step 1: Prepare Your Pan
Start by preheating your oven to 325°F (163°C). Grab a muffin tin and line it with mini cupcake liners or grease it well if you prefer a crust-free presentation. Don’t worry if you don’t have liners; I’ve baked these without them, and they come out beautifully!
Step 2: Make the Graham Cracker Crust
In a medium bowl, mix together 1 and 1/2 cups of graham cracker crumbs and 1/4 cup of melted butter. Give it a good stir until the crumbs are well-coated and resemble wet sand. If it feels too dry, add a tad more butter!
Next, spoon a tablespoon of the crumb mixture into each muffin cup. Using the back of a spoon (or your fingers), press the crumbs down firmly to form an even layer. This is where the magic begins—make it tight and compact for a perfect crust!
Step 3: Create the Cheesecake Filling
In a large mixing bowl, beat together 16 oz of softened cream cheese with 3/4 cup of granulated sugar until light and fluffy. I always say that this step is crucial—take your time and whip it well for that velvety texture, around 3-4 minutes should do the trick. 🎶
Next, mix in 1 cup of sour cream, 2 teaspoons of vanilla extract, and add 2 eggs, one at a time, beating well after each addition. Voilà! You have your creamy filling ready to go. If you want to add a hint of zest, a teaspoon of lemon juice or zest brightly complements the cheesecake flavor!
Step 4: Fill and Bake
Now it’s time for the fun part! Carefully spoon the cheesecake mixture into each muffin cup on top of the graham cracker crust—fill them about three-quarters full to allow for some rise as they bake (and trust me, they will rise!).
Place the muffin tin in the oven and bake for about 18-20 minutes or until the edges are set and the centers are slightly jiggly. You want them wobbly but not liquidy, like a perfectly cooked custard!
Step 5: Cooling Time
Once they’re done baking, remove the mini cheesecakes from the oven and let them cool in the tin for about 10 minutes. Then, carefully transfer them to a wire rack to cool completely. It’s tempting to dive right in, but patience is key here! If you skip this step, you might end up with cracks—nobody wants that!
Step 6: Chill the Cheesecakes
After they’ve cooled, cover the cheesecakes with plastic wrap and place them in the fridge for at least 4 hours (or overnight for the best results). Chilling helps them set perfectly and enhances the flavor.
Step 7: Top with Berries and Whipped Cream
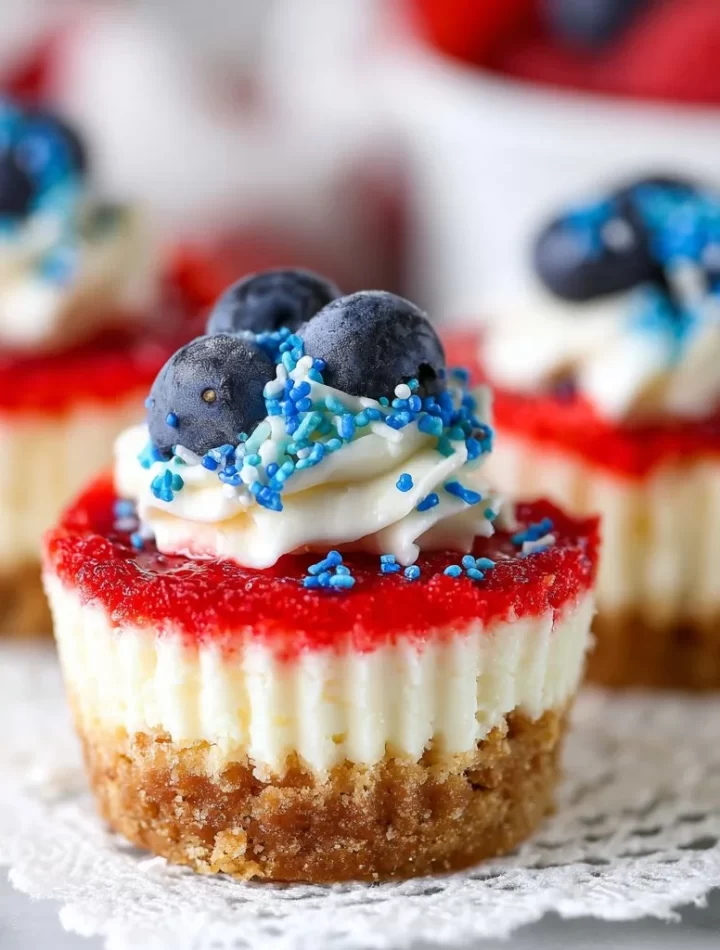
Once chilled, it’s time to adorn these beauties! Top each mini cheesecake with a swirl of whipped cream and a generous helping of fresh blueberries and strawberries. Get creative here—arrange them in a fun pattern or just toss them on for a more rustic vibe. It’s all about personal flair!
Step 8: Serve and Enjoy
Carefully peel the liners off (if used), and plate your mini cheesecakes! They’re perfect for sharing, so gather your family or friends, grab those forks, and dig in. Bon appétit! 😋
Serving Suggestions
The beauty of these cheesecakes is their versatility! They’re just as delightful on a picnic as they are at a fancy dinner. Here are a few serving suggestions to showcase their festive flair:
-
Plating: Arrange the cheesecakes on a colorful platter for a vibrant presentation. Consider using a decorative doily beneath the cheesecakes for an extra touch that screams elegance.
-
Garnishes: Drizzle a bit of chocolate or caramel sauce around the plate for added aesthetics. You can also sprinkle a little powdered sugar on top for an enchanting touch.
-
Pairings: Serve them alongside a cup of iced coffee, herbal tea, or a refreshing lemonade for a complete dessert experience. These flavors complement the cheesecakes beautifully!
Recipe Variations
Want to switch things up? Here are a few creative twists you can try with your mini cheesecakes:
-
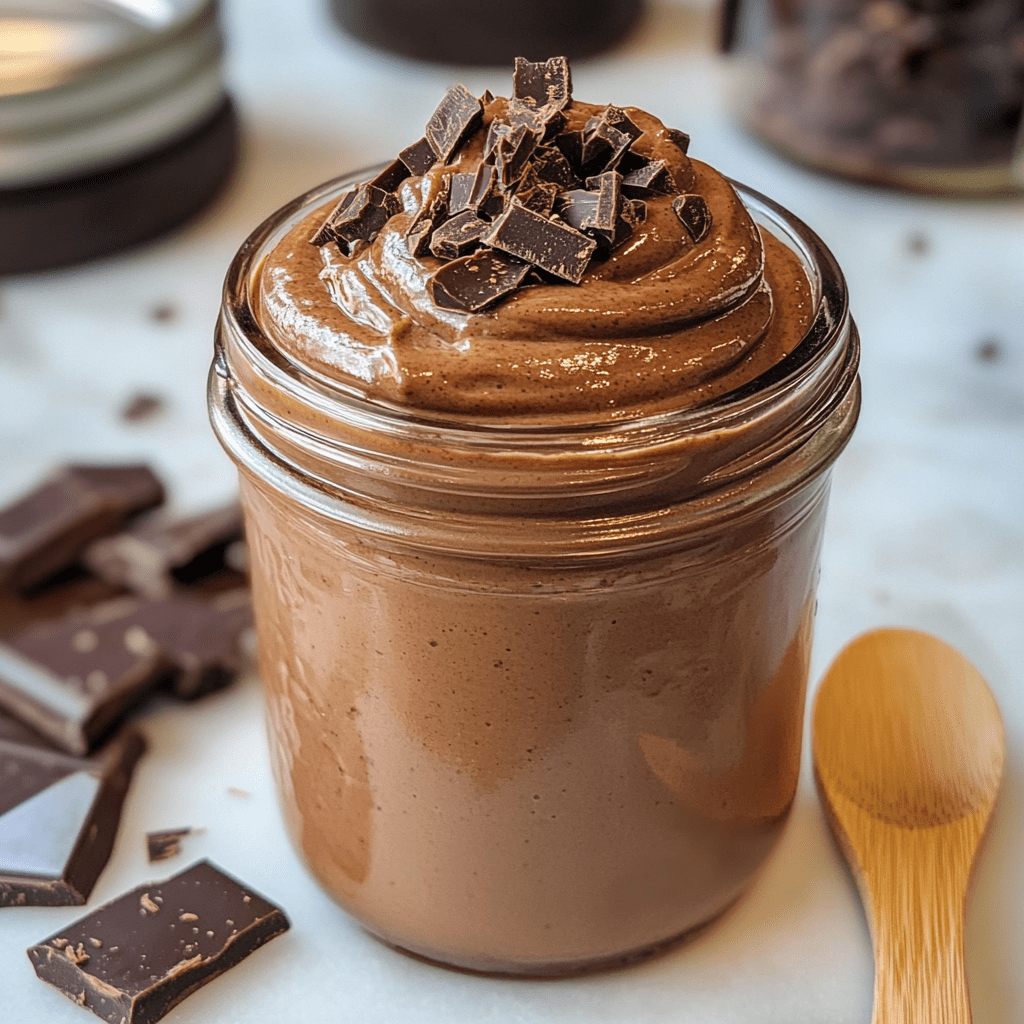
Chocolate Swirl Cheesecakes: Melt some chocolate and swirl it into the cheesecake filling before baking. You’ll have an indulgent chocolate cheesecake that everyone will adore!
-
Fruit-Filled Cheesecakes: For an even more fruity explosion, blend some of your berries into the cheesecake mixture for a vibrant color and burst of flavor.
-
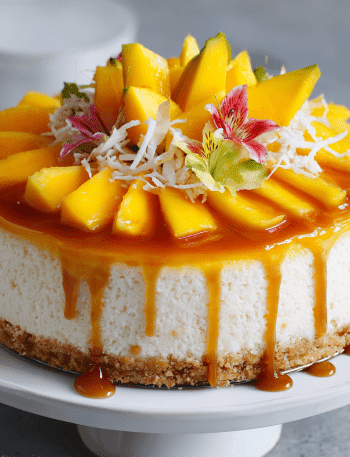
Coconut Cream: Substitute half of the sour cream with coconut cream for a tropical twist. Garnish with toasted coconut flakes for added texture!
-
Nutty Goodness: Add crushed nuts (like pecans or almonds) to the crust for more flavor, and consider sprinkling some on top as a garnish.
-
Mini Pumpkin Cheesecakes: Swap out the vanilla extract with pumpkin spice for a delightful autumn twist. These will be a hit in the fall months!
Chef’s Notes
Alright, folks! Here’s a little insider tip: these mini cheesecakes are great for making ahead of time. I’ve whipped up several batches for parties, and they’re always a crowd-pleaser. Just remember, the longer they chill, the better they taste! Plus, the whipped cream and fresh berries add that final, fresh pop, making them not just look good, but taste incredible too!
Oh, and if you have a mishap in the kitchen (trust me, we all have them), just embrace it! I once had a mini cheesecake explosion when my mixture overflowed—but hey, a little creativity turned it into a cheesecake parfait that was equally delightful! Laugh it off—it’s all part of the culinary journey!
FAQs and Troubleshooting
Q1: Why did my cheesecakes crack?
Cracks can happen when there’s too much air incorporated or if they cook too quickly. To avoid this, mix your ingredients just until combined and bake at a lower temperature. A water bath can also help keep them moist!
Q2: Can I freeze the mini cheesecakes?
Absolutely! These mini cheesecakes freeze beautifully. Allow them to cool completely then wrap them tightly in plastic wrap and aluminum foil. They’ll last up to three months—just thaw in the fridge overnight before serving.
Q3: How do I know they’re done?
They will be set around the edges but still slightly jiggly in the center when you take them out. They’ll firm up as they cool and chill.
Q4: Can I make them gluten-free?
Yes! Just use gluten-free graham crackers or crumbs for the crust, and you’re good to go!
Nutritional Info
A serving of these Red, White, and Blue Mini Cheesecakes typically contains:
- Calories: ~120
- Total Fat: 8g
- Saturated Fat: 4g
- Cholesterol: 30mg
- Sodium: 90mg
- Total Carbohydrates: 12g
- Dietary Fiber: 0g
- Sugars: 7g
- Protein: 2g
(Note: Nutritional breakdowns will vary based on portion size, specific ingredient choices, and any added toppings or variations!)
Final Thoughts
Creating these Red, White and Blue Mini Cheesecakes is not just about indulging your sweet tooth—it’s about celebrating moments with friends and family. Food, after all, has an incredible way of bringing us together, doesn’t it?
Whether for a holiday celebration or just because, these mini cheesecakes are bound to bring smiles and joy to your table. So, what are you waiting for? Let’s get in that kitchen and create some delightful memories today!❤️
I can’t wait to see your cheesecakes shining in your own moments of joy. Share your creations with me on social media; I’d love to see how you’ve put your spin on this recipe! Until next time, happy baking! 🍽️
Print
Red, White and Blue Mini Cheesecakes
- Total Time: 4 hours 35 minutes
- Yield: 12 servings 1x
- Diet: Vegetarian
Description
Delightful mini cheesecakes featuring a creamy filling, graham cracker crust, and topped with fresh berries, perfect for any celebration.
Ingredients
- 16 oz of cream cheese, softened
- 3/4 cup granulated sugar
- 1 cup sour cream
- 2 teaspoons vanilla extract
- 2 large eggs
- 1 and 1/2 cups graham cracker crumbs
- 1/4 cup unsalted butter, melted
- Fresh blueberries
- Fresh strawberries
- Whipped cream for topping
Instructions
- Preheat the oven to 325°F (163°C) and prepare a muffin tin.
- Mix together graham cracker crumbs and melted butter until well-coated.
- Spoon the crumb mixture into each muffin cup and press down to form the crust.
- Beat cream cheese and sugar in a large bowl until light and fluffy.
- Stir in sour cream, vanilla extract, and eggs until combined.
- Fill each muffin cup with cheesecake mixture, about three-quarters full.
- Bake for 18-20 minutes until edges are set and centers jiggle slightly.
- Cool in the tin for 10 minutes, then transfer to a wire rack to cool completely.
- Chill in the fridge for at least 4 hours or overnight.
- Top with whipped cream and fresh berries before serving.
Notes
These mini cheesecakes can be made ahead of time and freeze beautifully.
- Prep Time: 15 minutes
- Cook Time: 20 minutes
- Category: Dessert
- Method: Baking
- Cuisine: American
Nutrition
- Serving Size: 1 cheesecake
- Calories: 120
- Sugar: 7g
- Sodium: 90mg
- Fat: 8g
- Saturated Fat: 4g
- Unsaturated Fat: 4g
- Trans Fat: 0g
- Carbohydrates: 12g
- Fiber: 0g
- Protein: 2g
- Cholesterol: 30mg
Keywords: cheesecake, dessert, baking, mini cheesecakes, festive desserts