Why This Hummus is About to Become Your Kitchen Hero
Hey there, friend! Pull up a stool and let’s chat. If your snack game has been feeling a little… meh lately, I have just the thing to reignite your love for that pre-dinner nibble or that gotta-have-it-now afternoon bite. We’re talking about a dip so vibrant, so creamy, and so packed with personality that it might just upstage the main course. Today, we’re diving fork-first into my all-time favorite: Roasted Red Pepper Hummus.
Now, I know what you might be thinking. “Emily, it’s just hummus.” But trust me, this isn’t just any hummus. This is the hummus that makes people’s eyes light up at a party. The one that turns a simple veggie platter into a centerpiece. The spread that makes a Tuesday sandwich feel like a gourmet treat. It’s that magical blend of creamy, nutty chickpeas and the sweet, smoky char of roasted peppers, all brought together with a zing of lemon and a hint of warm spice. It’s sunshine in a bowl, and I’m beyond excited to show you how easy it is to make it shine in your own kitchen. So, tie on that apron (the messy one is totally welcome here), and let’s make something delicious together!
The Little Red Pepper That Could: A Kitchen Memory
This recipe always takes me back to my culinary school days, specifically to a slightly chaotic, wonderfully aromatic afternoon in the “Mediterranean Flavors” module. Our task was simple: elevate a classic. I, being the over-enthusiastic newbie, decided my classic hummus needed not just a garnish, but a full flavor infusion. I grabbed a red bell pepper, charred it over an open flame until its skin was blistered black, and let it steam in a paper bag. The scent that filled our corner of the kitchen was unreal—sweet, smoky, almost magical.
But here’s the funny part: I was so focused on the pepper, I completely forgot about my chickpeas simmering on the stove! A minor (okay, major) panic ensued when I smelled the bottom of the pot just starting to catch. I rescued them just in time, and in my frazzled state, I blended everything together. The result? A hummus so incredibly smooth and smoky, with a depth I hadn’t planned for. My instructor took a bite, raised an eyebrow, and said, “Walker, sometimes the best recipes come from happy accidents. Don’t forget the chickpeas next time.” A lesson in flavor and mindfulness, all wrapped up in one delicious dip. That’s the spirit I bring to this recipe—a little passion, a little improvisation, and a whole lot of love.
Gathering Your Flavor All-Stars
Every great dish starts with great ingredients. Here’s what you’ll need to build this flavor masterpiece. I’ve added my little chef-y insights so you know exactly why each player is on the team!
- 1 can (15 oz) chickpeas, drained and rinsed – The heart of the hummus! Pro tip: For the smoothest, dreamiest texture, take 2 minutes to pop the skins off the chickpeas by gently pinching them. It’s a game-changer! No time? No problem—it’ll still be delicious.
- 1 large roasted red bell pepper (or ½ cup jarred, drained) – The star of the show! Jarred peppers are a fantastic, convenient shortcut. If you’re roasting your own (my preferred method for deeper flavor), you’ll need one large pepper. The char adds a wonderful smoky note.
- ¼ cup tahini – This sesame seed paste adds essential creaminess and a rich, nutty backbone. Give the jar a good stir before measuring, as the oil can separate. Don’t skip it!
- 2 tbsp fresh lemon juice – The bright, zesty wake-up call that balances all the rich flavors. Always use fresh here—bottled juice just doesn’t have the same vibrant punch.
- 1 clove garlic, minced – A little zip of pungent flavor. If raw garlic is too strong for you, try roasting the garlic clove (skin on) with your pepper for a mellower, sweeter garlic taste.
- ½ tsp ground cumin – Our warm, earthy spice friend. It subtly ties all the other flavors together and gives that authentic hummus vibe.
- Salt to taste – The flavor enhancer. We’ll start with ½ tsp and adjust at the end. Different brands of chickpeas and tahini have varying salt levels, so tasting is key!
- 2–3 tbsp ice-cold water – The secret weapon for perfect consistency! Cold water helps create an amazingly light and creamy emulsion in the food processor.
- 2 tbsp extra virgin olive oil, plus more for drizzling – Use the good stuff here for finishing! The fruity, peppery notes of a quality EVOO make the final drizzle something special.
Let’s Get Blending: Your Step-by-Step Roadmap to Creamy Bliss
Ready to transform these simple ingredients into dip perfection? Follow these steps, and I’ll guide you through every tip and trick I’ve learned along the way.
- Prep Your Pepper (If Roasting Your Own). Turn a burner on your stove to medium-high. Using tongs, place the whole red pepper directly over the flame. Char it, turning occasionally, until the skin is blackened and blistered all over. Pop it into a bowl and cover with plastic wrap, or into a paper bag and fold it shut. Let it steam for 15 minutes—this makes the skin slide right off. Once cool, peel, seed, and chop it. Chef’s Hack: This step can be done a day or two ahead! Keep roasted peppers in the fridge in an airtight container.
- Start Your Base. In the bowl of your food processor, combine the tahini and fresh lemon juice. Process this alone for about a minute. It will look grainy, then seize up, then become wonderfully smooth and creamy. This “whipped tahini” step is a classic Levantine technique that guarantees a silky end result.
- Build the Flavor. Add the minced garlic, cumin, and a ½ teaspoon of salt to the whipped tahini. Process again for another 30 seconds until everything is well incorporated and fragrant.
- Bring in the Bulk. Now, add your drained chickpeas and the chopped roasted red pepper to the party. Secure the lid and start processing. While it’s running, stream in the 2 tablespoons of olive oil through the feed tube.
- Achieve Creamy Perfection. Stop and scrape down the sides of the bowl. With the processor running again, slowly add the ice-cold water, one tablespoon at a time, through the feed tube. Process for a full 2-3 minutes after adding the water. Yes, that long! This is the secret to getting that ethereal, cloud-like texture from your humble home appliance.
- Taste and Adjust. This is the most important step! Give your hummus a taste. Does it need more brightness? Add another squeeze of lemon. More salt? A pinch more. More garlic? Go for it! This is your hummus—make it sing to your taste buds.
- The Final Rest. For the best flavor, transfer your hummus to a serving bowl, cover, and let it rest at room temperature for at least 30 minutes before serving. This allows the flavors to get to know each other and mingle beautifully.
How to Serve Your Masterpiece (Beyond the Chip!)
Okay, the hard part is over (and it wasn’t even hard!). Now for the fun part: serving. Of course, it’s phenomenal with warm pita bread, crispy pita chips, and a rainbow of fresh veggies like sliced cucumbers, bell peppers, and carrots. But let’s think bigger!
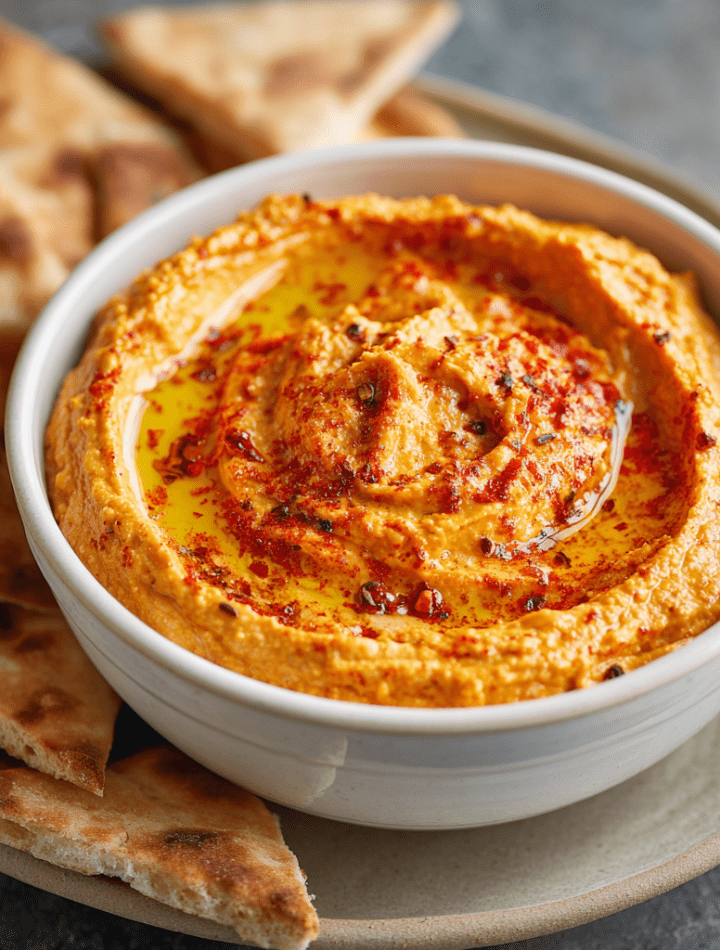
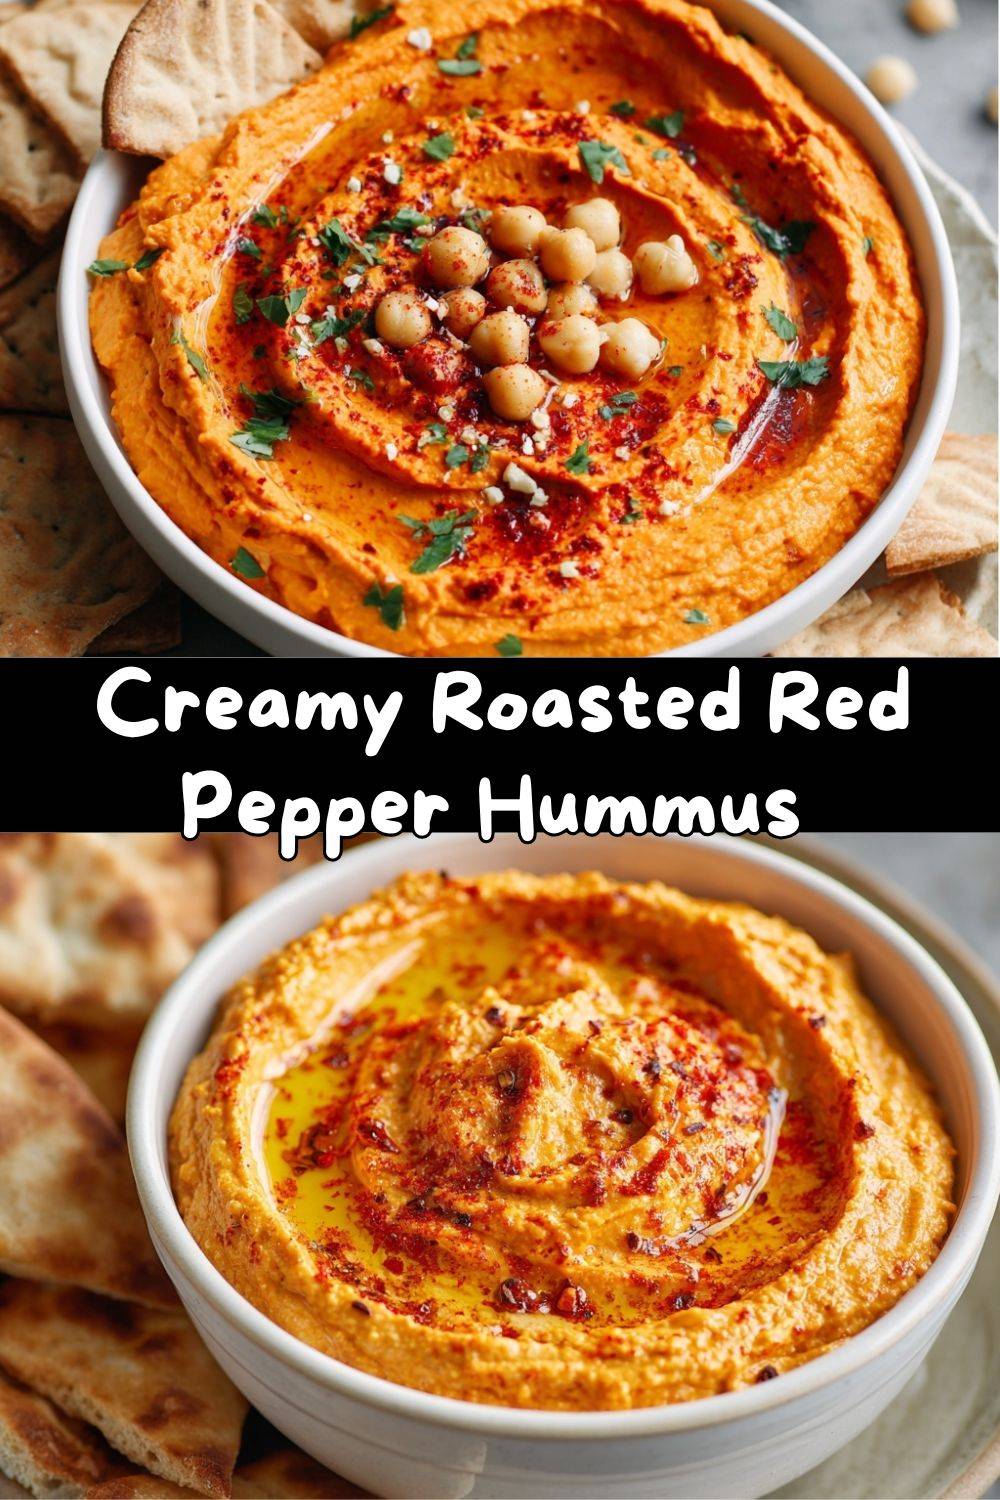
Transfer your hummus to a shallow bowl. Use the back of a spoon to create beautiful swoops and swirls on the surface. This isn’t just for looks—those grooves are perfect for catching the goodies. Drizzle generously with your best extra virgin olive oil. Then, get creative with your garnish: a sprinkle of smoky paprika, a handful of chopped fresh parsley or cilantro, a few reserved chickpeas, or even a pinch of toasted sesame seeds.
My favorite way to enjoy it? As a glorious sandwich spread. Slather it on sourdough, add sliced turkey or grilled chicken, crisp lettuce, tomato, and a sprinkle of feta. It instantly elevates lunch from boring to brilliant. It’s also an incredible base for a nourishing bowl—scoop a generous portion into a bowl and top with za’atar-spiced roasted vegetables, a soft-boiled egg, and some crumbled feta.
Make It Your Own: 5 Flavorful Twists
Once you’ve mastered this base recipe, the kitchen playground opens up! Here are a few of my favorite ways to riff on this classic.
- The Spicy Harissa Kick: Add 1-2 tablespoons of harissa paste to the food processor. You’ll get a stunning red color and a warm, complex heat that’s absolutely addictive.
- The Herb Garden: Throw in a big handful of fresh herbs before blending. Basil gives a sweet, summery twist, while dill or cilantro offers a bright, grassy note.
- The Sun-Drenched Tomato: Replace the roasted red pepper with ½ cup of oil-packed sun-dried tomatoes (drained). You’ll get an intense, tangy, and deeply savory hummus that’s incredible on crackers.
- The Everything Bagel: After plating, top your hummus with a generous sprinkle of everything bagel seasoning and an extra drizzle of olive oil. Instant party favorite!
- The Creamy Dream (Dairy Version): For an extra-indulgent, ultra-creamy version, blend in 2-3 tablespoons of plain Greek yogurt or softened cream cheese at the end.
Emily’s Kitchen Notebook
This recipe has been my faithful companion for years, from those early culinary school days to countless potlucks and cozy nights in. It’s evolved from my “blackened pepper” accident to a more refined, but still wonderfully simple, process. The biggest lesson? Patience in the blending stage is non-negotiable. Those extra minutes in the food processor are what separate a good hummus from a “can I get this recipe?!” hummus.
Also, don’t be afraid of the tahini. It’s the soul of the dish. I always keep a jar of good-quality tahini in my pantry—it’s the start of so many delicious sauces and dressings. Most of all, have fun with it! Cooking should feel like play, not a chore. If you’re smiling while you’re making it, I promise, you’ll taste the joy in every bite.
Your Hummus Questions, Answered!
Q: My hummus is too thick/grainy. What did I do wrong?
A: No worries—this is the most common issue, and it’s an easy fix! Graininess usually means it needs more liquid and more blending time. Add another tablespoon of ice water and process for a full 2-3 minutes. The friction from the blades heats the mixture slightly, and the extended processing time breaks down the chickpeas completely for that signature creamy texture.
Q: Can I make this without a food processor?
A: You can, though it takes a bit more elbow grease. A high-powered blender will work beautifully. If you only have an immersion blender, use a tall, narrow container and be patient, blending in stages. A standard potato masher won’t get it perfectly smooth, but it’ll make a tasty, rustic-style dip!
Q: How long does homemade hummus last in the fridge?
A: Stored in an airtight container, your homemade hummus will stay fresh and delicious for 4-5 days. The flavors often meld and become even better on day two! If the top dries out a bit, just give it a stir and add a fresh drizzle of olive oil.
Q: My hummus tastes bland. How can I boost the flavor?
A: This is a tasting game! First, make sure you’ve added enough salt—it’s crucial for making all the other flavors pop. Then, consider a bit more acid (lemon juice) or a pinch more cumin. Sometimes, the garlic flavor needs time to develop, so letting it rest before serving can help immensely.
Nourishment You Can Feel Good About
While we’re here for the incredible flavor, it’s a nice bonus that this hummus is packed with nourishing ingredients! Chickpeas are a fantastic source of plant-based protein and fiber, which helps keep you feeling full and satisfied. Tahini and olive oil provide heart-healthy fats. Red bell peppers are loaded with Vitamin C and antioxidants.
Remember, nutritional values are estimates and can vary based on specific ingredients and brands used. This information is intended as a general guide.
Nutrition Information (per ¼ cup serving):
Calories: 120 | Total Fat: 8g | Saturated Fat: 1g | Cholesterol: 0mg | Sodium: 180mg | Carbohydrates: 9g | Fiber: 2g | Sugars: 1g | Protein: 4g
Your Dip Awaits!
And there you have it, my friend! Your guide to making the most incredibly creamy, smoky, and satisfying roasted red pepper hummus right in your own kitchen. This recipe is more than just a list of steps—it’s an invitation to play, to taste, and to share something made with your own two hands.
I hope this becomes a staple in your fridge, a hero on your snack board, and a recipe you feel confident tweaking and making your own. Remember, the best kitchens are the ones filled with laughter, a little mess, and a whole lot of flavor. Now, go grab a pita chip, dig in, and enjoy the fruits (or should I say, legumes and peppers?) of your labor. You absolutely nailed it.
If you make it, I’d love to hear how it turned out! Tag me on social or leave a comment on the blog. Until next time, keep chasing those delicious flavors!
— Emily 🧡