Sauce-Separate Chicken Breast Prep – Juicy Every Time, Never Soggy
Hey friends, let’s have a real talk for a second. How many times have you followed a recipe for a gorgeous-sounding “Creamy Garlic Chicken” or “Lemon Butter Chicken,” only to end up with… well, a pot of sadness? The chicken is dry and chewy, the sauce is watery, and you’re left wondering where it all went wrong. You’re not alone. I’ve been there, standing in my apron, staring at a pan of overcooked meat swimming in a sad, separated sauce. It’s a culinary heartbreak I wouldn’t wish on anyone.
But what if I told you the secret to restaurant-quality, juicy chicken breast isn’t a fancy ingredient or a chef-level technique? It’s actually a simple mindset shift. The game-changer is this: stop simmering your chicken in the sauce. That’s right. Today, we’re breaking up with the one-pot-and-pray method and embracing a beautiful, flavorful friendship where chicken and sauce live their best lives separately, then come together for a perfect, harmonious plate. This “Sauce-Separate” method gives you ultimate control, guarantees incredible texture, and lets the flavors of both your protein and your sauce SHINE. Get ready to say a permanent goodbye to dry chicken and hello to juicy, glorious, saucy perfection.

The “Aha!” Moment in My Grandma’s Kitchen
This method wasn’t born in culinary school; it was born out of a happy accident in my grandma’s kitchen. She was famous for her pan-fried pork chops, always juicy with a crisp, salty crust. One Sunday, I watched her make gravy. She didn’t deglaze the pan the chops were in. Nope. She pulled the chops out to rest on a platter, made a simple gravy in a different saucepan with some broth and a roux, and then spooned it over the top just before serving. I remember asking, “Grandma, why not just make the gravy in the chop pan? It has all the good bits!” She winked and said, “Honey, the chops did their job. Now the gravy gets to do its job. You don’t want your beautiful crust to get all soggy, do you?” That wisdom stuck with me. She treated each component with respect. Years later, applying that same principle to lean, finicky chicken breast was a revelation. It was the key to unlocking consistent, foolproof juiciness. It’s a lesson in patience and respect for your ingredients, passed down with love and a wooden spoon.
Your Toolkit for Juicy Chicken & Amazing Sauce
Here’s everything you need. The beauty is in the simplicity. For the chicken, we’re building a flavorful foundation. For the sauce, the world is your oyster!
- 2 boneless, skinless chicken breasts – Look for plump, even-sized breasts. If yours are huge (the dreaded “woody breast”), I highly recommend butterflying them (slicing horizontally almost all the way through and opening like a book) or pounding them to an even ½-inch thickness. Even cooking is non-negotiable for juiciness.
- Kosher salt & freshly cracked black pepper – Don’t be shy! Salt is your #1 friend for flavor and helping the chicken retain moisture. Season at least 15 minutes ahead if you can.
- 1 tsp garlic powder OR smoked paprika – A little dry seasoning adds depth. Garlic powder is a classic; smoked paprika gives a gorgeous color and smoky warmth. Chef’s insight: Using dry spices here, instead of fresh garlic in the pan, prevents burning and bitterness during the sear.
- 1 tbsp olive oil, avocado oil, or butter – Olive oil is great for medium-high heat, avocado oil has a higher smoke point, and butter gives incredible flavor (just watch it doesn’t burn—you can do a mix of oil and butter!).
Choose Your Sauce Adventure (Make Separately!):
- Lemon Butter Sauce: Butter, garlic, lemon juice, chicken broth, parsley. Bright and classic.
- Garlic Cream Sauce: Butter, garlic, heavy cream, parmesan, a pinch of nutmeg. Pure indulgence.
- Chimichurri: Fresh parsley, cilantro, garlic, red wine vinegar, olive oil. A herby, tangy punch.
- Teriyaki Glaze: Soy sauce, mirin, brown sugar, ginger, garlic. Sweet, salty, and sticky.
- Pesto: Basil, pine nuts, parmesan, garlic, olive oil. A vibrant, no-cook option.
Step-by-Step to Chicken Bliss
Follow these steps, trust the process, and get ready for the juiciest chicken of your life.
- Prep & Season (The Pat-Down is Key!): Take your chicken breasts and thoroughly pat them dry with paper towels. I mean, get in there! Surface moisture is the enemy of a good sear—it steams the chicken instead of browning it. Season both sides generously with salt, pepper, and your chosen dry spice. Let them sit on a plate for 10-15 minutes if you have time. This lets the salt start to work its magic into the meat.
- Sear or Bake (Your Choice!):
- For Stovetop Searing (My Favorite for Flavor): Heat your oil in a heavy-bottomed skillet (cast iron is perfect) over medium-high heat. Once the oil is shimmering, add the chicken. Listen for that glorious sizzle! Don’t touch it for 5-6 minutes. Let a beautiful golden-brown crust form. Flip and cook for another 5-7 minutes, until the internal temperature reaches 165°F (74°C) at the thickest part. Chef Hack: Use a meat thermometer! It’s the single best tool to avoid guessing and overcooking.
- For Hands-Off Baking: Preheat oven to 400°F (200°C). Heat an oven-safe skillet with the oil, sear the chicken for 2-3 minutes per side to get color, then transfer the whole skillet to the oven. Roast for 15-18 minutes, until 165°F internally. This is great for cooking multiple breasts at once.
- The Non-Negotiable Rest: This is the step everyone wants to skip. DON’T! The moment your chicken hits 165°F, take it out of the pan and place it on a clean plate or cutting board. Tent it loosely with foil and let it rest for 5 full minutes. This allows the frantic, hot juices inside to relax and redistribute throughout the meat. If you slice it immediately, all those precious juices will run out onto the board, leaving you with dry chicken.
- Sauce It Up, Separately! While the chicken is resting (or even before you start cooking it), make your chosen sauce in a separate saucepan or skillet. This is where you build flavor without worrying about overcooking the protein. Reduce, simmer, whisk to your heart’s content. Once your sauce is perfect and your chicken has rested, slice the chicken against the grain. Then, and only then, spoon the warm sauce over the top or serve it on the side for dipping. Behold: juicy chicken, pristine sauce. Magic.
How to Plate Like a Pro (It’s Easy, I Promise!)
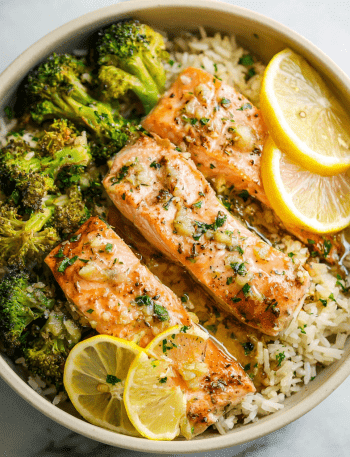
Presentation makes the meal taste even better! Here’s how I love to serve this chicken. Slice your rested chicken breast on a slight diagonal. Fan the slices out slightly on a warm plate. Generously spoon your sauce over the top, letting a little pool around the bottom. For a lemon butter or pesto, a final flourish of fresh chopped parsley or basil adds color and freshness. For the garlic cream, a little extra cracked pepper is perfect. Serve it alongside something that loves to soak up that extra sauce: a pile of fluffy mashed potatoes, buttery rice, or a simple bed of steamed greens like asparagus or broccoli. The beauty is on the plate—you can see the perfect cook on the chicken and the vibrant color of the sauce.
Get Creative! Flavor Twists & Swaps
This method is your canvas. Paint it with your favorite flavors!
- Mediterranean Style: Season chicken with oregano and lemon zest. Serve with a sauce of chopped sun-dried tomatoes, kalamata olives, fresh oregano, and a splash of red wine vinegar in olive oil.
- Coconut Curry Twist: Sear chicken seasoned with curry powder. Sauce is a quick blend of coconut milk, red curry paste, a spoonful of peanut butter, and a squeeze of lime. Serve over jasmine rice.
- For a Lighter Option: Skip the cream-based sauces. A “sauce” of diced ripe tomatoes, fresh basil, a glug of good balsamic vinegar, and a pinch of salt is incredibly fresh and flavorful.
- Gluten-Free/Dairy-Free: This method is naturally friendly! Use oil (not butter) for searing. For sauce, opt for chimichurri, a teriyaki made with tamari (GF soy sauce), or a dairy-free pesto (use nutritional yeast instead of parmesan).
- Use It for Meal Prep: Cook and slice a batch of this chicken on Sunday. Portion it out with different sauces (store sauces separately in small containers) and different sides (quinoa, roasted veggies) for effortless, juicy lunches all week.
Chef Emily’s Kitchen Notes
This recipe has evolved from my “strictly follow the recipe” days into my current “principles over rules” philosophy. I used to be terrified of dry chicken, so I’d constantly poke it, flip it early, and crowd the pan. The result was always gray and steamy. Learning to let the chicken be, to trust the sear and the thermometer, was huge. The separate sauce idea started with my grandma’s gravy but really clicked when a friend asked me how to keep her pesto chicken from turning the sauce brown. The answer was so simple: “Just… put the pesto on after?” We laughed, but it’s true! Sometimes the best techniques are the simplest ones we overlook. Now, this is my go-zero-fail method for everything from quick weeknight dinners to impressing guests.
FAQs & Your Chicken Questions, Answered
Q: My chicken is still dry inside even though I followed the time. What happened?
A: The most likely culprit is inconsistent thickness. A super thick end will be undercooked while a thin end is overdone. Always pound or butterfly to an even thickness! The second culprit could be your skillet wasn’t hot enough, causing the chicken to steam and lose moisture before it cooked through. Wait for that oil to shimmer.
Q: Can I use this method with chicken thighs?
A: Absolutely! Thighs are more forgiving due to their higher fat content, but this method still yields amazing results. You’ll get crispier skin (if using skin-on) and a more concentrated sauce. Just adjust cooking time—thighs take a bit longer.
Q: What if my sauce is too thin?
A> Since you’re making it separately, this is an easy fix! For cream sauces, let it simmer a bit longer to reduce. For pan sauces with broth, make a quick slurry (equal parts cold water and cornstarch, mixed) and whisk a little in until it thickens. For a butter sauce, you can mount it with an extra cold tablespoon of butter at the end, whisking until glossy.
Q: How long does the cooked chicken last in the fridge?
A> Properly stored in an airtight container, your juicy cooked chicken will be great for 3-4 days. Store the sauce separately for best texture.
Nutritional Breakdown (A Helpful Guide!)
Please note: This is an estimate for one plain, cooked 6-oz chicken breast prepared with ½ tbsp oil. Sauce calories will vary widely.
- Prep Time: 10 mins
- Cook Time: 15-25 mins
- Servings: 2
- Calories per serving (chicken only): ~240 kcal
- Protein: 32g | Fat: 10g | Carbs: 0–5g (depends on seasoning & sauce)
Chicken breast is an excellent source of lean protein. By controlling the sauce separately, you have complete power over added fats, sodium, and sugars, making this a fantastic method for those managing calories or specific dietary goals. A light chimichurri or lemon-caper sauce adds minimal calories but maximum flavor.
Your Journey to Juicy Chicken Starts Now
So, there you have it, my food-loving friend. The secret isn’t really a secret at all—it’s just a smarter, more respectful way to treat your ingredients. By giving your chicken breast the spotlight to cook perfectly and your sauce its own moment to shine, you unlock a world of flavor and texture that one-pot methods just can’t match. It’s about confidence in the kitchen. I want you to feel empowered, to grab that skillet, and to know, without a doubt, that juicy chicken is within your reach every single time. Now, go forth! Pick a sauce, heat that pan, and get ready for the compliments to roll in. Don’t forget to tag me on social @TastyChow so I can see your beautiful creations. Happy cooking, and as always, chow down!
— Emily 🧑🍳❤️