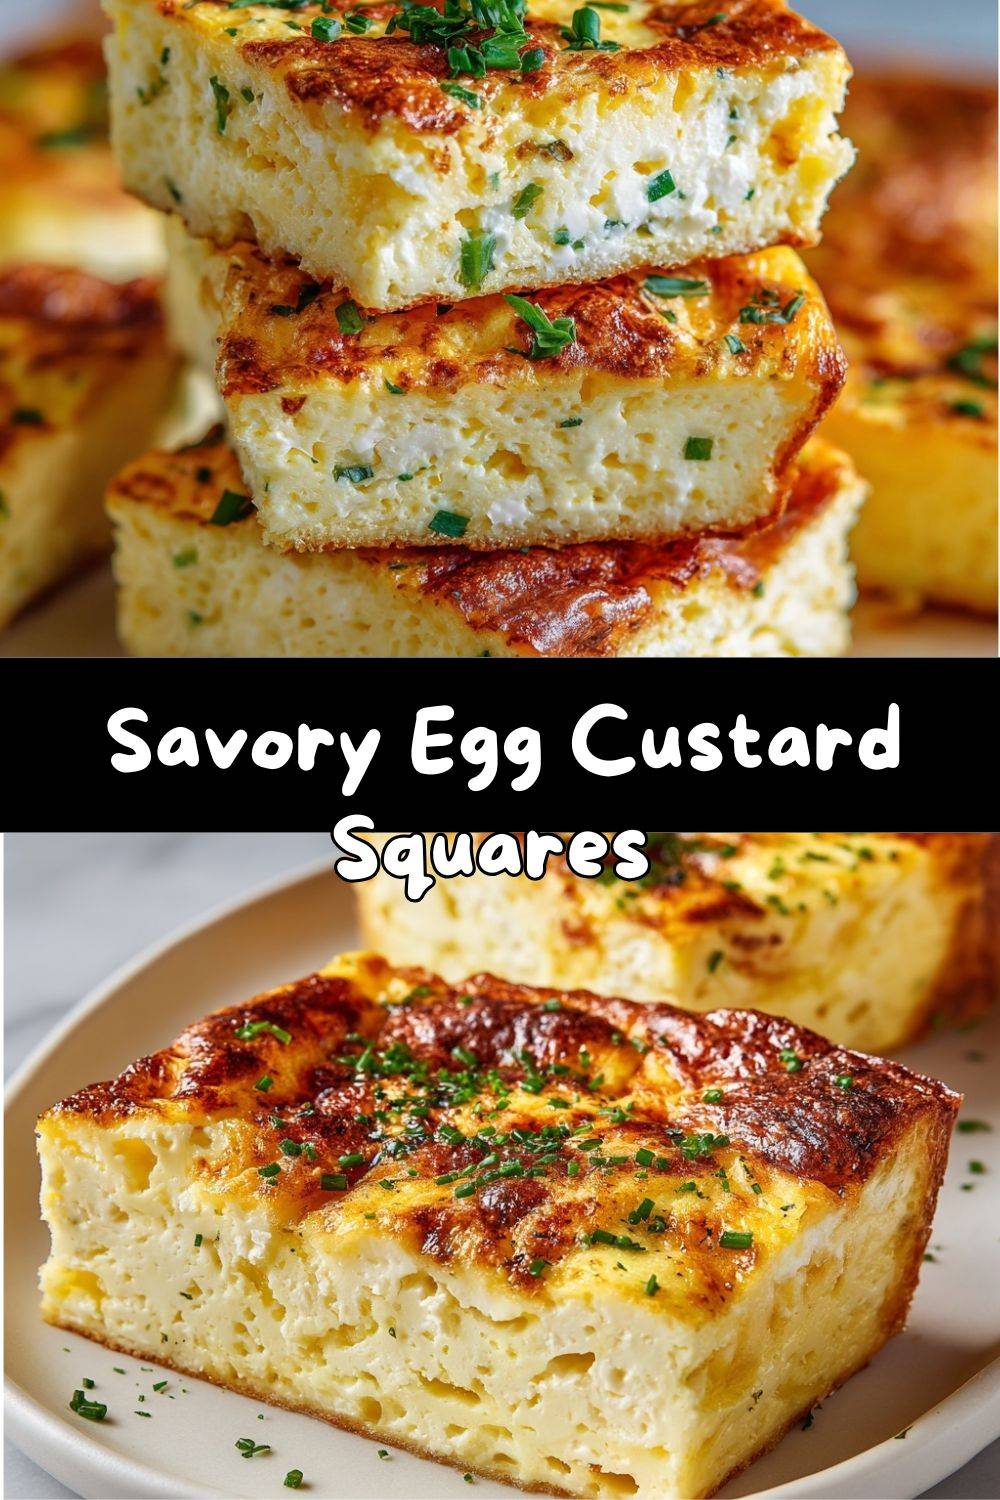
Savory Egg Custard Squares: Your New Protein-Packed Kitchen Bestie
Hey, friend! Let’s talk about that eternal kitchen quest: finding a make-ahead, protein-rich, actually-delicious bite that doesn’t feel like a chore to eat. You know what I mean—something you can grab with one hand while wrangling a coffee pot with the other, something that feels like a warm, savory hug but fuels you like a champ.
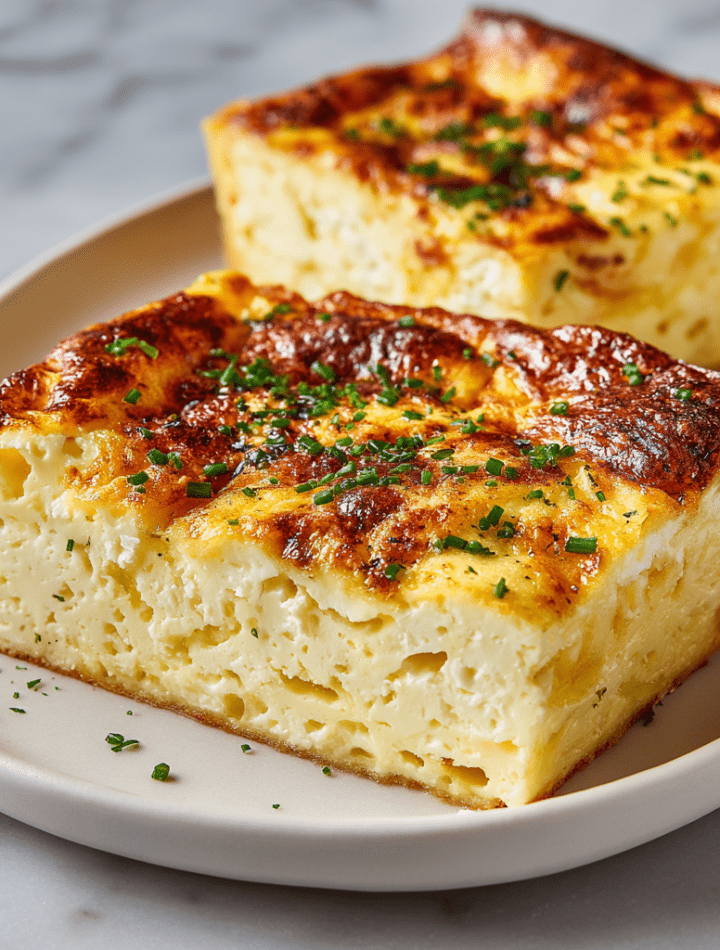
Well, pull up a chair and let me introduce you to your new secret weapon: Savory Egg Custard Squares. Imagine the silky, luxurious texture of a perfect crème brûlée, but in savory form, loaded with protein and sliceable into perfect, portable squares. It’s not quite a frittata, not quite a soufflé—it’s something uniquely creamy, dreamy, and downright magical.
I developed this recipe for those chaotic mornings, busy afternoons, and “I-need-a-snack-STAT” moments. It’s humble ingredient genius at its best. We’re talking pantry staples transformed through a low-and-slow bake into something elegant and satisfying. Whether you enjoy it warm right out of the oven or chilled straight from the fridge, these custard squares are a game-changer for meal prep and mindful eating. Ready to make your kitchen (and your belly) very, very happy? Let’s get cracking!
The Lesson in the Jiggle: A Grandma’s Whisper
This recipe takes me right back to my grandma’s linoleum-tiled kitchen. She was the queen of “waste not, want not,” and her signature move was a simple, steamed egg custard. It was her go-to when someone was under the weather, or when eggs were plentiful. She’d whisper the golden rule as she pulled it from the steamer: “Emily, it’s done when it sings a quiet jiggle. If it shouts, you’ve overstayed its welcome.”
For years, I overstayed that welcome. I’d poke and prod, baking my custards into rubbery, sad pucks. I was chasing certainty, killing the delicate magic. It wasn’t until I embraced that gentle, trusting jiggle—that moment of perfect, poised uncertainty—that I unlocked the secret to sublime texture. This recipe is my ode to that lesson. It’s my modern, bake-not-steam, protein-boosted twist on her classic comfort. It’s a reminder that sometimes, the best things in life (and in the kitchen) require a little faith and a perfectly timed exit. Every time I pull these squares from the oven, that quiet jiggle feels like her kitchen wisdom, alive and well in mine.
Gathering Your Flavor Crew
Here’s the beautiful part: the ingredient list is short, sweet, and supremely flexible. Let’s meet the team and talk about their roles. (Chef’s insight: using room-temperature ingredients helps them blend more smoothly and bake more evenly!)
- 6 large eggs: The superstar, providing structure, rich flavor, and high-quality protein. They’re the canvas for our custard masterpiece.
- 1 cup cottage cheese: The secret weapon! It adds a massive protein boost and creates an incredibly creamy, moist texture. Chef’s Tip: For a flawlessly smooth custard, blend it first. For a bit of pleasant, ricotta-like texture, just whisk it in as-is. Both ways are delicious!
- 1/4 cup milk: Our liquid for perfect consistency. Dairy milk adds richness, but unsweetened almond, oat, or soy milk work beautifully too. This is your chance to customize.
- Salt and black pepper, to taste: The essential flavor awakeners. Don’t be shy—custard needs seasoning. I start with 1/2 tsp kosher salt and a few good cracks of pepper.
- Optional add-ins: This is your playground! A handful of chopped chives for a bright oniony kick, a squeeze of cooked spinach (make sure to wring it dry!), some sautéed mushrooms for umami depth, or a sprinkle of shredded cheddar or gruyère for gooey pockets of joy.
Let’s Build Some Silky Magic: Step-by-Step
Follow these steps, and you’ll be a custard-square pro in no time. I’m talking you through every bit so you feel confident and excited!
- Preheat & Prep: Start by preheating your oven to a gentle 325°F (160°C). This low temperature is NON-NEGOTIABLE for that silky texture—no browning, no puffing, just gentle, even cooking. While it heats, lightly grease an 8×8-inch baking dish with butter, oil, or line it with parchment paper for super easy lift-out slices.
- The Blend (or Whisk): Now, choose your adventure! For the smoothest, most restaurant-style custard, toss the eggs, cottage cheese, milk, salt, and pepper into a blender. Blend on medium for about 30 seconds until it’s completely homogenous and frothy. If you prefer a bit more rustic, home-style texture (and fewer dishes!), just add everything to a large bowl and whisk vigorously for 1-2 minutes until well combined.
- Incorporate Your Extras: If you’re using hearty add-ins like spinach or mushrooms, fold them gently into the blended mixture now. For delicate herbs or a cheese topping, you can sprinkle them on after you pour the custard into the dish for a pretty finish.
- The Pour & The Peace: Pour your custard mixture into the prepared dish. Tap it gently on the counter once or twice to release any sneaky air bubbles. Now, take a breath. The hard part is over!
- The Low & Slow Bake: Place your dish in the center of the preheated oven. Set your timer for 35 minutes, but DO NOT OPEN THE DOOR. We’re creating a steady, tranquil environment. At 35 minutes, give the dish a gentle shake. We’re looking for that “grandma-approved jiggle”—the edges should be fully set, and the center should jiggle like firm Jell-O, not liquid. If it seems very loose, give it 5 more minutes. Total bake time is usually 35-40 minutes.
- The Crucial Cool: Once out of the oven, let the custard cool in the dish on a wire rack for at least 10 minutes. This allows it to finish setting up and makes slicing cleanly a breeze. I know it’s tempting to dive right in, but patience pays off in perfect squares!
- Slice & Celebrate: Run a knife around the edge, then slice into 6 or 9 beautiful squares. Use a spatula to lift them out. Admire that gorgeous, creamy interior!
How to Serve These Protein Powerhouses
The beauty of these squares is their versatility. Here’s how I love to enjoy them:
For a Hearty Breakfast Plate: Serve two warm squares alongside a pile of simply dressed arugula, a handful of cherry tomatoes, and a slice of buttered whole-grain toast. The contrast of warm/cold and creamy/crunchy is *chef’s kiss*.
As a Grab-&-Go Snack: Let them cool completely, then store in a container in the fridge. Grab one straight from the fridge—the custard firms up when chilled, making it the perfect portable, protein-packed bite. Pop it in a lunchbox with some fruit and nuts.
Elegant Appetizer Style: Cut into smaller, bite-sized pieces. Top each with a dollop of herbed Greek yogurt, a sliver of smoked salmon, and a tiny sprig of dill. Instant fancy party food!
Make It Your Own: 5 Tasty Twists
Once you’ve mastered the basic formula, the world is your custard oyster! Here are a few of my favorite riffs:
- Sun-Dried Tomato & Feta: Fold in 1/4 cup chopped sun-dried tomatoes (oil-packed, drained) and 1/3 cup crumbled feta cheese. The tangy, salty pops are incredible.
- “Everything Bagel” Style: Whisk 2 tbsp of everything bagel seasoning right into the custard base. After baking and cooling, top with a schmear of cream cheese and extra seasoning. Unreal.
- Dairy-Free Delight: Use a plain, unsweetened dairy-free milk (almond or oat are great) and swap the cottage cheese for 1 cup of silken tofu (blended until smooth). You’ll get a similarly silky, high-protein result.
- Mediterranean Herb Garden: Add 1/4 cup each of finely chopped fresh dill, parsley, and chives. It tastes like spring in a square.
- Spicy Southwest Kick: Add 1/4 cup diced roasted green chiles, 1 tsp cumin, and a pinch of smoked paprika. Top with a spoonful of salsa and avocado after baking.
A Few More Nuggets from My Kitchen
This recipe has become a true workhorse in my fridge. I often double it and bake it in a 9×13 dish (just add 5-10 mins to the bake time) for the whole week. My husband calls them my “protein gold bars” and will sneak them straight from the container. The recipe has evolved from my grandma’s steamed version to this bakeable, sliceable format purely for modern convenience—and my love of meal prep. A funny fail? The time I tried to “speed things up” by baking at 400°F. Let’s just say I created a puffy, brown, weeping sponge. Not cute. Low and slow, friends. Always low and slow.
Your Questions, Answered!
Q: My custard turned out watery or separated. What happened?
A: This is almost always due to either under-baking or adding wet ingredients (like fresh spinach or tomatoes) without draining/wringing them out first. Ensure your add-ins are cooked and dry, and bake until that center jiggle is firm, not sloshy.
Q: Can I make these without a blender?
A> Absolutely! A vigorous whisk by hand works perfectly. Your custard will have a bit more texture from the cottage cheese curds, which I personally adore. It feels more homemade.
Q: How long do they last in the fridge?
A: Stored in an airtight container, they’re fantastic for up to 4 days. They don’t freeze well due to the delicate custard texture—it can become grainy when thawed.
Q: It tastes a bit bland. How can I boost flavor?
A> Great question! Custard needs seasoning. Don’t underestimate the salt. Also, try adding a punchy ingredient right into the mix: a tablespoon of Dijon mustard, a dash of hot sauce, or a handful of grated Parmesan can work wonders.
Nutritional Highlights (Per Square, Recipe Makes 6)
Let’s be clear: I’m a chef, not a dietitian. These are estimates based on the core ingredients using a standard calculator. But here’s the exciting breakdown that makes me love this recipe:
- Calories: ~130
- Protein: ~11g – This is the star! It comes from the eggs and cottage cheese, making it a complete, satisfying protein source.
- Carbohydrates: ~2g – Naturally low-carb, making it friendly for many eating styles.
- Fat: ~8g – Mostly the healthy, satiating fats from the egg yolks.
The beauty is you control the add-ins, so you can easily tailor it to your nutritional goals. Using a low-fat cottage cheese or egg whites will alter these numbers, of course!
Go Forth and Bake with Confidence!
And there you have it, my friend—your complete guide to making the most delightfully silky, savory, and satisfying egg custard squares. This isn’t just a recipe; it’s a template for endless kitchen creativity and a tool for making your busy days a little more nourishing and a lot more delicious.
I hope you bake up a batch, embrace the gentle jiggle, and discover just how magical simple ingredients can be. When you do, I’d love to hear about it! Tag me on social or leave a comment telling me what add-ins you chose. Remember, the best kitchen is a happy, messy, flavor-filled one. Now, go make something wonderful.
With love and a well-seasoned spatula,
Emily 🧡