Spicy Fruit Balls: Your New Favorite Holiday Hug in Cookie Form
Hey there, my fellow food lover! Gather ‘round, because I’m about to share a recipe that’s basically a warm, spiced hug for your soul. We’re talking about my beloved Spicy Fruit Balls. Now, I know the word “fruitcake” can sometimes make people a little… wary. But trust me, these are nothing like the dense, doorstop-esque versions you might be picturing.
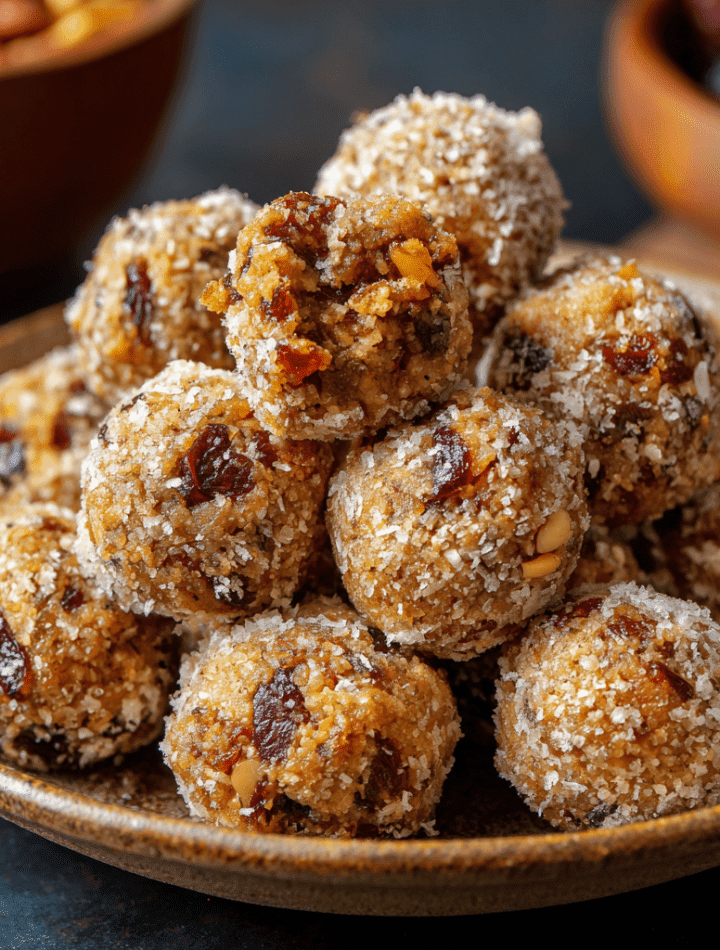
Imagine this instead: a soft, almost cake-like cookie, bursting with chewy, sweet dates, a delightful crunch from toasted nuts, and the warm, cozy embrace of cinnamon, cloves, and allspice. A bright kiss of orange zest cuts through the richness, making every single bite a perfect balance of flavor and texture. These little guys are chewy, fruity, and absolutely full of holiday warmth. They’re the undisputed stars of my holiday cookie platter, the treat I sneak with my afternoon coffee, and the recipe my friends text me for every single December. So, preheat your oven, tie on your favorite (and probably messy) apron, and let’s make some magic together.

The Scent of Sundays: A Story of Grandma’s Wooden Spoon
Every time I bake these Spicy Fruit Balls, I’m instantly ten years old again, standing on a wobbly stool in my grandma’s kitchen. The air would be thick with the scent of baking spices and citrus, a perfume more comforting to me than any fancy candle. Grandma called them her “Christmas Balls,” and she’d let me be in charge of the most important job: zesting the orange. She’d hand me that little metal grater and a bright, bumpy orange, and I’d scrape away, careful not to get my knuckles, feeling so proud of the tiny, fragrant piles of zest I’d create.
She never used a fancy stand mixer; it was just her, her worn-out wooden spoon, and a big yellow bowl. I’d watch her strong arms cream the shortening and sugar, her movements practiced and steady. She’d tell me stories about her own mother making these same cookies, and as I’d fold in the sticky dates and nuts, I felt like I was part of something bigger—a delicious, unbroken chain of love and kitchen chaos. That’s the true magic of this recipe. It’s not just a cookie; it’s a time machine to a kitchen filled with love, laughter, and the promise of something sweet.
Gathering Your Cozy Ingredients
Here’s everything you’ll need to create this batch of holiday happiness. Don’t be shy about making it your own—I’ve included some of my favorite swaps and chef-y insights!
- 1 cup shortening – This is the secret to that wonderfully soft, cakey texture! It creates a tender crumb that butter sometimes can’t quite achieve. If you’re a butter purist, you can use an equal amount of unsalted butter, but your cookies will be a bit crisper and flatter.
- 1½ cups brown sugar (light or dark) – Dark brown sugar will give you a deeper, almost molasses-like flavor, which is just *chef’s kiss* with the spices. Light brown sugar keeps it a touch lighter. The moisture in the brown sugar is key for that chewy bite.
- 2 large eggs – Our binding agents! Make sure they’re at room temperature to help them incorporate smoothly into the creamed shortening and sugar. No one wants a curdled-looking dough.
- 3½ cups all-purpose flour – The foundation of our fruit balls. For a slightly more tender cookie, you can swap out ½ cup with cake flour.
- 1 tsp baking soda & 2 tsp baking powder – Our leavening dream team! The baking powder gives an initial lift, and the baking soda helps them spread and brown beautifully. Yes, you need both!
- 1 tsp ground cinnamon, ½ tsp ground cloves, ½ tsp ground allspice – The holy trinity of holiday warmth! Toasting your spices in a dry pan for 30 seconds before using will wake up their oils and make your kitchen smell incredible.
- ½ cup orange juice – Freshly squeezed is fantastic, but from the carton works perfectly well too! This adds a subtle tang and moisture.
- 1 cup chopped walnuts or pecans – I’m Team Pecan all the way for their buttery flavor, but walnuts bring a wonderful earthy note. Toast them first! It’s a non-negotiable step for maximum nutty flavor.
- 1½ cups chopped dates – The star of the show! Their deep, caramel-like sweetness is what makes these cookies so special. If your dates are a little dry, soak them in hot water for 10 minutes, then drain and pat dry before chopping.
- 1 tbsp grated orange zest – This is where the magic lives! That bright, citrusy aroma is what takes these from “yum” to “can I have the whole batch?” Use a microplane to get the zest fine and fluffy.
Let’s Get Baking: Step-by-Step to Fruit Ball Bliss
Ready to create some cookie magic? Follow these steps, and you’ll be a Spicy Fruit Ball pro in no time. I’ve sprinkled in my best kitchen hacks to make sure your baking is as fun and foolproof as possible.
- Preheat & Prep: Fire up your oven to 375°F (190°C). This is our first step for a reason—a properly preheated oven is crucial for even baking. While it’s warming up, line your baking sheets with parchment paper. Chef’s Hack: Parchment paper is my baking BFF. It prevents sticking AND makes cleanup a dream. No parchment? A light coating of baking spray works too.
- Cream the Dream Base: In a large bowl, use an electric mixer (or channel your inner grandma with a wooden spoon and some elbow grease!) to cream together the shortening and brown sugar. We’re looking for a mixture that is light, fluffy, and pale in color. This usually takes about 2-3 minutes on medium speed. This step is important because it incorporates air into our dough, giving our cookies lift. Now, beat in the eggs one at a time, making sure the first is fully incorporated before adding the second. This ensures a smooth, emulsified dough.
- Whisk the Dry Team: In a separate bowl, grab a whisk and thoroughly combine the flour, baking soda, baking powder, and all those gorgeous spices (cinnamon, cloves, allspice). Whisking is better than sifting here—it’s faster and does a great job of evenly distributing the leaveners so you don’t get a bitter bite.
- The Grand Merge: Now, we bring the wet and dry teams together. With your mixer on low speed, gradually add the dry ingredients to the creamed mixture, alternating with the orange juice. I usually do three additions of dry and two of juice, starting and ending with the dry ingredients. Mix just until the flour disappears. Overmixing is the enemy of a tender cookie!
- Fold in the Fun Stuff: Switch to a sturdy spatula for this part. Gently fold in the toasted nuts, chopped dates, and that glorious orange zest. Make sure everything is evenly distributed without overworking the dough.
- Shape & Bake: Using a small cookie scoop (about 1 tablespoon size) or your hands, roll the dough into 1-inch balls. Place them on your prepared baking sheets, spacing them about 2 inches apart. They don’t spread a ton, but they need their personal space! Bake for 12-15 minutes. You’re looking for the tops to be set and the bottoms to be a light golden brown. They might still feel a little soft in the center—that’s perfect! They’ll firm up as they cool.
- The Cool Down: This is a test of your willpower! Let the cookies rest on the hot baking sheet for 5 minutes before transferring them to a wire rack to cool completely. This allows them to set up properly so they don’t fall apart.
How to Serve These Spicy Gems
Okay, the hardest part is over (waiting for them to cool!). Now, how do we serve these beauties? Let me count the ways!
For the ultimate holiday experience, pile them high on a vintage cake stand or a rustic wooden board as part of your epic holiday cookie platter. They look gorgeous next to snowball cookies, gingerbread men, and chocolate-dipped shortbread.
My absolute favorite way to enjoy them is still warm from the oven (okay, maybe after a 10-minute cool-down so I don’t burn my tongue) with a giant mug of strong black coffee. The bitterness of the coffee is a perfect match for the sweet, spiced fruit. They’re also a dream with a hot mug of chai tea or a glass of cold milk.
Want to get fancy? For a dinner party dessert, crumble one or two over a scoop of vanilla bean ice cream and drizzle with a little caramel sauce. It’s a simple, yet show-stopping way to end a meal.
Make It Your Own: Delicious Recipe Twists
I love this recipe as-is, but playing with your food is half the fun! Here are a few of my favorite ways to mix things up.
- Boozy & Bold: Soak those chopped dates in 2-3 tablespoons of dark rum or bourbon for an hour before adding them to the dough. It adds a wonderful depth of flavor that adults will go crazy for.
- Tropical Twist: Swap the walnuts for macadamia nuts and add ½ cup of shredded, sweetened coconut along with the dates. It’s like a little vacation in a cookie!
- Gluten-Free Goodness: You can easily make these gluten-free! Use a 1:1 gluten-free all-purpose flour blend (I love the ones with a bit of xanthan gum already in them). The texture is virtually identical.
- Fruity Fun: Feel free to play with the dried fruit! Substitute half of the dates with dried cranberries or cherries for a pop of tartness and color.
- Spice It Up: For a little kick, add a tiny pinch (⅛ tsp) of freshly ground black pepper or cayenne pepper to the dry ingredients. It sounds wild, but it makes the warm spices sing even louder!
Chef Emily’s Kitchen Notes
This recipe has evolved so much since my grandma first showed me! I’ve learned a few things along the way. For years, I stubbornly used butter and wondered why my cookies weren’t as pillowy-soft as hers. Turns out, Grandma was right about the shortening all along! It’s a lesson in trusting the classics.
One of my funniest kitchen fails was the time I accidentally used salt instead of sugar. Let me tell you, a spicy salty fruit ball is not a taste sensation I’d recommend to anyone. I now always do the “sniff test” with my ingredients before they go in the bowl—it’s saved me more than once!
These cookies also freeze like a dream. I often make a double batch, roll the dough into balls, and freeze them on a sheet pan before transferring to a zip-top bag. Then, I can bake off just a dozen at a time whenever a cookie craving strikes. It’s my secret for having fresh-baked treats in 15 minutes flat!
Your Questions, Answered!
Over the years, I’ve gotten a few repeat questions about this recipe. Here are the answers to help you bake with confidence!
- Q: My cookies spread too much and went flat. What happened?
A: This is almost always due to a warm kitchen or over-creaming. Make sure your shortening is cool, not super soft, and don’t over-whip it with the sugar. Also, double-check that your baking soda and powder are fresh—old leaveners lose their power! - Q: Can I make the dough ahead of time?
A: Absolutely! You can cover the bowl and refrigerate the dough for up to 48 hours. Let it sit at room temp for 15-20 minutes before scooping and baking. The flavor actually deepens! - Q: My dough seems a bit dry and crumbly. Help!
A: No worries! This can happen based on flour humidity. Just add an extra tablespoon or two of orange juice until the dough comes together nicely when you squeeze it in your hand. - Q: Are these cookies supposed to be super soft in the middle?
A: Yes! That’s their signature texture. They will firm up as they cool, but they should remain soft and cake-like, not crunchy. If they’re still wet and raw, they just need another minute or two in the oven.
A Quick Bite on Nutrition
I’m all about balance, and I believe that treats like these are an essential part of a happy life! While these are definitely a dessert, it’s nice to know what you’re enjoying. Here’s a rough breakdown per cookie (assuming you get about 60 from the batch):
Calories: ~85 kcal | Fat: 4g | Carbs: 12g | Sugar: 7g | Protein: 1g
The dates provide natural sugars and a bit of fiber, and the nuts add healthy fats and a touch of protein. They’re a more wholesome option than many overly processed cookies out there. Remember, it’s all about savoring each delicious, mindfully-made bite!
Final Thoughts from My Kitchen to Yours
Well, my friend, we’ve done it! We’ve taken a handful of simple ingredients and transformed them into a cookie that’s packed with more flavor and nostalgia than should be legally allowed. I hope this recipe finds its way into your kitchen and becomes a part of your own family’s traditions, creating messy, joyful, and delicious memories for years to come.
With love and a flour-dusted apron,
Emily