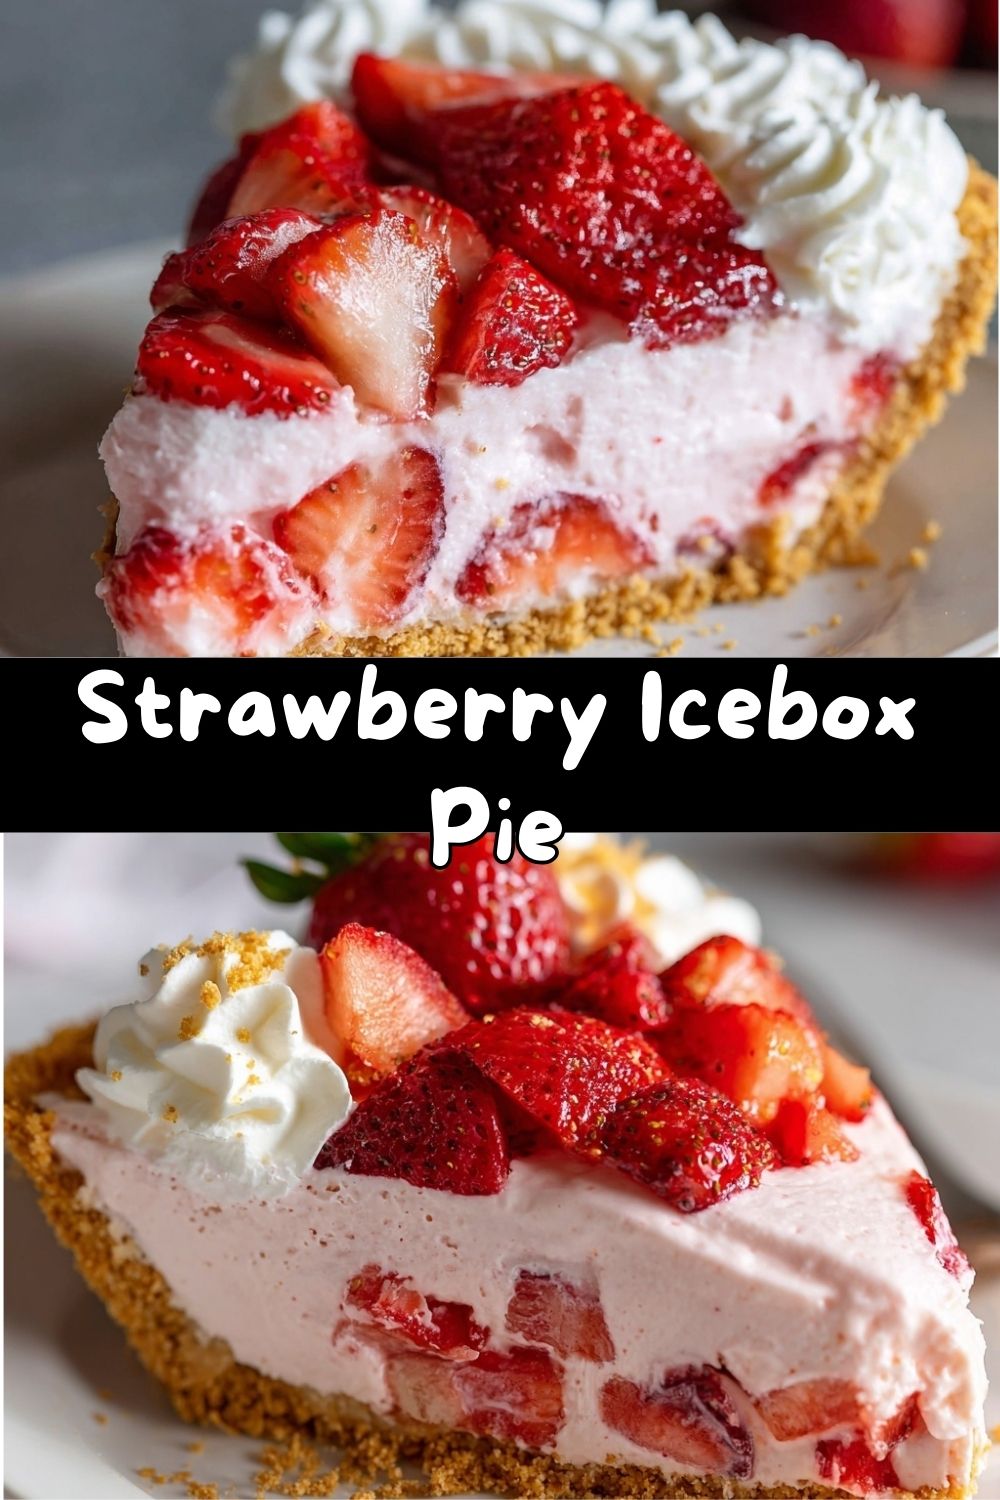
Strawberry Icebox Pie: A Cool, Creamy Slice of Summer Magic
Hey there, fellow food lover! 👋 Emily Walker here, back in my happy kitchen corner with a recipe that screams summer louder than a sizzling grill and a popped-open soda. Today, we’re diving spoon-first into my absolute favorite no-bake wonder: Strawberry Icebox Pie.
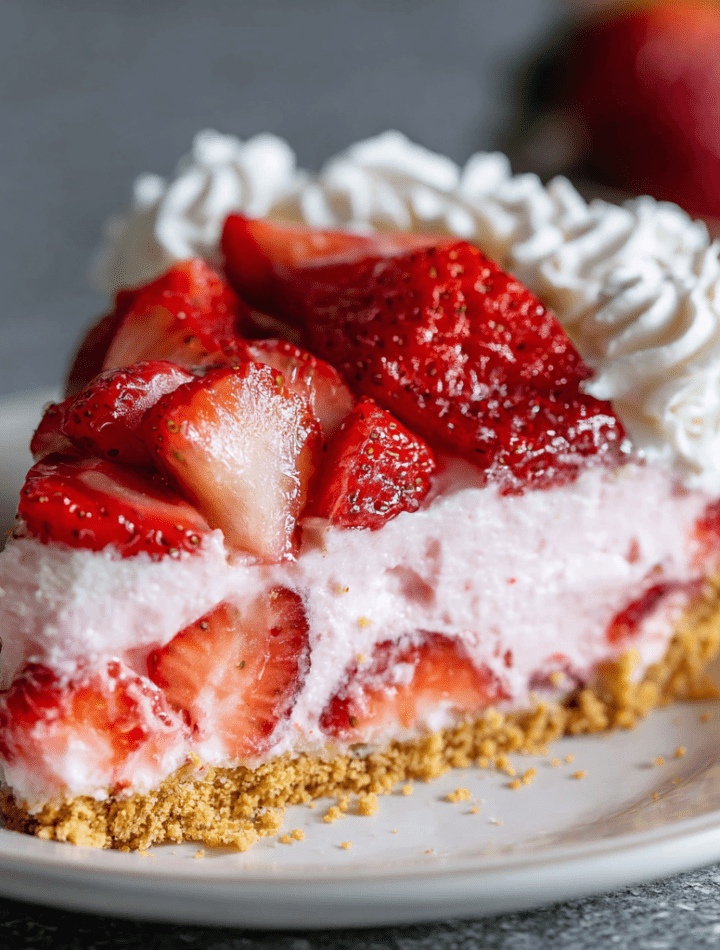
Imagine this: a buttery, crumbly graham cracker crust. A cloud-like, pink filling that’s bursting with the pure, sun-ripened flavor of real strawberries. All topped with a crown of glistening fresh berries. It’s cool, it’s creamy, it’s sweet-but-not-too-sweet, and the best part? You don’t have to turn on your oven. Not even for a second.
This pie is my go-to hero for every summer gathering, lazy Sunday, or “I-need-something-sweet-STAT” moment. It’s the dessert that makes people’s eyes light up, the one that disappears from the picnic table first, and the recipe that even my most kitchen-shy friends feel confident tackling. It’s more than just a dessert; it’s a vibe. It’s the taste of long, sunny days, relaxed backyard hangs, and the simple joy of a treat that feels both fancy and completely down-to-earth. So, tie on your apron (the messy one is totally acceptable here), grab your mixing bowl, and let’s make some no-bake magic together. Your future self, enjoying a chilled slice of this berry bliss, will thank you.
The Sweet Start: My Grandma’s Icebox Legacy
My love affair with icebox pies didn’t start in culinary school. It began decades earlier, on a sticky Ohio afternoon in my Grandma Betty’s kitchen. Her “icebox” was an avocado-green Kelvinator refrigerator that hummed like a contented bumblebee, and inside it, miracles happened. One particular summer, after we’d spent the morning picking strawberries at a local farm (and eating at least as many as we put in our baskets), she declared it was “Icebox Pie Day.”
I watched, perched on a step-stool, as she crushed graham crackers with a rolling pin, the sound like a summer thunderstorm in a zip-top bag. She let me stir the sweetened condensed milk, that magical, thick nectar, into the cream cheese. The real thrill was turning our ruby-red haul of berries into a vibrant puree. We didn’t have a fancy food processor; we used an old-fashioned Foley food mill, its metallic grind turning berries into the most gorgeous, seed-speckled pulp. The whole house smelled of sugar, butter, and fresh fruit. That wait for it to set felt like an eternity to my six-year-old self, but the first bite—cold, creamy, and exploding with strawberry—was a revelation. It tasted like summer love. Every time I make this pie now, that memory comes rushing back, and I swear it tastes even better because of it.
Gathering Your Goodies: The Icebox Pie Lineup
Here’s everything you’ll need to build your own slice of nostalgia. I’ve added a few of my chef-y insights and swap ideas so you can make this pie your own!
For the Crust:
- 1 ½ cups graham cracker crumbs: You can buy these pre-crumbled, but I love the texture of crushing whole crackers myself. It’s a fantastic stress reliever! Chef’s Insight: For a deeper flavor, try using cinnamon or honey grahams. Gluten-free? Any gluten-free graham-style cracker works perfectly here.
- 6 tablespoons melted butter: This is the glue that holds our crunchy dream together. Use unsalted so you control the saltiness. Substitution Tip: For a dairy-free version, refined coconut oil works like a charm and adds a lovely, subtle tropical note.
- 2 tablespoons granulated sugar: A little sweetness to balance the cracker’s toasty flavor. Feel free to adjust to your taste, or swap in brown sugar for a hint of caramel.
For the Filling (The Star of the Show!):
- 1 (8 oz) block full-fat cream cheese, softened: This is non-negotiable for texture. Full-fat gives us that luscious, creamy base that sets up beautifully. Let it sit on the counter for a good hour—truly softened cream cheese beats into silk, no lumps allowed!
- 1 (14 oz) can sweetened condensed milk: The secret weapon of no-bake desserts! It provides sweetness, body, and that iconic creamy texture. Don’t confuse it with evaporated milk—they are not the same!
- 1 cup pureed fresh strawberries: The heart of the flavor. Hull about 1.5 cups of berries and blitz them in a blender or food processor until smooth. Pro Tip: Strain it if you want a perfectly smooth pink filling, but I love the rustic texture and extra fiber from the seeds.
- 1 teaspoon pure vanilla extract: The flavor enhancer. It rounds out the berry and cream notes beautifully.
- Juice of ½ a lemon: My kitchen magic trick! This brightens the entire filling, making the strawberry flavor pop and also helping to balance the richness. Fresh is best here.
- 1 cup whipped topping or stabilized whipped cream: This lightens the filling into a mousse-like cloud. A tub of frozen whipped topping (thawed) is foolproof, but if you’re a from-scratch hero, see my Chef’s Notes for how to stabilize your own whipped cream so it holds up.
For the Topping:
- Fresh sliced strawberries: For that gorgeous, fresh-from-the-patch look. You can arrange them in a pretty pattern or just pile them on joyfully!
- Optional: Extra whipped cream for garnish: Because more whipped cream is always a good idea. A dollop on each slice is pure heaven.
Let’s Build This Beauty: Step-by-Step with Chef Emily
Step 1: Craft the Crust
In a medium bowl, combine your graham cracker crumbs, melted butter, and sugar. Mix it with a fork until it looks like wet sand and holds together when you pinch it. Dump this glorious mixture into a standard 9-inch pie dish. Now, here’s my favorite trick: use a flat-bottomed measuring cup to press the crumbs firmly and evenly into the bottom and up the sides. This gives you a professional-looking, compact crust that won’t fall apart when you slice it. Once it’s perfectly pressed, pop the whole pie dish into the freezer for 10-15 minutes while you make the filling. This quick chill sets the butter, making the crust extra sturdy.
Step 2: Whip Up the Dreamy Filling
In a large mixing bowl, beat your softened cream cheese with an electric mixer (or a mighty strong arm and a whisk) for about 2 minutes, until it’s completely smooth and fluffy. Scrape down the sides of the bowl—this is crucial for no lumps! Now, pour in the entire can of sweetened condensed milk and beat again until it’s fully incorporated and silky.
Next, add your vibrant strawberry puree, the vanilla, and the lemon juice. Mix on medium speed until the whole bowl transforms into a beautiful, uniform pale pink color. Taste it! This is the cook’s reward. It should be bright, berry-forward, and perfectly sweet-tart. Adjust with a tiny bit more lemon if needed.
Step 3: The Light & Fluffy Fold-In
Now, take your whipped topping or prepared stabilized whipped cream. Add about one-third of it to the strawberry mixture and fold it in gently with a rubber spatula. This initial addition lightens the dense mixture, making it easier to incorporate the rest without deflating all the air. Add the remaining whipped topping and continue folding with a gentle, sweeping motion from the bottom of the bowl up and over, until no white streaks remain. You’ll see the filling become even lighter and more voluminous.
Step 4: Assemble & The Big Chill
Pull your rock-solid crust from the freezer. Pour the cloud-like pink filling into the center, then gently spread it out to the edges with your spatula. Give the pie dish a little tap-tap-tap on the counter to settle the filling and remove any air bubbles. Smooth the top into pretty swoops and swirls—they’ll hold their shape when set.
Here’s where patience is key: cover the pie loosely with plastic wrap (poke a few toothpicks in the top to keep the wrap from sticking to the filling) and refrigerate for at least 6 hours, but overnight is truly best. This isn’t a suggestion, it’s the law of the icebox pie! The filling needs this time to firm up perfectly so you get clean, gorgeous slices.
Step 5: The Grand Finale – Topping & Serving
Right before you’re ready to serve, artfully arrange your fresh sliced strawberries on top. I love a classic spiral from the outside in, or a rustic pile in the center. Add dollops of extra whipped cream around the edges if you’re feeling fancy. To slice, dip a sharp, thin-bladed knife in hot water and wipe it dry between each cut for impeccably clean slices.
Serving Your Masterpiece: How to Plate the Perfect Slice
This pie is a stunner all on its own, but a little plating love makes it feel extra special. Slide your perfect slice onto a chilled plate—this keeps it cool longer. I love adding a tiny sprinkle of graham cracker crumbs or a few micro mint leaves on the plate for a chef’s touch. For a summer BBQ, serve it right from the pie dish on a picnic table; the casual vibe is perfect. For a dinner party, pre-slice the pie, plate each piece, and add a single perfect whole strawberry and a mint sprig on the side. It’s all about contrast: the cool, creamy pink against the white plate, the fresh red berries on top. Don’t forget the coffee, iced tea, or a glass of cold milk for the ultimate pairing!
Make It Your Own: 5 Flavorful Twists on the Classic
The basic formula is a canvas for your creativity! Here are some of my favorite ways to riff on this classic:
- Mixed Berry Bonanza: Swap the strawberry puree for a mix of raspberries, blueberries, and blackberries. The color will be a deep, gorgeous purple, and the flavor is complex and tangy.
- Lemon-Berry Swirl: Make the filling as directed, but before pouring it into the crust, gently swirl in ¼ cup of prepared lemon curd. You’ll get beautiful ribbons of bright lemon throughout the strawberry.
- Chocolate-Dipped Strawberry Pie: Add ¼ cup of sifted cocoa powder to the graham cracker crust mixture. For the topping, drizzle melted chocolate over the fresh berries. It’s decadent and dreamy.
- Peanut Butter & Jelly Icebox Pie: Use Nilla wafer crumbs for the crust. Swirl ½ cup of creamy peanut butter into the strawberry filling before folding in the whipped topping. Taste like childhood, elevated.
- Dairy-Free/Vegan Delight: Use coconut oil in the crust, a high-quality vegan cream cheese, coconut whipped cream, and sweetened condensed coconut milk (available in most grocery stores now). It’s just as creamy and delicious!
Chef Emily’s Notes & Kitchen Confessions
Over the years, this recipe has seen some fun experiments. I once tried using frozen berries in a winter pinch—just thaw and drain them really well to avoid a soupy filling. It works! I’ve also learned the hard way that “softened” cream cheese is different from “room temperature for 5 minutes.” True softening is the difference between a silky filling and a lumpy one. Trust me on this.
Stabilized Whipped Cream Hack: If you want to make your own whipped cream (you champion!), here’s my go-to method: Chill your bowl and beaters. Whip 1 cup of heavy cream with 2 tablespoons of powdered sugar and ½ teaspoon of vanilla until soft peaks form. Then, sprinkle in ½ teaspoon of unflavored gelatin that’s been bloomed in 1 tablespoon of cold water and gently melted. Whip just until stiff peaks form. This will keep your pie firm for days without weeping.