Your New Favorite Sauce: Sweet, Hot, and Absolutely Addictive
Hey there, friend! Let’s talk about one of life’s simple, yet profound, kitchen truths: the right sauce can change everything. It can turn a simple plate of steamed dumplings into a gourmet experience, transform basic egg rolls into a party-worthy appetizer, and make a weeknight chicken breast feel like a culinary adventure. I’m a firm believer that every home cook needs a few legendary sauce recipes in their back pocket, and today, I’m handing you one of my all-time favorites.
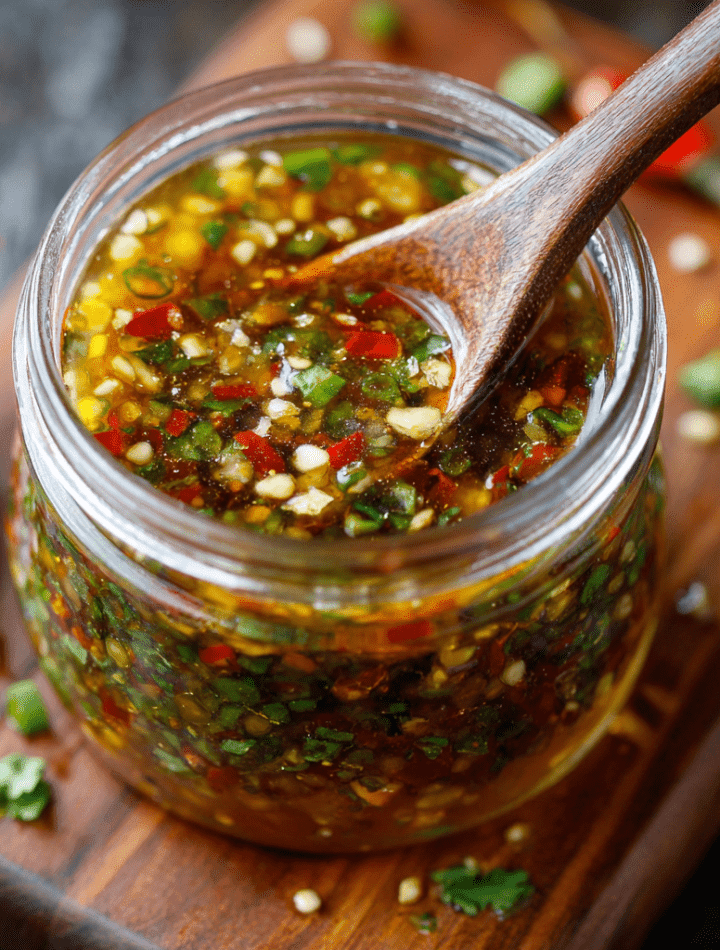
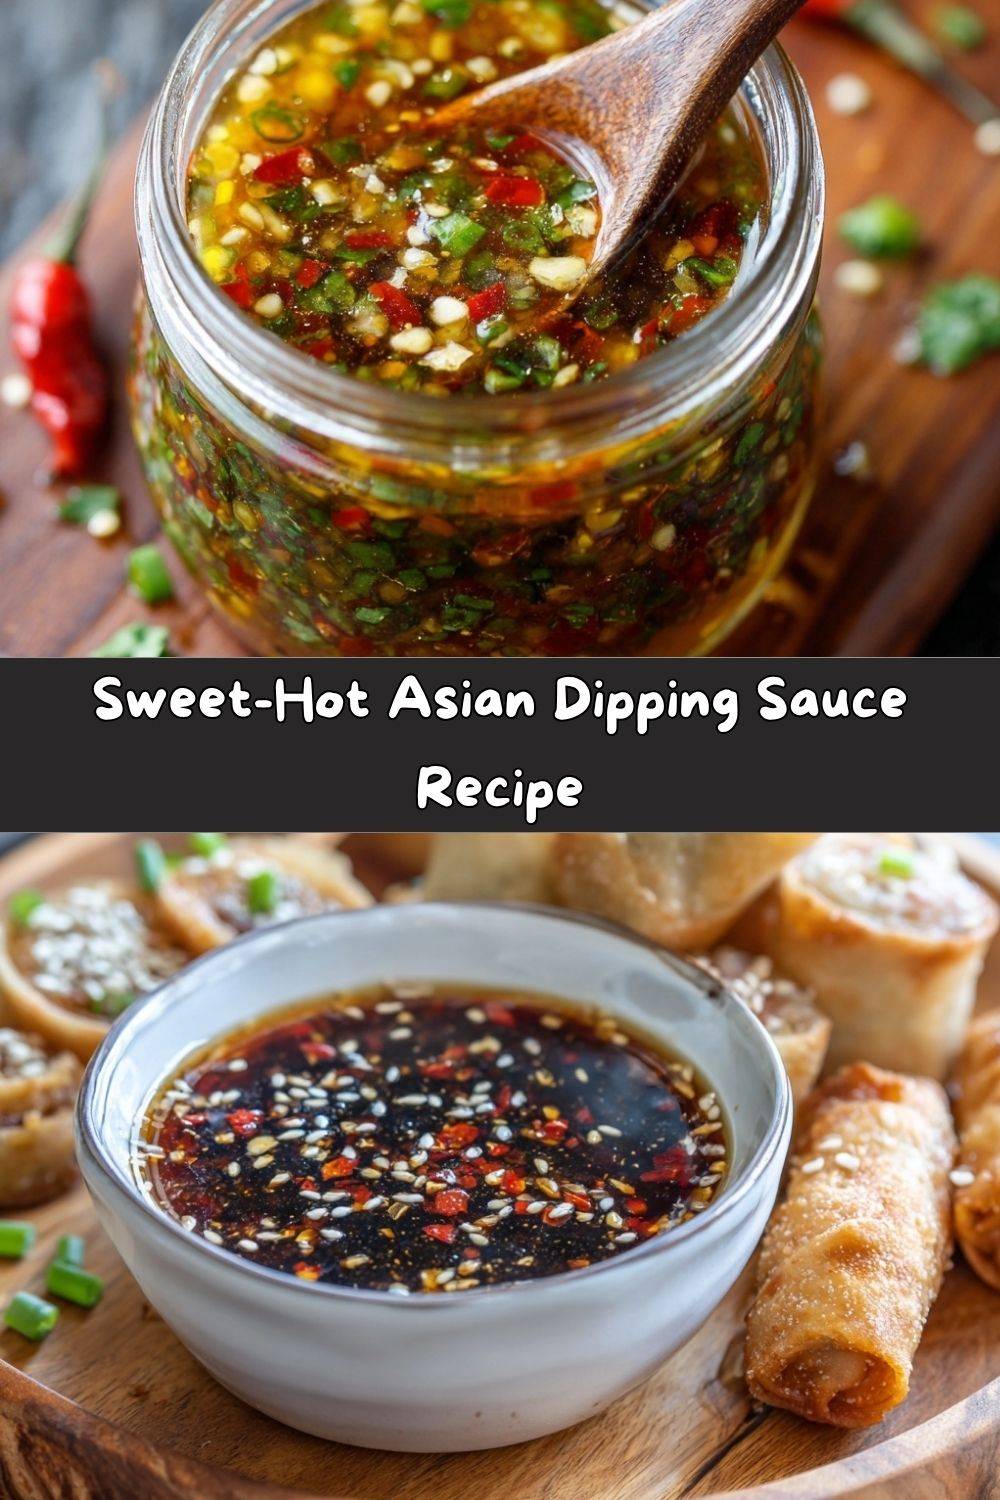
This isn’t just any sauce. This is my Sweet-Hot Asian Dipping Sauce. Imagine the perfect balance of tangy, sweet, and spicy, all dancing together in one glorious, glossy spoonful. It’s the kind of sauce that makes you do a little happy dance right there by the stove. It’s sticky, it’s got a little kick, and it’s packed with tiny, flavorful bits of red bell pepper and onion.
Whether you’re dunking crispy egg rolls, drizzling it over fluffy pork buns, tossing it with an Asian-inspired salad, or even using it as a glaze for roasted broccoli or salmon, this sauce is your new secret weapon. The best part? It’s a canning recipe, which means you can make a big batch, jar it up, and have this liquid gold on hand for months. Let’s make your fridge (and your taste buds) very, very happy.
The Sauce That Started It All
This recipe takes me right back to my first apartment after culinary school. My kitchen was about the size of a postage stamp, but it was all mine. I had a single, wobbly-burner stove and a dream of hosting my very first “fancy” dinner party. The menu was ambitious, but the star of the show was a platter of homemade vegetable spring rolls.
I spent hours prepping the fillings, rolling them just right, and frying them to a perfect, shatteringly crisp golden brown. I felt so proud… until I realized I had completely forgotten to make a dipping sauce. A spring roll without a sauce is like a hug without a squeeze—it’s just not complete! In a panic, I started throwing things into a pot: vinegar, sugar, a lonely red bell pepper, some chili flakes for heat. I let it bubble away, and what emerged was a happy accident that had all my friends begging for the recipe. That chaotic, last-minute creation was the humble beginning of this very sauce. It taught me that sometimes, the best dishes come from a little bit of love and a whole lot of improvisation.
Gathering Your Flavor All-Stars
Here’s everything you’ll need to create this flavor magic. Don’t be intimidated by the canning process—we’ll walk through it together, step-by-step!
- 2½ cups sugar: This is the “sweet” in our sweet-hot sauce, creating a lovely, sticky base that balances the sharp vinegar. For a deeper flavor, you can swap half of it for light brown sugar.
- 2½ cups white vinegar: This gives our sauce its signature tangy punch and acts as a natural preservative. White vinegar has a clean acidity that lets the other flavors shine.
- 1 cup water: This simple ingredient helps mellow the intensity of the vinegar and sugar, bringing everything into a perfect, harmonious balance.
- 1 cup finely chopped red bell pepper: These little gems add a subtle sweetness, a beautiful pop of color, and a lovely texture. Chef’s Insight: Finely chopping is key here—you want little bursts of flavor, not big, chunky pieces.
- ½ cup finely chopped onion: The onion adds a savory depth that keeps the sauce from being one-dimensionally sweet. A yellow or white onion works perfectly.
- 1 tbsp soy sauce: Our secret umami weapon! It adds a rich, salty, savory complexity that makes the sauce taste incredibly well-rounded.
- 1 tbsp crushed red pepper flakes: This is the “hot”! One tablespoon gives you a solid, medium heat. Spice Pro-Tip: Feel free to dial it down to 1 tsp for mild, or crank it up to 2 tbsp if you’re a heat-seeker!
- 1 tsp garlic powder: We’re using powder here for its consistent flavor and smooth texture, which blends seamlessly into the sauce. It gives you that warm, aromatic garlicky base note.
- 1 (3 oz) pouch liquid fruit pectin: Don’t let this ingredient surprise you! The pectin is our magic trick for giving the sauce a slightly thickened, glossy, “restaurant-quality” consistency. It’s usually in the baking aisle near the canning supplies.
Let’s Make Some Magic: Step-by-Step Instructions
Ready? Put on your favorite apron, cue up some good music, and let’s get saucy! I’ll be right here with you, walking you through every single step.
- Combine & Dissolve: In a large, heavy-bottomed saucepan (a big pot is your best friend here to prevent bubbling over!), combine the sugar, white vinegar, water, chopped red bell pepper, onion, soy sauce, red pepper flakes, and garlic powder. Now, over medium heat, bring this glorious mixture to a boil. Stir it pretty constantly as it heats up—this isn’t the time to multitask! We want to make sure all that beautiful sugar dissolves completely. You’ll know it’s ready when the liquid goes from cloudy to clear.
- The Flavor-Infusing Simmer: Once you’ve hit a rolling boil, reduce the heat to low and let it simmer gently for 10 minutes. This is where the magic happens! The peppers and onions soften, the flavors get to know each other and become best friends, and the sharp edge of the vinegar mellows out. Your kitchen is going to smell absolutely incredible right about now.
- The Pectin Power-Up: After 10 minutes, it’s time for our secret weapon. Stir in the entire pouch of liquid fruit pectin. Chef’s Hack: Before you squeeze it in, give the pouch a good squeeze and roll between your hands to warm it up—this helps it incorporate more smoothly. Once you’ve added it, crank the heat back up to medium and bring the sauce to a full, rolling boil that you can’t stir down. Let it boil hard for exactly 1 minute, stirring constantly. This activates the pectin and gives us that perfect, glossy consistency.
- Foam Management & Jar Prep: Remove the pot from the heat. You’ll likely see a little foam on the surface—no worries! Just skim it off with a spoon. This gives us a clearer, prettier final product. While the sauce is doing its thing, you should have your sterilized half-pint jars ready and waiting. A quick run through the dishwasher on a sanitize cycle or a 10-minute bath in boiling water does the trick!
- The Canning Finale (You’ve Got This!): Carefully ladle the hot sauce into your hot, sterilized jars, leaving about ¼-inch of space at the top (this is called “headspace”). Wipe the rims clean with a damp paper towel—this is a crucial step for a good seal! Place the lids on and screw the bands on until they’re fingertip-tight (don’t crank them with all your might!). Process the jars in a boiling water bath for 10 minutes. Then, turn off the heat and let them sit in the water for another 5 minutes before removing them to a towel-lined countertop. As they cool, you’ll be rewarded with the most satisfying little “pop” sounds—that’s the sound of a successful seal!
So Many Delicious Ways to Serve It!
Okay, the hard part is over (and it really wasn’t so bad, was it?). Now for the fun part: eating! This sauce is a total rockstar in the kitchen. Here are just a few of my favorite ways to use it:
- The Classic Dunk: This is its destiny. Serve it in little bowls alongside a platter of crispy vegetable egg rolls, pork spring rolls, or steamed or pan-fried dumplings (potstickers!).
- Salad Dressing Superstar: Thin out a couple of tablespoons with a squeeze of fresh lime juice and a tiny drizzle of sesame oil. Toss it with shredded cabbage, carrots, edamame, and crunchy noodles for a quick Asian-inspired slaw.
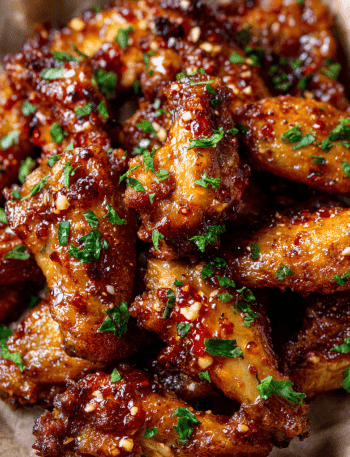
- The Glaze: Brush it on chicken wings, salmon fillets, or shrimp during the last few minutes of roasting or grilling. The sugar caramelizes beautifully, creating a sticky, finger-licking-good glaze.
- The Drizzle: Elevate your grain bowls! Drizzle it over a bowl of jasmine rice, some roasted veggies, and a perfectly fried egg. Instant flavor explosion.
Make It Your Own: Fun Recipe Variations
I love this recipe exactly as it is, but cooking is all about creativity! Here are a few ways you can twist it to suit your taste:
- Ginger Zing: Add a tablespoon of freshly grated ginger when you add the other ingredients for a warm, zesty kick.
- Garlic Lover’s Dream: Swap the garlic powder for 2-3 cloves of freshly minced garlic for a more pungent, real-deal garlic flavor.
- Fruity Twist: Substitute ½ cup of the water with pineapple juice or orange juice for a subtle tropical sweetness.
- Low-Sugar Swap: You can experiment with a 1:1 sugar substitute like erythritol for a lower-calorie version, though the texture and final yield might vary slightly.
- Extra Umami: Add a teaspoon of fish sauce along with the soy sauce for an even deeper, savory flavor profile (don’t worry, it won’t taste fishy!).
Chef Emily’s Notebook
This recipe has been on quite a journey with me! That first chaotic batch in my tiny apartment was quite thin. It was delicious, but it pooled at the bottom of the plate. I started playing with different ways to thicken it—a cornstarch slurry worked, but it could get cloudy and sometimes separate in the jars. One day, while making jam, I had a lightbulb moment: pectin! It was the perfect solution. It gives the sauce a beautiful, glossy sheen and a clingy texture that sticks perfectly to whatever you’re dipping, without making it taste like jam. It’s my favorite little kitchen hack that took this sauce from “great” to “I-need-this-recipe-NOW” status.
Your Questions, Answered!
I’ve gotten a lot of questions about this sauce over the years. Here are the most common ones to help you out!
- Q: Do I HAVE to can it? Can’t I just keep it in the fridge?
A: You absolutely can! The canning process is for long-term shelf storage (up to a year). If you’re going to use it within 3-4 weeks, you can simply let the sauce cool, pour it into a clean jar or bottle, and store it in the refrigerator. No water bath required!
- Q: My sauce didn’t thicken much. What did I do wrong?
A: The most common culprit is not achieving a “rolling boil” for the full minute after adding the pectin. It needs that vigorous, can’t-stir-it-down boil to activate properly. Don’t be shy with the heat in that final step!
- Q: Can I use a different type of pepper?
A: Of course! For a different color and slightly sweeter flavor, try an orange or yellow bell pepper. For a serious kick, add a finely chopped fresh Thai chili or a teaspoon of sriracha along with the red pepper flakes.
- Q: The sauce is too spicy for me. How can I fix it?
A: No problem! The beauty of a homemade sauce is you’re in control. If a batch is too hot, you can gently reheat it and stir in a bit more sugar or a splash of water to tame the heat.
Nutritional Information*
I’m a big believer that all foods can fit into a happy, balanced lifestyle! Here’s a quick look at the nutritional breakdown for this sauce. Remember, a little goes a long way in terms of flavor!
- Prep + Cook Time: 50 minutes
- Yield: 6 half-pint jars
- Serving Size: 2 tablespoons
Per Serving:
- Calories: 54
- Fat: 0g
- Cholesterol: 0mg
- Sodium: 75mg
- Carbohydrates: 13g
- Sugar: 13g
- Fiber: 0g
- Protein: 0g
*Please note that this is an estimate provided for informational purposes. Factors like specific ingredient brands and exact measurements can cause variations.
Final Thoughts from My Kitchen to Yours
Well, my friend, we’ve done it! You are now the proud creator of an incredibly versatile, downright delicious dipping sauce that’s going to become a staple in your home. This recipe is more than just a list of ingredients; it’s a passport to countless flavorful meals and happy moments around the table.
I hope you feel empowered, excited, and ready to dunk, drizzle, and glaze to your heart’s content. Making your own sauces from scratch is one of the most rewarding things you can do in the kitchen. It connects you to your food, allows you to control exactly what goes into it, and fills your home with the most amazing aromas.
So, what are you going to dip first? Tag me on social @TastyChow when you make it—I always love seeing your creations! Now, go forth and chow down.
With love and a full jar of sauce,
Emily