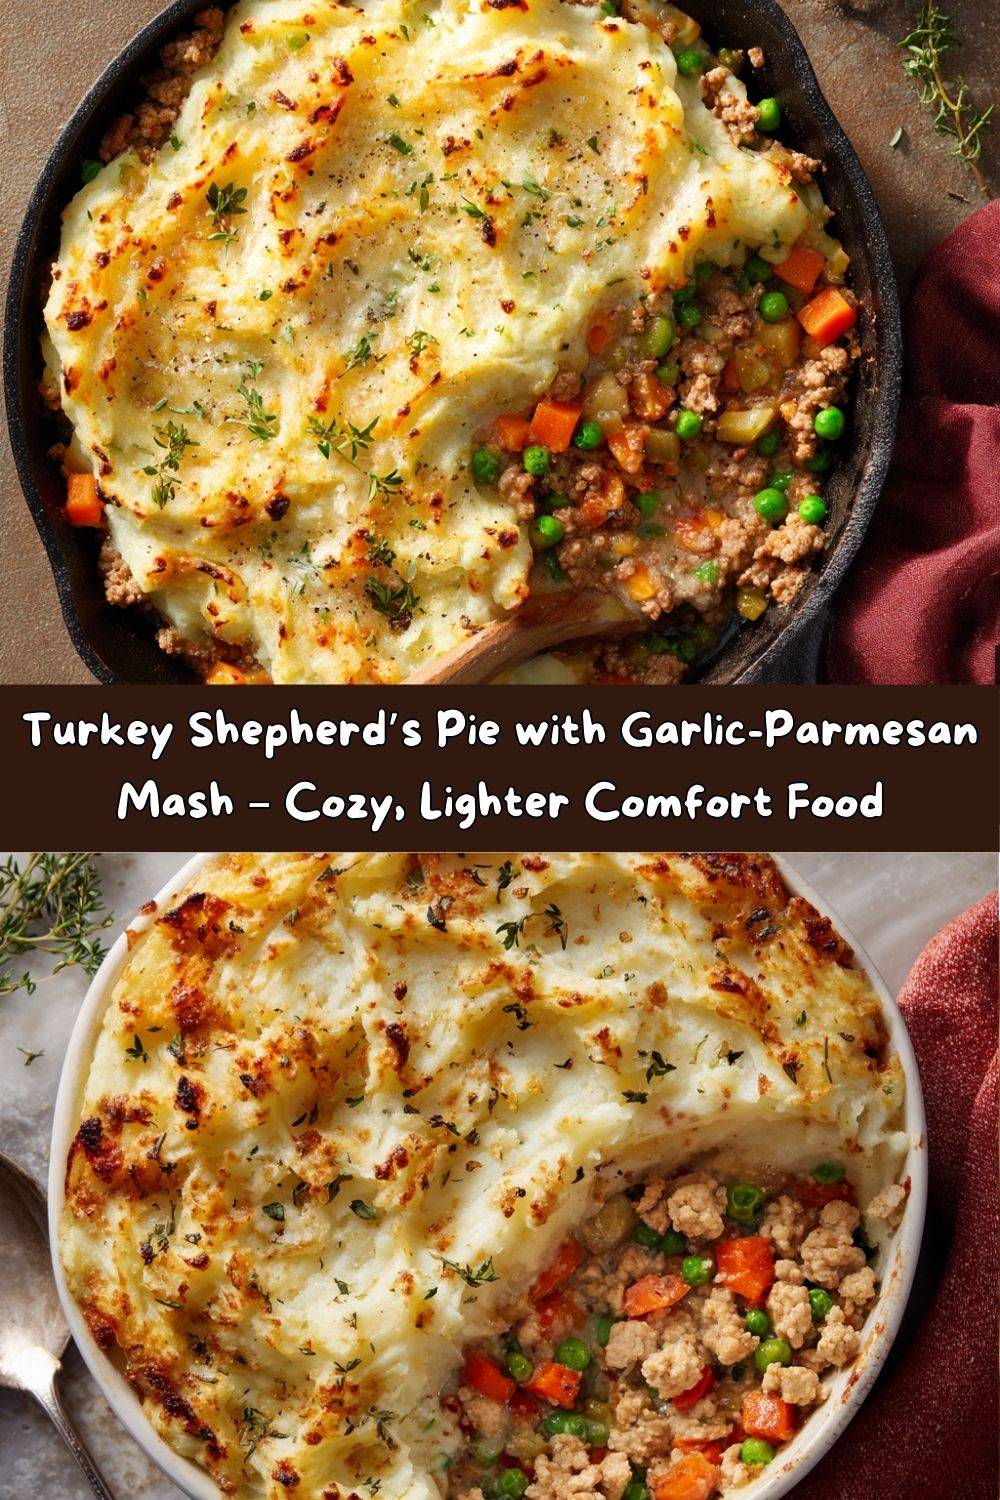
Let’s Make the Coziest, Dreamiest Turkey Shepherd’s Pie Together!
Hey there, friend! Chef Emily here, waving at you from my flour-dusted kitchen. Is there anything better than the smell of a hearty, bubbling casserole wafting from the oven on a crisp evening? It’s the ultimate edible hug, and today, we’re creating a lighter, brighter version of a total comfort food icon: Shepherd’s Pie.
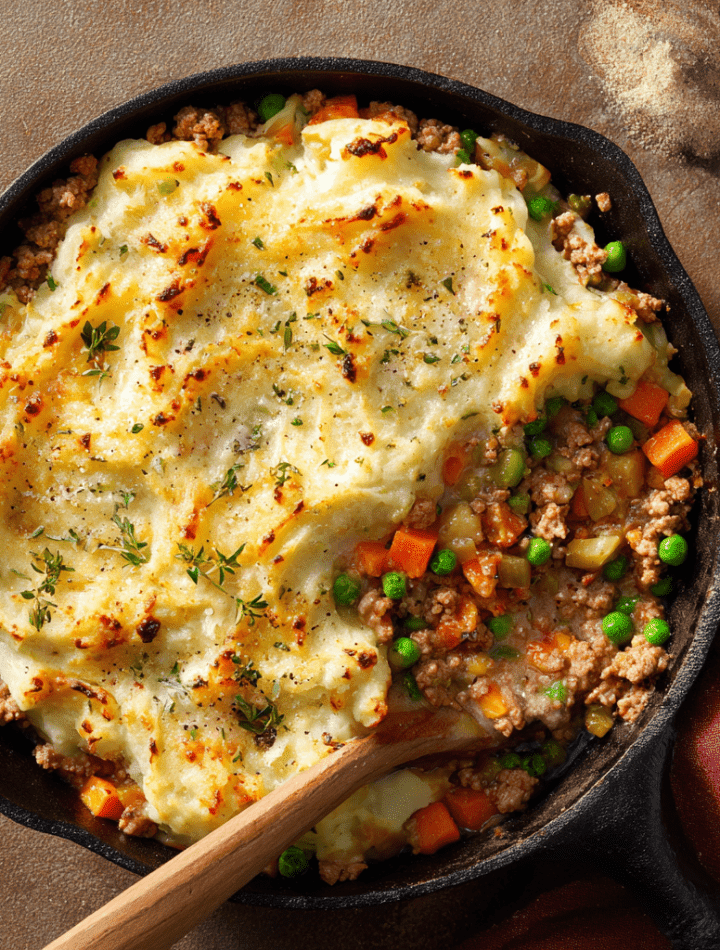
Now, I love a classic beef shepherd’s pie as much as the next gal, but sometimes you want all that cozy, savory goodness without feeling like you need to unbutton your jeans immediately after. That’s where this glorious Turkey Shepherd’s Pie swoops in to save the day! We’re using lean ground turkey simmered with sweet carrots, tender peas, and onions in a rich, herby gravy. And the crowning glory? A cloud-like, garlic-parmesan mashed potato topping that gets perfectly golden and a little crispy in the oven.
This isn’t just a recipe; it’s your new secret weapon for busy weeknights, meal-prepping like a boss, or impressing guests with minimal fuss. It’s forgiving, deeply flavorful, and guaranteed to have everyone at the table asking for seconds. So, tie on your favorite apron (the one with the stains that tell a story), and let’s make some magic happen!
A Messy Spoonful of Memories
This recipe always takes me right back to my grandma’s kitchen. It wasn’t a fancy kitchen—just a small, warm room with yellow floral wallpaper and a countertop that was always cluttered with something delicious. Her version was the traditional one, made with leftover Sunday roast, and she’d let me be in charge of the mashed potatoes. I’d stand on a wobbly stool, armed with her ancient potato masher, and she’d say, “More butter, Em! The secret is love and butter!” (We’re balancing that out with turkey these days, Grandma!)
The best part was the “quality control” spoonful we’d sneak before it went into the baking dish. We’d both lean over the skillet, blow on a steaming spoonful of the meaty filling, and she’d always wink and say, “Needs a pinch more thyme, I think.” It was in those messy, fragrant moments that I truly learned that cooking is about more than just ingredients; it’s about connection, stories, and creating something that makes people feel cared for. That’s the spirit I want you to bring to your kitchen today.
Gathering Your Cast of Characters
Here’s everything you’ll need to create this masterpiece. I’ve included some of my favorite chef-y insights and swaps to make this recipe your own!
For the Savory Turkey Filling:
- 1 tablespoon olive oil: Our cooking fat of choice! It has a lighter flavor than butter for sautéing, which lets the other ingredients shine.
- 1 lb ground turkey: I prefer 93% lean for the best balance of flavor and health. If you can find ground dark meat turkey, it’s even more juicy and flavorful!
- 1 onion, diced: The aromatic base of our filling. A yellow or white onion works perfectly here.
- 2 carrots, diced: They add a wonderful sweetness and pop of color. Don’t skip these!
- 1 cup frozen peas: We add these at the end so they stay bright green and don’t get mushy. No need to thaw!
- 2 cloves garlic, minced: Because is it even a savory dish without garlic? I think not.
- 1 tablespoon tomato paste: This is our flavor powerhouse! It adds a deep, savory richness (that “umami” kick) to the gravy.
- 1 tablespoon flour: This is our thickening agent. For a gluten-free version, you can use an equal amount of cornstarch.
- ¾ cup low-sodium chicken broth: Low-sodium is key so you can control the salt level. You can also use turkey broth or even vegetable broth.
- 1 teaspoon dried thyme: Earthy and fragrant, thyme is a classic pairing with poultry. Fresh thyme is great too—use about 1 tablespoon.
- Salt & pepper to taste: Season as you go! Taste your filling before it goes into the dish.
For the Garlic-Parmesan Mashed Potato Topping:
- 4 large russet potatoes: Russets are my go-to for mashing because they’re starchy and fluffy. You can use Yukon Golds for a creamier, buttery mash that doesn’t even need much mashing!
- 2 tablespoons butter: For that essential richness. Salted or unsalted is fine—just adjust your added salt accordingly.
- ½ cup milk: Whole milk will give you the creamiest results, but any milk you have on hand will work. Warm it up a bit before adding to the potatoes for a smoother texture.
- 2 cloves garlic, minced: For a more subtle, sweet garlic flavor, try using roasted garlic! Just squeeze the soft cloves out of the skins.
- ¼ cup grated parmesan cheese: This adds a salty, nutty depth that takes the topping to a whole new level. Freshly grated is always best!
- Salt to taste: Potatoes need a good amount of salt. Be sure to salt your boiling water generously—it’s the first chance to season the spuds from the inside out.
Let’s Build Our Masterpiece, Step-by-Step
Okay, team! Let’s fire up the stove. I’ll walk you through each step with my best tips to ensure your Shepherd’s Pie is absolutely perfect.
- Boil the Potatoes: First things first, get your potatoes going. Place your peeled and chopped potatoes in a large pot and cover them with cold, generously salted water. (Pro Chef Tip: Starting with cold water ensures they cook evenly!). Bring them to a boil and let them cook for about 15-20 minutes, or until they are fork-tender. Drain them really well—soggy potatoes make a sad topping. Let them steam-dry in the colander for a minute or two.
- Create the Fluffy Topping: Return the drained potatoes to the warm pot. Add the butter, milk, garlic, and parmesan cheese. Now, mash away! I’m a fan of a good old-fashioned potato masher for a slightly textured mash, but if you like yours super smooth, a ricer or hand mixer will do the trick. (Just be careful not to over-mix, or they can become gluey). Taste and adjust the seasoning. If the mash seems too thick, add a splash more milk until it’s spreadable. Set this beautiful cloud of potatoes aside.
- Start the Filling: While the potatoes are boiling, heat the olive oil in a large, oven-safe skillet (like a cast-iron) or a regular skillet over medium heat. Add the diced onion and carrots and sauté for about 5-7 minutes, until they start to soften and smell amazing. Add the minced garlic and cook for one more minute until fragrant.
- Brown the Turkey: Crumble in the ground turkey. Cook, breaking it up with your spoon, until it’s no longer pink. This should take about 5-6 minutes. Season with a good pinch of salt and pepper as it cooks.
- Build the Gravy: Push the turkey and veggie mixture to the sides of the skillet. Add the tomato paste to the center and let it cook for 30 seconds to caramelize slightly—this deepens its flavor. Then, sprinkle the flour over everything and stir to coat, cooking for another minute to get rid of the raw flour taste. This is the base of our gravy!
- Simmer to Perfection: Pour in the chicken broth, and add the frozen peas and dried thyme. Give everything a good stir, scraping up any browned bits from the bottom of the pan (that’s pure flavor!). Let the mixture simmer for 5-7 minutes, until the gravy has thickened nicely. Give it a final taste and season with more salt or pepper if needed.
- Assemble the Pie: If you didn’t use an oven-safe skillet, now is the time to transfer the turkey filling into a greased 9×9 or similar-sized baking dish. Spread the filling into an even layer. Now, carefully dollop the mashed potatoes over the top. Use a spatula or the back of a spoon to spread them evenly, making sure to seal the edges to prevent the filling from bubbling over. For that classic, rustic look, drag a fork over the top to create ridges that will get extra crispy and golden.
- Bake to Golden Bliss: Pop your masterpiece into a preheated 375°F (190°C) oven. Bake for 20-25 minutes, until the filling is bubbly and the potatoes have started to get some color. If you want an extra-golden, crispy top (and trust me, you do!), switch your oven to broil for the last 2-3 minutes. WATCH IT CLOSELY so it doesn’t burn! Let it rest for about 5-10 minutes before serving—this allows the filling to set, so you get perfect slices.
How to Serve Your Savory Creation
This Turkey Shepherd’s Pie is a complete meal in one dish, but a little something on the side never hurts! I love serving it right out of the skillet at the table for a real “wow” factor. Use a large spoon to scoop down to the bottom, making sure you get all the layers in one perfect bite.
For a simple, elegant presentation, garnish with a sprinkle of fresh chopped parsley or chives. The green adds a fresh pop of color and flavor. If you’re feeling fancy, a little extra grated parmesan on top never hurt anybody.
What to serve with it? A crisp, simple green salad with a tangy vinaigrette is the perfect contrast to the rich, cozy pie. For a real comfort food feast, a side of buttery dinner rolls is absolutely mandatory for mopping up every last bit of that savory gravy.
Make It Your Own! Delicious Twists & Swaps
One of the best things about this recipe is how adaptable it is. Here are a few of my favorite ways to mix it up:
- Veggie-Packed Powerhouse: Feel free to add other veggies to the filling! Sliced mushrooms sautéed with the onions are divine. A cup of frozen corn or diced zucchini would also be lovely additions.
- Cheesy Lover’s Dream: Take the topping up a notch by stirring a half cup of shredded sharp cheddar or Gruyère cheese into the mashed potatoes. For an extra cheesy crust, sprinkle a little more on top before baking.
- Spicy Kick: Love a little heat? Add a pinch of red pepper flakes to the turkey filling while it’s browning, or stir in a tablespoon of Sriracha or your favorite hot sauce into the gravy.
- Shepherd’s Pie Pot Pies: For a fun individual serving, divide the filling among oven-safe ramekins, top with mashed potatoes, and bake for about 15-20 minutes. Perfect for dinner parties!
- Sweet Potato Topping: For a sweeter, vitamin-packed twist, swap the russet potatoes for mashed sweet potatoes. The sweet and savory combo is incredible.
Chef Emily’s Kitchen Confidential
This recipe has evolved so much since my first attempt, which involved lumpy potatoes and a filling that was… let’s just say, a bit too “soupy.” The biggest game-changer for me was learning to let the filling simmer long enough to thicken properly. Patience is a virtue, especially when gravy is involved!
Another funny kitchen fail: I once tried to be clever and use a piping bag to make fancy swirls with the mashed potatoes. It looked beautiful for about five minutes in the oven before the swirls collapsed into a delicious, but decidedly un-fancy, blob. Now I firmly believe that rustic, fork-swirled tops have the most character anyway. Embrace the imperfection—it’s what makes it homemade!
Your Questions, Answered!
Let’s tackle a few common questions to make sure your pie is perfect.
Q: Can I make this ahead of time?
A: Absolutely! This is a fantastic make-ahead meal. Assemble the pie completely, cover tightly, and refrigerate for up to 2 days. When you’re ready to bake, you may need to add 10-15 minutes to the baking time since it will be going into the oven cold. You can also freeze the unbaked pie for up to 3 months. Thaw in the refrigerator overnight before baking.
Q: My filling is too runny. What happened?
A: This usually means the gravy didn’t have enough time to reduce and thicken. Next time, let it simmer a few minutes longer. If you’re in a pinch, you can mix a teaspoon of cornstarch with a tablespoon of cold water to make a “slurry,” stir it into the filling, and simmer for another minute until thickened.
Q: Can I use instant mashed potatoes?
A: I’m a big believer from scratch is best for flavor and texture, but I also believe in real life! In a pinch, yes, you can use prepared instant mashed potatoes. Follow the package directions for 4 servings to get enough for the topping.
Q: The potato topping sank into the filling. How do I prevent that?
A: This can happen if the filling is very hot and liquidy when you add the potatoes. Let the filling cool for about 10-15 minutes before spreading the potatoes on top. Also, make sure your mashed potatoes are relatively thick and not too loose.
A Lighter Take on Comfort Food
By using lean ground turkey and being mindful of the butter and cheese, we’ve created a Shepherd’s Pie that feels indulgent but is noticeably lighter than the traditional version. Ground turkey is a fantastic source of lean protein, and the load of vegetables adds fiber and essential vitamins.
Approximate Nutrition per Serving (based on 6 servings):
Calories: 360 | Protein: 27g | Carbohydrates: 28g | Fat: 15g
Remember, these are estimates and can vary based on the specific ingredients you use. This dish is a well-balanced meal, providing sustained energy and satisfaction. It’s proof that comfort food can absolutely be part of a healthy lifestyle!
You Did It! Now, Dig In.
Look at that beautiful, golden-brown pie you just created! I am so proud of you. You’ve just made more than dinner; you’ve made a memory, a moment of warmth and comfort for yourself and your loved ones.
This Turkey Shepherd’s Pie is the kind of recipe that you’ll come back to again and again. It’s reliable, customizable, and always, always delicious. I hope it finds a special place in your recipe rotation and becomes a new favorite in your home.
I’d love to hear how it turned out for you! Did you add any fun twists? Tag me on social @TastyChow with your creations. Now, grab a fork, gather your people, and chow down on something truly made with love.