White Chocolate Peppermint Cookies: Your New Holiday Favorite
Hey there, my fellow food lover! Is there anything that screams “holiday magic” more than the smell of cookies baking in the oven? I’m talking about that warm, buttery, sugary scent that wraps around your kitchen like a cozy blanket. Now, imagine that, but with the cool, festive kick of peppermint and the creamy, dreamy sweetness of white chocolate. Yeah, you’re smiling already—I can feel it!
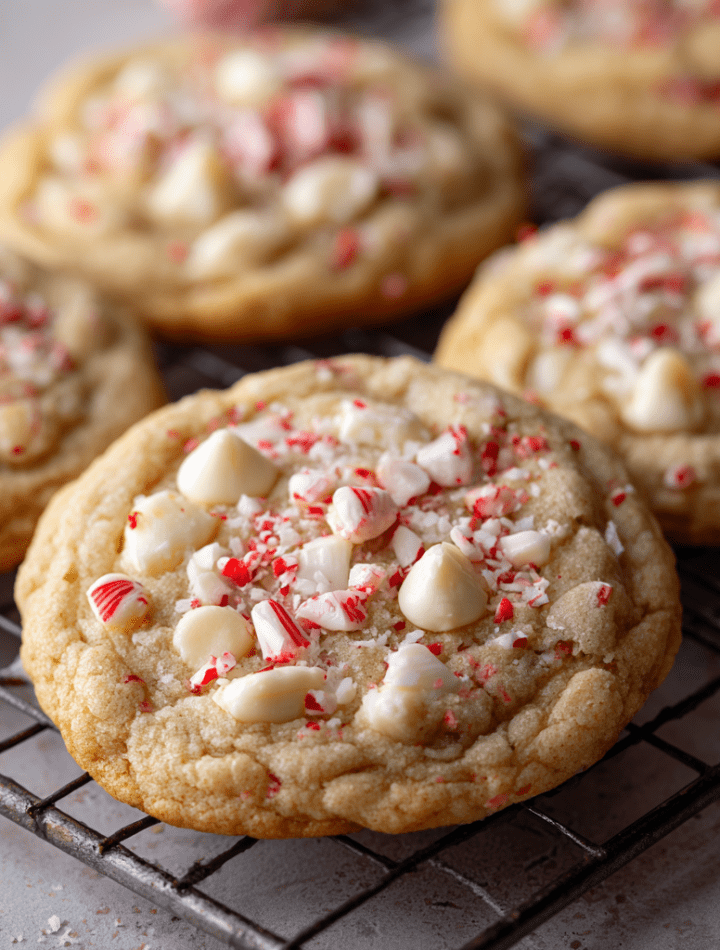
These White Chocolate Peppermint Cookies are my absolute go-to for bringing a little winter sparkle into any day. They’re soft and chewy in the center with just the right amount of crispness on the edges, and they’re absolutely loaded with melty white chocolate chips and crunchy bursts of peppermint. They’re the cookie that disappears first from the platter, the one that friends always ask for the recipe of, and the one that makes your kitchen smell like a North Pole bakery. They’re simple enough for a weeknight baking project but special enough for your fanciest cookie exchange. So, tie on your favorite apron (the messy one is always the best!), and let’s make some memories together. I promise, your taste buds are going to throw a party.

A Sweet, Crunchy Memory
This recipe will always hold a special place in my heart because it was born from a happy little kitchen disaster. Years ago, I was attempting a complicated yule log cake for a holiday party. Let’s just say it looked… creative. In a last-minute panic, I needed a backup plan and fast. I whipped up my classic chocolate chip cookie dough but realized I was out of chocolate chips! All I had were some white chocolate chunks and a bag of candy canes left over from decorating the tree.
I crushed those candies up, folded everything into the dough, and sent up a little prayer to the baking gods. What came out of the oven was pure magic. The cookies were a hit—the cool peppermint against the rich white chocolate was a revelation. That “oops” moment taught me that sometimes the best recipes aren’t meticulously planned; they’re discovered with a dash of creativity and a willingness to play. Now, I make these cookies every year, not just because they’re delicious, but because they remind me that joy—and great food—is often found in the happy accidents.
Gathering Your Cookie Crew: The Ingredients
Here’s everything you’ll need to create these festive wonders. I’ve added my little chef-y notes to help you understand the “why” behind each ingredient!
- 1 cup unsalted butter, softened: This is the foundation of our cookie! Using unsalted butter lets us control the salt level perfectly. And softened is key! It should be cool to the touch but leave a slight indent when you press it. Too cold and your cookies won’t spread; melted and they’ll turn greasy and flat.
- 1 cup granulated sugar + ½ cup brown sugar: The dynamic duo! Granulated sugar gives our cookies that lovely crisp edge, while the brown sugar (packed with molasses) is the secret to a chewy, moist center and that gorgeous golden color.
- 2 large eggs: These are our binders, holding everything together. Make sure they’re at room temperature to emulsify perfectly with the butter and sugar, creating a smooth, fluffy base.
- 1½ tsp vanilla extract + ½ tsp peppermint extract: Vanilla is the warm, classic flavor we all love. The peppermint extract is our star! A little goes a long way, so measure carefully. For a stronger minty punch, you can bump it up to ¾ tsp.
- 2¾ cups all-purpose flour: The structure of our cookie. For the best results, fluff your flour with a spoon, sprinkle it into your measuring cup, and level it off. No packing!
- 1 tsp baking soda + ½ tsp baking powder: Our leavening agents! They work together to give the cookies the perfect amount of lift and spread. Check the dates on your containers—fresh leaveners are non-negotiable for perfect cookies.
- ½ tsp salt: The flavor enhancer! It balances the sweetness and makes all the other flavors pop. Don’t skip it.
- 1½ cups white chocolate chips: Creamy, sweet, and luxurious. I prefer using chips for their hold, but chopped white chocolate bars will give you gorgeous, melty pockets.
- ½ cup crushed peppermint candies or candy canes: The festive crunch! Unwrap those candies and place them in a zip-top bag. Use a rolling pin to crush them into a mix of fine dust and small pieces. The dust will tint the dough a pretty pink and infuse every bite with flavor!
Let’s Get Baking: The Step-by-Step Guide
Ready to create some magic? Follow these steps, and you’ll be a cookie hero in no time. I’ve sprinkled in all my best tips to ensure your success!
Step 1: Preheat and Prep. Fire up that oven to 350°F (175°C). This is our sweet spot for a cookie that’s golden on the outside and soft on the inside. Line your baking sheets with parchment paper. Trust me, this is the easiest way to prevent sticking and makes cleanup a dream. No parchment? A silicone baking mat works wonders too.
Step 2: The Creaming Method. In a large bowl, beat the softened butter, granulated sugar, and brown sugar together on medium-high speed for a good 2-3 minutes. We’re not just mixing; we’re creaming. This incorporates tiny air bubbles into the dough, which is the first secret to a light, tender cookie. It should look pale and fluffy.
Step 3: Incorporate the Wet Stuff. Scrape down the sides of the bowl with a spatula (a chef’s best friend!). Add the eggs one at a time, beating well after each addition. Now, pour in the vanilla and peppermint extracts. Mix until everything is beautifully smooth and homogenous. That heavenly minty aroma will start to fill your kitchen already!
Step 4: The Dry Team. In a separate bowl, whisk together the flour, baking soda, baking powder, and salt. This ensures our leaveners and salt are evenly distributed throughout the flour, so every cookie bakes uniformly. Gradually add the dry ingredients to the wet ingredients, mixing on low speed just until the flour disappears. Do not overmix! Overworking the dough develops gluten and leads to tough cookies. A few streaks of flour are okay—they’ll incorporate when we add the goodies.
Step 5: The Fun Part: Mix-Ins! Switch to a sturdy spatula or wooden spoon. Gently fold in the white chocolate chips and the crushed peppermint candies. Be sure to scrape the bottom of the bowl to ensure everything is evenly distributed.
Step 6: Scoop and Space. Use a cookie scoop or a tablespoon to portion the dough into balls, about 2 tablespoons each. This ensures all your cookies are the same size and bake evenly. Place them on your prepared baking sheets about 2 inches apart. They need room to spread and become the perfect puffy, chewy disks we’re dreaming of.
Step 7: Bake to Perfection. Slide those sheets into your preheated oven and bake for 9-11 minutes. Ovens can be tricky, so keep an eye on them. You want the edges to be lightly golden and set, but the centers should still look soft and slightly underdone. They will continue to cook on the hot baking sheet after you pull them out—this is the second secret to a super chewy cookie!
Step 8: The Patient Wait. Remove the pans from the oven and let the cookies cool right on the baking sheet for at least 5 minutes. This allows them to set up enough to move without breaking. Then, transfer them to a wire rack to cool completely. I know, it’s torture waiting, but it’s worth it!
How to Serve These Festive Cookies
Okay, they’re baked, they’re cooled (mostly… I won’t judge if you eat one warm!), now how do we make them look as incredible as they taste?
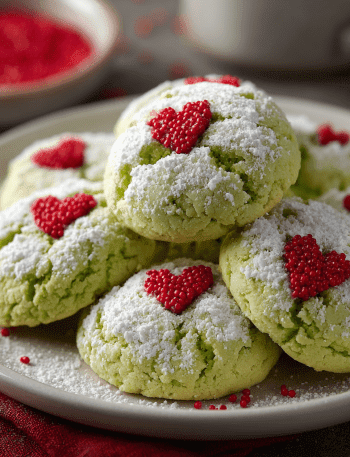
For a simple, elegant touch, right after the cookies come out of the oven, you can press a few extra white chocolate chips and a sprinkle of crushed candy cane on top. It makes them look bakery-level gorgeous! Pile them high on a rustic wooden board or a festive holiday platter. They look stunning with a dusting of powdered sugar, like a light snowfall.
These cookies are a dream with a cold glass of milk, a mug of rich hot chocolate, or a cozy peppermint latte. They’re the ultimate cookie exchange contender, a wonderful homemade gift stacked in a cellophane bag tied with a ribbon, or just the perfect treat to enjoy after a long day of holiday shopping. Place a plate of these out for Santa, and I guarantee you’ll be on the nice list for life!
Get Creative: Recipe Variations
Love the base recipe? Let’s play! Here are a few fun twists to keep things interesting all season long.
- Dark Chocolate Swirl: For a more intense chocolate flavor, swap out half of the white chocolate chips for dark chocolate chips. The combination of dark chocolate and peppermint is a classic for a reason!
- Peppermint Bark Cookies: Chop up chunks of store-bought or homemade peppermint bark and use that instead of the separate chocolate and candy. You’ll get little pockets of chocolate and candy all in one!
- Gluten-Free Goodness: You can easily make these gluten-free! Use a 1:1 gluten-free all-purpose flour blend (I love Bob’s Red Mill or King Arthur). The texture might be slightly more delicate, but they’ll be just as delicious.
- ‘Tis the Season Cookie Sandwich: Take two cooled cookies and sandwich them together with a layer of peppermint buttercream or vanilla ice cream. It’s over-the-top, holiday decadence!
- Orange Twist: Add the zest of one orange to the dough when you cream the butter and sugar. The combination of orange and peppermint is incredibly refreshing and festive.
Chef Emily’s Notes
This recipe has evolved so much since that first happy accident! I’ve learned that chilling the dough for at least 30 minutes (if you have the time) helps prevent overspreading and results in an even thicker, chewier cookie. It’s a great trick if your kitchen is particularly warm.
One of my favorite kitchen memories is the year my nephew “helped” me crush the candy canes. Let’s just say there was more peppermint on the floor and in his hair than in the bag, but his giggles were totally worth it. That’s what these recipes are all about—the mess, the memories, and the delicious results. Don’t be afraid to get your loved ones involved. It’s where the real magic happens.
FAQs & Troubleshooting
Q: My cookies spread too much and turned out flat. What happened?
A: This is usually caused by butter that is too warm. Make sure your butter is softened but not melted or greasy. Another culprit could be an old or inaccurate oven thermometer—if your oven runs cool, the butter melts before the structure sets. Try chilling the dough balls for 30 minutes before baking next time!
Q: Can I make the dough ahead of time?
A: Absolutely! You can scoop the dough into balls, place them on a baking sheet, and freeze them solid. Then, transfer the frozen dough balls to a zip-top bag. You can bake them straight from the freezer; just add 1-2 minutes to the baking time. Hello, instant fresh cookies anytime!
Q: My peppermint extract taste is too strong/weak. How can I adjust it?
A: Peppermint extract potency can vary by brand. I recommend starting with ½ tsp and then tasting the dough (I know, a tough job!). If you want more punch, add another ¼ tsp. Remember, you can always add more, but you can’t take it out!
Q: The candy canes melted away. How do I keep the crunch?
A> The finer the candy is crushed, the more it will melt into the dough (which is great for flavor!). To ensure a visible crunch, make sure you have some larger pieces mixed in with the dust. Also, adding a few extra pieces on top right after baking guarantees a crunchy finish.
Nutritional Information (Approximate, Per Cookie)
While these are definitely a treat, it’s always good to know what you’re enjoying! This nutritional info is an estimate based on the specific ingredients listed and will vary slightly depending on brands and exact portions.
Calories: 215 | Total Fat: 10g | Saturated Fat: 6g | Cholesterol: 35mg | Sodium: 85mg | Total Carbohydrates: 28g | Dietary Fiber: 0.5g | Sugars: 17g | Protein: 2g
The primary sources of calories are from the carbohydrates (sugars and flour) and fats (butter and chocolate). To make a slightly lighter version, you could reduce the white chocolate chips to 1 cup, but where’s the fun in that? Life is about balance—enjoy one or two with a glass of milk as part of a joyful holiday season!
Final Thoughts
Well, my friend, we’ve done it! We’ve created a batch of pure, unadulterated holiday joy. I hope you have as much fun making these White Chocolate Peppermint Cookies as I do. Remember, baking isn’t about perfection; it’s about the love you stir into the bowl. It’s about the mess, the laughter, and the shared experience of creating something delicious from the heart.
So, from my messy apron to yours, I wish you a season filled with warmth, love, and incredibly tasty chow. Now, go forth and bake! And don’t forget to tag me on social @emilywalker if you make them—I love seeing your creations!
With love and a sprinkle of peppermint dust,
Emily