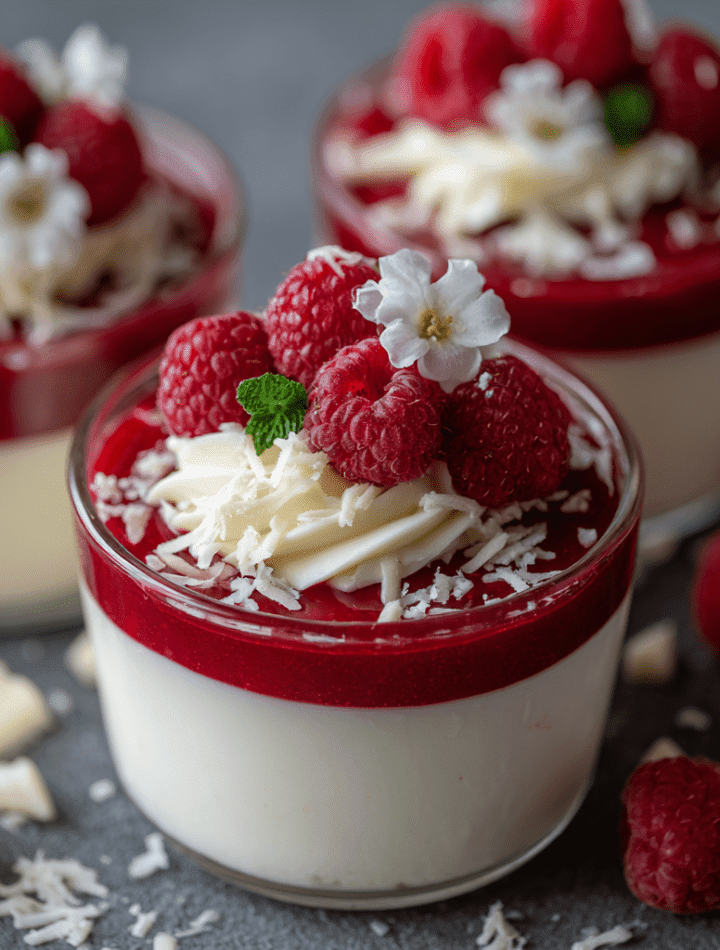
White Chocolate Raspberry Mousse Cups – Your Secret Weapon for an Elegant, No-Bake Dessert
This recipe is all about smart, simple techniques that yield a seriously impressive result. It’s the kind of dessert that whispers “gourmet” but is really just a friendly, doable kitchen project. So, tie on that apron (the messy one is totally welcome), and let’s make something incredibly delicious together. These mousse cups are about to become your new go-to for any occasion that calls for a touch of sweet, effortless magic.
A Spark of Inspiration: From a Kitchen “Oops” to a Favorite Treat
This recipe has a funny little origin story, one that involves a bit of a kitchen “oops” and my undying love for the flavor pairing of berries and cream. It was years ago, right after culinary school. I was trying to make an elaborate white chocolate terrine for a friend’s birthday. Let’s just say the gelatin and I did not see eye-to-eye that day. What was supposed to be sliceable turned out… decidedly *not*. It was more of a luxurious, spoonable pool of deliciousness.
Instead of panicking, I looked at the beautiful, failed terrine in its dish, grabbed a handful of raspberries I had for garnish, and quickly smashed them with a fork and a drizzle of honey. I layered the berry mash and the creamy white chocolate mixture into some old-fashioned coupe glasses I had. A quick chill in the fridge, and what emerged was a happy accident that got more rave reviews than the original recipe ever would have! It taught me a fantastic lesson: sometimes the best dishes are born from flexibility and a willingness to play. That spirit of fun, flavor-chasing experimentation is exactly what I bring to every recipe I create for you here at Tasty Chow.
Gathering Your Flavor Tools: The Ingredients & Why They Matter
This dessert has two gorgeous layers, and each ingredient plays a key role in creating the perfect texture and taste. Here’s exactly what you’ll need, plus my chef-y insights and easy swaps!
For the Raspberry Layer:
- 1 cup fresh or frozen raspberries – Frozen are a fantastic, year-round staple and work perfectly here. They’re often picked at peak ripeness and break down beautifully. Fresh are lovely in the summer months!
- 1 tablespoon honey or granulated sugar – The sweetener tames the raspberries’ natural tartness. Honey adds a floral depth, while sugar keeps it pure and simple. Use what you love!
- 1 teaspoon lemon juice – This is our brightening agent! A tiny splash of acid makes the raspberry flavor pop and prevents the layer from being too one-dimensional. Don’t skip it.
For the White Chocolate Mousse:
- 1 cup high-quality white chocolate chips or chopped bar – This is the star, so quality counts! Look for chocolate with cocoa butter listed. Cheap baking chips can sometimes be finicky to melt. A good bar chopped up melts like a dream.
- 1½ cups heavy whipping cream, divided – We use it two ways. A small amount gets melted with the chocolate to create a ganache base. The rest gets whipped into fluffy peaks to give the mousse its airy, cloud-like body. Ensure it’s very cold for best whipping results.
- ½ teaspoon pure vanilla extract – The warm, cozy note that enhances the sweetness of the white chocolate. It’s the aromatic hug in the background.
For the Optional (But Highly Recommended) Garnish:
- Fresh raspberries, white chocolate shavings, mint leaves – This is where you make it look like it came from a patisserie! A berry, a curl of chocolate, and a tiny mint leaf add color, texture, and a final touch of freshness.
Let’s Build Some Magic: Step-by-Step Instructions with Chef Emily
Ready? We’re going to tackle this in two acts: the vibrant raspberry base and the dreamy mousse. It’s all about patience and gentle hands. You’ve got this!
- Create the Raspberry Jewel. In a small saucepan, combine your raspberries, honey (or sugar), and lemon juice. Cook this over medium heat for about 5-7 minutes, mashing the berries gently with a fork or spoon as they soften. You’re looking for them to break down and the mixture to become syrupy. Chef’s Tip: If you prefer a seedless puree (I often do for that super-smooth layer), simply press the warm mixture through a fine-mesh sieve into a bowl. Discard the seeds. Let this gorgeous ruby sauce cool completely before the next step.
- Melt the White Chocolate Dream. This step is crucial for a smooth mousse. Place the white chocolate and ½ cup of the heavy cream in a heatproof bowl. Set it over a pot of gently simmering water, ensuring the bottom of the bowl doesn’t touch the water. Stir gently and constantly until the chocolate is completely melted and the mixture is velvety smooth. Chef’s Hack: No double boiler? Use the microwave! Heat in 20-second bursts, stirring well after each, until melted. Be careful not to overheat, as white chocolate can seize (get grainy) easily. Remove from heat and let this cool to room temperature. It should feel just slightly warm to the touch.
- Whip It Good. While the chocolate cools, take your remaining 1 cup of cold heavy cream and the vanilla extract. Using a stand mixer or hand mixer with a chilled bowl (pop it in the freezer for 10 minutes beforehand for even better results!), whip the cream until it reaches soft peaks. What’s a soft peak? When you lift the beaters, the cream should form a peak that gently curls over at the tip. Don’t go to stiff peaks—we want billowy, not buttery!
- The Gentle Fold. Time to marry the chocolate and cream. Take about one-third of your whipped cream and stir it vigorously into the cooled white chocolate mixture. This “loosens” the thick chocolate. Now, add the remaining whipped cream. Using a large rubber spatula, fold gently. Cut down through the center, scoop along the bottom, and fold over the top. Turn the bowl. Repeat just until no white streaks remain. This gentle technique keeps all that precious air in the whipped cream, giving you a light mousse, not a dense one. Patience is key!
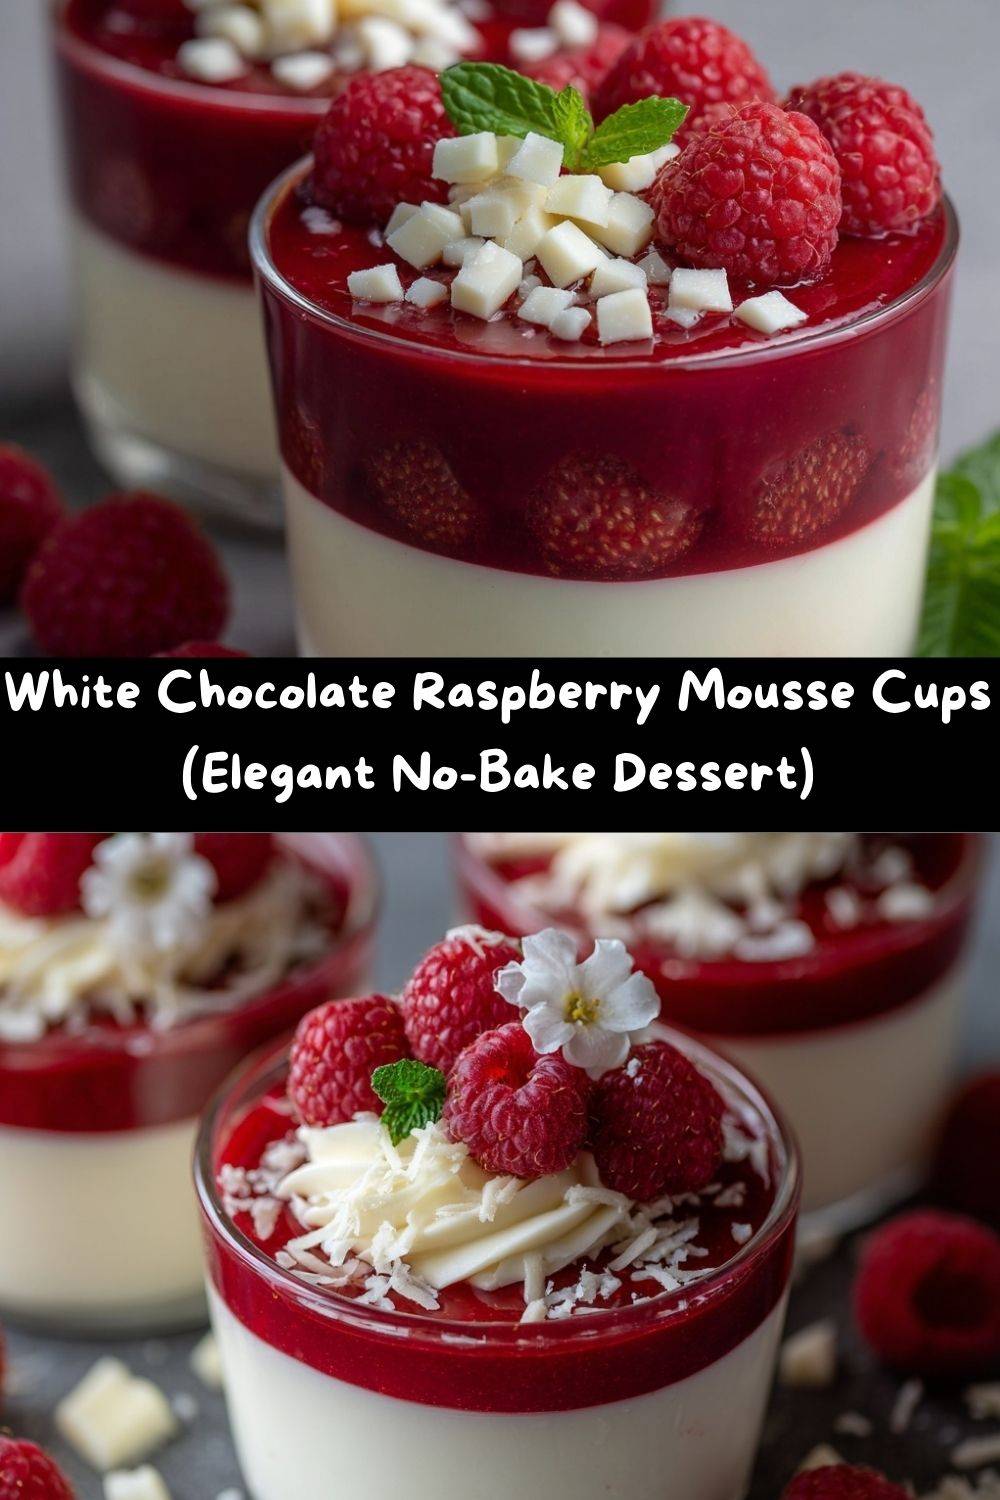
- Layer and Chill. Grab your serving glasses—martini glasses, coupes, elegant dessert cups, or even clear mason jars all work beautifully. Spoon a layer of the cooled raspberry sauce into the bottom of each glass. Then, gently spoon or pipe the white chocolate mousse on top. Smooth the surface. Cover lightly and refrigerate for at least 2 hours, but ideally 4 or even overnight. This chilling time allows the mousse to set perfectly, making each spoonful divine.
- The Grand Finale: Garnish! Just before serving, add your fresh raspberries, a sprinkle of white chocolate shavings (use a vegetable peeler on a cool chocolate bar!), and a tiny mint leaf. This transforms them from delicious to stunning.
How to Serve These Stunners: Presentation is Everything!
You’ve done the work, now let’s make it shine! I love serving these on a decorative tray lined with a simple white or dark napkin—it makes the colors in the glasses pop. For a dinner party, you can assemble them ahead of time, keep them chilled, and just add the garnish as you’re clearing the main course. The “oohs” and “aahs” are practically guaranteed.
These are rich, so a small serving is perfect. Pair them with a cup of strong coffee, a glass of late-harvest dessert wine, or even a sparkling Prosecco for a truly celebratory feel. The tartness of the raspberry cuts through the sweetness and richness beautifully, making every bite feel balanced and crave-worthy.
Make It Your Own: Fun Flavor Twists & Swaps
Love the base recipe? Let’s get creative! Here are a few ways to spin this dessert to suit your taste or what’s in your pantry.
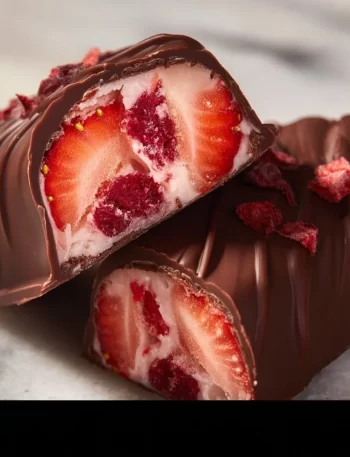
- Berry Bonanza: Swap the raspberries for blackberries, blueberries, or a mix of all three! Strawberries work too, but chop them small and consider adding an extra ½ tsp of lemon juice for brightness.
- Citrus Zing: Replace the raspberry layer with a quick lemon curd (store-bought is fine!) or a blood orange puree for a stunning color contrast.
- Boozy Kick: For an adults-only version, add 1-2 tablespoons of Chambord (raspberry liqueur) to the cooled raspberry puree, or a splash of Grand Marnier to the white chocolate as it melts.
- Dairy-Free Delight: Use full-fat coconut cream (chilled, then scooped off the solid part) instead of heavy whipping cream. Choose a dairy-free white chocolate. The flavor profile will shift slightly coconutty, but it’s utterly delicious.
- Crunchy Bottom: Add a textural layer! Before the raspberry sauce, add a thin layer of crushed vanilla wafers, shortbread cookies, or even almond biscotti mixed with a tiny bit of melted butter.
Chef Emily’s Notebook: Extra Thoughts & Kitchen Confessions
This recipe has been my faithful friend for years, and it’s evolved with me. I used to be terrified of whipping cream to the perfect stage, but now I do it by sight and feel—you’ll get there, too! The biggest lesson? Letting the white chocolate mixture cool enough before folding is non-negotiable. I learned that the hard way with a slightly soupy (but still tasty) batch early on. If your mousse seems soft after folding, just pop the whole bowl in the fridge for 15 minutes before layering—it’ll firm up nicely.
Also, a confession: I almost never strain the raspberry seeds when I’m making these just for my family. We love the little pops of texture! But for a truly elegant, refined feel for guests, straining is the way to go. Do what brings you joy.
Your Questions, Answered: FAQs & Quick Fixes
My white chocolate mixture got chunky/grainy when I melted it. What happened?
This is called “seizing,” and it usually happens if a tiny bit of steam or water got into the chocolate, or if it was overheated. Fix: Try whisking in a teaspoon of warm cream at a time until it smooths back out. If it’s truly stubborn, sadly, it’s best to start over. Low, slow, gentle heat is the key to preventing this!
Can I make these ahead of time?
Absolutely, and I highly recommend it! These are the ultimate make-ahead dessert. You can assemble them completely and store them, covered, in the fridge for up to 24 hours. Add the fresh garnish right before serving so it stays perky.
My mousse seems too runny. Did I do something wrong?
This usually has two culprits: 1) The white chocolate mixture was still too warm when folded into the whipped cream, melting it slightly. 2) The cream was under-whipped. Fix: Pop the entire mixture (bowl and all) into the fridge for 20-30 minutes, then give it a few gentle folds and check the consistency. It should firm up. Next time, ensure your chocolate is cool and whip that cream to those perfect soft peaks!
I don’t have individual glasses. Can I make this in one big dish?
Yes! A pretty trifle bowl, an 8×8 glass dish, or even a pie plate works wonderfully. You’ll just scoop out servings instead of presenting individual cups. It’s equally delicious and fantastic for a potluck.
A Quick Nutritional Glance
While these mousse cups are absolutely a dessert, they’re lighter and more balanced than many traditional options. Here’s the approximate nutritional breakdown for one serving (based on 6 servings, not including optional garnishes):
Approximate Nutrition Per Serving:
Calories: ~280
Fat: ~20g
Carbohydrates: ~20g
Protein: ~3g
Sugar: ~18g
Fiber: ~2g
Most of the richness comes from the cream and white chocolate—which is exactly why the texture is so luxurious. The raspberry layer brings natural brightness and antioxidants, while the portion size keeps everything feeling indulgent but not heavy.
In other words?
This dessert tastes like it should be a once-a-year treat, but it’s balanced enough to enjoy any time you want something beautiful, luscious, and worthy of a slow, sweet spoonful.
If you want a lighter option, you can always:
-
Swap part of the heavy cream for coconut cream
-
Use a high-quality low-sugar white chocolate
-
Increase the raspberry layer for more fruit volume
-
Make smaller “mini cups” for a two-bite version
But honestly?
Sometimes dessert is meant to be dessert—and this one delivers elegance in every single bite.