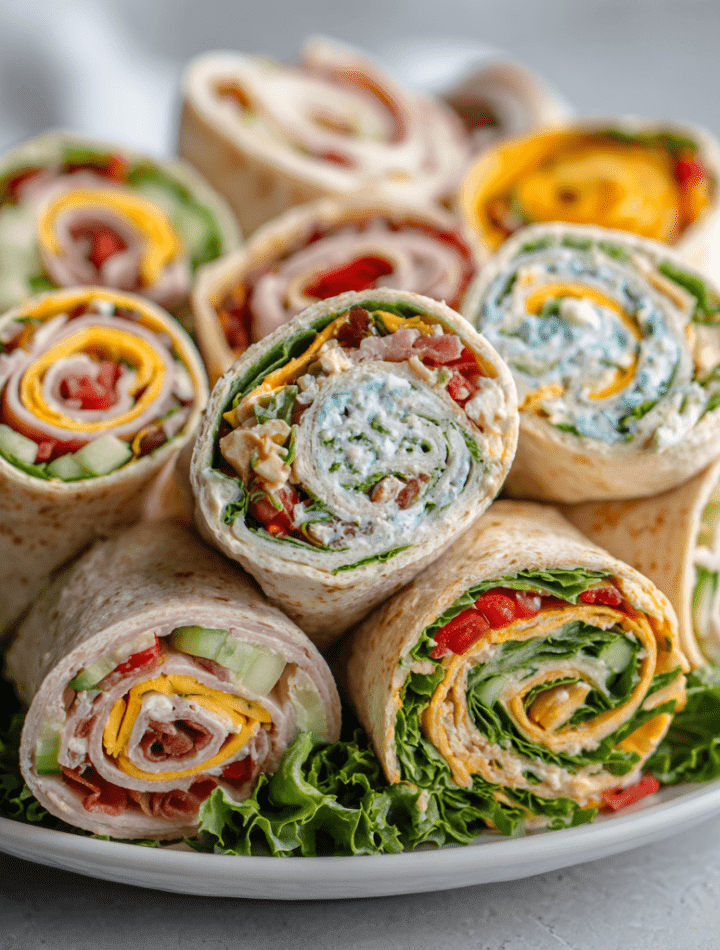
Wrap Pinwheels: Your New Go-To for Snacks, Lunches & Parties!
Hey there, friend! Ever find yourself staring into the fridge, hoping a delicious, satisfying, and frankly, kinda cute snack will magically assemble itself? Or maybe you’ve got a party coming up and the thought of making 50 complicated appetizers makes you want to hide in the pantry? I’ve been there more times than I’ve burned garlic bread (which is… a lot). That’s why I’m absolutely obsessed with Wrap Pinwheels.
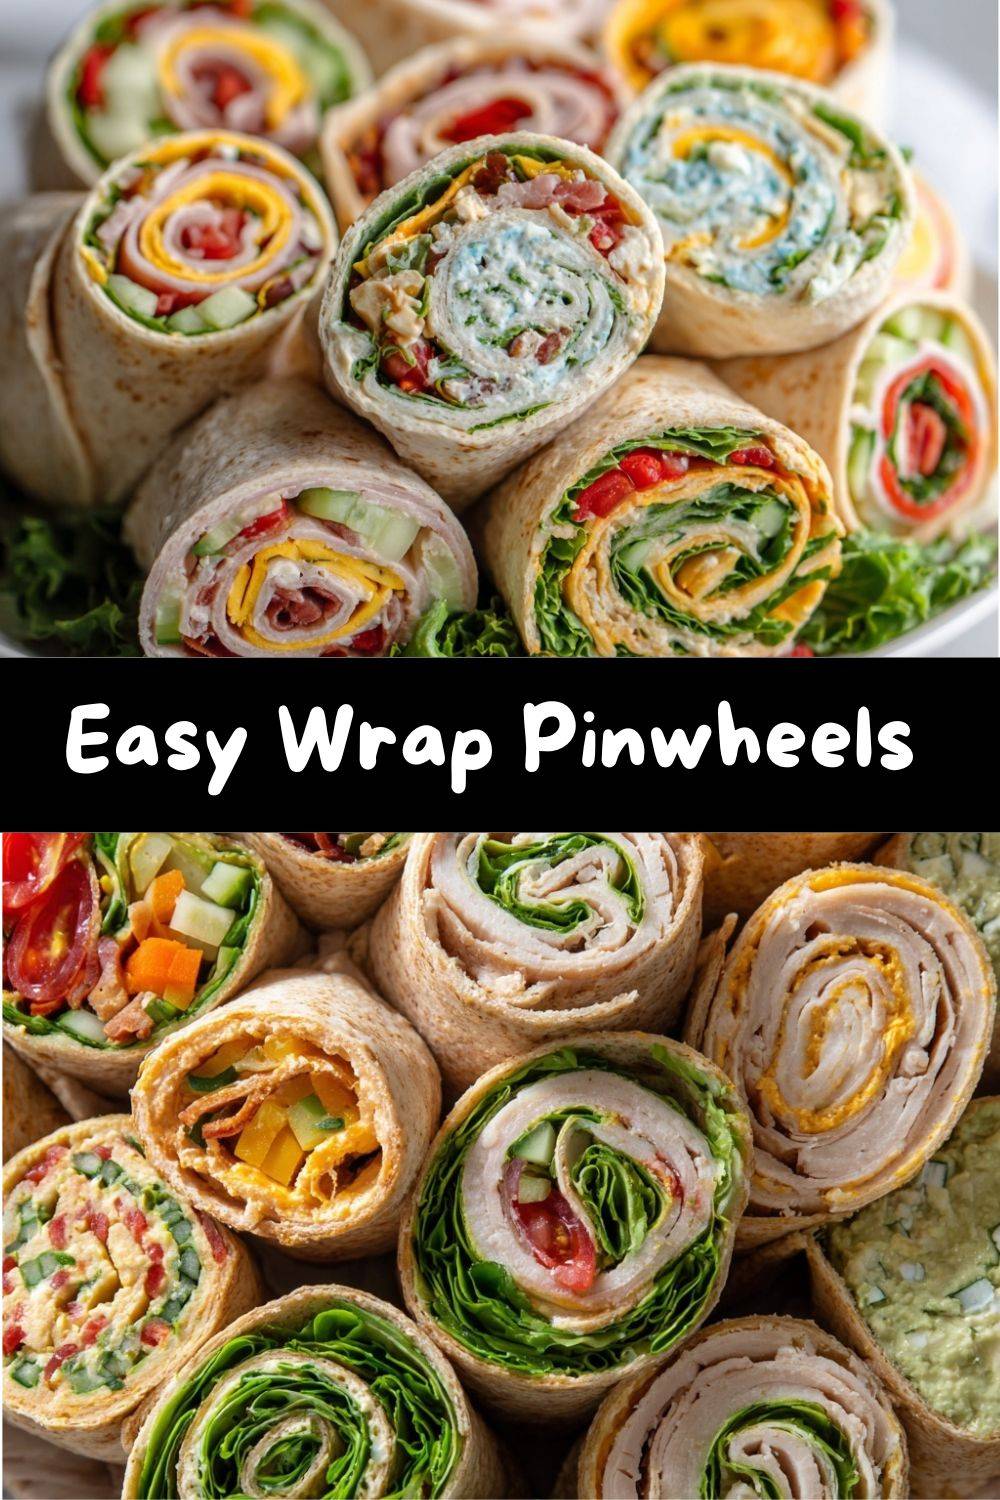
Think of them as the culinary equivalent of your favorite playlist: totally customizable, reliably awesome, and guaranteed to make any occasion better. Whether you’re packing lunches, need a protein-packed post-workout bite, or are feeding a hungry crowd, these colorful, flavor-packed rolls are the answer. They’re not just food; they’re little edible smiles. The best part? You probably have most of the ingredients already, and they come together faster than you can say “pass the plate!” So, tie on your apron—the cute one with the stains that tell stories—and let’s roll up something seriously tasty together.
The Pinwheel That Started It All: A Kitchen Revelation
My love affair with pinwheels started not in culinary school, but in my first post-college apartment kitchen, which was roughly the size of a postage stamp. I was hosting my very first “grown-up” friendsgiving, buzzing with nervous energy and a deep-seated fear that my green bean casserole wouldn’t cut it. I needed a foolproof, crowd-pleasing starter. Time was short, counter space was shorter, and my budget was… let’s call it “creative.”
I remember standing there, tortillas, leftover turkey, and a nearly-empty bottle of ranch staring back at me. In a moment of pure “what if?” desperation, I spread, layered, rolled, and sliced. What emerged from that chaotic, flour-dusted counter were these perfect, swirly bites. I arranged them on my one nice platter, holding my breath as my friends tried the first one. The “OMG, these are amazing!” and “Did you really make these?!” reactions were immediate. That platter was empty in minutes. In that messy, wonderful moment, I learned a core kitchen truth: the most memorable food isn’t about being fancy; it’s about being shared, being fun, and making people feel joy with every bite. These pinwheels have been my secret weapon for easy entertaining ever since.
Gathering Your Flavor Arsenal: Ingredients & Smart Swaps
Here’s everything you’ll need to create a trio of classic pinwheels. Remember, these are your canvas—feel free to paint with whatever flavors you love!
Base Ingredients for All Pinwheels:
- 3 Large Tortillas (10-inch): I love using spinach or tomato tortillas for a color pop, but whole wheat or plain flour work perfectly. Chef’s Insight: Let them sit at room temp for 10 minutes—they’re less likely to crack when you roll!
- Leafy Greens: Romaine, spinach, or spring mix. Pro Tip: Pat your greens dry with a paper towel! This tiny step is the #1 secret to preventing soggy pinwheels.
For the Turkey Ranch Pinwheels:
- 6 Slices Deli Turkey: Look for a thicker-cut oven-roasted style for the best texture and flavor. Ham or roast beef are fabulous swaps!
- 1/4 Cup Ranch Dressing: The glue and the flavor! Use your favorite brand, or for a lighter twist, mix Greek yogurt with ranch seasoning.
- 1/2 Cup Shredded Cheddar Cheese: Sharp cheddar brings a lovely tang. Monterey Jack or pepper jack would be delicious here too.
- 1/4 Cup Sliced Cucumbers or Bell Peppers: For that essential fresh crunch. Julienne them thinly so they roll neatly.
For the Veggie Hummus Pinwheels:
- 1/2 Cup Hummus: Any flavor you adore! Roasted red pepper or lemon-herb are my go-tos. This acts as your creamy spread and protein source.
- 1/4 Cup Each: Shredded Carrots, Thinly Sliced Cucumber, Sliced Red Bell Pepper: The rainbow crew! The more color, the more beautiful (and nutritious) your slices will be.
- Optional: A Handful of Baby Spinach or Arugula: Adds a peppery bite and even more greenery.
For the Chicken Caesar Pinwheels:
- 1 Cup Cooked, Shredded Chicken: A rotisserie chicken is your weeknight superhero here. Save time and savor flavor.
- 1/4 Cup Caesar Dressing: Creamy Caesar is classic, but a light vinaigrette-style works if you prefer.
- 2 Tbsp Grated Parmesan Cheese: The salty, umami kick that makes a Caesar a Caesar. Freshly grated is always best!
- Romaine Lettuce, Chopped: Use the crunchy hearts for the best structure.
Let’s Get Rolling: Your Step-by-Step Guide to Perfect Pinwheels
Ready? This is where the magic happens. Follow these steps, and you’ll be a pinwheel pro in no time.
Step 1: The Setup
Clear off a big section of counter. Lay out your three tortillas. Have all your fillings prepped and within arm’s reach—this is a “mise en place” moment (that’s just chef-speak for “get your stuff together,” and it makes everything smoother).
Step 2: Spread the Love
Take your first tortilla. Using a spoon or a small offset spatula, spread your chosen base (ranch, hummus, or Caesar) in a thin, even layer across the entire surface. Here’s my biggest hack: leave a 1-inch border bare around the edges. This empty margin is your secret weapon—it catches any filling that tries to escape when you roll, giving you a clean, tight spiral.
Step 3: Layer It Up
Now, create your layers. For the turkey ranch: lay down the turkey slices first, then sprinkle cheese, then add your crunchy veggies and greens on top. For the veggie hummus: after the hummus, scatter your rainbow of veggies, then top with greens. For the chicken Caesar: toss the shredded chicken with a bit of the dressing first, then layer it on, followed by romaine and a snowstorm of Parmesan. The key is to distribute everything evenly so every slice gets a bit of every flavor.
Step 4: The Tight Roll
This is the only “technical” part, and it’s easy! Starting at the edge closest to you, use your fingers to tuck the fillings in tightly and begin rolling forward. Apply gentle, even pressure as you go. Don’t just fold; roll with purpose. Think “snug burrito,” not “loose scarf.” Once fully rolled, give it a little squeeze along its length to secure everything.
Step 5: The Chill (Don’t Skip This!)
Individually wrap each roll tightly in plastic wrap. This is non-negotiable, my friend! Pop them in the fridge for at least 20-30 minutes, or up to 2 hours. This chill session firms everything up, melds the flavors, and makes slicing an absolute dream—no squished, messy wheels.
Step 6: The Grand Finale – Slicing!
Unwrap your chilled log. Using a very sharp serrated knife, gently slice off and discard the messy end (chef’s treat!). Then, slice the roll into 1-inch pieces. Use a gentle sawing motion; don’t press down hard. Wipe the knife clean between cuts for the prettiest presentation. Arrange them on a platter and watch them disappear!
How to Serve Your Masterpiece: Plating & Pairing Ideas
You’ve made these gorgeous swirls—now let’s show them off! For a party, arrange them on a large platter or a wooden board. Group the different flavors together or mix them up for a confetti effect. Tuck in some fresh herb sprigs (dill or parsley are lovely) or lemon wedges for a pop of color.
For lunches, pack 3-4 pinwheels in a container with parchment paper between layers. They pair beautifully with a side of fresh fruit, a handful of kettle chips, or some crispy snap peas. They’re the ultimate portable, no-reheat-needed meal. Feeling fancy? Serve them alongside a small bowl of extra dressing or hummus for dipping. A simple, vibrant platter of these pinwheels says, “I’ve got this hosting thing down,” with minimal effort. It’s our little secret.
Mix It Up! 5 Delicious Pinwheel Twists
The fun doesn’t stop with these three classics! Your tortilla is a blank slate. Here are some of my favorite riffs:
- Buffalo Chicken: Mix shredded chicken with buffalo sauce and a touch of blue cheese or ranch dressing. Add chopped celery and romaine.
- Mediterranean: Spread with whipped feta or tzatziki. Layer with sliced grilled chicken or chickpeas, chopped kalamata olives, cucumber, tomato, and red onion.
- Pizza Party: Use marinara sauce as your base (use sparingly!). Add sliced pepperoni, shredded mozzarella, chopped bell peppers, and a sprinkle of Italian seasoning.
- Breakfast Pinwheels: Scrambled eggs, cooked crumbled sausage or bacon, and a sprinkle of cheddar cheese. Perfect for brunch or meal prep!
- Dessert Pinwheels: Yes, really! Spread a tortilla with Nutella or cream cheese frosting, sprinkle with mini chocolate chips and strawberries, roll, chill, and slice. Kid (and adult) heaven.
Chef Emily’s Notebook: Extra Thoughts & Stories
This recipe has evolved in my kitchen more than my taste in aprons. I once made a “kitchen sink” version for a potluck using leftover Thanksgiving turkey, cranberry sauce, and stuffing—it was surprisingly epic! The biggest lesson? Don’t overstuff. It’s tempting to load on every veggie in the drawer, but a moderate, even layer is the key to a roll that doesn’t burst. Also, I’ve learned that these are the ultimate “clean out the fridge” Friday meal. That lone carrot, the last few slices of lunch meat, the half-empty tub of cream cheese? They all deserve a second act as a pinwheel. It makes me feel resourceful and a little bit clever, which is a great way to end the week.
Your Pinwheel Questions, Answered!
Q: My pinwheels are falling apart when I slice them. Help!
A: The most common culprits are: 1) Not chilling them (the plastic wrap chill is crucial for setting the shape!), or 2) Using a dull knife. A sharp serrated knife is your best friend here. Also, make sure you’re not overfilling the very center of the tortilla.
Q: Can I make these ahead of time?
A: Absolutely! You can assemble the whole rolls, wrap them tightly in plastic, and refrigerate for up to 24 hours before slicing. For the freshest texture, slice them the day you plan to serve. You can also store sliced pinwheels in an airtight container in the fridge for 1-2 days.
Q: The tortillas are cracking when I roll. What did I do wrong?
A> Old or cold tortillas can be brittle. Let them come to room temperature before you start. You can also very briefly warm them in the microwave for 5-10 seconds (just until pliable, not hot) to make them more flexible.
Q: Are these freezer-friendly?
A> They can be, but with a caveat. Freeze the whole, unsliced roll tightly wrapped in plastic and then foil. Thaw in the fridge overnight before slicing. Note: Pinwheels with a lot of fresh, watery veggies (like tomatoes) won’t freeze as well due to texture changes.
Nutritional Notes (A Quick Guide)
Since you can customize these endlessly, the nutrition varies! Here’s a general idea per pinwheel (based on the recipes above, using large flour tortillas):
- Calories: 60-90 kcal
- Protein: 4-6g
- Carbohydrates: 5-8g
- Fat: 2-5g
Want to lighten them up? Use low-carb or whole wheat tortillas, lean proteins like turkey breast, load up on veggies, and use Greek yogurt-based spreads. To boost protein, add an extra layer of meat or use a bean-based spread like hummus. Remember, these are approximations—the best part is making them your own!
Final Thoughts: Roll, Slice, Share, and Enjoy!
And there you have it—your complete guide to becoming a Wrap Pinwheel wizard. I hope this recipe brings as much ease and joy to your kitchen as it has to mine. It’s a reminder that great food doesn’t have to be complicated; it just has to be made with a little intention (and a lot of delicious fillings).
I’d love to see your creations! Tag me on social @TastyChow with your pinwheel platters, your wild variations, and your happy eaters. Now go forth, raid your fridge, and roll up something wonderful. Until next time, keep your knives sharp and your kitchen messy.
With love and a full plate,
Emily