Let’s Make Some Holiday Magic: The Ultimate Marshmallow Treats
Hey there, my fellow foodie friend! Chef Emily here, waving at you from my wonderfully messy kitchen. Is there anything that whispers “celebration” quite like the sweet, simple scent of marshmallows melting into a pool of buttery goodness? I think not. These aren’t just any rice cereal treats; these are Holiday Marshmallow Treats, and they are about to become your new favorite festive tradition.
Imagine this: a snowy afternoon, your favorite holiday playlist setting the mood, and a batch of these irresistibly chewy, crispy squares cooling on your counter. They’re the perfect project for a cozy baking session with loved ones, a last-minute potluck hero, or a sweet little homemade gift that says, “I made this with love for you.” The best part? You don’t need a fancy mixer or a pastry degree. All you need is one pot, a few simple ingredients, and a whole lot of heart. So, tie on that apron (the messy one is always the most loved!), and let’s create some edible holiday joy together. Trust me, your kitchen is about to smell like pure happiness.
A Spoonful of Nostalgia: My First Marshmallow Mishap
I’ll never forget the first time I tried to make these on my own. I was about ten years old, feeling wildly independent in my grandma’s kitchen. I’d watched her make them a hundred times, her hands moving with a calm, practiced ease. I decided to surprise her. I turned the heat up way too high, convinced I could speed up the process. Let’s just say I created a volcanic eruption of scorched marshmallow lava instead of a smooth, gooey river. The smoke alarm sang a song of my failure, and my poor grandma just laughed, gave me a hug, and said, “Sweetheart, some of the best things in life can’t be rushed.”
That little kitchen disaster taught me so much more than just how to properly melt marshmallows. It taught me about patience, about the joy of the process, and about the fact that even a slightly-burnt treat, made with love, is still pretty darn delicious. Now, every time I make a batch, I think of her and that worn-out wooden spoon. It’s a memory baked right into every bite, and it’s why this recipe will always hold a special place in my heart (and my recipe box!).
Gathering Your Holiday Treat Squad
Here’s your shopping list for pure, unadulterated joy. This is the classic base—your blank canvas for holiday creativity!
- 6 cups puffed rice cereal: This is the crispy, airy foundation. I love the classic brand, but any plain puffed rice will work beautifully. Chef’s Insight: Make sure your cereal is fresh and crispy, not stale! For a gluten-free option, just double-check that your cereal is certified GF.
- 1 (10 oz) bag mini marshmallows: The star of the show! Minis melt faster and more evenly than large marshmallows. Substitution Tip: For a different flavor, try using flavored marshmallows like peppermint or vanilla bean. Vegan friends, most Dandies marshmallows work perfectly!
- 3 tbsp unsalted butter: Butter adds richness and helps create that perfect, non-stick texture. Using unsalted lets you control the salt level. Chef’s Insight: Don’t swap for margarine or oil; the flavor and texture just won’t be the same.
- ½ tsp vanilla extract: A splash of vanilla adds a warm, sweet depth that elevates the entire treat. Pure vanilla extract is always my go-to for the best flavor.
- Pinch of salt: This is the secret weapon! A tiny pinch balances the overwhelming sweetness and makes all the other flavors pop. Don’t skip it!
Optional Holiday Twists (Pick your favorites!):
- ½ tsp cinnamon or pumpkin pie spice: A warm, cozy spice that smells like the holidays in a bowl.
- ½ cup white chocolate chips or crushed candy canes: White chocolate adds creaminess, while candy canes bring a cool, festive crunch.
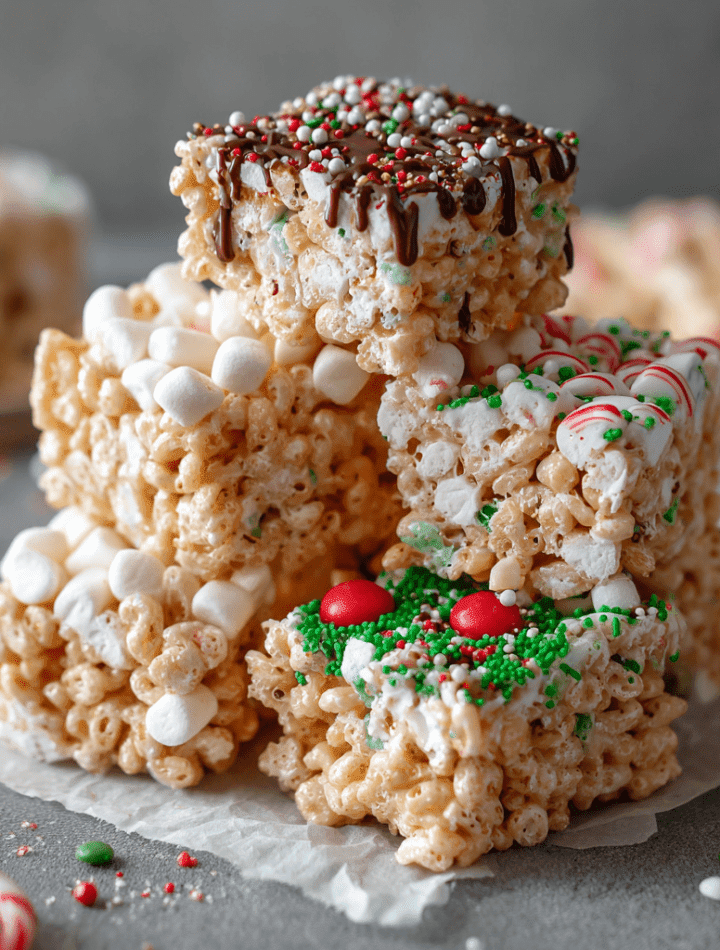
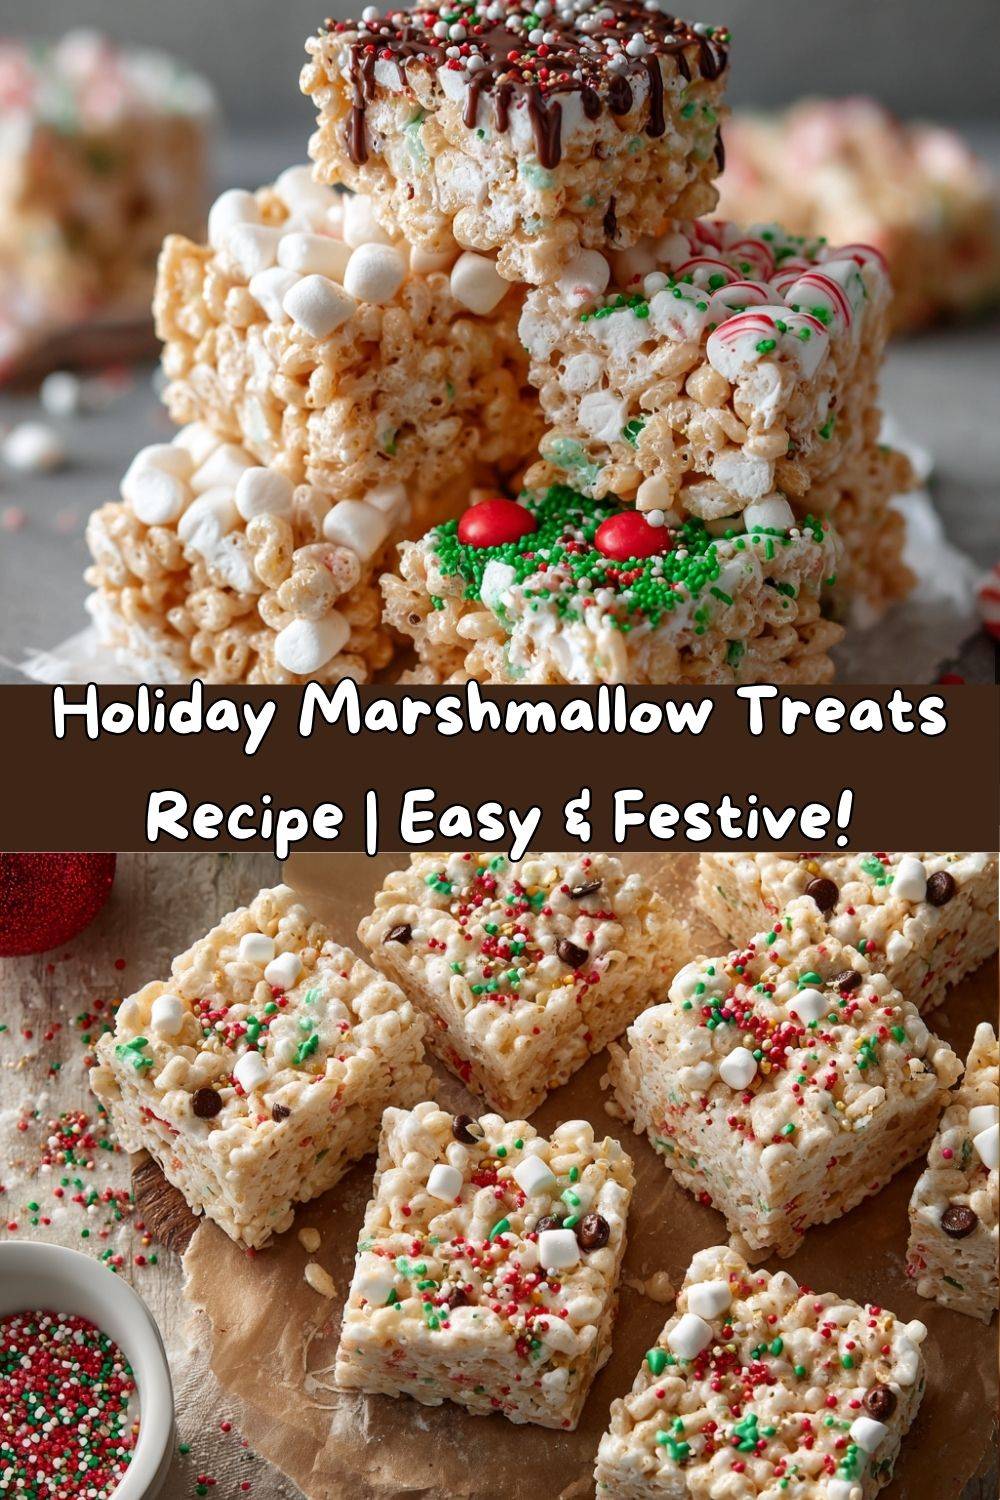
- Red & green sprinkles or mini M&Ms: For a serious dose of holiday cheer and color.
- Drizzle with dark chocolate: Because everything is better with a little chocolate drizzle on top.
Let’s Get Gooey: Your Foolproof Guide
Follow these steps, and you’ll be a marshmallow treat master in no time. I’ve included all my best chef hacks to ensure your success!
- Prepare your pan. Lightly grease an 8×8” pan for thicker, bar-style treats or a 9×13” pan for thinner, classic squares. You can also line it with parchment paper, leaving a little overhang on two sides. Chef’s Hack: Greasing the paper too makes it super easy to lift the whole block out later for super clean cuts!
- Melt the marshmallows. In a large, heavy-bottomed pot, melt the butter over LOW heat. This is crucial! We are melting, not frying. Once melted, add the entire bag of marshmallows and stir constantly with a sturdy silicone spatula until they are completely smooth, melted, and glorious. Chef’s Commentary: This is where patience pays off. Low and slow prevents burning and ensures a perfectly white, gooey base. If you see brown bits, the heat is too high!
- Season the goo. Remove the pot from the heat immediately. Quickly stir in the vanilla extract and that all-important pinch of salt. If you’re using any spices (like cinnamon), add them now.
- Mix it up! Now, dump in all 6 cups of puffed rice cereal. Using your spatula, gently but quickly fold the cereal into the marshmallow mixture until every single piece is beautifully coated in that sweet, sticky goodness. Chef’s Hack: Work fast before the marshmallow starts to set! If you’re adding any mix-ins like sprinkles or chocolate chips, fold them in now, right in the pot.
- Press into the pan. Immediately transfer the mixture to your prepared pan. Now, for the secret to a perfect texture: use a piece of wax paper or parchment paper to press the mixture evenly into the pan. Lightly press it down—don’t compact it! Chef’s Hack: If you lightly butter your fingers or the back of a spoon, you can press it down without everything sticking to you. We want them chewy, not hard and dense.
- The hardest part: wait! Let the treats cool completely at room temperature for at least 30-45 minutes. I know, the wait is torture! But this allows them to set properly so you get clean cuts.
- Slice and serve! Once completely cool, use the parchment paper overhang to lift the entire block out of the pan. Place it on a cutting board and use a sharp knife to cut it into squares. Wiping the knife clean between cuts helps get those beautiful, sharp edges.
How to Serve These Holiday Stars
Presentation is part of the fun! Here’s how to make your treats look as incredible as they taste.
For a simple, homespun look, just stack them high on a rustic wooden board or a favorite vintage plate. If you’re feeling fancy, place each square in a mini cupcake liner—this makes them perfect for party platters and keeps fingers less sticky. Going the extra mile? After they’ve cooled and you’ve cut them, melt a little dark or white chocolate, drizzle it over the top in zig-zags, and immediately add a light dusting of festive sprinkles or crushed candy cane pieces before the chocolate sets. They’ll look like they came from a professional bakery! These treats pair wonderfully with a cold glass of milk, a mug of rich hot chocolate, or a warm cup of coffee to balance the sweetness. They’re the perfect edible gift, too! Stack a few in a clear cellophane bag, tie it with a ribbon, and you’ve got a heartfelt present anyone would adore.
Mix It Up! Endless Holiday Variations
The fun doesn’t stop with the classic recipe. Here are a few of my favorite ways to mix things up and keep it exciting all season long!
- The Peppermint Twist: Add ½ teaspoon of peppermint extract (instead of vanilla) along with the salt. Fold in ½ cup of crushed peppermint candies or candy canes and a handful of dark chocolate chips. Drizzle with more chocolate after cooling.
- Gingerbread Spice: Stir ½ teaspoon of cinnamon, ¼ teaspoon of ginger, and a pinch of nutmeg and cloves into the melted marshmallow mixture. Fold in ¼ cup of finely chopped crystallized ginger for a spicy, chewy surprise.
- Christmas Tree Crunch: Use green-tinted vanilla or mint marshmallows. Fold in holiday-shaped sprinkles and white chocolate chips. Press into a pan, and after cooling, you can even use cookie cutters to cut them into tree or star shapes!
- Everything But the Kitchen Sink: Feeling adventurous? Go for it! Fold in a mix of mini pretzels (for salty crunch), holiday M&Ms, and even a handful of crushed potato chips for an unexpected sweet-and-salty situation. It’s incredible.
- Nutty & Nice: For a more grown-up twist, fold in ½ cup of toasted pecans or walnuts and a handful of dried cranberries for a fantastic flavor and texture combination.
Chef Emily’s Kitchen Confidential
This recipe has evolved so much from my first burnt-batch disaster! I’ve learned that the type of pot matters—a heavy-bottomed pot distributes heat evenly and is your best defense against scorching. I also used to pack the mixture into the pan way too firmly, resulting in hockey pucks instead of pillow-y treats. The wax paper press-and-pat method was a total game-changer. One of my favorite kitchen memories is the year my nephew decided to “help” by adding an entire extra cup of red and green nonpareils. We ended up with what we called “Elvis Festivus Treats”—they were wildly colorful, a bit crunchy, and absolutely hilarious. They were a huge hit. So remember, even the “mistakes” can turn into happy accidents and new traditions. Cooking is about joy, not perfection!
Your Questions, Answered!
Q: My treats turned out really hard and tough. What did I do wrong?
A: The most common culprit is over-pressing the mixture into the pan. You just want to gently press it to an even layer, not compact it. Another reason could be overheating the marshmallows, which makes them seize up and become less pliable. Always use low heat!
Q: Can I make these ahead of time? How do I store them?
A: Absolutely! They are a great make-ahead treat. Once completely cooled, store them in an airtight container at room temperature. They are best eaten within 2-3 days for optimal texture, but they’ll still be tasty for up to a week. You can also layer them with parchment paper so they don’t stick together.
Q: My marshmallow mixture became super sticky and impossible to work with. Help!
A> This likely means you moved a little too slowly and the marshmallow began to set. It sets fast! To make it easier next time, make sure all your ingredients are measured and your pan is prepared before you even turn on the stove. Speed is your friend once the cereal goes in.
Q: Are there any tricks for cutting them cleanly?
A> Yes! Let them cool completely. Using a sharp knife, spray it lightly with cooking spray or wipe it down with a little butter before each cut. Wipe the blade clean between cuts for the prettiest squares.
Holiday Marshmallow Treats
- Total Time: 40 minutes
- Yield: 16 Squares 1x
Description
Puffed rice and gooey marshmallows come together for the ultimate throwback snack—sweet, simple, and endlessly customizable. Add a holiday twist with colors, spices, or surprise mix-ins that make these classics party-ready.
Ingredients
6 cups puffed rice cereal
1 (10 oz) bag mini marshmallows
3 tbsp unsalted butter
½ tsp vanilla extract
Pinch of salt
Optional Holiday Twists:
½ tsp cinnamon or pumpkin pie spice
½ cup white chocolate chips or crushed candy canes
Red & green sprinkles or mini M&Ms
Drizzle with dark chocolate for extra indulgence
Instructions
Prepare pan
Lightly grease or line an 8×8” or 9×13” pan with parchment paper.
Melt marshmallows
In a large pot, melt butter over low heat. Add marshmallows, stirring constantly until fully melted and smooth. Stir in vanilla and a pinch of salt.
Mix it up
Remove from heat and quickly stir in puffed rice cereal until well-coated. Fold in any add-ins like sprinkles or chocolate chips while still warm.
Press into pan
Transfer mixture to the prepared pan. Use a buttered spatula or wax paper to press evenly. Don’t pack too tightly or treats may be tough.
Cool & cut
Let cool at room temp for about 30 minutes. Cut into squares and enjoy!
- Prep Time: 10 minutes
- Set Time: 30 minutes
Nutrition
- Calories: 130 / Square
- Fat: 4g / Square
- Carbohydrates: 23g / Square
- Protein: 1g / Square
Nutritional Information*
Let’s be real—these are a treat, through and through! But here’s a general breakdown per square (based on the classic recipe without add-ins). This is just an estimate, as ingredients and additions can vary widely.
Estimated per square: ~130 kcal | 4g fat | 23g carbs | 1g protein
*This information is provided as a courtesy and is an estimate only. Please note that nutrition information can vary based on the specific brands of ingredients you use and any additions or substitutions you make. For the most accurate nutritional information, I recommend using a calculator like MyFitnessPal with your exact ingredients.
Final Thoughts from My Kitchen to Yours
Well, my friend, there you have it—your ultimate guide to creating the most festive, delicious, and joy-filled holiday marshmallow treats. This recipe is more than just a list of ingredients; it’s an invitation to create memories, to get a little messy, and to share something wonderful with the people you love. Whether you keep it classic or go all out with peppermint and chocolate, I hope these treats bring a little extra sparkle to your holiday season.
Remember, the best ingredient you can add is always a dash of fun and a heaping spoonful of love. So from my cozy, flour-dusted kitchen to yours, happy baking! I’d love to see your creations. Tag me on social @TastyChow with #TastyChowHolidays so I can cheer you on.
Now go on, make something delicious!
— Emily 🥄❤️