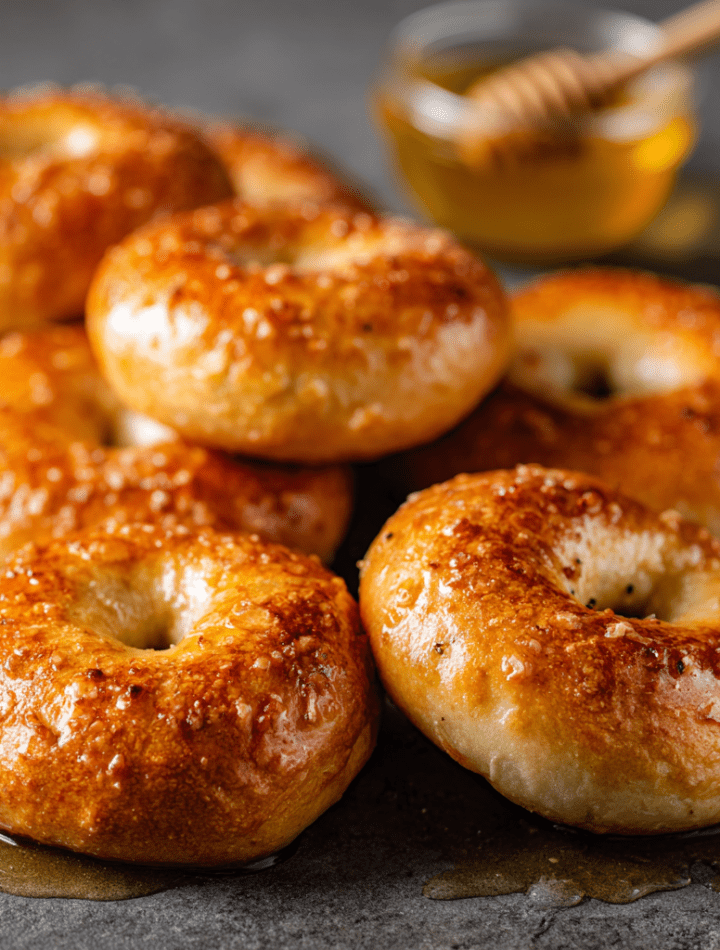
Golden Honey Bagels: Your New Favorite Baking Project Awaits!
Hey there, my fellow food lover! Let’s talk about that magical, elusive feeling of biting into a perfect bagel. You know the one. It’s got a glossy, golden-brown crust that offers just the right amount of resistance before you sink your teeth into a soft, chewy, and airy interior. That slight sweetness that lingers on your tongue, making you reach for the cream cheese before you’ve even finished the first bite. If you’ve ever thought that kind of bakery magic was only for the pros, I’m here, in my slightly flour-dusted apron, to tell you that you can absolutely create it in your own kitchen.
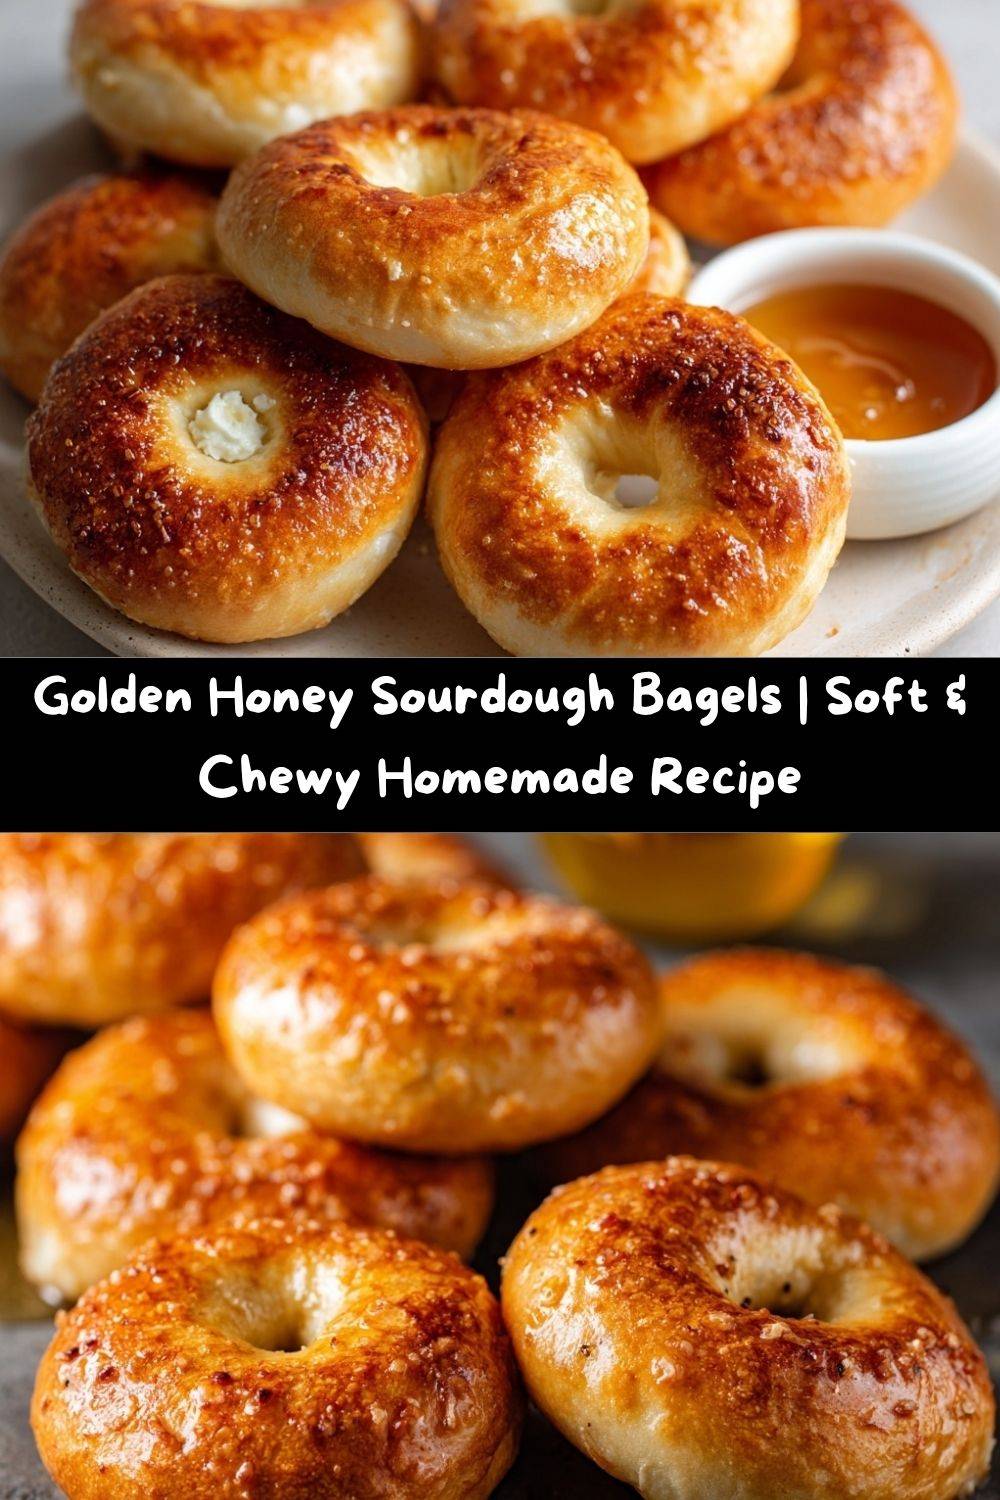
These Golden Honey Bagels are my absolute pride and joy. They’re everything you crave in a homemade bake, but with a little extra soul. We’re using a bubbly, active sourdough starter for that incredible depth of flavor and texture, and we’re giving them a luxurious bath in a honey-sweetened boil that creates that signature glossy, chewy crust. The result? A bagel that’s not just a carrier for your favorite schmear, but a star in its own right.
I promise, this isn’t a fussy, complicated recipe. It’s a joyful, hands-on process that’s as rewarding as the final product. So, tie up your hair, put on your favorite playlist, and let’s make your kitchen smell like a New York bakery crossed with a cozy grandma’s kitchen. Trust me, once you try a warm, homemade honey bagel, there’s simply no going back.
The Bagel That Started It All
My love affair with bagels started not in a fancy bakery, but in my Grandma Ruth’s tiny, sunlit kitchen. Every Sunday, without fail, the scent of toasting bagels and brewing coffee would drift upstairs and wake me up. It was our ritual. She’d always have a plain one for my grandpa, an everything bagel for my dad, and for me? A golden, honey-wheat bagel, sliced and waiting by the toaster.
She’d slather mine with an almost comical amount of cream cheese and then, with a wink, drizzle a tiny spiral of honey right on top. “For my sweet girl,” she’d say. It was more than breakfast; it was a little edible hug. Years later, in culinary school, I became obsessed with recreating that perfect texture and flavor. I must have made a hundred batches, tweaking and adjusting, until I finally landed on this recipe. It’s my homage to those slow, sweet Sunday mornings—a perfect blend of nostalgic comfort and a chef’s pursuit of the perfect crumb.
Gather Your Ingredients: The Dream Team
Alright, let’s get our mise en place! Having everything ready is the first secret to a stress-free baking experience. Here’s what you’ll need:
- 300g Active Sourdough Starter: This is the heart of our bagels! Make sure it’s bubbly, lively, and has been fed 4-8 hours before you start. It should be at or just past its peak. This isn’t just for flavor; it’s our natural leavening agent, giving the bagels their incredible airy texture.
- 500g Warm Water: Think baby-bottle warm, not hot. Too hot, and you’ll shock the yeast in your starter. The warmth just helps everything get cozy and active.
- 1000g Bread Flour: The high protein content in bread flour is non-negotiable for that classic, chewy bagel bite. It creates a strong gluten network. If you must substitute, all-purpose flour will work, but your bagels will be a bit softer and less chewy.
- 80g Sugar: This is the food for our starter, helping it get extra active and also contributing to that beautiful golden-brown color during baking. It also adds a subtle sweetness that plays so nicely with the honey.
- 22g Salt: Don’t be shy! This amount is crucial for balancing the flavor and strengthening the gluten structure. Without it, your bagels would taste bland and be a bit weak.
- Honey Boil Bath (40g Honey + Large Pot of Water): This is the magic step! Boiling the bagels sets the crust, giving them that iconic chew. The honey in the water adds a delicate sweetness and helps create a gorgeous, glossy finish. It’s our secret weapon!
Let’s Get Baking: Your Step-by-Step Guide to Bagel Bliss
Ready to get your hands dirty? Let’s do this! I’ll walk you through every step with all my favorite chef hacks.
Step 1: Mix the Dough. In a large bowl (I mean LARGE – this dough grows!), combine your active starter and warm water. Use your hands or a sturdy spatula to break up and dissolve the starter. Now, add the bread flour, sugar, and salt all at once. Mix until you no longer see dry patches of flour and a shaggy, rough dough forms. This doesn’t need to be pretty! Once combined, cover the bowl with a damp kitchen towel or plastic wrap and let it rest for 30 minutes. This “autolyse” rest allows the flour to fully hydrate, making the next step much easier.
Step 2: Knead & Bulk Ferment. Now, turn the dough out onto a lightly floured surface. Channel your inner baker and knead that dough! Push, fold, and turn for a good 10-15 minutes by hand. You’re looking for a smooth, slightly tacky, and elastic dough. If it’s sticking to your hands like crazy, add a tiny bit more flour, but be patient—it will come together. Chef’s Hack: To test if it’s ready, do the “windowpane test.” Stretch a small piece of dough between your fingers. If you can stretch it thin enough to see light through it without it tearing, you’re golden! Place the dough back in the greased bowl, cover, and let it bulk ferment at room temperature for 4-6 hours. During the first two hours, we’ll perform 2-3 “stretch and folds.” Simply wet your hand, grab one side of the dough, stretch it up, and fold it over the center. Rotate the bowl a quarter turn and repeat. This builds incredible strength and structure without constant kneading.
Step 3: Shape Your Bagels. Once the dough is puffy and full of air, turn it out onto a clean surface. Use a bench scraper or a sharp knife to divide it into 12 equal pieces. We’re aiming for uniformity so they bake evenly. Now, to shape! Take a piece of dough and roll it into a tight, smooth ball by pulling the edges down and pinching them at the bottom. Let the balls rest for 5 minutes—this relaxes the gluten. To form the classic bagel shape, poke a floured finger straight through the center of a ball. Gently swirl your finger around to widen the hole to about 2 inches (it will shrink a bit!). Place your shaped bagels on a parchment-lined baking sheet that’s been lightly dusted with semolina flour or cornmeal to prevent sticking. Cover them well with plastic wrap.
Step 4: The Proof. You have two options here, both fantastic! For the best flavor and an easier morning, I love the cold proof. Just pop the entire tray, covered, into the fridge for 8-12 hours (or overnight). If you’re baking today, you can do a room temp proof for 2-3 hours, until they look puffy and a bit jiggly. The cold proof is my go-to—it develops a more complex, slightly tangy flavor.
Step 5: The Honey Boil Bath. Preheat your oven to a hot 220°C (430°F). Now, bring a large, wide pot of water to a rolling boil. Stir in the 40g of honey. Gently drop 2-3 bagels into the boiling water at a time—don’t crowd the pot! They will sink and then float. Boil them for 30 seconds, flip them with a slotted spoon or spider strainer, and boil for another 30 seconds. This boiling step is what gives the bagel its signature chewy crust and dense crumb. The honey adds a beautiful flavor and sheen.
Step 6: Bake to Golden Perfection. Carefully remove the boiled bagels from the water, let any excess drip off, and place them back on your prepared baking sheet. Bake for 20-22 minutes, rotating the tray halfway through, until they are a deep, glorious golden brown. Transfer them to a wire rack to cool completely. I know it’s hard, but try to let them cool for at least 20 minutes—the inside is still setting!
How to Serve Your Masterpiece
Oh, the possibilities! A warm, freshly baked honey bagel is a blank canvas for deliciousness.
- The Classic: A generous schmear of full-fat cream cheese is all you need. The cool, tangy cream cheese against the warm, sweet, chewy bagel is a match made in heaven.
- Grandma Ruth’s Way: Cream cheese, a thin slice of sharp cheddar, and a light drizzle of honey. Trust me on this one.
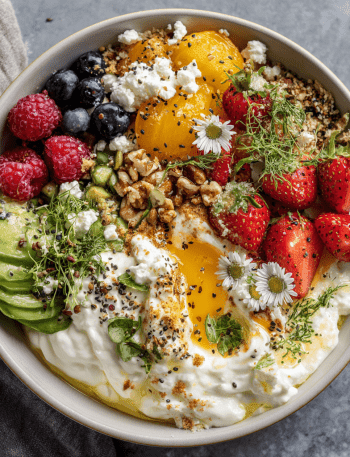
- Sweet & Savory: Slice, toast, and top with mashed avocado, a sprinkle of flaky sea salt, and a pinch of red pepper flakes.
- The Ultimate Breakfast Sandwich: Fry an egg, add a slice of melty provolone and a couple of slices of crispy bacon or a savory veggie sausage patty. You’ve just upgraded your entire morning.
However you serve them, do it with pride! You just baked bagels!
Get Creative! Flavor Twists & Swaps
Once you’ve mastered the classic, the fun really begins. Here are a few of my favorite ways to mix it up:
- Cinnamon Raisin Bliss: During the kneading stage, work in 2 teaspoons of ground cinnamon and 1 cup of raisins (soak them in warm water for 10 minutes first to plump them up!).
- Everything But The Bagel: After boiling the bagels, brush them with an egg white wash (1 egg white + 1 tbsp water) and generously sprinkle with Everything Bagel Seasoning before baking.
- Whole Wheat Honey: Substitute up to 30% of the bread flour with whole wheat flour for a nuttier, heartier bagel. You may need to add a touch more water.
- “Cheater’s” Flavor: No time to mix in flavors? Simply roll your boiled bagel in a plate of rolled oats, sesame seeds, or poppy seeds before baking for an instant upgrade.
- Vegan-Friendly: The base recipe is already vegan! Just ensure your sugar is vegan-friendly (some are processed with bone char) and use maple syrup instead of honey in the boil for a similar effect.
Chef Emily’s Kitchen Notes
This recipe has been a living, evolving thing in my kitchen. The first time I made them, I was so nervous about the boil that I dropped one from a foot above the water and created a mini tidal wave of honey water all over my stovetop. It was a sticky, hilarious mess! But you know what? That bagel was still delicious. Don’t fear the boil. Over time, I’ve learned that the cold, overnight proof is the real game-changer for flavor. It also means you can have fresh bagels for breakfast with minimal morning effort—just boil and bake! These bagels have been on the table for lazy brunches, packed into lunchboxes, and even served as the “bun” for a epic Thanksgiving leftover sandwich. They are as versatile as they are delicious.
Your Bagel Questions, Answered!
I’ve gotten a lot of questions about this recipe over the years. Here are the most common ones to help you out!
Q: My bagels turned out dense and didn’t puff up much. What happened?
A: This is usually a proofing issue. Either your starter wasn’t active and bubbly enough to begin with, or the dough didn’t get enough time to ferment and rise. Make sure your starter passes the float test (a spoonful of starter should float in a glass of water) before you begin. Also, ensure your kitchen isn’t too cold—a warm spot helps the yeast do its thing!
Q: Can I make these without a sourdough starter?
A> You can! Substitute the 300g of starter with 150g of warm water and 150g of bread flour, plus 7g (one packet) of instant yeast. Add the yeast in with the dry ingredients. Your bulk ferment time will be much shorter—likely 1-2 hours, or until doubled in size.
Q: My bagels have huge, uneven air pockets inside. How do I prevent that?
A> This is often caused by under-kneading or not degassing the dough enough during shaping. When you’re shaping your balls, make sure you’re pressing out any large air bubbles to create a more even crumb structure.
Q: The bagels stuck to the pan after baking! Help!
A> A few things can help: 1) Use parchment paper. Always. 2) A light dusting of semolina or cornmeal on the parchment works wonders. 3) Make sure you let the bagels cool on a wire rack for at least 10-15 minutes before trying to move them. They need time to set!
Nutritional Information (Per Bagel)
Hey, knowledge is power! Here’s a general breakdown of what’s in one of these glorious golden rings. Remember, these are estimates and can vary based on specific ingredients used.
- Calories: ~260
- Protein: 8g
- Carbohydrates: 52g
- Fat: 1g
- Sugar: 5g
These bagels are a fantastic source of energy, and thanks to the slow fermentation of the sourdough, they may be easier to digest and have a lower glycemic index than commercial bagels. They’re also naturally low in fat. Pair one with some protein and healthy fats (like that cream cheese and avocado!) for a balanced and utterly satisfying meal.
You Did It! Final Thoughts from My Kitchen to Yours
Look at you, you magnificent baker! You’ve just created something truly special from just flour, water, and a whole lot of love. I hope this recipe brings as much joy to your kitchen as it has to mine. There’s something so profoundly satisfying about the process—the feel of the dough, the smell of them baking, and that first, triumphant bite.
Don’t be surprised if this becomes a new weekend ritual. These bagels have a way of turning an ordinary morning into a small celebration. Share them with friends, freeze them for later (they toast up beautifully!), and most importantly, pat yourself on the back.
Thank you for baking with me today. I’d love to see your beautiful creations! Tag me on social @TastyChow with #TastyChowBagels so I can cheer you on. Now, go forth and chow down!
With a full heart and a floury apron,
Emily