Let’s Bake a Little Magic!
Hey there, my fellow flavor-chaser! Have you ever had a cookie that instantly transported you back to the best parts of being a kid? You know, the sticky-fingered, sun-drenched days of county fairs, swirling clouds of pink and blue cotton candy, and that pure, uncomplicated joy of a sugary treat? That’s the exact feeling I wanted to capture when I first dreamed up these Cotton Candy Sugar Cookies.
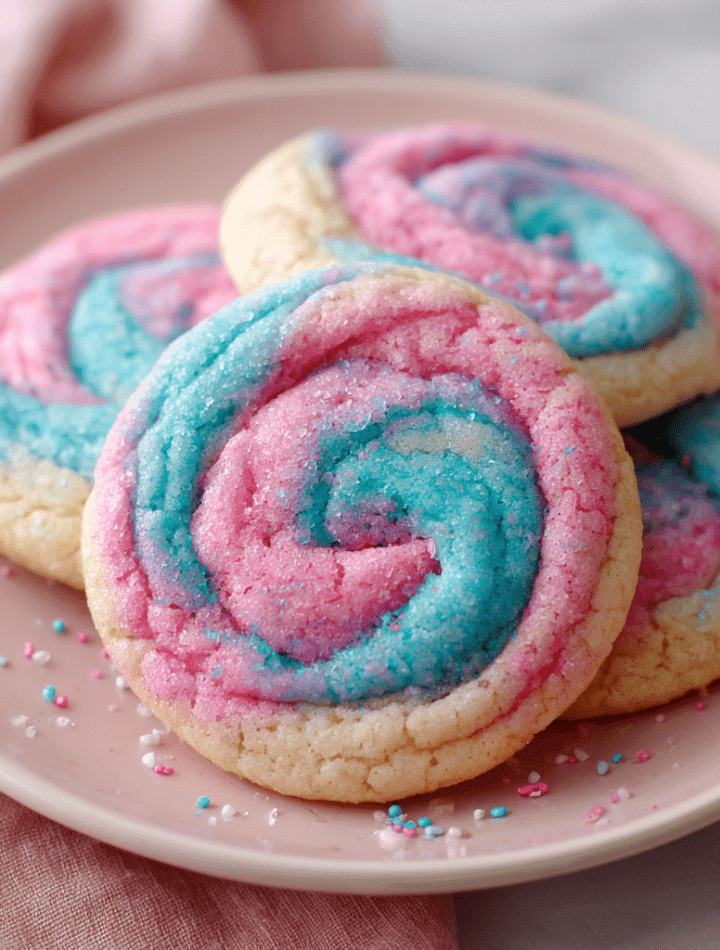
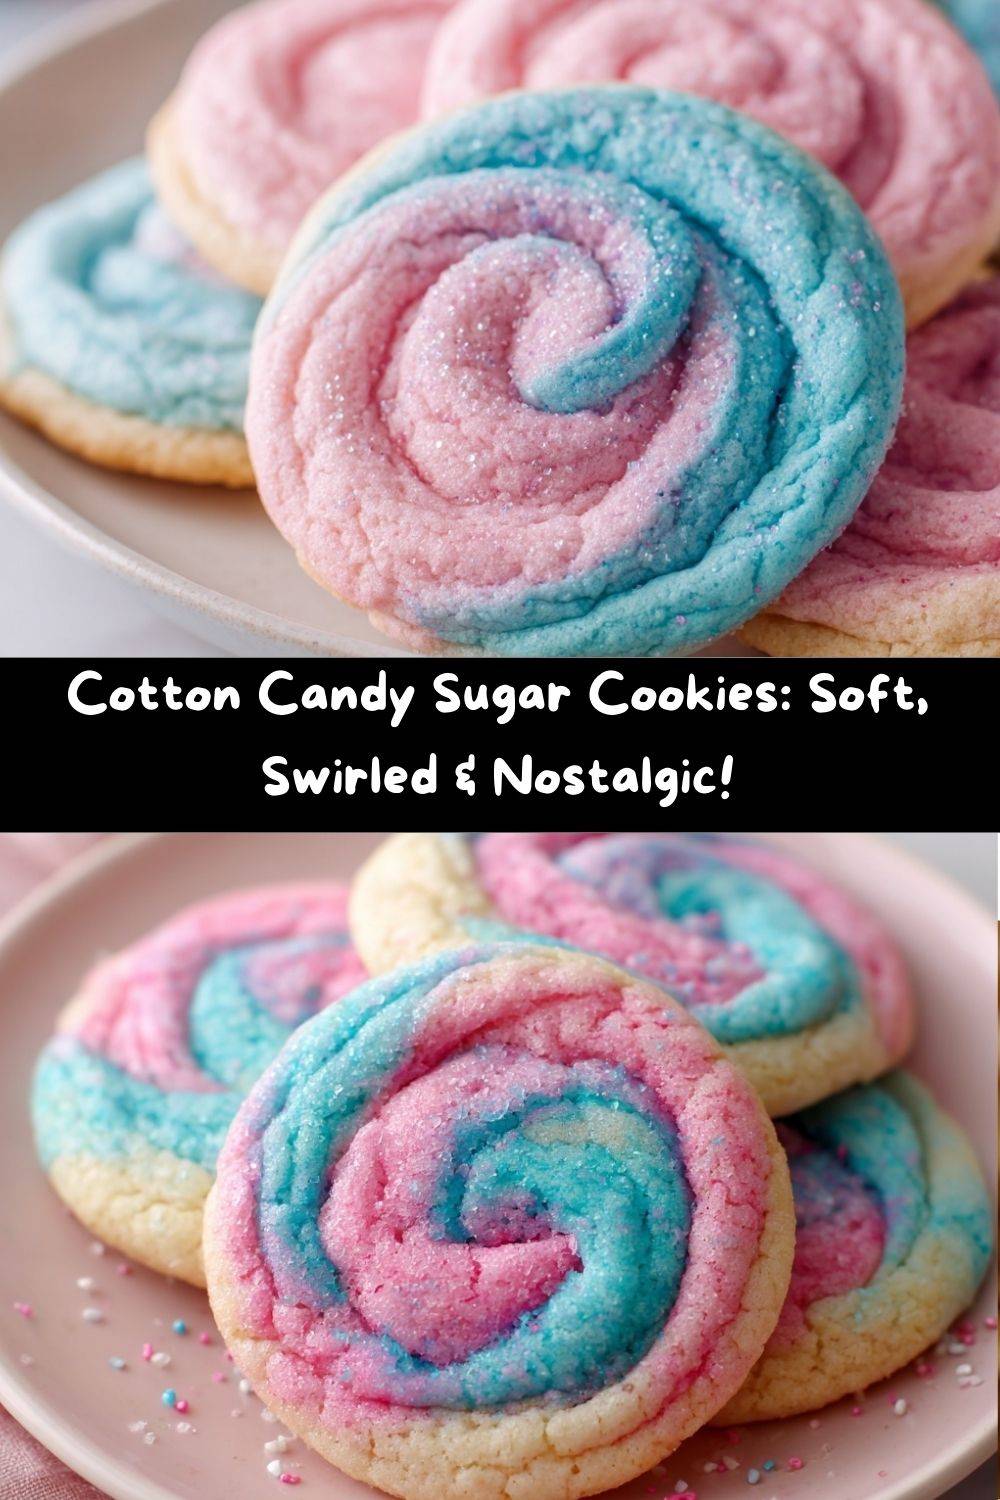
Let’s be real, friends. Adulting is hard. Between work deadlines, endless to-do lists, and just the general hustle of life, we could all use a little more whimsy. And what’s more whimsical than a cookie that tastes like a carnival? These aren’t just your average sugar cookies. They’re soft, they’re chewy, and they have this incredible, melt-in-your-mouth texture that’s dotted with beautiful pastel pink and blue swirls. The subtle vanilla and cotton candy flavoring work together to create a taste that’s nostalgic, fun, and utterly irresistible.
I’ve made these for birthday parties, baby showers, and just because-Tuesdays, and every single time, they disappear in a flash. They’re the kind of treat that makes people’s eyes light up. So, tie on your favorite apron (the messy one is always the best!), preheat your oven, and let’s create some kitchen magic together. We’re about to whip up a batch of pure, unadulterated happiness.
A Sticky-Fingered Flashback
My love affair with cotton candy started at the Clark County Fair when I was about seven. My grandma, the original queen of comfort food, would always take me. We’d see the prize-winning pigs, ride the creaky Ferris wheel, and then, without fail, she’d buy me a giant, fluffy cloud of pink cotton candy. It was bigger than my head! I remember the way the sugar would dissolve on my tongue, the way the paper cone would get sticky, and the way my grandma would laugh as I inevitably ended up with a pink-dusted nose.
One year, a gust of wind stole my entire cotton candy puff, sending it tumbling across the fairgrounds like a sugary tumbleweed. I was devastated, on the verge of tears. But my grandma, without missing a beat, simply bought me another one. “Life’s too short for lost cotton candy, Em,” she’d said with a wink. That moment—the resilience, the love, the unwavering commitment to joy—stuck with me. These cookies are my edible homage to that feeling. They’re my way of saying that even when life tries to steal your sweetness, you can always make more. And sharing that sweetness? That’s the real magic.
Gathering Your Magical Ingredients
Before we start, let’s chat about our lineup. Baking is a science, but it’s also an art. Understanding your ingredients is the first step to cookie-confidence!
- 2 ¼ cups all-purpose flour: This is the backbone of our cookie, giving it structure. For a slightly softer cookie, you can replace ¼ cup with cornstarch to make a homemade “cake flour” blend.
- ½ teaspoon baking soda & ½ teaspoon baking powder: Our dynamic leavening duo! The baking powder gives an initial lift, while the baking soda helps with that perfect spread and chewy texture. Yes, we need both!
- ¼ teaspoon salt: Do not skip this! Salt is the flavor superhero that makes all the sweetness pop and balances the recipe beautifully.
- ¾ cup unsalted butter, softened: I always use unsalted so I can control the salt level. “Softened” is key here! It should be cool to the touch but leave a slight indent when you press it. This is non-negotiable for achieving that light and fluffy creamed base.
- 1 cup granulated sugar: This sweetens the deal and, when creamed with the butter, creates tiny air pockets that give our cookies a lovely tender crumb.
- 1 large egg: Our binding agent, bringing everything together and adding richness. Make sure it’s at room temperature to play nicely with the butter.
- 1 ½ teaspoons vanilla extract: The classic flavor foundation that makes everything taste more… well, like a cookie! Use the real stuff, not imitation, for the best flavor.
- ½ teaspoon cotton candy flavoring (or raspberry extract): This is the star of the show! You can find cotton candy flavoring online or in some craft stores. If you can’t find it, raspberry extract is a fantastic stand-in that gives a similar fruity, nostalgic vibe.
- Pink and blue gel food coloring: I’m a gel food coloring evangelist! They provide vibrant color without watering down your dough. A little dot goes a long way to creating those perfect pastel hues.
Let’s Get Baking: The Step-by-Step Fun!
Okay, team! Time to get our hands a little dusty (and maybe a little colorful). Follow these steps, and you’ll be a cookie wizard in no time.
- Preheat and Prep. First things first, get that oven preheating to a toasty 350°F (175°C). This gives it plenty of time to reach a consistent temperature, which is crucial for even baking. While it’s warming up, line your baking sheets with parchment paper. Trust me, this is the easiest cleanup hack in the book and prevents any sticky situations!
- Whisk the Dry Team. In a medium bowl, take your flour, baking soda, baking powder, and salt. Grab a whisk and give them a good, thorough mixing. We’re not just combining here; we’re aerating the flour to make our cookies even lighter. A little chef’s secret: this prevents you from over-mixing later, which can lead to tough cookies.
- Cream the Butter & Sugar. In a large bowl, combine your softened butter and granulated sugar. Now, let your mixer (or your strong arm!) go to work. We’re not just mixing; we’re “creaming.” Beat it on medium-high speed for a good 2-3 minutes, until the mixture turns pale yellow and becomes wonderfully light and fluffy. This step is the heart and soul of a perfect sugar cookie texture, so don’t rush it!
- Incorporate the Wet Ingredients. Beat in the egg until it’s fully combined. Then, add in the vanilla and that magical cotton candy flavoring. Scrape down the sides of the bowl to make sure everything is getting to know each other.
- Combine Wet & Dry. With your mixer on low speed, gradually add the flour mixture to the wet ingredients. Mix until just combined. I mean it—the moment you no longer see streaks of flour, STOP! Over-mixing is the enemy of tenderness.
- Create the Swirl! This is the fun part! Divide your dough in half. Tint one half with a dot of pink gel coloring and the other with a dot of blue. You can use a spatula or (my favorite method) pop on some food-safe gloves and knead the color in by hand until you have two beautiful, uniformly colored dough balls. Now, take a small piece of pink and a small piece of blue. Gently twist them together, then roll them between your palms to form a ball. Don’t overwork it—we want a marbled effect, not a muddy purple!
- Bake to Perfection. Place your beautifully swirled dough balls about 2 inches apart on your prepared baking sheet. Give them a slight flatten with your fingers or the bottom of a glass—this helps them spread just right. Bake for 8-10 minutes. The key here is to pull them out when the edges are just lightly golden and set, but the centers still look a tiny bit soft. They will continue to cook on the hot baking sheet. This is the secret to a super soft, chewy center!
- The Cool Down. Let the cookies cool on the baking sheet for at least 5 minutes before you transfer them to a wire rack. This allows them to set up properly so they don’t fall apart. I know it’s tempting, but patience is a virtue that pays off in perfect cookies!
How to Serve These Whimsical Wonders
Presentation is part of the fun! These cookies are a showstopper all on their own, but why not make the moment even more special?
I love serving them on a vibrant, colorful platter that really makes the pastel swirls pop. For a real carnival feel, stack them high on a cake stand and sprinkle a little edible glitter over the top. They’re the perfect companion to a tall glass of cold milk for the kids, or a fun, fizzing pink lemonade or prosecco for the adults.
These are also the ultimate “just because” gift. Tuck a few into a cellophane bag, tie it with a cute ribbon, and you’ve just made someone’s day. I’ve been known to leave a small plate of these on a new neighbor’s doorstep—it’s the quickest way to make a friend! However you choose to serve them, do it with a smile. Food made with love always tastes better.
Get Creative! Fun Recipe Twists
Once you’ve mastered the classic, feel free to play with your food! Here are a few of my favorite ways to mix things up:
- Confetti Celebration: Fold in ½ cup of rainbow sprinkles when you combine the dry and wet ingredients. The extra crunch and color take the festive factor to an 11!
- Stuffed Cookie Surprise: This is a game-changer! Take a ball of your swirled dough and flatten it slightly. Place a small square of white chocolate or a pink & blue “funfetti” marshmallow in the center, then wrap the dough around it and re-roll. Bake as usual. You get a gooey, melty center that will have everyone begging for the recipe.
- Cotton Candy Frosting Dip: Mix 1 cup of powdered sugar with 1-2 tablespoons of milk and a drop of cotton candy flavoring and pink food coloring to create a simple glaze. Dip the top of each cooled cookie in the glaze and let it set. It’s a double dose of cotton candy delight!
- Lemonade Twist: For a tangy contrast, swap the cotton candy flavoring for lemon extract. Tint the entire dough a soft yellow and roll the balls in coarse sugar before baking. You get a totally different, but equally delicious, vibe.
- Gluten-Free Goodness: No problem! Simply replace the all-purpose flour with a 1:1 gluten-free baking blend. I’ve had great success with this swap, and the cookies come out just as soft and wonderful.
Chef Emily’s Kitchen Notes
This recipe has seen a few… *ahem*… learning experiences. The first time I tested it, I got a little overzealous with the food coloring and ended up with cookies that were a vibrant, almost neon, purple. They tasted great, but they looked like they belonged in a cartoon! Lesson learned: a little gel color goes a very long way for those perfect, dreamy pastels.
I’ve also found that this dough is a fantastic candidate for freezing. After you’ve rolled your swirled dough into balls, you can pop them on a baking sheet, freeze them solid, and then transfer them to a freezer bag. Then, whenever a cookie craving strikes, you can bake them straight from frozen—just add a minute or two to the baking time. It’s like having a little jar of happiness on standby in your freezer, and honestly, isn’t that what we all need?
Your Questions, Answered!
Over the years, I’ve gotten a few repeat questions about these cookies. Here’s the scoop to ensure your baking success!
Q: My cookies spread too much and got flat. What happened?
A: This is usually a butter issue! If your butter was too warm or melted, the cookies will spread. Make sure it’s just softened. Also, double-check that your baking soda and powder are fresh—they lose their potency over time. And finally, make sure you didn’t accidentally forget the flour. (It happens to the best of us!).
Q: Can I use liquid food coloring instead of gel?
A: You can, but use it sparingly! Liquid coloring can add too much moisture to the dough, potentially altering the texture. You’ll also need to use more to achieve a vibrant color, which can sometimes impart a slight aftertaste. Gel or paste colors are highly recommended for the best results.
Q: My cookies are cakey, not chewy. Why?
A> This often comes down to over-measuring the flour. The best way to measure flour is to spoon it into your measuring cup and level it off with a knife. Scooping directly with the cup can pack in too much flour, leading to a denser, cakier cookie. Also, be sure you’re not over-baking them—that soft center is key for chewiness!
Q: I can’t find cotton candy flavoring anywhere. What’s the best substitute?
A> Don’t worry, you still have options! As mentioned, raspberry extract is a fantastic and delicious alternative. You could also use a combination of vanilla and almond extract (¾ tsp vanilla, ¼ tsp almond) for a different, but still wonderfully sweet, flavor profile.
A Quick Note on Nutrition
I’m all about balance, friends! Life is about enjoying that rich, gooey brownie and that crisp, fresh salad. These cookies are a treat, a celebration, a little bite of pure joy. Here’s a general nutritional breakdown per cookie (assuming you get about 20 from the batch), but please remember this is just an estimate. The real value is in the smile they bring!
- Calories: ~150
- Carbohydrates: ~18g
- Fat: ~7g
- Sugar: ~10g
- Protein: ~1g
My philosophy? Savor every single bite. Enjoy one (or two!) with your afternoon coffee, share them with people you love, and soak in the happiness they bring. That’s the kind of nourishment that doesn’t have a calorie count.
Final Sweet Thoughts
And there you have it! My recipe for turning a simple afternoon into a whimsical, sugar-dusted memory. These Cotton Candy Sugar Cookies are more than just flour and sugar; they’re a reminder to find the fun, to embrace a little nostalgia, and to never, ever be too old for the magic of a county fair.
I hope you love baking them as much as I do. I hope your kitchen fills with the sweet, vanilla-cotton candy scent and that you feel that little spark of joy as you twist the pink and blue dough together. Most of all, I hope you share them. Because the very best recipes are the ones that create connections and leave everyone with a full heart and, of course, a happily hungry belly.
Now, go forth and bake something wonderful! And don’t forget to tag me @TastyChow if you share your creations online—I absolutely love seeing your kitchen masterpieces.
With love and a sprinkle of sugar,
Emily