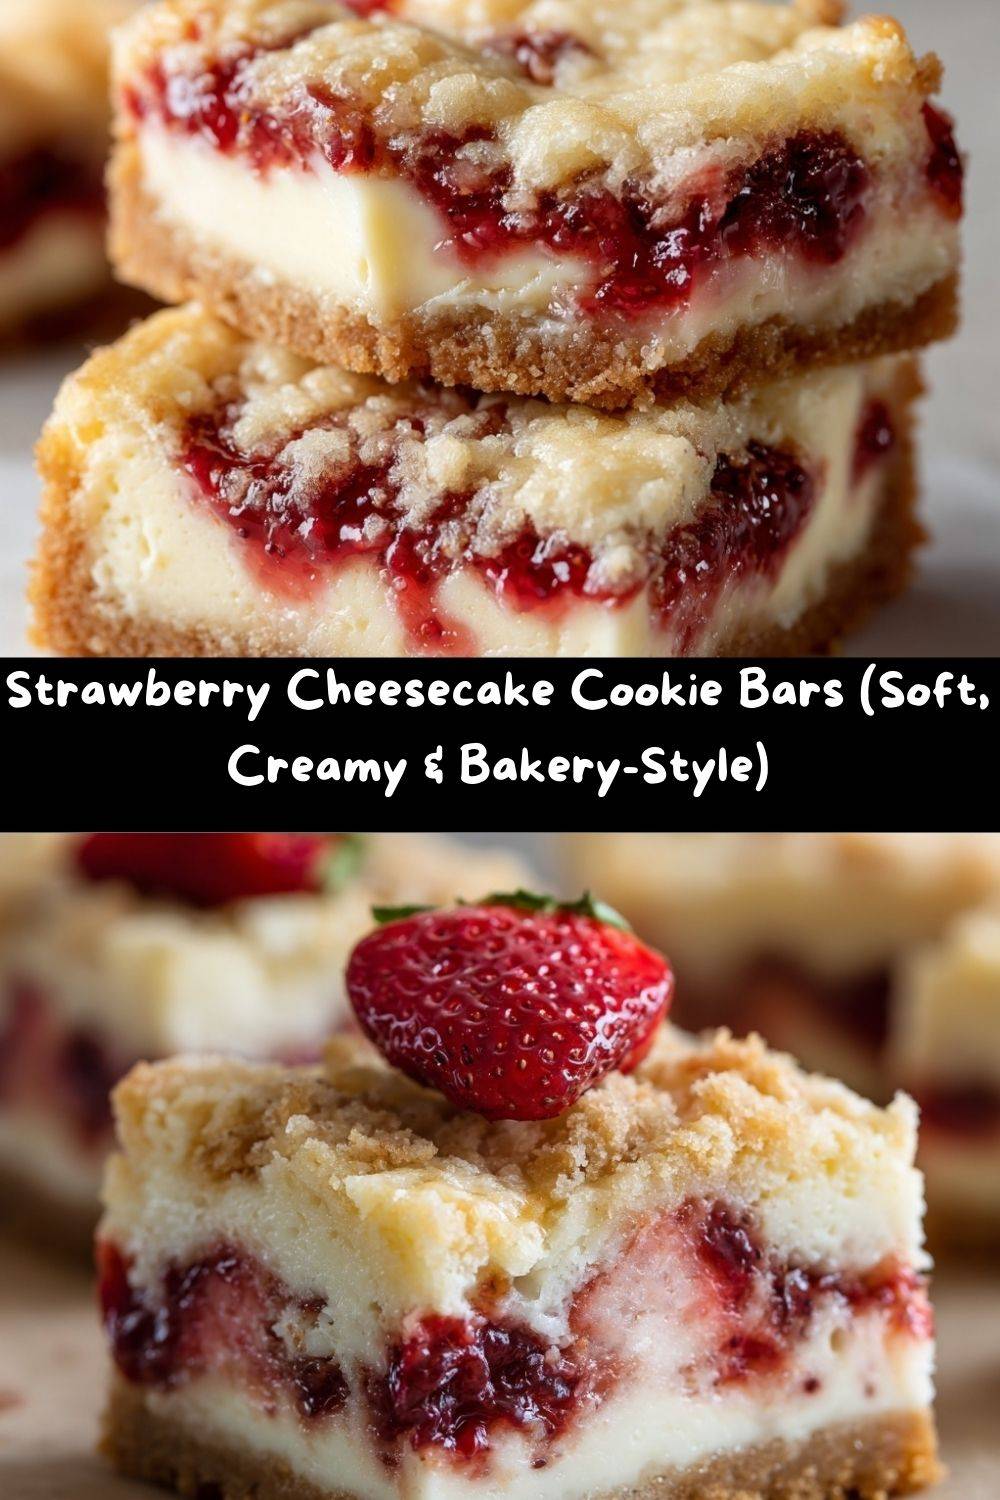
Strawberry Cheesecake Cookie Bars: The Dessert Lovechild of Your Dreams
Hey friends! Chef Emily here, apron slightly dusted with powdered sugar, coming to you from my happily chaotic kitchen. Have you ever stood in front of your fridge, torn between two incredible dessert cravings? One voice whispers, “A thick, creamy slice of cheesecake, please.” The other shouts, “But wait! A warm, chewy, buttery cookie sounds even better!” Well, what if I told you that you don’t have to choose? That you can have the best of both worlds in one pan, with minimal fuss and maximum deliciousness?
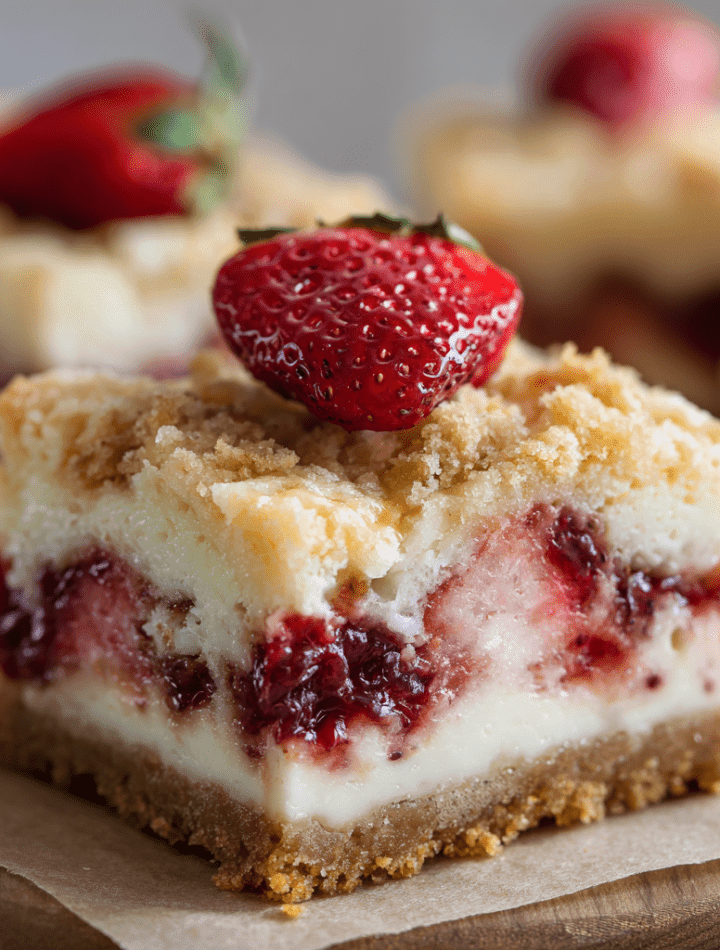
Enter the lovechild of these two dessert icons: Strawberry Cheesecake Cookie Bars. Imagine this: a soft, golden-brown sugar cookie base, like a cozy edible blanket. On top of that, a luscious, tangy-sweet layer of creamy cheesecake. Swirled through it all, pockets of vibrant, gooey strawberry jam that bake into sweet little berry ribbons. And just when you think it can’t get better, a crumble of that same irresistible cookie dough crowns the top, creating the perfect textural contrast.
This isn’t just a dessert; it’s an experience. It’s the perfect shareable treat for a potluck (you’ll be a hero), the star of your next girls’ night in, or the just-because baking project that makes a Tuesday feel special. They’re easier than a full cheesecake (no water bath anxiety here!), more impressive than a simple cookie, and guaranteed to make your kitchen smell like a bakery paradise. So, are you ready to make something magical? Let’s grab our bowls and get mixing!
A Spoonful of Nostalgia & A Dash of Rebellion
This recipe takes me right back to my grandma’s linoleum-floored kitchen. She was a pie and casserole wizard, but her neighbor, Mrs. Henderson, was the undisputed queen of the “bar cookie.” Every church social featured her legendary seven-layer bars, lemon squares, and something she called “Cheesecake Marvels.” As a kid, I’d always sneak an extra one, mesmerized by the layers.
One summer afternoon, while “helping” my grandma bake, I had a flash of inspiration (or what an 8-year-old considers genius). What if we mixed the strawberry jam from her thumbprint cookies into the creamy filling of Mrs. Henderson’s marvels? My grandma, bless her, humored me. The result was… messy. The jam sank, the top was pale, but the flavor was there—that perfect sweet-tart berry creaminess. She wrapped an arm around my shoulders, flour and all, and said, “Not bad for a first try, Em. Cooking is about tasty experiments.” This recipe is that childhood daydream, all grown up and (finally) perfected. It’s my tribute to both my grandma’s patience and Mrs. Henderson’s iconic bars.
Gathering Your Delicious Cast of Characters
Here’s everything you’ll need to create these layered wonders. I’ve added my little chef notes to help you understand the “why” behind each ingredient!
For the Cookie Base & Topping:
- ½ cup (1 stick) unsalted butter, softened – This is NON-NEGOTIABLY softened, friends! Leave it on the counter for an hour. It should indent easily when you press it. This creates the airy, chewy texture we crave. Chef’s Tip: In a pinch? Cut cold butter into small cubes and let it sit for 15 minutes.
- ½ cup packed light brown sugar – The molasses in brown sugar gives our cookie layer moisture, chew, and a warm caramel note. Dark brown sugar works for a deeper flavor.
- ¼ cup granulated sugar – The white sugar helps with spreading and crisp edges. This combo is our cookie texture dream team.
- 1 large egg – Bring it to room temperature too! It binds everything together beautifully.
- 1 teaspoon pure vanilla extract – The perfume of baked goods. Always use real vanilla for the best flavor.
- 1 ¼ cups all-purpose flour – The foundation. Spoon and level it into your measuring cup to avoid a dry, dense base.
- ½ teaspoon baking soda – Our leavening agent for a little lift and tenderness.
- ¼ teaspoon salt – The flavor enhancer! It makes the sweet notes pop and balances the richness.
For the Cheesecake Layer:
- 8 oz (one brick) full-fat cream cheese, softened – Full-fat is key for a creamy, non-grainy filling. SOFTENED (are you sensing a theme?). This ensures a silky-smooth layer without lumps.
- ¼ cup granulated sugar – Just enough to sweeten the tangy cream cheese perfectly.
- 1 large egg yolk – The yolk adds incredible richness and helps set the filling without making it too eggy.
- ½ teaspoon vanilla extract – A little extra in the filling ties all the flavors together.
- ¼ cup strawberry jam or preserves – This is our star swirl! I prefer preserves for those lovely little fruit bits. Chef’s Insight: Give the jam a quick stir in its jar before measuring—it makes swirling so much easier!
Let’s Build Some Layers: Step-by-Step
Follow these steps, and you’ll be a layer bar pro in no time. I’m talking you through each one with my favorite kitchen hacks!
- Prep Like a Pro. Preheat your oven to 350°F (175°C). Line an 8×8-inch baking pan with parchment paper, leaving some overhang on two opposite sides. This is your “sling” for lifting the whole batch out perfectly later—no awkward flipping! Lightly grease any exposed pan sides. Chef’s Hack: A little dab of butter under the parchment corners helps it stick to the pan while you press in the dough.
- Make the Magic Cookie Dough. In a medium bowl, cream together the softened butter, brown sugar, and granulated sugar. Use a hand mixer or stand mixer on medium speed for about 2 minutes, until it’s light, fluffy, and pale in color. This step incorporates air, which is the secret to a tender cookie layer. Scrape down the bowl. Beat in the egg and vanilla until fully combined and smooth.
- Bring It All Together. In a separate small bowl, whisk together the flour, baking soda, and salt. Add this dry mixture to the wet ingredients. Mix on low speed just until no dry flour remains. The dough will be soft and slightly sticky. Perfect! Resist the urge to overmix.
- Create the Base Layer. This is the fun, hands-in part! Take about two-thirds of the cookie dough and dollop it into the prepared pan. Using lightly floured or damp fingers, press it into a firm, even layer across the entire bottom. Getting it even is the key to a uniform bake.
- Whip Up the Creamy Dream. No need to wash the mixer bowl! In the same bowl (a little cookie dough residue is fine), beat the softened cream cheese on medium until perfectly smooth, about 1 minute. Add the ¼ cup sugar, egg yolk, and vanilla. Beat again until the mixture is creamy, glossy, and lump-free. Scrape the bowl once more to ensure everything is incorporated.
- Layer & Swirl. Pour and spread the cheesecake filling evenly over the cookie base. Now, drop small spoonfuls of the strawberry jam randomly over the cream cheese layer. Take a thin knife or a toothpick and gently swirl the jam into the filling. Don’t overdo it! We want pretty ribbons, not a pink muddle.
- Add the Finishing Touch. Take the remaining one-third of cookie dough and crumble it in small clumps over the entire top. Don’t worry about covering every single millimeter—the gaps let the cheesecake peek through and look gorgeous.
- Bake to Golden Perfection. Bake for 30-35 minutes. The top should be golden brown, the crumble will look set, and the edges will be slightly puffed. The center might have a very slight jiggle (like a cheesecake), but it shouldn’t be liquidy. Big Tip: Ovens vary! Start checking at 28 minutes.
- The Most Important Step: PATIENCE. Remove the pan and let it cool completely on a wire rack. I mean it—completely. Then, for the cleanest slices, cover and refrigerate for at least 2 hours, or ideally overnight. This sets the cheesecake layer firmly so you get those beautiful, defined layers when you cut.
- Slice & Savor. Use the parchment paper sling to lift the entire square out of the pan. Place it on a cutting board and use a sharp knife to slice into 16 bars. For super-clean cuts, wipe the knife clean between each slice.
How to Serve These Show-Stopping Bars
Presentation is part of the joy! Here’s how to make these bars look as incredible as they taste:
- The Classic: Simply place a bar on a cute plate or napkin. That’s all it needs!
- Fancy It Up: Add a tiny dollop of freshly whipped cream and a single fresh strawberry slice on top. A light dusting of powdered sugar just before serving looks like a snowfall of sweetness.
- The A La Mode Dream: Warm a bar slightly in the microwave for 10 seconds and serve it with a scoop of vanilla bean ice cream. The contrast of warm, cool, creamy, and chewy is next-level.
- For a Crowd: Arrange all the bars on a beautiful cake stand or serving platter. They transport like a dream, so they’re the perfect portable dessert.
- Storage Smarts: Keep leftover bars in an airtight container in the fridge for up to 5 days. The flavors actually get better on day two! You can also freeze them (individually wrapped) for up to 2 months.
Make It Your Own: Delicious Twists & Swaps
Love the blueprint but want to play? Here are some of my favorite ways to riff on this recipe:
- Berry Bonanza: Swap the strawberry jam for raspberry, blackberry, or mixed berry. A swirl of lemon curd is also a spectacularly bright option!
- Chocolate Lover’s Delight: Add ½ cup of mini chocolate chips to the cookie dough. For the swirl, use a chocolate hazelnut spread instead of jam. You’re welcome.
- Citrus Sunshine: Add 1 teaspoon of lemon or orange zest to the cookie dough. For the swirl, use a high-quality orange marmalade.
- “Lunchbox” Friendly: For a nut-free option perfect for schools, the recipe is already perfect as-is. Just ensure your jam is from a nut-free facility if that’s a concern.
- Graham Cracker Twist: Replace half of the all-purpose flour in the cookie base with finely crushed graham cracker crumbs for a flavor that screams “cheesecake!”
From My Kitchen to Yours: Chef Emily’s Notes
This recipe has been my trusty potluck sidekick for years, and it’s evolved with every bake. I’ve learned that using a really good quality strawberry preserves with visible fruit bits makes the swirls truly stunning. One time, I tried using frozen strawberry puree I’d reduced down… and added too much. Let’s just say the bars were delicious but a vibrant, dripping pink! It was a mess, but a tasty one. The beauty of this recipe is in its flexibility and foolproof nature. It’s a forgiving friend in the kitchen. Don’t stress about making the swirls “perfect”—the homemade, rustic look is what makes them so full of love.
Your Questions, Answered!
Q: My cheesecake layer cracked a little on top. What did I do wrong?
A: Don’t worry! This is usually due to a slight overbake or the oven temperature running hot. It doesn’t affect the taste one bit. To prevent it, make sure you’re not overmixing the cheesecake batter (which incorporates too much air) and pull the bars out as soon as the center is just set with that slight jiggle.
Q: Can I use frozen or fresh strawberries instead of jam?
A: Jam or preserves are best here because they’re thick and concentrated. Fresh or frozen berries release too much water and can make the filling soggy. If you want a fresh berry flavor, try making a quick “compote”: cook down ¾ cup chopped strawberries with 1 tbsp sugar until thick, then let it cool before swirling.
Q: My bottom cookie layer is hard to press. Any tips?
A> If your dough is too stiff, it might mean your butter wasn’t quite soft enough or you slightly over-measured the flour. A great trick is to place a small sheet of plastic wrap or parchment directly on the dough before you press. It keeps your fingers from sticking and helps you smooth it out evenly.
Q: Can I make these gluten-free or dairy-free?
A> Absolutely! Use a 1:1 gluten-free all-purpose flour blend for the cookie base. For dairy-free, use plant-based butter and a vegan cream cheese block (the kind that comes in a tub is often too soft). The results are fantastic!
Nutritional Information*
*Please note: This is an estimate for one bar (based on 16 servings) provided for informational purposes. Values may vary based on specific ingredients used.
Per Bar (1 of 16):
Calories: ~190–220
Fat: ~10–12g
Carbohydrates: ~24–28g
Sugar: ~15–18g
Protein: ~2–3g
Fiber: ~0.5–1g
These bars are definitely a dessert treat — buttery, creamy, jammy, and rich in all the ways that make dessert… well, dessert. The cookie layer brings those comforting carbs and buttery flavor, while the cheesecake filling adds satisfying creaminess without being too heavy. The strawberry swirl gives a pop of fruity brightness that balances the richness beautifully.
If you’re looking to lighten things up a bit, here are a few simple tweaks you can make:
– Use reduced-fat cream cheese (the texture stays surprisingly great!)
– Reduce the crumble topping slightly
– Use a lower-sugar jam or fruit spread
– Cut the bars into 20 mini pieces instead of 16 for smaller servings
But honestly? These bars shine exactly as they are — nostalgic, fun, and full of flavor. The goal here isn’t to count every gram, but to savor every bite. Enjoy!