Say Hello to Your New Lunchtime BFF: High-Protein Chicken Nugget Boxes
Hey friend! Let’s talk about that 3 PM feeling. You know the one—your stomach starts rumbling, your brain gets foggy, and your willpower starts doing a slow, sad slide toward the nearest drive-thru window. I’ve been there, apron strings and all. We all crave that crispy, dippable, totally satisfying joy that only a nugget can bring. But what if I told you we could have it all? The crunch, the flavor, the fun… and a powerhouse of protein that keeps you fueled and fabulous for hours?
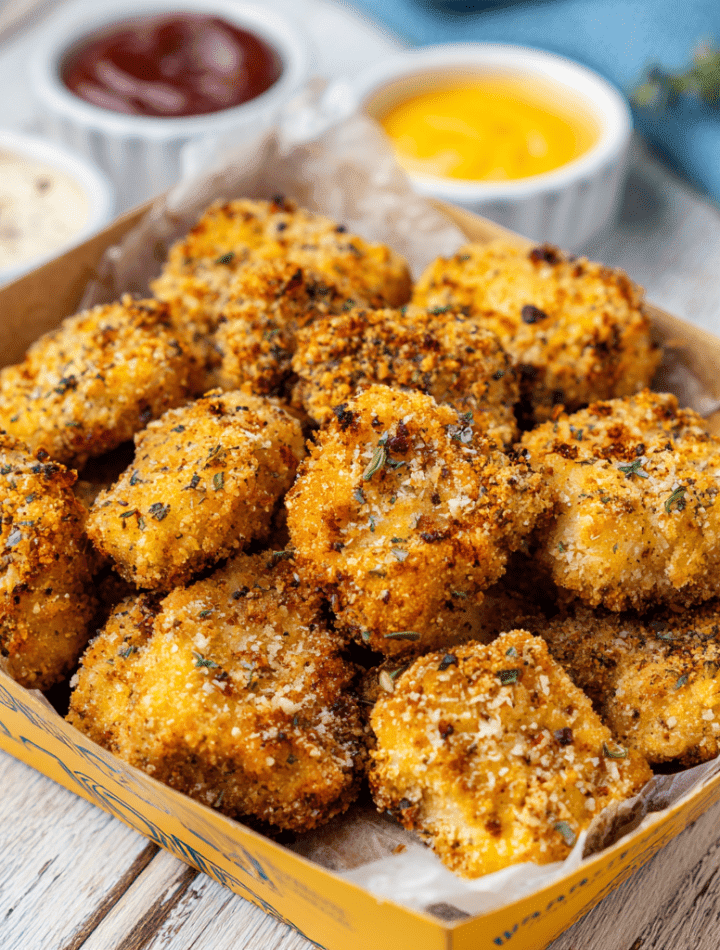
Welcome to my kitchen-tested, family-approved, meal-prep-magic solution: High-Protein Chicken Nugget Boxes. This isn’t just a recipe; it’s your ticket to winning the week. We’re taking juicy chicken breast, giving it a seriously crunchy, flavorful coat, and air-frying it to golden perfection. Each serving packs a whopping 40+ grams of protein to keep you full and focused. Best part? They reheat like a dream, making them the ultimate grab-and-go lunch or “I-don’t-feel-like-cooking” dinner hero.
So, tie on your favorite apron (the messy one is always the best), and let’s transform a childhood favorite into a grown-up, goal-crushing powerhouse meal. Get ready to fall in love with your lunchbox all over again!

From Freezer Aisle to Kitchen Hero: My Nugget Journey
My love affair with chicken nuggets started, as many great food stories do, in my grandma’s kitchen. But hers weren’t from a bag. She’d take leftover roasted chicken, chop it fine, mix it with breadcrumbs and herbs, and form them into little patties she’d pan-fry in a whisper of butter. To my six-year-old self, they were pure magic—especially when dunked in her homemade honey mustard.
Fast forward to culinary school and my first “adult” kitchen. Life was busy, budgets were tight, and I’ll admit, the frozen nugget bag had a permanent spot in my freezer. But I always felt a little… blah after eating them. Where was the satisfaction? The real flavor? It hit me: I needed to recreate that feeling of my grandma’s kitchen—the joy, the nourishment, the love—but in a way that fit my fast-paced, health-conscious life. Thus began the Great Nugget Experiment of 2021 (a title I gave it to make it sound more official). After more batches than I can count—some too dry, some not crunchy enough—I landed on this formula. It’s the perfect bridge between nostalgic comfort and the protein-packed, energy-sustaining food my body needs now. Every time I make them, I think of my grandma, and that’s the best seasoning of all.
Gathering Your Nugget-Making Squad: The Ingredients
Simple ingredients, big results. That’s my motto. Here’s everything you’ll need to build your crispy, high-protein wonders. Don’t just toss them in your cart—let’s chat about why each one matters and how you can swap things around.
- 1.5 lbs Boneless, Skinless Chicken Breast: Our star player! Look for plump, even-sized breasts for consistent cooking. Chef’s Insight: For ultra-tender nuggets, give the chicken a quick 10-minute brine in salt water before cutting, but it’s totally optional. Swap: Chicken thighs work beautifully for extra juiciness (just adjust cooking time slightly).
- 1/2 cup Plain Greek Yogurt (or 1 large egg): This is our flavor-glue! Greek yogurt adds a tangy tenderness and a sneaky extra protein boost. Chef’s Insight: The yogurt creates a slightly thicker coating than egg, which helps the crumbs stick like a dream. Swap: A beaten egg is the classic binder and works perfectly.
- 3/4 cup Panko Breadcrumbs or Crushed High-Protein Chips: The CRUNCH factor. Panko gives a lighter, airier crisp. Chef’s Secret: For a major protein upgrade and insane flavor, crush up protein chips or pork rinds! It’s a game-changer.
- 1/4 cup Grated Parmesan Cheese (optional but highly recommended): The flavor bomb. Parmesan adds a savory, umami depth that makes these taste gourmet. Swap: Nutritional yeast for a dairy-free cheesy vibe.
- 1 tsp Garlic Powder, 1/2 tsp Paprika, Salt & Pepper: The supporting cast. Garlic powder for punch, paprika for warmth and color. Don’t be shy with the seasoning—this is where the magic happens!
Let’s Get Crispy: Your Step-by-Step Roadmap
Ready to make some magic? Follow these steps, and you’ll be a nugget pro in no time. I’ve packed each one with my best tips to guarantee success.
- Prep & Cut. Pat your chicken breasts completely dry with paper towels. This is CRUCIAL for getting the coating to stick. Cut them into even, bite-sized chunks—about 1 to 1.5 inches. Consistency is key here so they all cook at the same rate. Pro Tip: Slightly freezing the chicken for 20 minutes makes it easier to cut cleanly!
- Create Your Crunch Station. Get out two shallow bowls. In the first, add your Greek yogurt (or beaten egg). In the second, mix the panko, Parmesan, garlic powder, paprika, salt, and pepper. Give it a good stir so every bite is perfectly seasoned. Chef’s Hack: For extra coverage, toss the dry mix in a gallon zip-top bag. You can shake the nuggets in batches—less mess, more fun!
- Coat Like a Boss. Toss all your chicken chunks into the bowl with the yogurt. Use your hands (the best tools you have!) to make sure every nook and cranny is coated. Then, one by one, dredge them in the panko mixture, pressing gently to adhere a nice, even layer. Place them on a plate or baking sheet. Pro Tip: Use one hand for the wet step and one for the dry step to avoid “club finger” (a dreaded breadcrumb-caked thumb).
- Air-Fry to Perfection. Preheat your air fryer to 400°F (200°C). Arrange the nuggets in a single layer with a little space between them for optimal airflow. Cook for 10-12 minutes, flipping them halfway through with tongs. They’re done when they’re deeply golden brown and the internal temperature reaches 165°F. No Air Fryer? See the FAQ below for oven and pan-fry instructions!
- Rest & Serve. Let the nuggets cool on a wire rack for just 5 minutes after cooking. This helps the coating stay ultra-crispy instead of getting steamy. Then, it’s time to dive in!
Building the Ultimate Meal Prep Box
This is where the “box” part comes in, and it’s my favorite step! Transforming these nuggets from a snack into a satisfying meal is all about the sides. Think color, texture, and flavor balance.
Grab your meal prep containers (these are my favorite part—so satisfying!). Start with a base of crisp romaine or spinach. Add a hearty portion of your warm nuggets. Now, for the fun: create little compartments or use small sauce cups for your dippers. I love a trio of Greek yogurt ranch (just mix Greek yogurt with ranch seasoning!), sugar-free BBQ sauce, and spicy sriracha mayo. For sides, add crunchy veggie sticks (carrots, cucumbers, bell peppers), some roasted sweet potato cubes, or a handful of cherry tomatoes. The contrast of the hot, crispy nuggets with the cool, crunchy veggies is absolutely divine. Pack it up, and you’ve got a lunch that’s anything but boring!
Mix It Up! 5 Fun Twists on the Classic
Once you’ve mastered the base recipe, the world is your nugget oyster! Here are some of my favorite ways to play with flavors.
- Buffalo Blue Cheese: Toss the cooked nuggets in a light coating of Buffalo sauce. Serve with a side of chunky blue cheese dressing and celery sticks for the full experience.
- Everything Bagel: Replace the paprika and garlic powder with 2 tablespoons of Everything Bagel seasoning in the breadcrumb mix. Unbelievable flavor with every bite!
- Keto/Carnivore Style: Use crushed pork rinds instead of panko, and omit the Parmesan if your pork rinds are already cheesy. The coating is incredibly crunchy and 100% grain-free.
- Extra-Herbaceous: Add 1 tablespoon each of dried parsley and dill to the breadcrumb mixture. It tastes fresh, bright, and super gourmet.
- “Sweet & Smoky” BBQ: Add 1 teaspoon of smoked paprika and 1/2 teaspoon of onion powder to the dry mix. Serve with a tangy, sugar-free BBQ sauce for dipping.
Chef Emily’s Kitchen Confessions & Notes
This recipe is a living, breathing thing in my house. I’ve made it for my nieces (who declared them “better than the restaurant”), for my gym buddies looking for post-workout fuel, and for myself on more lazy Sundays than I can count. One time, I was so eager to try a new chip flavor for the coating that I didn’t crush them finely enough—let’s just say we had “chicken with chip shards” instead of nuggets! Lesson learned: a few pulses in the food processor or a good roll with a wine bottle does the trick.
The beauty of this recipe is its flexibility. It has evolved from a strict “must use egg and panko” formula to a “use what you love and what loves you back” guideline. Don’t have an air fryer? No sweat. Want to bake a giant batch? Go for it. This recipe is here to serve you, not the other way around. Make it your own!
Your Nugget Questions, Answered!
Q: My coating is falling off! What did I do wrong?
A: The most common culprit is moisture. Make sure your chicken is pat-dry before you start. Also, ensure your coating isn’t too thick—a gentle press is all you need. And that one-wet-hand, one-dry-hand method is a lifesaver!
Q: Can I bake these instead of using an air fryer?
A: Absolutely! Preheat your oven to 425°F (220°C). Place the coated nuggets on a wire rack set over a baking sheet (this promotes airflow for crispiness on all sides). Spray lightly with oil and bake for 15-18 minutes, flipping halfway, until golden and cooked through.
Q: How do I store and reheat these for meal prep?
A: Let them cool completely before storing in an airtight container in the fridge for up to 4 days. To reheat, pop them back in the air fryer at 375°F for 3-4 minutes or in a toaster oven. The microwave will work in a pinch but will soften the coating.
Q: Can I make these gluten-free or dairy-free?
A> For sure! Use certified gluten-free panko or crushed gluten-free chips/cereal. For dairy-free, simply omit the Parmesan or use a vegan Parmesan alternative. The recipe is super adaptable.
Fueling Your Body Right: The Nutritional Lowdown
Let’s talk numbers, but let’s keep it simple. One serving of these nuggets (about 6 oz of cooked chicken) is designed to be a protein powerhouse. Using the base recipe with chicken breast, Greek yogurt, panko, and Parmesan, you’re looking at approximately 420 calories, 42g of protein, 10g of carbs, and 22g of fat. Remember, these numbers can shift based on your exact ingredients (like using thighs or different coatings).
The high protein content is the star here. Protein is essential for building and repairing muscles, keeping you feeling full and satisfied, and supporting a healthy metabolism. By choosing a lean protein like chicken breast and a smart coating, you’re getting a massively satisfying meal that supports your goals without sacrificing flavor. It’s a win-win on a plate!
Your New Go-To Recipe Awaits
And there you have it, my friend—your complete guide to making High-Protein Chicken Nugget Boxes that are anything but basic. This recipe is a celebration of the fact that eating well doesn’t have to mean eating boring. It’s about taking the foods that bring us joy and giving them a nourishing, delicious twist that makes us feel amazing.
I hope you’ll whip up a batch, pack them into your favorite containers with all the dippers and sides, and feel that little surge of pride knowing you just made your week a whole lot tastier (and easier!). If you do, I’d love to hear about it. Tag me on social @TastyChow or leave a comment on the blog—nothing makes my day more than seeing your kitchen creations.
Now go forth, get crispy, and chow down!
With love and a full plate,
Emily 🧡