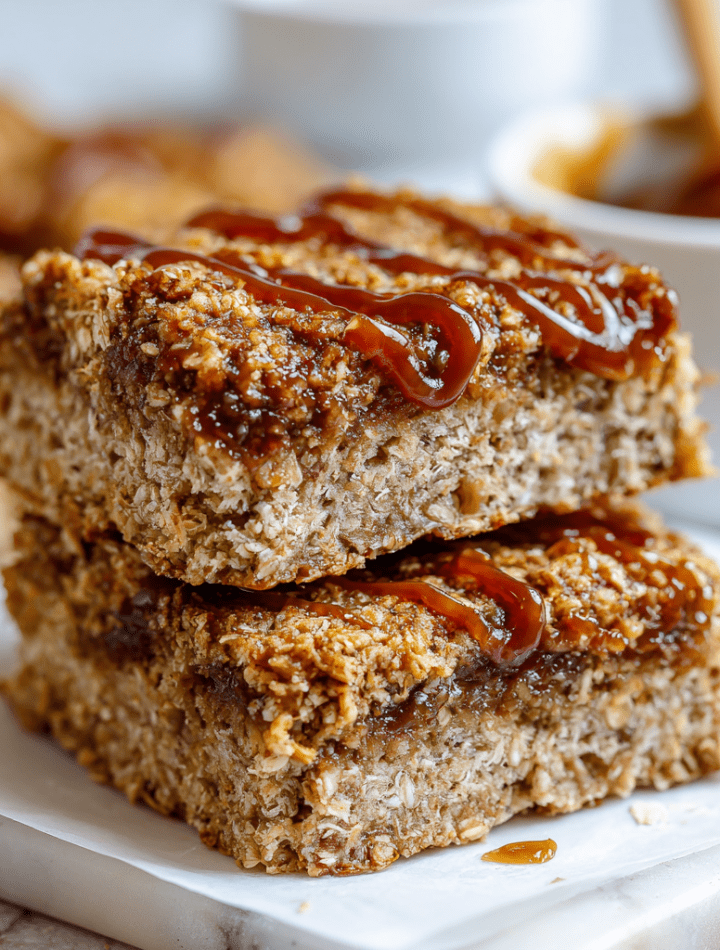
Healthy Banana Oatmeal Bars: Your New Favorite Wholesome Snack
Hey there, friend! Let’s talk about that universal kitchen dilemma: you’re buzzing with energy one minute, and the next, you’re hit with a snack attack that threatens to derail your entire day. We’ve all been there, rummaging through cupboards, hoping for a miracle. Well, my mission today is to arm you with that miracle, and it comes in the form of these unbelievably simple, downright delicious Healthy Banana Oatmeal Bars.
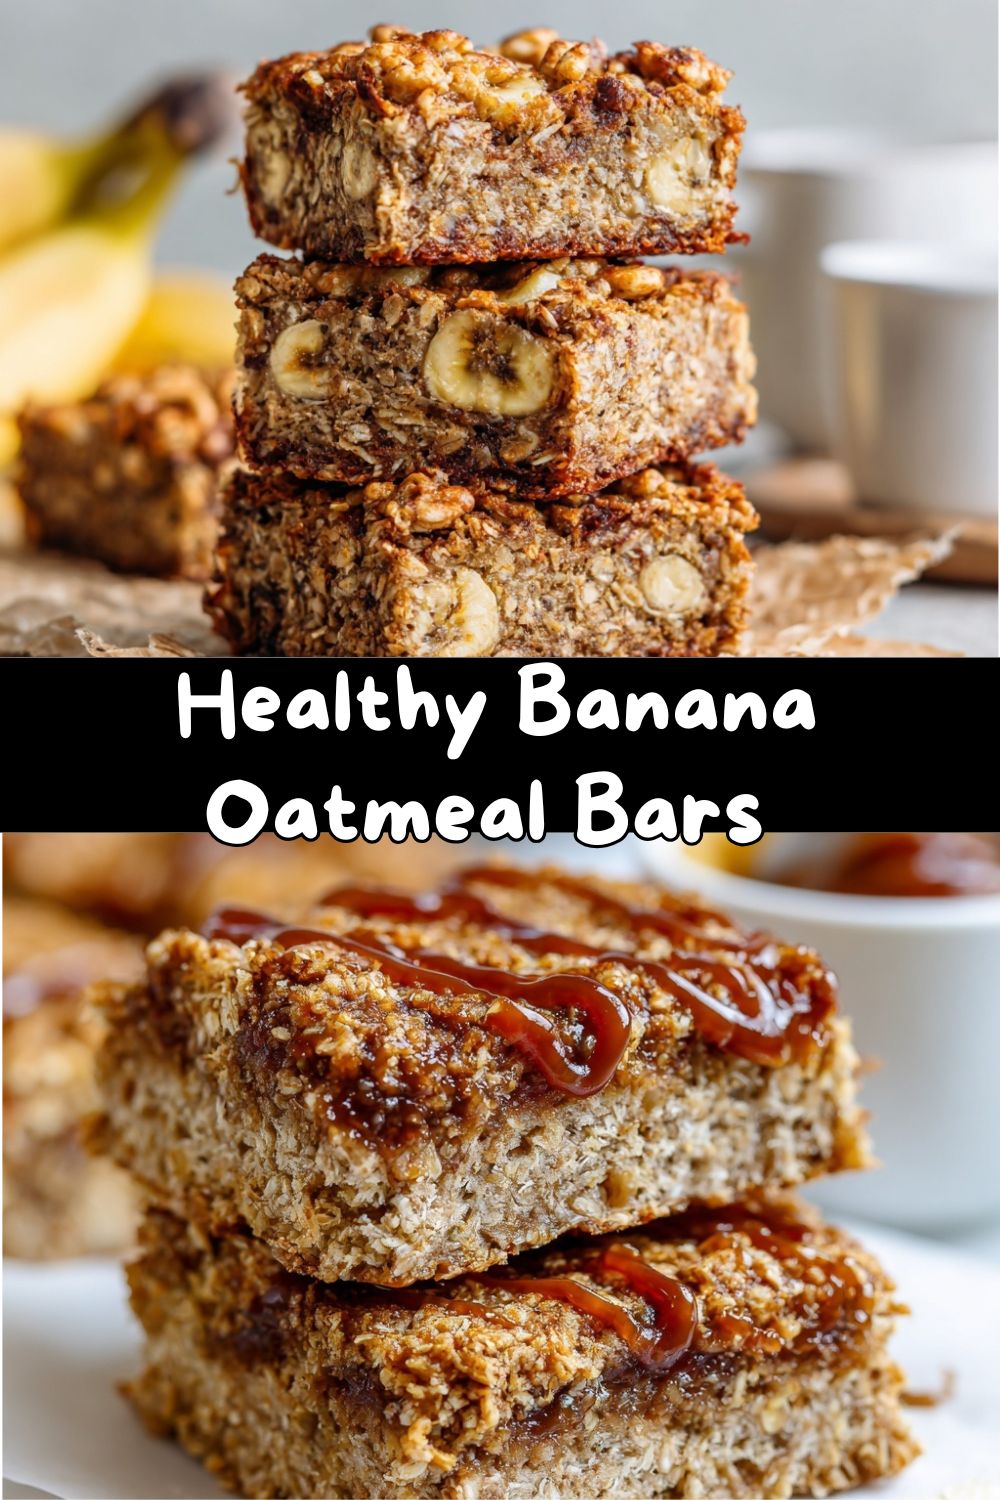
Imagine this: the cozy, comforting aroma of baked bananas and cinnamon wafting through your kitchen. A tray of golden, soft-baked bars waiting to be sliced. A snack that’s naturally sweet, seriously satisfying, and made with ingredients you can feel good about. No refined sugar, no mysterious additives—just real, wholesome food that tastes like a hug. Whether you’re sprinting out the door for school drop-off, need a pre-gym boost, or just want a sweet treat without the guilt, these bars are your answer. They’re the hero of my snack drawer, and I have a feeling they’re about to become the hero of yours, too. So, tie on that apron (the messy one is always the best), and let’s make something delicious together!
The Story Behind the Bars: More Than Just Bananas
This recipe, like so many of my favorites, has roots in my grandma’s kitchen. She had a magical, almost psychic ability to know when a banana was at its peak. Not yellow, not just speckled, but deeply freckled and so sweet it practically sang. “Emily,” she’d say, waving one at me, “this isn’t past its prime. This is ready for its greatest role.” And for her, that greatest role was often her famous banana bread, which filled her tiny kitchen with the most incredible scent.
Years later, as a busy culinary student juggling classes and part-time work, I found myself with a bowl of those same super-ripe bananas. I craved that comforting flavor but needed something even easier, more portable—a true grab-and-go fuel. I started playing with oats, nut butter, and those beautiful brown bananas, aiming for something between a breakfast cookie and a soft granola bar. The first batch was a touch crumbly, the second a bit too dense, but the third? The third was pure magic. It tasted like my grandma’s love, wrapped up in a format that fit my crazy schedule. Every time I make these bars, I think of her, and I’m reminded that the best recipes aren’t just about feeding our bodies; they’re about connecting us to sweet memories and fueling our busy, beautiful lives.
Gather Your Ingredients: Simple Pantry Heroes
Here’s the beautiful part: you probably have most of this in your kitchen right now. Let’s break it down. This recipe is a master of disguise—it looks humble, but each ingredient plays a starring role.
- 2 ripe bananas, mashed – This is our natural sweetener and binder! The riper (blacker!) the banana, the sweeter and more fragrant your bars will be. Chef’s Tip: No ripe bananas? Speed up the process by baking whole, unpeeled bananas on a lined tray at 300°F for 15-20 minutes until the skins turn black.
- 1½ cups rolled oats (old-fashioned) – The hearty base. Rolled oats give the perfect chewy texture. Substitution: Use certified gluten-free oats if needed. Avoid quick oats—they can make the bars mushy.
- ¼ cup nut butter – Adds healthy fats, protein, and rich flavor. I adore creamy peanut butter, but almond butter, cashew butter, or even sunflower seed butter for a nut-free option work beautifully.
- ¼ cup pure maple syrup or honey – A little extra natural sweetness to complement the bananas. I love the caramel notes of maple syrup. Insight: If your bananas are super ripe, you can reduce this to 2 tablespoons.
- ½ teaspoon cinnamon – The warm, cozy spice that makes everything taste like home. Don’t skip it!
- ½ teaspoon pure vanilla extract – The flavor enhancer. It deepens all the other sweet notes.
- 1 teaspoon baking powder – Our little lift agent! It gives the bars a perfect, cakey softness instead of being a dense brick.
- A generous pinch of salt – Crucial! It balances the sweetness and makes every flavor pop.
Optional Add-Ins (Pick your passion!):
- ¼ cup chopped nuts or seeds – Walnuts, pecans, or pumpkin seeds add fabulous crunch.
- 2 tablespoons mini chocolate chips – Because a little chocolate makes everything better. I use dark chocolate chips.
- ¼ cup shredded coconut – Adds a tropical, chewy texture.
Let’s Make Them! Step-by-Step with Chef Emily
Ready? This is where the fun happens. We’re about 10 minutes of mixing away from snack heaven.
- Preheat & Prep: Fire up your oven to 350°F (175°C). This is our first step because ovens are like grumpy cats—they like to take their time warming up. While it heats, line an 8×8 inch square baking pan with parchment paper, letting the edges hang over the sides. This “sling” is my favorite hack for lifting the entire batch out perfectly for easy slicing. No parchment? A light spray of cooking oil works too.
- Mash & Mix the Wet Crew: In a large mixing bowl, peel and mash those gorgeous ripe bananas with a fork until mostly smooth. A few small lumps are totally fine—they add character! To the banana mush, add the nut butter, maple syrup, and vanilla extract. Stir, stir, stir with a sturdy spatula until it’s one beautifully gloppy, cohesive mixture. Smell it? That’s the scent of success already.
- Bring in the Dry Team: To the same bowl (yay for less dishes!), add the rolled oats, cinnamon, baking powder, and that all-important pinch of salt. If you’re using any add-ins like nuts or chocolate chips, toss them in now. Fold everything together until every oat is lovingly coated in the banana mixture. The dough will be thick, sticky, and spoonable—not a pourable batter. That’s exactly what we want!
- Pan & Press: Scrape the mixture into your prepared pan. Now, take your spatula or even the bottom of a lightly dampened glass and press, press, press the mixture into an even, compact layer. Getting it nice and tight here is the secret to bars that hold together later. Smooth the top like you’re frosting a tiny cake.
- Bake to Golden Perfection: Slide the pan into the middle of your preheated oven. Bake for 20-25 minutes. You’re looking for golden edges and a top that looks set and dry to the touch. A toothpick inserted near the center should come out clean or with just a few moist crumbs. Chef’s Warning: Don’t overbake! They firm up a ton as they cool. Overbaking=dry bars.
- The Crucial Cool Down: This is the hardest part, I swear! Let the pan cool completely on a wire rack. I mean it—completely. If you slice them warm, they’ll be crumbly. Letting them cool allows the structure to set, giving you those perfect, clean-cut bars. I sometimes pop the whole pan in the fridge for 30 minutes to speed up the process if I’m impatient.
- Slice & Celebrate: Once cool, use the parchment paper sling to lift the whole slab onto a cutting board. Slice into 9 even squares (or 12 smaller rectangles). Admire your handiwork!
How to Serve & Savor Your Masterpiece
Okay, you’ve resisted slicing them warm (proud of you!), and now you have a perfect batch of bars. Let’s talk serving!
These bars are the ultimate multi-tasker. For a quick breakfast, grab one with a piece of fruit or a hard-boiled egg. Need a post-workout refuel? Pair a bar with a glass of milk or a protein shake. They’re the ideal lunchbox stuffer or after-school snack.
Want to fancy them up? Warm a bar for 10 seconds in the microwave and top it with a dollop of Greek yogurt and a drizzle of extra nut butter. For a dessert vibe, add a small scoop of vanilla ice cream. Honestly, they’re fantastic straight from the fridge with a hot cup of coffee—the contrast in temperatures is so satisfying!
Store them in an airtight container at room temperature for 2-3 days, or in the fridge for up to a week. They also freeze like a dream for up to 3 months—just wrap individually and grab one whenever the craving strikes.
Mix It Up! 5 Delicious Twists on the Classic
Once you’ve mastered the base recipe, the kitchen playground opens up! Here are some of my favorite riffs:
- Apple Pie Bars: Replace one banana with ½ cup of unsweetened applesauce. Add ½ teaspoon of apple pie spice along with the cinnamon, and fold in ½ cup of finely chopped dried apples.
- Tropical Bliss Bars: Use coconut butter as your nut butter, fold in the ¼ cup shredded coconut, and add 2 tablespoons of chopped dried pineapple or mango.
- Double Chocolate Chip: Because why not? Add 2 tablespoons of cocoa powder to the dry ingredients, and use ¼ cup of dark chocolate chips. It’s like a healthy brownie!
- Protein Powerhouse: Stir 2 scoops of your favorite vanilla or chocolate protein powder into the wet ingredients. You may need to add a tablespoon or two of milk (any kind) if the batter gets too thick.
- Berry Burst: Gently fold in ½ cup of frozen blueberries or raspberries (don’t thaw!) at the very end. They’ll create little juicy pockets of flavor.
Chef Emily’s Notebook: Extra Bits of Love
This recipe has been my trusty sidekick for years, and it’s evolved with me. My first ever batch, I was so nervous about them being dry that I underbaked them slightly. They were glorious, gooey messes that we ate with forks—and you know what? They were still delicious. Don’t stress about perfection.
I’ve made these in hotel room microwaves (using a microwave-safe dish, checking in 60-second intervals), in a toaster oven when my big oven died, and even once on a camping trip mixed in a zip-top bag and “baked” in a skillet over the fire (truly an adventure!). The point is, they’re forgiving. They’ve fueled me through recipe testing marathons, road trips, and lazy Sundays alike. I hope they become just as versatile and beloved in your home. Remember, the best ingredient is always the joy you stir into the bowl.
Your Questions, Answered!
Q: My bars turned out crumbly and fell apart! What happened?
A: The most common culprits are not packing the mixture firmly enough into the pan, slicing before they’re completely cool, or needing a touch more binder. Next time, really press that mixture down with conviction. Also, ensure your bananas are large—if they’re on the small side, add an extra half. A tablespoon of ground flaxseed mixed with 2 tablespoons of water (a “flax egg”) can also help bind.
Q: Can I make these vegan?
A> Absolutely! Just make sure to use maple syrup (not honey) and choose a vegan nut butter. Check that your chocolate chips are dairy-free if using.
Q: Why shouldn’t I use quick oats?
A> Rolled oats give structure and that perfect chewy, hearty texture. Quick oats are cut smaller and absorb moisture differently, which can lead to a gummy or overly soft bar. Stick with old-fashioned rolled oats for the best results.
Q: Can I double the recipe?
A> Yes! Double all ingredients and bake in a 9×13 inch pan. The baking time might need to increase by 5-10 minutes—just keep an eye on the golden edges.
Nutritional Highlights (A Quick Glance)
While I’m all about flavor first, it feels great to know what’s fueling your body. This info is for one bar (based on 9 bars from the base recipe with no add-ins, using peanut butter and maple syrup).
These bars are a wonderful source of sustained energy. The complex carbohydrates and fiber from the oats and banana help keep blood sugar levels stable, preventing that mid-morning crash. The healthy fats and protein from the nut butter add staying power, making you feel satisfied longer. They’re naturally lower in added sugars compared to store-bought bars because we’re leaning on the sweetness of fruit. Remember, these numbers are a guide—adding chocolate chips or nuts will change them slightly. Most importantly, you’re eating real, whole foods. That’s a win in my book!
Final Thoughts from My Kitchen to Yours
And there you have it! Your new secret weapon for hungry moments, wrapped up in one simple, no-fuss recipe. These Healthy Banana Oatmeal Bars prove that eating well doesn’t have to be complicated, expensive, or boring. It can be soft, sweet, chewy, and deeply satisfying.
I hope you’ll make them, share them, and maybe even get creative with your own add-ins. Tag me on social if you do—nothing makes me happier than seeing your kitchen creations! Now, go enjoy that well-earned bar with a proud smile. You made that! Until next time, keep chasing flavor and feeding your joy.
With love and a full belly,
Emily 🍌