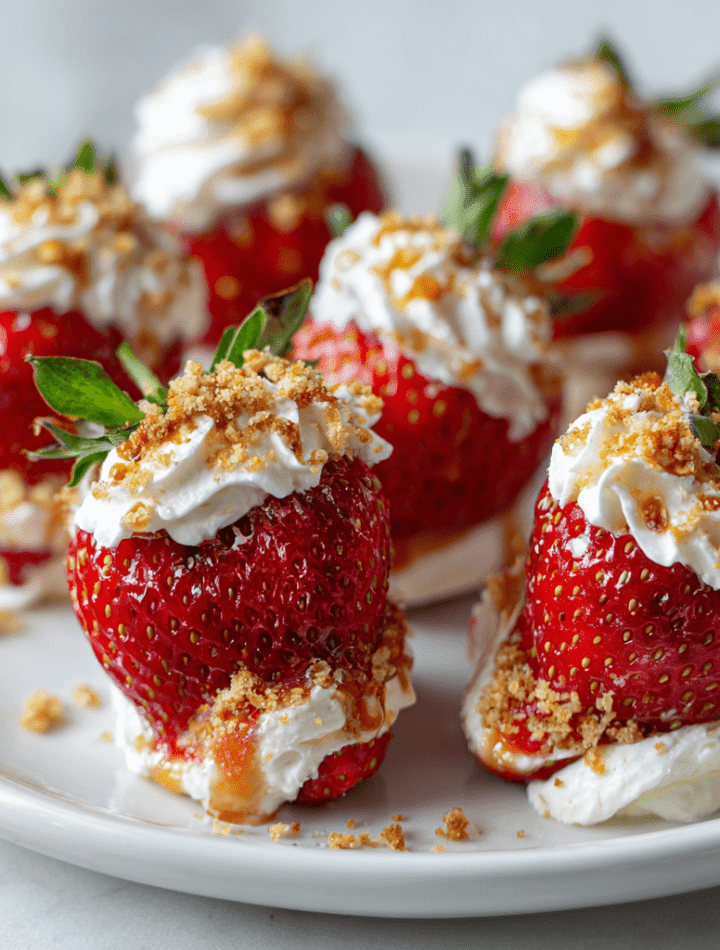
Cheesecake-Stuffed Strawberries: Your New Favorite Bite-Sized Treat
Enter my obsession of the season: Cheesecake-Stuffed Strawberries. These little ruby-red jewels are everything I love in a recipe: stunningly simple, deceptively impressive, and bursting with fresh, happy flavor. Imagine the juiciest, sweetest strawberry you can find, hollowed out and filled with a cloud of creamy, tangy, vanilla-kissed cheesecake filling. It’s a flavor explosion in one perfect bite.
This isn’t just a dessert; it’s a snack, an appetizer, a party trick, and a life-saver when you need a sweet fix that doesn’t derail your day. They’re naturally gluten-free, require zero baking, and come together faster than you can preheat an oven. Whether you’re prepping for a baby shower, a picnic, or just treating yourself on a sunny afternoon, these stuffed strawberries are about to become your go-to. So, grab your favorite mixing bowl and let’s make something delicious that’s as fun to make as it is to eat!
A Berry Sweet Memory: Where It All Started
This recipe takes me right back to my first summer out of culinary school. I was helping cater a huge, fancy garden wedding. My job? Assisting the pastry chef, a formidable French woman named Claudette, who believed elegance should never be complicated. The dessert spread was gorgeous, but the star was a massive tiered cheesecake decorated with a mountain of fresh berries.
About an hour before service, disaster struck. A well-meaning server bumped the table, and the entire top tier of the cheesecake… slid. Right onto the floor. There was a moment of pure, silent panic. Claudette didn’t flinch. She looked at the remaining berries, looked at the salvaged filling, and said, “Alors, we make petits fours. Nature’s cups.”
In a whirlwind, we hollowed strawberries, piped in the filling, and dusted them with powdered sugar. They were the hit of the night! Guests raved about the “clever, individual desserts.” That day, Claudette taught me one of my most cherished kitchen philosophies: the best recipes often come from a happy accident and a focus on letting gorgeous, simple ingredients shine. Every time I make these, I think of her, and that lesson in graceful, last-minute deliciousness.
Gather Your Ingredients: Simple Stars of the Show
Here’s the beautiful part: you only need a handful of simple ingredients to create magic. Quality is key here, especially with so few components!
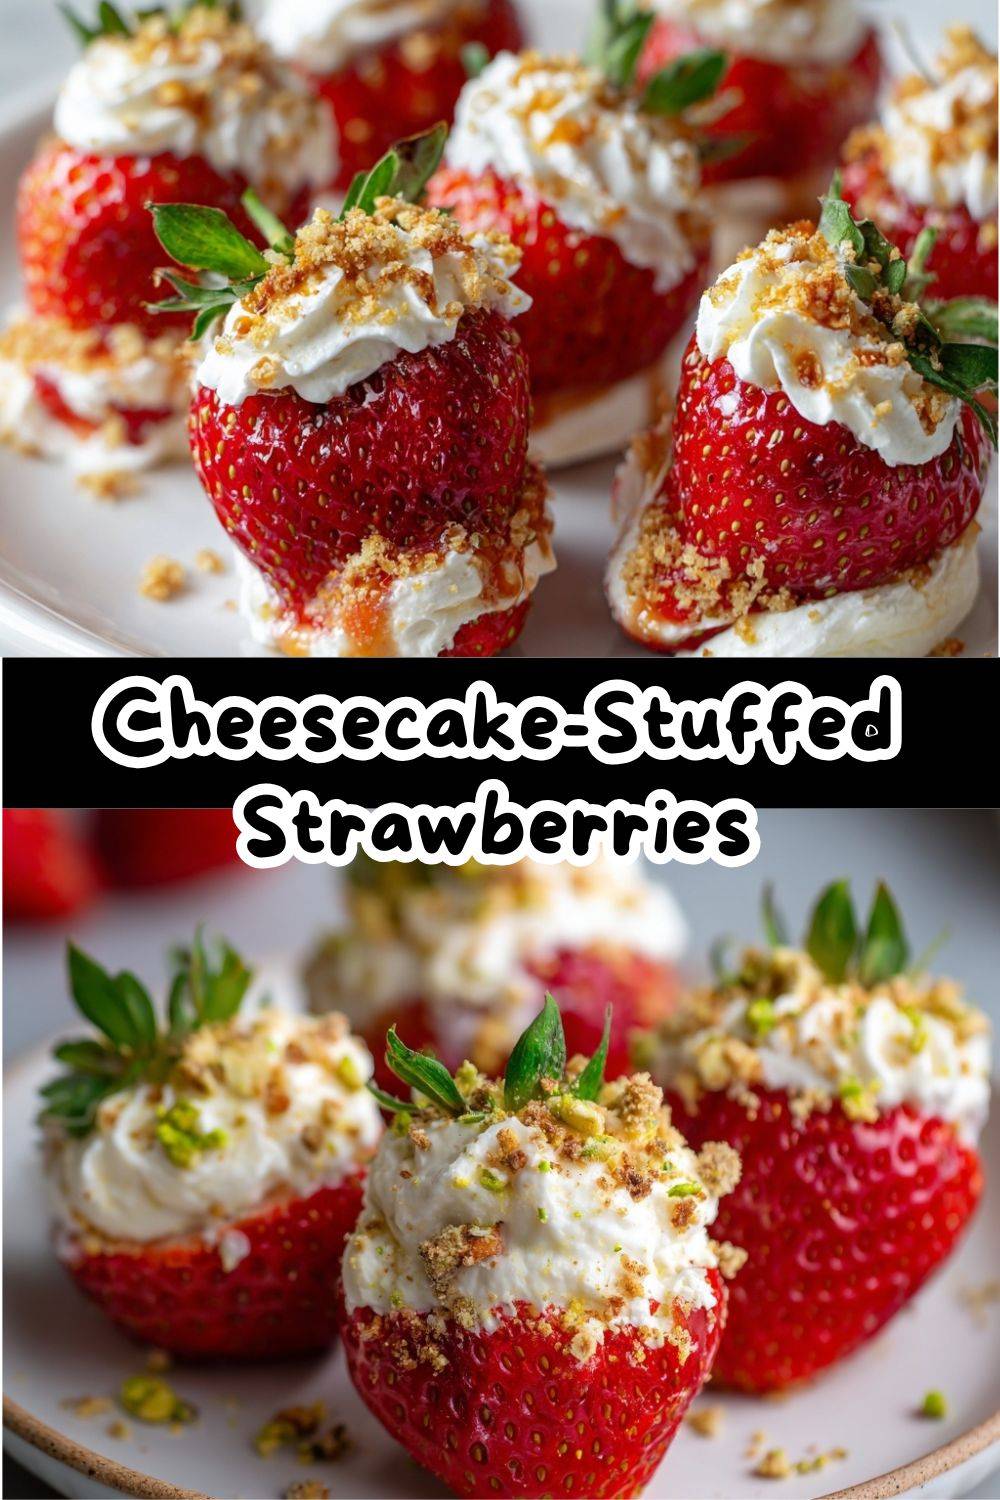
- 1 lb fresh, large strawberries: Look for berries that are bright red, fragrant, and have a firm, green stem cap. They should stand up straight on their own—these are your edible bowls! Avoid any that are mushy or have white shoulders.
- ½ cup plain Greek yogurt: This is our protein powerhouse and gives the filling a wonderful tang. I use full-fat (5%) for ultimate creaminess, but 2% works great too. For a dairy-free swap, a thick, plain coconut yogurt can work in a pinch.
- ¼ cup cream cheese, softened: The classic cheesecake flavor anchor. Let it sit on the counter for 30 minutes before mixing—this is non-negotiable for a silky-smooth filling without lumps! For a lighter version, Neufchâtel cheese is a perfect 1:1 substitute.
- 1–2 tbsp maple syrup or honey: My natural sweeteners of choice. Maple adds a subtle depth, while honey brings a floral note. Start with 1 tbsp and taste! The sweetness needed depends on your berries and your palate. Pure maple syrup keeps it vegan.
- ½ tsp pure vanilla extract: The secret whisper that makes everything taste like dessert. Don’t skip it!
For the Optional Toppings (The Fun Part!):
- Crushed graham crackers: For that true “cheesecake crust” experience in every bite.
- Lemon zest: A tiny sprinkle adds a burst of bright, sunny fragrance.
- Mini chocolate chips: Because strawberries and chocolate are a match made in heaven.
- Chopped nuts (like pistachios or almonds): For a delightful crunch.
- A drizzle of balsamic glaze: Trust me, this gourmet twist is incredible.
Let’s Get Building: Step-by-Step to Strawberry Bliss
Ready? This is where the fun begins. We’re going to create these little masterpieces together. Put on some good music, and let’s do this!
- Prep Your Berries: Gently wash your strawberries under cool water and pat them completely dry with a kitchen towel or paper towels. A wet berry will make the filling slide right off. Using a small paring knife, carefully cut off the stem end to create a flat base. Then, from the top, cut out a small cone-shaped core to hollow out the center. Don’t go too deep, or you’ll poke through the bottom! Pro Chef Tip: A ¼ teaspoon measuring spoon or a small melon baller is my secret weapon for a perfectly neat hollow. Place your prepped berries on a plate or baking sheet lined with parchment paper.
- Make the Magical Filling: In a medium bowl, combine your softened cream cheese, Greek yogurt, 1 tablespoon of your chosen sweetener, and the vanilla extract. Using a hand mixer (or a sturdy whisk and some elbow grease), beat everything together until it’s completely smooth, creamy, and lump-free. This should take about 1-2 minutes with a mixer. Now, taste it! Is it sweet enough for you? Remember, the strawberries are sweet too. Add the extra sweetener if you like, and whip for another 10 seconds to combine.
- Fill ‘Em Up: You have two gorgeous options here. For a rustic, homemade look, simply spoon the filling into each strawberry. For a more elegant, professional finish, spoon the filling into a piping bag fitted with a star or round tip (or a plastic zip-top bag with the corner snipped off). Then, pipe the filling generously into each strawberry, swirling it slightly at the top. No matter your method, don’t be shy—pile that creamy goodness high!
- Top & Chill: This is your moment to shine! Sprinkle your topped berries with crushed graham crackers, lemon zest, chocolate chips, or your topping of choice. For the best texture and flavor, pop the tray into the refrigerator for at least 15-20 minutes. This lets the filling firm up slightly and the flavors really mingle.
See? I told you it was easy! You’ve just created a stunning, healthy-ish dessert that looks like you spent hours.
Serving Your Strawberry Masterpieces
Presentation is half the fun with these bites! Here are a few of my favorite ways to serve them:
- The Simple Platter: Arrange them on a beautiful white platter or a slab of slate. Scatter a few extra berries and mint leaves around for a pop of color. Instantly Instagrammable!
- Dessert Shooters: For a party, place each strawberry in a mini cupcake liner. It keeps them stable, looks adorable, and makes them super easy for guests to grab.
- With a Dip: Serve them alongside a small bowl of melted dark chocolate or warm caramel sauce for an over-the-top dipping experience. Yes, please!
- Brunch Star: These are a fantastic, unexpected addition to a brunch spread alongside muffins, quiche, and mimosas. They feel decadent but won’t weigh anyone down.
Get Creative! Flavor Twists & Dietary Swaps
Once you master the basic formula, the flavor world is your oyster… or, well, your strawberry! Here are some delicious twists to try:
- Lemon Berry Bliss: Add 1 teaspoon of fresh lemon zest and 1 teaspoon of lemon juice to the filling. Top with a tiny twist of lemon zest. So refreshing!
- Chocolate Hazelnut Dream: Mix 1 tablespoon of unsweetened cocoa powder into the filling and use honey as your sweetener. Top with finely chopped, toasted hazelnuts. Tastes like a gourmet candy bar.
- Vegan & Dairy-Free: Use a thick, plain, unsweetened coconut yogurt and vegan cream cheese. Sweeten with maple syrup, and top with dairy-free chocolate chips or crushed vegan cookies.
- PB&J Remix: Add 1 tablespoon of smooth, natural peanut butter (or powdered peanut butter) to the filling. Just before serving, dot the top with a tiny dollop of your favorite jam.
- Tropical Vacation: Use coconut cream instead of Greek yogurt, and add a pinch of coconut extract. Top with toasted coconut flakes and a tiny piece of diced mango or pineapple.
Chef Emily’s Notebook Scribbles
This recipe has evolved so much since that fateful wedding day! My first test batch at home used all cream cheese, and while delicious, they were *rich*. Swapping in Greek yogurt was a game-changer—it lightened the texture, added that protein boost, and balanced the sweetness perfectly. It’s now my non-negotiable.
A funny story: I once tried to use frozen strawberries in a pinch during winter. Reader, I do not recommend it. They turned into deflated, watery little puddles. We’re going for structure here! This is a recipe that truly celebrates fresh, in-season produce. Wait for those gorgeous spring/summer berries for the best results. And hey, if a few get a little “over-hollowed” and you have extra filling? No problem. It makes an amazing dip for apple slices or graham crackers. Waste not, want not!
Your Questions, Answered!
Q: My filling is a bit runny. What did I do wrong?
A: This usually happens if the cream cheese wasn’t full-fat or wasn’t soft enough to blend completely smooth, or if the Greek yogurt had excess liquid (called whey). Next time, make sure your cream cheese is truly softened and use a thick yogurt. For a quick fix, pop the mixed filling in the fridge for 10 minutes to firm up before piping.
Q: Can I make these ahead of time?
A: Absolutely! You can prep the strawberries and make the filling up to a day in advance. Store the hollowed berries in an airtight container in the fridge, and keep the filling in a separate bowl. Fill and top them 1-2 hours before serving for the best texture. They’re best enjoyed the day they’re filled.
Q: What other sweeteners can I use?
A: You can use powdered sugar (which will dissolve instantly), agave nectar, or even a sugar-free maple syrup alternative. If using a granulated sweetener like coconut sugar, I’d dissolve it in a teaspoon of milk or lemon juice first to avoid graininess.
Q: My strawberries won’t stand up! Help!
A: Two tricks! First, when you cut the stem end, slice off just enough to create a flat base. Second, if they’re still wobbly, place them in a mini muffin tin. The cups will hold them perfectly upright while you fill and chill them.
Nutritional Breakdown (Because Knowledge is Power!)
I’m not a registered dietitian, but I love knowing what’s in my food! Here’s an approximate nutritional snapshot for one serving (about 3-4 stuffed strawberries), based on using full-fat ingredients and 1 tbsp of honey. This info is provided as a helpful guide.
- Calories: ~95
- Protein: ~6g (Thanks, Greek yogurt! This helps keep you satisfied.)
- Carbohydrates: ~9g
- Fat: ~4g
- Fiber: ~2g (From those beautiful berries!)
Compared to a slice of traditional cheesecake, which can easily clock in at over 400 calories and 30g of fat, these little bites let you enjoy all the iconic flavors in a much lighter, portion-friendly package. They’re a treat you can genuinely feel good about.
Final Thoughts from My Kitchen to Yours
And there you have it, my food-loving friend! My complete love letter to Cheesecake-Stuffed Strawberries. This recipe embodies everything I want Tasty Chow to be: approachable, joyful, and focused on making real food that makes you feel great.
It’s proof that you don’t need complicated techniques or a pantry full of obscure ingredients to create something special. Sometimes, magic is just a strawberry and a spoonful of creamy filling away. I hope you make these, share them, and maybe even create your own happy kitchen accident that turns into a new family favorite.
If you do make them, I’d be over the moon if you tagged me @TastyChow on socials so I can see your beautiful creations! Now, go forth and stuff some berries. Your taste buds will thank you.
With love and a fully stocked berry basket,
Emily 🍓