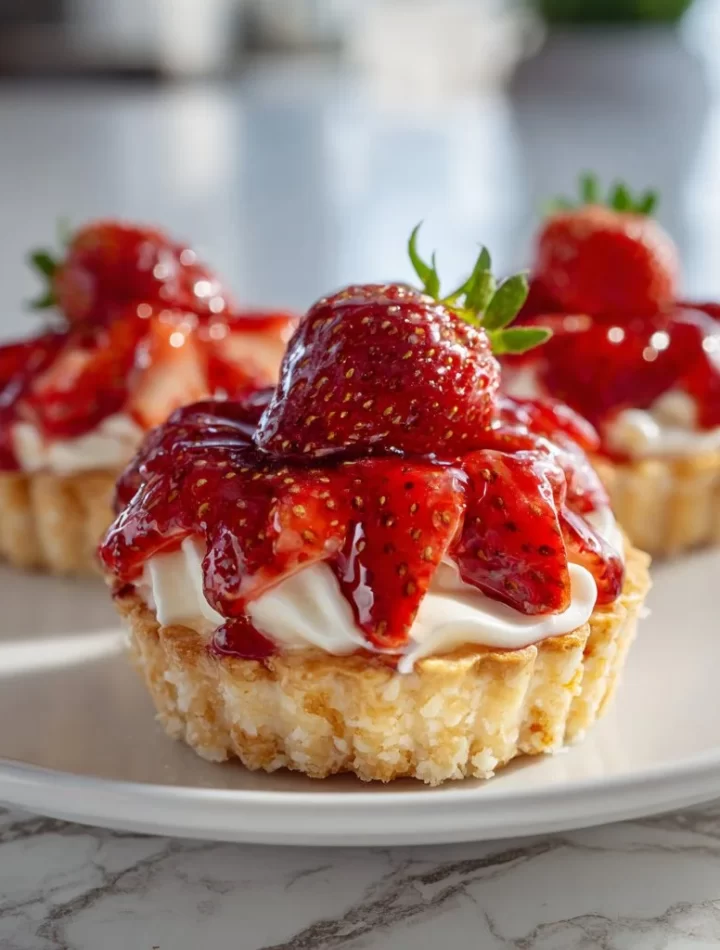
Miffy Strawberry Cheesecake Tartlets: A Sweet Delight for Every Palette
Hey there, fellow food lovers! 🌟 If you’re anything like me, you have a soft spot for desserts that not only taste divine but also evoke happy memories. Today, I’m thrilled to share a recipe that does just that: Miffy Strawberry Cheesecake Tartlets. These delightful little treats are the perfect blend of creamy cheesecake filling and sweet strawberries, all nestled in a buttery tart crust. Whether you’re looking to impress guests at a dinner party, bring a sweet surprise to a picnic, or just treat yourself to something special, these tartlets are sure to make your heart sing.
You might be wondering, “What makes these tartlets so special?” Well, let me tell you! Not only are they adorable and packed with flavor, but they also remind me of joyful summer days spent lounging with friends and family, indulging in sweet treats. The best part? They’re surprisingly simple to make, so even if you’re a beginner in the kitchen, you’ll feel like a pro!
As we dive into this recipe, I invite you to roll up your sleeves, put on your favorite apron, and join me in the kitchen. Grab your strawberries and let’s create something delicious together!🍓
Personal Story
Let me take you back to my childhood—a time filled with laughter, warm sunlight streaming through the kitchen window, and, of course, my grandma’s incredible desserts. One sunny afternoon, my grandma and I decided to have a little fun in the kitchen, and we set our sights on cheesecake. I can still hear her teasingly say, “You can never go wrong with cream cheese and sugar, Emily!”
That day, we whipped up a glorious cheesecake that was the star of our family picnic. We topped it with strawberries, their sweet juice dribbling down the sides, filling each bite with pure bliss. It was a messy affair, but as we laughed and shared stories, all that mattered was the joy of creating something delicious together.
Fast forward to today, and that memory brings a smile to my face every time I make cheesecake. These Miffy Strawberry Cheesecake Tartlets pay homage to that beloved dessert while adding a cute twist inspired by my favorite childhood character, Miffy! Let’s bring a bit of nostalgia and joy into your kitchen—just like my grandma did for me.
Ingredients
Let’s gather everything we need for these delightful tartlets! Here’s what you’ll need:
-
1 cup all-purpose flour
A staple in most kitchens, it forms the base of our tart crust. If you need a gluten-free option, try using almond flour! -
1/4 cup powdered sugar
This gives our crust a touch of sweetness without being overpowering. If you’re in a pinch, granulated sugar works too—just be sure to blend well. -
1/2 cup unsalted butter, softened
The star of our crust! It adds richness and flavor to the tartlets. For a dairy-free option, coconut oil is a great substitute! -
1 cream cheese block (8 oz)
This creamy delight forms the heart of our cheesecake filling. If you’re feeling adventurous, try flavored cream cheese for a fun twist! -
1/2 cup granulated sugar
Sweetness is key! Adjust to your liking; you can use honey or maple syrup for a more natural sweetener. -
1 teaspoon vanilla extract
This simple ingredient elevates the flavors of the tartlets. A splash of almond extract can add a unique twist too! -
1 cup fresh strawberries, hulled and sliced
Fresh is best! They’ll bring that delightful berry flavor to each tartlet. If you can’t find strawberries, raspberries or blueberries would work wonderfully. -
1 tablespoon lemon juice
Brightens up the flavors and helps prevent the strawberries from browning. -
Whipped cream (for garnish)
An optional but lovely finishing touch! You can make your own or buy it pre-made for convenience.
With your ingredients ready, let’s dive into the fun part—the cooking!
Step-by-Step Instructions
Step 1: Prepare the Tart Crust
-
Preheat your oven to 350°F (175°C). This gives your oven time to warm up while you focus on the crust.
-
In a mixing bowl, combine the flour and powdered sugar. Give it a quick stir to blend, then add the softened butter. Using a pastry cutter or your fingers, mix until crumbly and combined. This helps create that delicious, crumbly texture we love in tart crust!
-
Press the dough into mini tart pans or a muffin tin, making sure to cover the bottom and sides evenly. It doesn’t have to be perfect! It’ll look rustic and charming—just like grandma’s.
-
Bake for 10-12 minutes until lightly golden. Check on them halfway through to ensure they’re not browning too quickly. The smell will be heavenly!
Step 2: Make the Cream Cheese Filling
-
While the crust bakes, grab a mixing bowl and beat the cream cheese. Use a hand mixer or stand mixer for ease—whipping it until smooth is key!
-
Add in the granulated sugar and vanilla extract, mixing until fully combined. You want that delightful cream cheese mixture to be velvety and air-like. If you want to be extra fancy, feel free to add in some finely grated lemon zest here too!
-
Spoon the cream cheese filling into your cooled tart shells once they’ve had a chance to cool down completely. Filling them to the brim is encouraged—you want every bit to be creamy and decadent!
Step 3: Top with Strawberries
-
In a bowl, combine your sliced strawberries with lemon juice. This keeps the berries fresh and vibrant.
-
Top each tartlet with a generous amount of strawberries. Feel free to arrange them in a cute pattern; after all, we eat with our eyes first!
-
Optional: Add a dollop of whipped cream on top for that extra zing of flavor—because why not indulge a little?
Step 4: Chill and Serve
-
Refrigerate the tartlets for at least 30 minutes to let the filling set up nicely. This wait will only make your tartlets even more delightful!
-
Once chilled, they’re ready to serve! Arrange them on a beautiful platter and watch as everyone’s eyes light up. Don’t forget to take a few pictures before they all disappear!
Serving Suggestions
These Miffy Strawberry Cheesecake Tartlets are as charming as they are delicious, perfect for any occasion! Here are a few serving suggestions to help you make the most of this treat:
-
Elegant Plating: Arrange the tartlets on a colorful serving platter. Scatter some fresh berries around the tartlets for an eye-catching display. It’ll have your guests thinking you should start your own bakery!
-
Coffee Pairing: Serve them alongside a lovely cup of coffee or tea. The creamy cheesecake pairs beautifully with the warm flavors of coffee, making it a cozy choice for afternoon tea breaks or dessert after dinner.
-
Festive Touch: Top each tartlet with a sprinkling of crushed graham crackers or a drizzle of chocolate sauce for an extra flair. You can even add a hint of mint for a refreshing touch!
Recipe Variations
Feel free to mix things up! Here are a few creative twists, flavor options, or dietary swaps to try:
-
Berry Delight: Swap out the strawberries for raspberries, blueberries, or even blackberries for a colorful summer medley. Each berry brings its unique flavor to the party!
-
Chocolate Cheesecake: Add melted chocolate (dark or white) to the cream cheese filling for a decadent twist. Who can resist chocolate?
-
Nut Crust: Instead of a traditional crust, try a nut-based crust made of crushed almonds or walnuts mixed with butter. It adds a wonderful crunch and nutty flavor!
-
Vegan Option: Use vegan cream cheese and coconut oil for a plant-based version. Trust me—it’ll be just as delicious, and your friends will never know!
-
Flavor Profiles: Add a splash of almond or coconut extract to the cream cheese filling for a gourmet touch. It’ll surprise your taste buds in the best way!
Chef’s Notes
This recipe has a special place in my heart! Over the years, I’ve experimented with countless variations, but nothing beats the classic Miffy Strawberry Cheesecake Tartlets. They’re versatile, making them crowd-pleasers at potlucks and gatherings!
A funny kitchen story? I once got a bit too adventurous and tried adding matcha powder to the cream cheese filling—let’s just say it looked like something straight out of a science experiment! But hey, it’s all about trying new things and learning along the way, right?
FAQs and Troubleshooting
Here are some common questions and troubleshooting tips to ensure your tartlets are a hit:
-
Why is my crust crumbling?
- This can happen if there isn’t enough butter in the crust. Make sure to use the full amount, and don’t hesitate to use your fingers to press it firmly into the tart pans.
-
How do I prevent the strawberries from getting mushy?
- The lemon juice not only enhances flavor but keeps the strawberries fresh! Make sure to keep your tartlets cool until you’re ready to serve.
-
Can I make these tartlets ahead of time?
- Absolutely! You can prepare the crust and filling a day in advance. Just assemble and top them with strawberries on the day you plan to serve them.
-
What if I don’t have tart pans?
- No worries! A muffin tin works just as well. Just be sure to adjust the baking time slightly.
Nutritional Info
While desserts are meant to be a treat, here’s a quick glance at the nutritional breakdown per tartlet (estimated):
- Calories: 180
- Total Fat: 10g
- Saturated Fat: 5g
- Carbohydrates: 20g
- Sugars: 8g
- Protein: 2g
These tartlets can fit into a balanced diet, especially when enjoyed in moderation. Plus, with fresh strawberries, you’re getting some vitamins and antioxidants in there!
Final Thoughts
And there you have it—Miffy Strawberry Cheesecake Tartlets, the perfect little bites of joy! 🎉 Whether you whip them up for a special occasion or just because you want to bring a smile to your day, these tartlets are a surefire way to win hearts.
I hope this recipe warms your kitchen like it has warmed mine. Don’t forget to share your tartlet creations with me! I love seeing fellow foodies get excited about cooking. So grab a fork, dig in, and enjoy every bite!
Until next time, happy cooking!
— Chef Emily Walker

Miffy Strawberry Cheesecake Tartlets
- Total Time: 45 minutes
- Yield: 12 servings 1x
- Diet: Vegetarian
Description
Delightful tartlets featuring a creamy cheesecake filling topped with fresh strawberries, perfect for any occasion!
Ingredients
- 1 cup all-purpose flour
- 1/4 cup powdered sugar
- 1/2 cup unsalted butter, softened
- 1 cream cheese block (8 oz)
- 1/2 cup granulated sugar
- 1 teaspoon vanilla extract
- 1 cup fresh strawberries, hulled and sliced
- 1 tablespoon lemon juice
- Whipped cream (for garnish)
Instructions
- Preheat your oven to 350°F (175°C).
- Combine the flour and powdered sugar in a mixing bowl.
- Add the softened butter and mix until crumbly.
- Press the dough into mini tart pans or a muffin tin.
- Bake for 10-12 minutes until lightly golden.
- Beat the cream cheese until smooth in a mixing bowl.
- Add granulated sugar and vanilla extract, mixing until fully combined.
- Spoon the cream cheese filling into cooled tart shells.
- Combine sliced strawberries with lemon juice in a bowl.
- Top each tartlet with strawberries and optional whipped cream.
- Refrigerate the tartlets for at least 30 minutes before serving.
Notes
These tartlets can be made ahead by preparing the crust and filling a day in advance.
- Prep Time: 15 minutes
- Cook Time: 12 minutes
- Category: Dessert
- Method: Baking
- Cuisine: American
Nutrition
- Serving Size: 1 tartlet
- Calories: 180
- Sugar: 8g
- Sodium: 150mg
- Fat: 10g
- Saturated Fat: 5g
- Unsaturated Fat: 3g
- Trans Fat: 0g
- Carbohydrates: 20g
- Fiber: 1g
- Protein: 2g
- Cholesterol: 30mg
Keywords: strawberry, cheesecake, tartlets, dessert, easy recipe, summer dessert