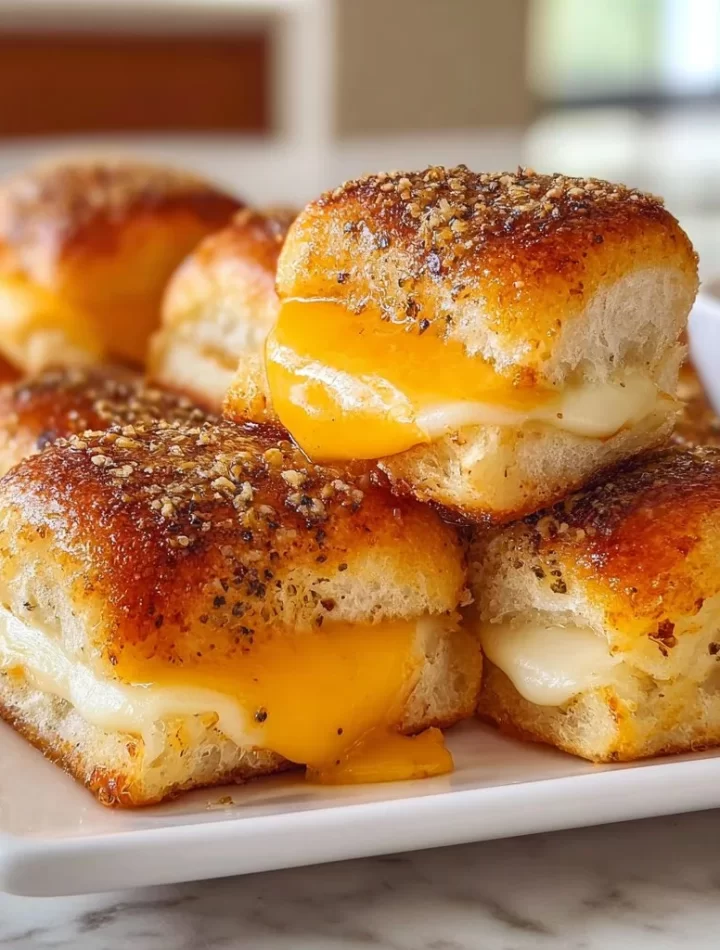
Mini Grilled Cheese Hawaiian Rolls: A Melty Throwback to Simpler Times
Hey there, food aficionados! 👋 Are you ready to take a culinary trip down memory lane? Today, we’re diving into something that’s not just a treat for your taste buds but also a blast from the past! I’m talking about Mini Grilled Cheese Hawaiian Rolls. Picture this: the warm aroma of melted cheese filling the air, a crispy, buttery exterior, and that first divine bite where the ooey-gooey goodness comes spilling out. It’s comfort food at its finest and a guaranteed crowd-pleaser!
You know those afternoons when you’re craving a snack that not only fills your belly but also brings a smile to your face? That’s exactly what these mini grilled cheese rolls do. They’re perfect for a lazy Sunday afternoon, an after-school treat, or even as a fun appetizer at your next get-together. Plus, they’re as easy to whip up as they are to devour. I love making these with my friends and family, and you’ll often find someone sneaking a piece here and there before they even hit the table!
In this post, I’m going to show you how to elevate your grilled cheese game by turning your favorite childhood sandwich into mini handheld delights. Trust me, you’ll want to make these over and over again! So grab your apron, take a deep breath, and let’s roll into the gooey goodness of Mini Grilled Cheese Hawaiian Rolls!
Personal Story
Ah, the memories! One of my fondest childhood moments revolves around cheesy goodness. Every Friday night, my grandma would host a family dinner, and you better believe that her kitchen was the mecca of melted cheese and crispy bread. I can still recall the sound of her wooden spoon against the pan as she mixed up that classic cheese filling. It was always a mix of cheddar—sharp and tangy—and mozzarella—mild and creamy. Every bite of her grilled cheese brought warmth, laughter, and the feeling of being enveloped in a big ol’ hug.
Fast forward a few years, and we decided to host a backyard movie night with friends. It was then that I decided to channel my grandma’s spirit and create an appetizer version of her beloved grilled cheese. Mini rolls were a hit among my friends, and I could hear the nostalgic oohs and ahhs reminiscent of my childhood gatherings. With every bite, I felt connected to those simpler times spent in my grandma’s kitchen. These Mini Grilled Cheese Hawaiian Rolls bring that same joy to my heart and will undoubtedly do the same for you!
Ingredients
To make these scrumptious Mini Grilled Cheese Hawaiian Rolls, you’ll need the following ingredients:
-
Hawaiian Sweet Rolls:
- These little beauties are soft, sweet, and the perfect vessel for melted cheese! If you can’t find Hawaiian rolls, you could substitute them with dinner rolls, but you might miss that sweet, fluffiness.
-
Cheddar Cheese:
- A classic choice that brings sharpness and depth to the mix. Feel free to shake things up with smoked cheddar for an even more indulgent flavor!
-
Mozzarella Cheese:
- For that gooey texture we all know and love! If you want a lower-fat option, you could swap this for low-fat mozzarella.
-
Butter:
- Not just for flavor but for that golden-brown crust we all crave. For a healthier twist, consider using olive oil or plant-based butter.
-
Garlic Powder:
- A little sprinkle adds an aromatic touch! For a fresh option, minced fresh garlic would work wonders here too.
-
Dried Oregano:
- This gives an earthy flavor that beautifully complements the richness of cheese. Swap it out for Italian seasoning if you’re feeling adventurous!
-
Salt and Pepper:
- Essential for balancing flavors, but go easy on the salt since cheeses tend to be salty as well!
Armed with these ingredients, you’re ready to make magic happen in the kitchen!
Step-by-Step Instructions
Now on to the fun part—let’s cook these mini masterpieces! Follow along with my step-by-step instructions to make your Mini Grilled Cheese Hawaiian Rolls.
Step 1: Preheat Your Oven
Start by preheating your oven to 350°F (175°C). This ensures your rolls will bake to golden perfection. While it warms up, you’ll have time to prepare everything else!
Step 2: Slice Up Those Rolls
Carefully take your Hawaiian rolls and slice them in half to create individual mini sandwiches. I love using a serrated knife for this, as it glides through the soft rolls without squishing them.
Step 3: Mix Your Cheesy Filling
In a mixing bowl, combine shredded cheddar and mozzarella cheese. This mixture will be pure magic once melted! Add a sprinkle of garlic powder and dried oregano, and season with salt and pepper. Don’t be afraid to give it a taste—just make sure not to eat it all before it goes into the rolls!
Step 4: Assemble Your Rolls
Now it’s time to stuff those rolls! Spread a generous helping of the cheesy mixture onto the bottom half of each roll. You could exceed your limits with the cheese—after all, there’s no such thing as too much cheese in my book! Place the top halves back on.
Step 5: Butter It Up
Melt some butter in a small pan over low heat. Brush this melted butter over the tops of the mini rolls. If you’re feeling extra fancy, you could even mix in some minced garlic for added flavor. This will create a beautifully crispy crust when baked!
Step 6: Bake Until Golden
Arrange the stuffed rolls on a baking sheet lined with parchment paper. Pop them into the preheated oven for about 12-15 minutes, until the tops are golden and the cheese is bubbling. You can keep a close eye on them to make sure they don’t over-brown—nobody likes burnt cheese!
Step 7: Serve and Enjoy
Once they come out of the oven, let them cool for a minute before devouring. Get ready for some serious ooohs and ahhhs. Pair these with your favorite dipping sauce, like marinara or ranch, and watch them disappear!
Serving Suggestions
So, you’ve just made these divine Mini Grilled Cheese Hawaiian Rolls—now how do you serve them? Here are some fun ideas to ensure they make a grand appearance at your table:
-
Dipping Sauce Station: Create a mini dipping station with bowls of marinara, ranch, and even a spicy aioli. Let your guests choose their favorites!
-
Plating: Stack the rolls in a cute basket lined with parchment paper for a rustic touch. You could even add a few sprigs of fresh parsley on the side for color!
-
Individual Portions: For a more elegant touch, serve each roll on a small white plate with a drizzle of balsamic glaze on the side for a pop of flavor.
The presentation can make a huge difference, so feel free to get creative with how you serve your rolls!
Recipe Variations
Get ready to customize your Mini Grilled Cheese Hawaiian Rolls to fit your taste profile or dietary preferences! Here are some fun twists on the classic recipe:
-
Add Meats: Spice things up by adding some sliced turkey, ham, or even cooked bacon inside the rolls. Trust me, the combo of meat and cheese is downright addictive.
-
Veggie Lovers: For a veggie-packed option, add sliced tomatoes, spinach, or roasted bell peppers into the cheesy mixture. It adds color and makes it a little healthier!
-
Spicy Kick: Want to turn up the heat? Mix in some jalapeños or your favorite hot sauce to the cheese mixture for a zesty bite.
-
Herb Burst: Instead of oregano, try using fresh basil or cilantro for a fresh twist. It’ll brighten up those flavors and is especially delightful in the summer!
-
Sweet and Savory: For a sweet touch, consider spreading a thin layer of fruit preserves (think apricot or fig) on the inside of the rolls before adding cheese. The sweetness pairs fabulously with the salty cheese.
Chef’s Notes
Let me just say, these Mini Grilled Cheese Hawaiian Rolls have become a staple at my gatherings! I once made them for a potluck, and people couldn’t stop talking about them. One of my friends suggested adding some pickles to the cheese filling next time (which I can’t wait to try!), and now I can’t help but experiment with different combinations every time I make them.
Also, I can’t help but laugh when I think back to the first time I attempted this recipe. I was so excited to put them in the oven; I accidentally used one of my grandma’s vintage cheeseboards as a baking sheet! As it turns out, melted cheese makes a very interesting mess. Who knew nostalgia could be so messy?
FAQs and Troubleshooting
What if my cheese doesn’t melt properly?
No worries! If your cheese isn’t melting well, it may be due to the type of cheese you’re using. Always opt for good-quality cheese that’s known for melting well (like these ones!). If it still resists, just pop the rolls back in for a few more minutes!
Can I make these ahead of time?
Absolutely! You can assemble the rolls and store them covered in the fridge until you’re ready to bake. Just add a few extra moments to your baking time if they’re chilled.
Why are my rolls soggy?
Sogginess might occur if there’s too much moisture from the cheese or if you leave them in the oven too long. Spread the cheese filling evenly to avoid leakage, and keep an eye on the baking time!
What can I substitute for Hawaiian rolls?
If Hawaiian rolls aren’t available, any soft dinner rolls or slider buns would work just as well. Be flexible and enjoy experimenting with different bread types!
Nutritional Info (Per Serving – 2 Rolls)
- Calories: 240
- Protein: 10g
- Carbs: 28g
- Fat: 12g
- Saturated Fat: 7g
These mini cheesy delights are best enjoyed in moderation, but they sure do bring joy!
Final Thoughts
So there you have it—the ultimate guide to making your very own Mini Grilled Cheese Hawaiian Rolls! I hope you enjoyed this fun journey into the kitchen as much as I did. Remember, cooking should be an experience filled with laughter, love, and sometimes a bit of chaos—especially when it comes to melted cheese!
These little rolls are just perfect for sharing with friends and family, whether at parties or just a cozy night in, and they have the power to transform any meal into a warm, nostalgic moment. So, whip up a batch, gather your loved ones, and dive into a delicious conversation around the dinner table. Enjoy every gooey bite, and as always—happy cooking!
Now, who’s ready to grab a fork and chow down? Let’s do this! 🧀💖
Print
Mini Grilled Cheese Hawaiian Rolls
- Total Time: 30 minutes
- Yield: 12 servings 1x
- Diet: Vegetarian
Description
A nostalgic and delicious twist on the classic grilled cheese, these Mini Grilled Cheese Hawaiian Rolls are perfect for snacks or appetizers.
Ingredients
- 12 Hawaiian Sweet Rolls
- 1 cup Cheddar Cheese, shredded
- 1 cup Mozzarella Cheese, shredded
- 2 tablespoons Butter, melted
- 1 teaspoon Garlic Powder
- 1 teaspoon Dried Oregano
- Salt and Pepper, to taste
Instructions
- Preheat your oven to 350°F (175°C).
- Slice the Hawaiian rolls in half to create mini sandwiches.
- Mix shredded cheddar and mozzarella cheese in a bowl, along with garlic powder, dried oregano, salt, and pepper.
- Assemble the rolls by spreading the cheesy mixture onto the bottom half of each roll.
- Butter the tops of the rolls with melted butter.
- Bake the rolls in the oven for 12-15 minutes until golden and bubbling.
- Serve and enjoy with your favorite dipping sauces!
Notes
Feel free to customize with meats, veggies, or different herbs to suit your taste.
- Prep Time: 15 minutes
- Cook Time: 15 minutes
- Category: Appetizer
- Method: Baking
- Cuisine: American
Nutrition
- Serving Size: 2 rolls
- Calories: 240
- Sugar: 3g
- Sodium: 500mg
- Fat: 12g
- Saturated Fat: 7g
- Unsaturated Fat: 4g
- Trans Fat: 0g
- Carbohydrates: 28g
- Fiber: 1g
- Protein: 10g
- Cholesterol: 30mg
Keywords: grilled cheese, appetizers, Hawaiian rolls, cheese, comfort food