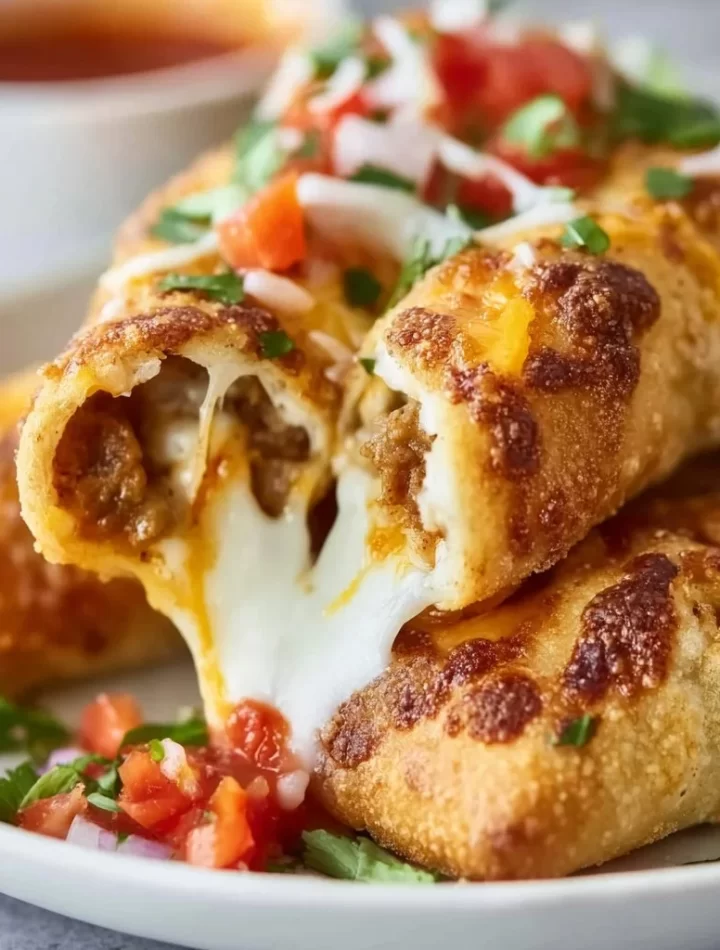
Cheesy Taco Sticks — The Ultimate Cheesy, Crunchy Party Snack
Introduction
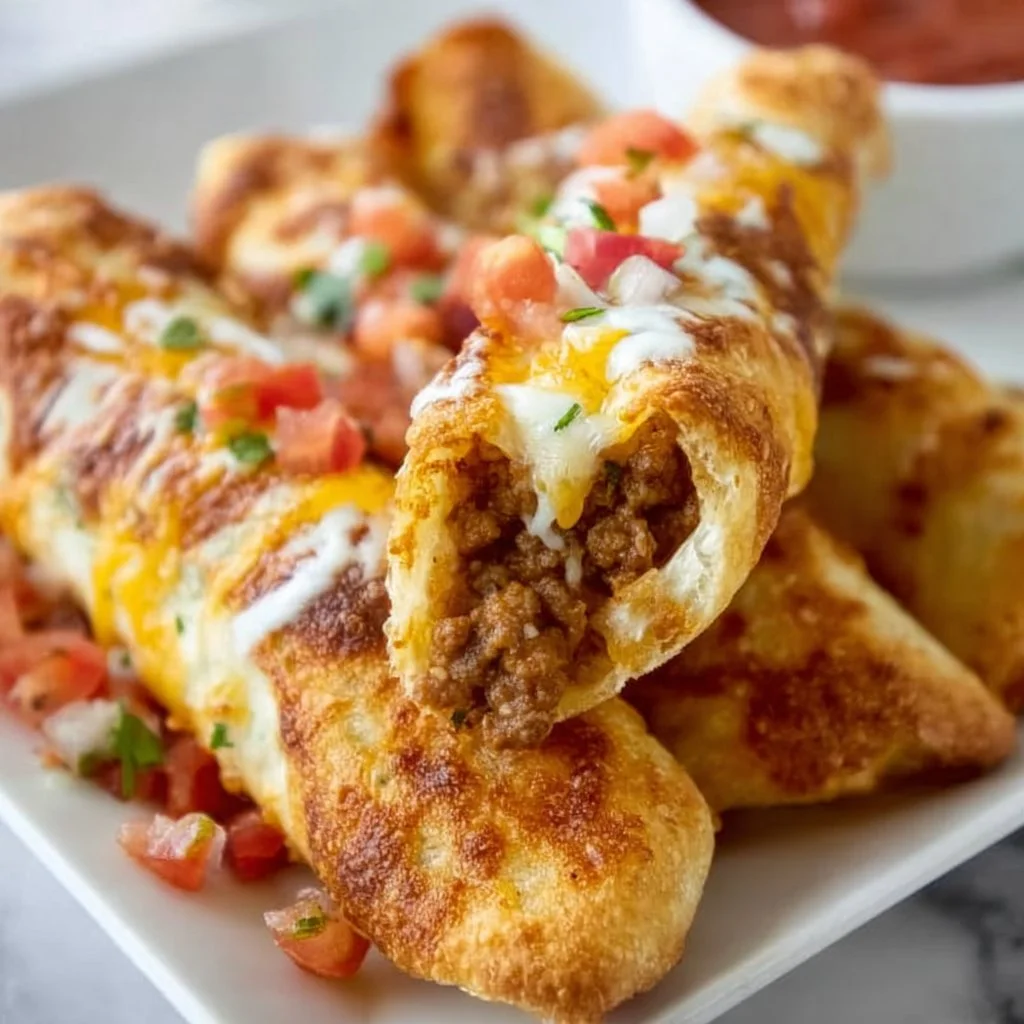
Hey friends — Emily here, apron flour and all. If you love melty cheese, handheld snacks, and flavor that hits like a high-five, you’re going to fall hard for these Cheesy Taco Sticks. They’re the kind of snack that disappears in minutes at parties, makes weeknight dinners feel like a celebration, and teaches picky eaters that yes, vegetables can hide in deliciousness. Think of them as a mash-up of pizza, tacos, and everything you loved as a kid — but more grown-up, more flavorful, and way easier to make than you’d expect.
These Cheesy Taco Sticks are built on crisp, golden pastry (or store-bought dough for the win), a seasoned taco-style filling, and a ridiculous amount of melty cheese. They bake fast, travel well, and hold up beautifully for game-day snacking, potlucks, or whenever you want to make someone’s day with something warm and cheesy. Best part? You can customize them — use shredded chicken, seasoned beef, or a veggie-forward filling — and they still slay.
I love recipes that solve real problems: what’s for dinner on a busy Tuesday, how to feed a crowd with minimal fuss, or how to sneak a bit of green into a kid-approved snack. These taco sticks check every box. They crisp up in the oven, the cheese pulls like a dream, and every bite has that cozy taco spice that makes your tastebuds do a happy dance. Plus, they come together with pantry staples and a few fresh bits. No need to stress about long ingredient lists or complicated techniques.
Over the years I’ve turned these into an absolute go-to for everything from movie night to lunchbox wins. In this post I’ll walk you through my favorite version — complete with ingredient notes, step-by-step instructions, clever little chef hacks, serving ideas, tasty variations, and troubleshooting tips so your Cheesy Taco Sticks come out perfect every time. Let’s roll up our sleeves, preheat the oven, and make something ridiculously comforting together.
Personal Story
When I was a kid, my grandma used to toss together the most magical, improvised snacks out of leftovers. One rainy Saturday we opened every drawer in the fridge like treasure chests: shredded chicken, half a jar of salsa, a lonely block of cheddar. She wrapped all that goodness in crescent roll dough, sprinkled more cheese on top, and popped them in the oven. The house filled with that irresistible, garlicky, toasted-cheese smell. We ate them curled up on the couch under a blanket while watching old movies — by the time the credits rolled, the plate was empty and everyone wanted seconds.
That memory stuck with me. It taught me two things: comfort food doesn’t need to be complicated, and food made with love always tastes better. These Cheesy Taco Sticks are my grown-up tribute to that rainy-day snack — more refined, yes, but still nostalgic, warm, and unapologetically cheesy. I’ve made them for backyard barbecues, midnight cravings, and even a nervous first-date picnic (spoiler: they worked like a charm). Every time I bite into that crunchy shell and molten center, I’m back in grandma’s kitchen, sneaking another one when she wasn’t looking.
Ingredients
- Ready-made pizza dough or crescent roll dough (about 1 lb dough)
- Insight: I love the shortcut of store-bought dough for speed and consistency. Pizza dough gives a heartier chew; crescent dough makes them flakier and more pillowy.
- 1 cup cooked, shredded chicken or 1 lb ground beef (or plant-based ground meat)
- Substitution tip: Use rotisserie chicken to save time or canned black beans for a vegetarian option.
- 1 cup shredded cheddar cheese (sharp or medium)
- Chef tip: Sharp cheddar gives more punch. Mix cheddar with Monterey Jack for extra melt.
- 1/2 cup shredded pepper jack or mozzarella
- Insight: Pepper Jack adds a little heat without overwhelming other flavors.
- 1/2 cup diced onion
- Swap: Use green onions for a milder, fresh bite.
- 1/2 cup diced bell pepper (any color)
- Tip: Red or orange peppers add sweetness; green peppers add a bit of bite.
- 1/2 cup salsa (mild or medium, depending on spice preference)
- Sub: Swap for taco sauce or enchilada sauce for a saucier filling.
- 1 tablespoon taco seasoning (or homemade: chili powder, cumin, garlic powder, paprika, salt)
- Chef insight: Homemade seasoning lets you control heat and sodium.
- 1 tablespoon olive oil
- Use avocado oil if you prefer a neutral flavor.
- 1/4 cup chopped fresh cilantro (optional)
- Tip: Stir in at the end to keep brightness and color.
- 1 egg + 1 tablespoon water (egg wash)
- Insight: Egg wash gives that bakery-bright shine; milk works too if you don’t have eggs.
- Optional toppings: sesame seeds, everything bagel seasoning, or a sprinkle of smoked paprika
Step-by-Step Instructions
-
Preheat and prep your station (Tip: mise en place matters).
- Preheat the oven to 400°F (200°C). Line a baking sheet with parchment for easy cleanup and a nonstick finish. Set out your filling ingredients so everything moves quickly once the dough is ready.
-
Cook and season the filling.
- Heat 1 tablespoon olive oil in a skillet over medium heat. Add the diced onion and bell pepper; sauté until tender and slightly golden, about 4–5 minutes. Add the cooked shredded chicken or ground beef and sprinkle the taco seasoning over the top. Stir to combine, then add the salsa and cook for 2–3 more minutes to let flavors meld and moisture reduce slightly.
- Hack: If your filling seems wet, cook a little longer so it won’t make the dough soggy. If too dry, add a splash more salsa or a tablespoon of tomato sauce.
-
Cool the filling slightly and add cheeses.
- Remove the skillet from heat and let the mixture cool for 3–5 minutes — this prevents the cheese from turning greasy when mixed. Stir in 1 cup shredded cheddar and 1/2 cup pepper jack or mozzarella until evenly distributed. Mix in chopped cilantro if using.
- Chef’s note: Slightly cooling keeps the cheeses melty but not oily.
-
Roll out and cut the dough.
- On a lightly floured surface, roll the dough into a large rectangle about 12×10 inches (or unroll crescent dough and pinch seams to seal). Cut the dough into long strips, roughly 1.5–2 inches wide.
- Tip: Use a pizza cutter for clean, fast cuts. If you like thicker bites, make your strips wider.
-
Fill and twist.
- Place about 1–2 tablespoons of filling along each strip, leaving 1/2 inch at the ends so you can seal them. Fold the dough over and gently crimp or roll to seal, or twist the strip into a spiral for a braided look. Press lightly so the filling stays put but doesn’t ooze out during baking.
- Hack: For extra pull, add a thin line of extra shredded cheese down the center before sealing.
-
Egg wash and finish.
- Whisk the egg with a tablespoon of water and brush lightly over each stick. Sprinkle sesame seeds, everything seasoning, or smoked paprika for color and flavor.
- Tip: Don’t over-brush — too much egg can pool and burn.
-
Bake until golden and melty.
- Bake on the prepared sheet for 12–16 minutes, depending on thickness, until the dough is golden and the cheese peeks through. Rotate the pan halfway for even browning.
- Troubleshooting tip: If the tops brown too quickly but the dough underneath is undercooked, tent loosely with foil and continue baking.
-
Rest and serve.
- Let the sticks rest 3–5 minutes on the pan after baking so the filling sets slightly — this makes them easier to handle. Transfer to a wire rack if you want the bottoms to stay extra crisp.
- Final hack: If you want a cheesy, gooey pull, serve immediately with a side of warm salsa, sour cream, or guacamole.
Serving Suggestions
These Cheesy Taco Sticks shine as an appetizer, snack, or main when paired cleverly. For parties, arrange them on a large platter with small bowls of dipping sauces: classic salsa, creamy cilantro lime crema (mix sour cream with lime zest, lime juice, and chopped cilantro), and a smoky chipotle mayo. Sprinkle chopped cilantro and a squeeze of lime over the platter right before serving for freshness that cuts through the richness.
For a family dinner, serve alongside a crisp green salad with a tangy vinaigrette or a Mexican-style slaw (shredded cabbage, lime juice, a pinch of sugar, and chopped cilantro). They also pair beautifully with a simple rice and beans side for a more filling meal. If you’re packing them for lunch or a picnic, wrap in parchment and tuck in an ice pack with a small container of dip — they hold up nicely.
For kid-friendly servings, slice them into smaller bite-sized pieces and serve with a mild cheese dip or ketchup — they magically become “dinosaur food” or “magic sticks” in my house. And for a fancier presentation, line a wooden board with arugula and lay the sticks on top, drizzling a little crema in a zig-zag pattern for contrast and flair.
Recipe Variations
-
Vegetarian Fiesta
- Swap the meat for a cup of seasoned black beans or crumbled seasoned tofu. Add corn, diced zucchini, or mushrooms for texture. Use a smoky chipotle cheese blend for bold flavor.
-
Buffalo Chicken Taco Sticks
- Toss shredded chicken in buffalo sauce before mixing with cheese. Serve with blue cheese or ranch dressing for dipping. Add thinly sliced celery on the side for crunch.
-
Breakfast Cheesy Taco Sticks
- Fill with scrambled eggs, breakfast sausage crumbles, and cheddar. Sprinkle with chives and serve with a mild salsa or hot honey for a sweet-heat wake-up call.
-
Low-Carb / Keto Version
- Use low-carb almond flour dough or a fathead dough (mozzarella + cream cheese + almond flour) and fill with high-fat fillings like seasoned ground beef and extra cheese. Watch the bake time carefully; these brown faster.
-
Pizza-Taco Fusion
- Add pepperoni slices and a pizza-style tomato sauce instead of salsa. The result is a hybrid everyone at the table will fight over.
Chef’s Notes
I’m wildly fond of versatile recipes — these Cheesy Taco Sticks have evolved from my grandma’s improvised snacks into a recipe that can pivot depending on what’s in the fridge. Early versions oozed too much filling; I learned to cool the mixture and not overfill the dough. I also discovered that rolling the dough slightly thinner gives a crispier shell, while a thicker strip makes the stick heartier and more burger-like.
One of my favorite kitchen memories tied to these is the time I baked a double batch for a neighborhood block party and labeled them “mystery sticks” to see who would guess the filling. People loved guessing — and no one guessed all the ingredients. That’s the magic of layered flavors: you can be creative, hide greens in there, and still get rave reviews.
A couple of practical tips: if you’re making these ahead, assemble and refrigerate unbaked sticks on a sheet pan, covered, and bake within 24 hours. They also freeze beautifully — bake first, then freeze cooled sticks in a single layer and reheat in a hot oven until crisp.
FAQs and Troubleshooting
Q: My sticks leaked filling while baking. How do I stop that?
A: Overfilling is the usual culprit. Use slightly less filling per strip and make sure you seal the ends well by pinching and rolling them under. Also, letting the filling cool a bit before assembling helps it bind rather than run.
Q: The dough is raw in the middle but browned on top. What went wrong?
A: This happens when oven heat is uneven or the sticks are too thick. Try lowering the oven temperature to 375°F and baking a few minutes longer, or tent with foil if the tops brown too quickly. Rotating the pan halfway also promotes even cooking.
Q: My cheese turned oily. How can I prevent greasy filling?
A: Using a blend of cheeses (sharp cheddar with mozzarella or Monterey Jack) helps: high-moisture cheeses melt smoothly without releasing too much oil. Avoid pre-shredded cheeses with anti-caking agents if you want the best melt; freshly shredded gives better texture.
Q: Can I make these ahead and reheat without losing crispness?
A: Yes. Bake fully, then cool and store in an airtight container. Reheat at 350°F for 8–10 minutes on a baking sheet; finish with 1–2 minutes under the broiler for extra crispness. For freezer storage, wrap singles in foil and reheat at 375°F from frozen for 15–20 minutes.
Nutritional Info
Below is an approximate nutritional breakdown per Cheesy Taco Stick assuming the recipe yields 12 sticks using pizza dough, shredded chicken, and standard cheeses. Keep in mind exact values vary by brand and portion size, so use this as a guideline.
- Calories: ~270–340 kcal per stick
- Protein: 12–18 g
- Protein comes primarily from chicken (or beef) and cheese. Using lean chicken increases protein without too many extra calories.
- Carbohydrates: 18–28 g
- Comes from the dough and any added veggies/salsa. Using a lower-carb dough or thin crust reduces carbs.
- Fat: 14–22 g
- Fat content depends on cheese type and meat choice. Choose lean ground turkey or reduce cheese slightly to lower fat.
- Fiber: 1–3 g
- Add beans or extra veggies to bump fiber up.
- Sodium: can be moderate to high depending on taco seasoning and cheese
- To cut sodium, make your own taco seasoning and choose lower-sodium cheeses or rinse canned beans before using.
If you’re tracking macros or following a specific diet, swap ingredients accordingly: lean proteins and whole-grain or low-carb doughs help tailor the recipe. For family-friendly portions, make smaller sticks to manage calorie intake while letting everyone enjoy a cheesy treat.
Final Thoughts
I love recipes that feel like a hug and taste like a little party in your mouth — Cheesy Taco Sticks are exactly that. They’re approachable, endlessly adaptable, and deeply satisfying. Whether you’re feeding a crowd, whipping up a cozy meal, or trying to make a fussy eater smile, these sticks deliver. Don’t be afraid to experiment: add roasted corn, pickled jalapeños, or swap the cheese blend to find your signature version.
Cooking is about joy and sharing. When friends come over and the first bite is met with that silent-chew-and-then-smile moment, you know you’ve hit the sweet spot. Make a double batch next time — trust me, they disappear fast. And if you ever want to chat about flavor combos or late-night snack hacks, drop a comment or share a photo. I love seeing how you make recipes your own.
Conclusion
If you want another tested take on Cheesy Taco Sticks or a slightly different method to compare notes, check out this extra recipe for inspiration: Cheesy Taco Sticks – I Wash You Dry.
Print
Cheesy Taco Sticks
- Total Time: 31 minutes
- Yield: 12 servings 1x
- Diet: Flexitarian
Description
The ultimate cheesy, crunchy snack that combines the flavors of pizza and tacos in a delightful stick form.
Ingredients
- 1 lb ready-made pizza dough or crescent roll dough
- 1 cup cooked, shredded chicken or 1 lb ground beef (or plant-based ground meat)
- 1 cup shredded cheddar cheese (sharp or medium)
- 1/2 cup shredded pepper jack or mozzarella
- 1/2 cup diced onion
- 1/2 cup diced bell pepper
- 1/2 cup salsa (mild or medium)
- 1 tablespoon taco seasoning
- 1 tablespoon olive oil
- 1/4 cup chopped fresh cilantro (optional)
- 1 egg + 1 tablespoon water (egg wash)
- Optional toppings: sesame seeds, everything bagel seasoning, or smoked paprika
Instructions
- Preheat the oven to 400°F (200°C) and line a baking sheet with parchment.
- Heat 1 tablespoon olive oil in a skillet over medium heat. Add the diced onion and bell pepper; sauté until tender, about 4–5 minutes.
- Add the cooked shredded chicken or ground beef and taco seasoning. Stir to combine and add salsa.
- Cool the filling slightly for 3–5 minutes, then stir in the cheeses.
- Roll the dough into a large rectangle and cut into strips, about 1.5–2 inches wide.
- Place filling on each strip, fold over, and seal.
- Brush with egg wash and sprinkle toppings if desired.
- Bake for 12–16 minutes until golden and melty.
- Let rest for 3–5 minutes before serving.
Notes
These Cheesy Taco Sticks can be made ahead and stored before baking, making them perfect for parties.
- Prep Time: 15 minutes
- Cook Time: 16 minutes
- Category: Appetizer
- Method: Baking
- Cuisine: Mexican
Nutrition
- Serving Size: 1 stick
- Calories: 300
- Sugar: 3g
- Sodium: 500mg
- Fat: 18g
- Saturated Fat: 8g
- Unsaturated Fat: 8g
- Trans Fat: 0g
- Carbohydrates: 24g
- Fiber: 2g
- Protein: 15g
- Cholesterol: 50mg
Keywords: cheesy snacks, taco sticks, party food, appetizer, easy recipe